How to Install FL Studio in 2026: Full Setup Guide
A safe current setup guide for installing FL Studio, activating your license, choosing audio settings, and opening the first project.

By the end of this guide we will have a clean current FL Studio install running on Windows or macOS, the license activated, audio playing through our headphones at a sensible buffer size, and the bundled Producer or Signature plugin packs unpacked into the right user folder. We assume zero prior experience. We also assume the most common starting setup: a laptop with built-in audio, no dedicated interface yet, and a freshly downloaded installer from Image-Line. If something goes wrong on first launch (silent output, ASIO conflict, Apple Silicon plugin error), the troubleshooting section near the end covers the fixes we use ourselves.
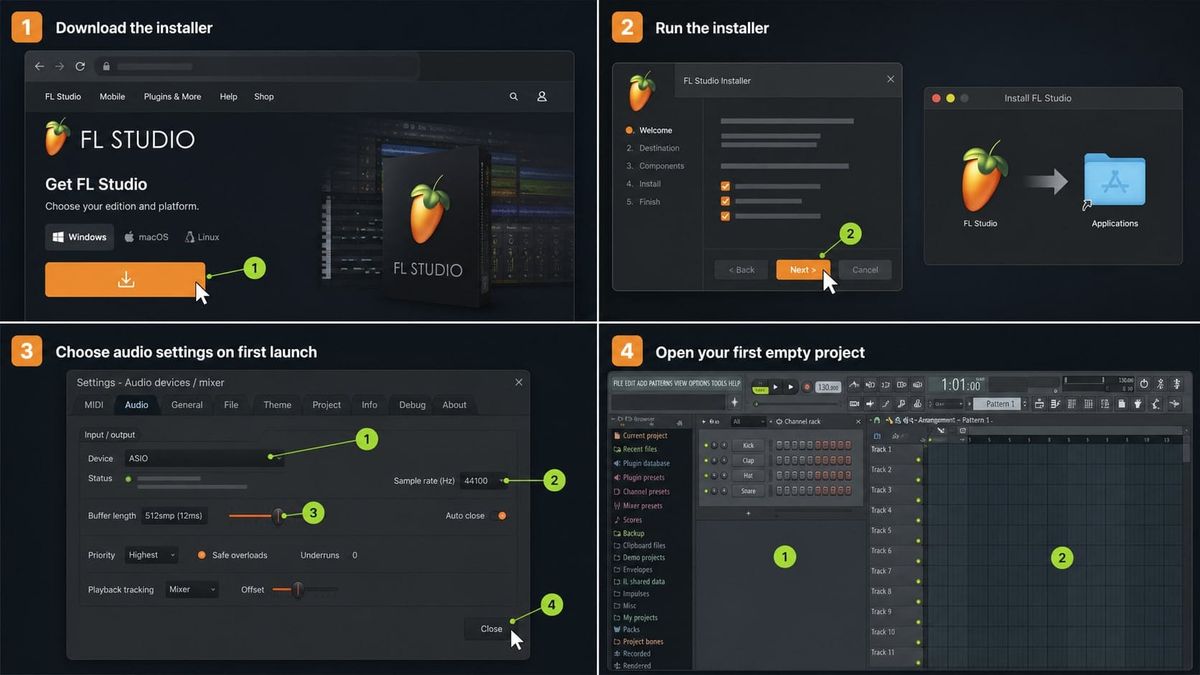
Step 1: Download the Latest FL Studio Installer from Image-Line
FL Studio is built by Image-Line, a small company based in Ghent, Belgium. The only safe place to get the installer is directly from their site at image-line.com/fl-studio-download. Avoid mirror sites, third-party download portals, and torrent links. Those are the main vector for cracked builds that ship with malware.
The same installer covers both the free trial and the paid editions (Fruity, Producer, Signature, All Plugins). The license you enter on first launch is what unlocks the edition you bought. There is no separate paid download.
- Windows: grab the
flstudio_win_installer.exefile. It is roughly 1.4 GB depending on bundled content. - macOS: grab the
flstudio_mac_installer.dmgfile. Universal Binary, runs natively on both Intel and Apple Silicon.
If we are on a metered connection, download once and copy the installer to an external drive. We can reuse it for the secondary machine that the same license entitles us to.
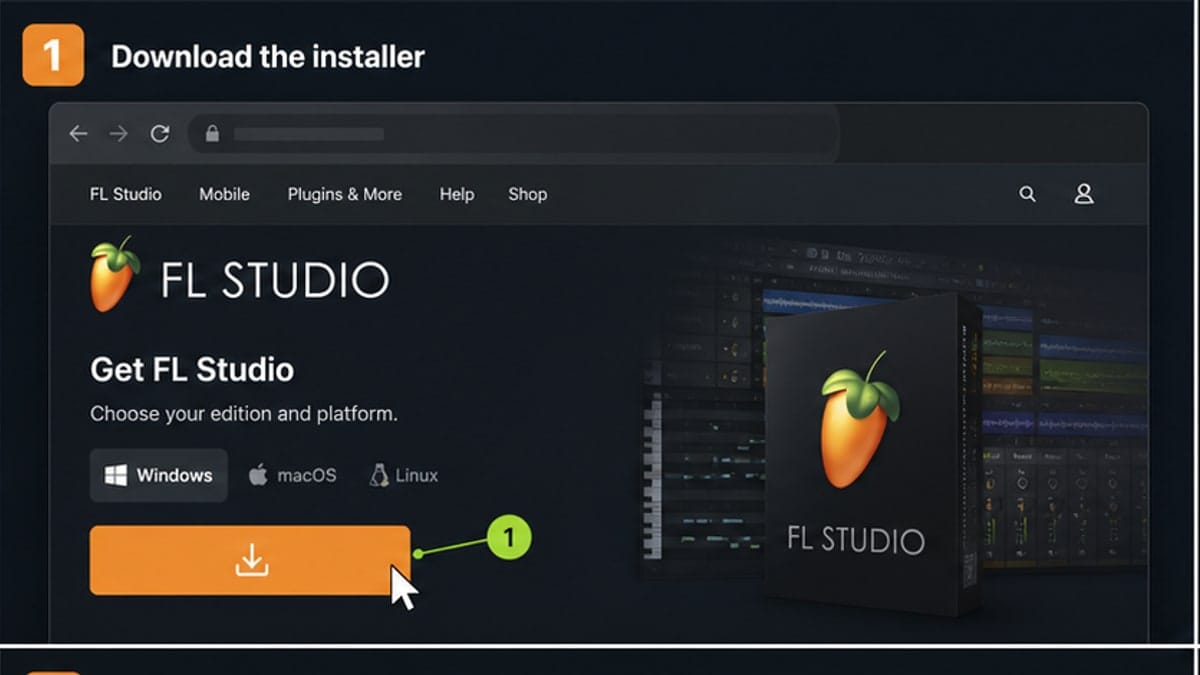
Step 2: Run the Installer on Windows or macOS
The Windows and Mac installers ask slightly different questions, but the end state is the same: an current FL Studio app, a shared content folder, and a user-data folder under Documents. Here is the side-by-side.
| Step | Windows | macOS |
|---|---|---|
| Launcher | Double-click flstudio_win_installer.exe | Open the .dmg, drag FL Studio into /Applications |
| Admin prompt | UAC prompt — accept | Gatekeeper warning — right-click, Open |
| Install location | C:\Program Files\Image-Line\current FL Studio\ | /Applications/current FL Studio.app |
| Shared content | C:\Program Files\Image-Line\Shared\ | Inside the app bundle |
| User data | Documents\Image-Line\FL Studio\ | ~/Documents/Image-Line/FL Studio/ |
| Plugin format | VST3 + native | AU + VST3 + native |
| First launch | Start menu → current FL Studio | Launchpad → current FL Studio |
On Windows, leave all checkboxes at default unless we know we need a custom path. The installer will write to %ProgramData% for shared registry data and to our user Documents folder for projects and presets.
On macOS, the first launch will trigger a Gatekeeper check ("current FL Studio is an app downloaded from the Internet, are you sure"). Click Open. If we are on Apple Silicon, no extra step is needed — FL Studio is a Universal Binary and runs natively on M1, M2, M3, and M4 chips.
Step 3: Activate Your License (or Start the Free Trial)
On first launch FL Studio shows an unlock dialog. We have two paths:
- Free trial: click Try FL Studio. Everything works — VSTs, mixer, all stock plugins, full export — except we cannot reopen a saved
.flpfile. The trial saves the project, but reloading it requires a paid license. Plan accordingly. - Paid license: sign in with the Image-Line account we used at checkout. The license is bound to that account, not the machine. It is lifetime and includes all future major-version updates at no extra cost.
To verify activation, open Help → About. The bottom of the splash will show the registered edition (Fruity, Producer, Signature, All Plugins) and the registered email.
If the activation dialog says license server unreachable, the machine is being blocked from support.image-line.com. Common causes: corporate firewall, VPN with strict DNS, or a hosts file blocking Image-Line. Disable the VPN, retry, then re-enable.
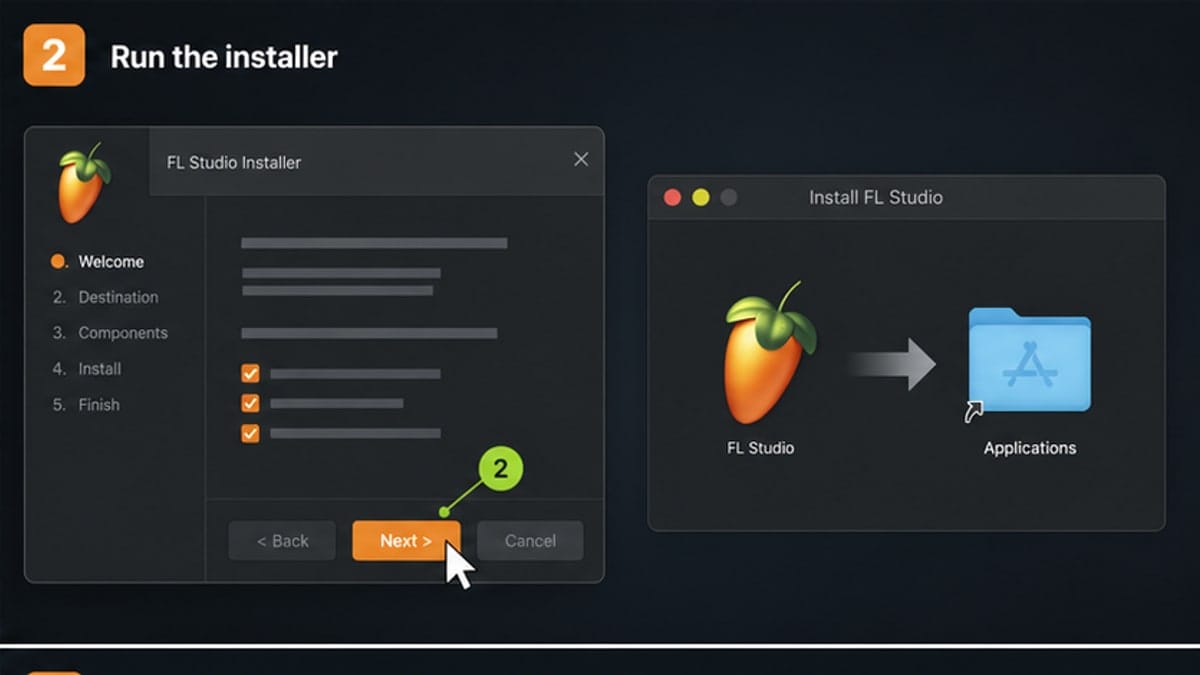
Step 4: Configure Audio on First Launch (ASIO4ALL or Core Audio)
A fresh install plays no sound until we pick an audio device. Open Options → Audio Settings. The Device dropdown is the first thing to set.
Windows: ASIO4ALL or your interface driver
Windows has two driver classes: WDM/MME (built-in, high latency) and ASIO (low latency, what we want). If we have a USB or Thunderbolt audio interface (Focusrite, Universal Audio, MOTU, etc.), pick its native ASIO driver from the dropdown. Done.
If we are on a laptop with no dedicated interface, install ASIO4ALL from asio4all.org. It is free, it wraps the built-in soundcard as an ASIO device, and it is the de facto Windows driver for laptop production. After installing, restart FL Studio and pick ASIO4ALL v2 from the Device dropdown.
One gotcha: ASIO is exclusive-mode by default, meaning Chrome, Spotify, or Discord will lose audio while FL Studio is open. We can toggle ASIO4ALL's tray panel to allow shared mode, but the cleanest fix is to close the browser tab playing audio before opening FL Studio.
macOS: Core Audio
Pick FL Studio (Core Audio) and then choose the output device (MacBook speakers, headphones, or the connected interface). No third-party driver needed. Core Audio handles low-latency natively.
Sample rate and buffer length
Two settings matter on day one:
- Sample rate: 44,100 Hz or 48,000 Hz. Use 44.1 for music, 48 if we are scoring video. Both are fine for a beginner.
- Buffer length: 256 samples for general writing and mixing. Drop to 128 samples when tracking a MIDI keyboard or vocals — lower buffer means less round-trip latency, but more CPU load.
Higher buffers (512, 1024) are useful only on slow machines or huge sessions. Start at 256, adjust only if we hear pops or clicks.
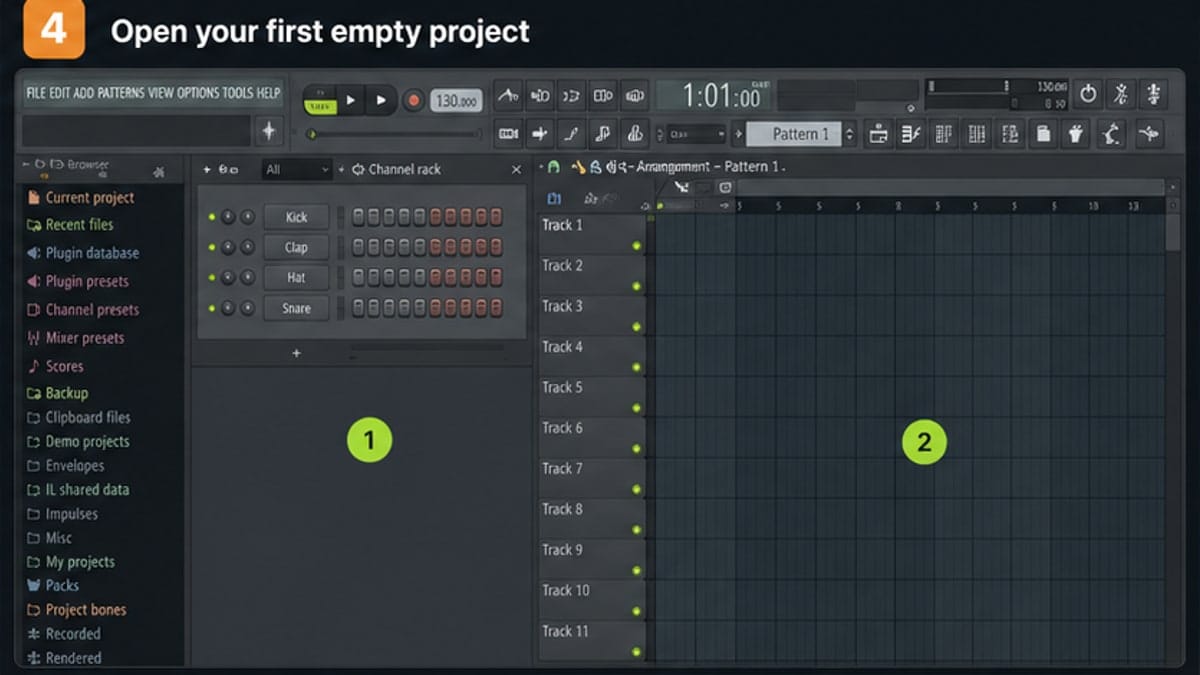
Step 5: Install the Bundled Plugin Packs and Verify Everything Loads
Producer and Signature editions ship with extra plugin packs (Sytrus, Harmless, Toxic Biohazard, Slicex, Newtone, FLEX 2 expansions) that are not installed by the main installer. We have to fetch them from the Image-Line account portal.
- Log in at
image-line.com/my-account. - Open the My Licenses tab. The bundled plugins are listed under our FL Studio license.
- Download each pack. They install into the shared content folder automatically and register their VST3 paths.
- Restart FL Studio.
- In the channel rack click
Channel rack → Add → FLEX(or any new plugin) to confirm it loads.
To rescan plugins manually, open Options → Manage Plugins and click Find more plugins. This is also where we add third-party VST folders later.
current FL Studio also includes stem separation built in (Edison → Tools → AI Stem Separation), multi-language UI under Options → General Settings → Language, and the redesigned Vintage Phaser. These are part of the base install — no extra download needed.
Common Errors and How We Fix Them
Three issues account for most first-day support questions.
- License server unreachable. Almost always a VPN or corporate firewall blocking
support.image-line.com. Disable the VPN, retry activation, re-enable after. - ASIO conflict with browser or Discord. ASIO is exclusive. Close other audio apps before opening FL Studio, or open the ASIO4ALL tray panel and enable shared-mode for the device.
- Rosetta 2 needed on Apple Silicon. FL Studio itself runs natively, but some older third-party VSTs are still Intel-only. When loading one, macOS prompts to install Rosetta 2 — accept once and it covers all future Intel binaries. To force the whole FL Studio app to run under Rosetta (rarely needed), right-click the app in Finder, Get Info, tick Open using Rosetta.
If FL Studio crashes on launch, the fastest recovery is to reset the audio device by holding Shift while opening the app on Windows or Option on macOS. That bypasses the saved audio device choice and lets us pick a working one.
Sources and reference pages
Image-Line FL Studio download, Image-Line FL Studio pricing and editions, Image-Line Audio Settings manual.
FAQ
Where should I download FL Studio?
Download FL Studio only from Image-Line. Third-party mirrors and cracked installers are risky and can include malware.
Can I install FL Studio on Windows and macOS?
Yes. Image-Line provides installers for Windows and macOS from the official FL Studio download page.
What should I do after installing FL Studio?
Activate your license or start the trial, open Audio Settings, choose the correct driver, set a safe buffer, then open a clean first project.
Do FL Studio updates cost extra?
Image-Line advertises Lifetime Free Updates for FL Studio editions, so future updates to your edition are included.