How to Record Vocals in FL Studio
Record clean vocals in FL Studio with the right Mixer input, Playlist audio track, monitoring setup, loop recording, and beginner gain staging.
Short answer: select your microphone input on a Mixer insert, record the clean input, and let FL Studio place the take into the Playlist as an audio clip. Effects can come later.
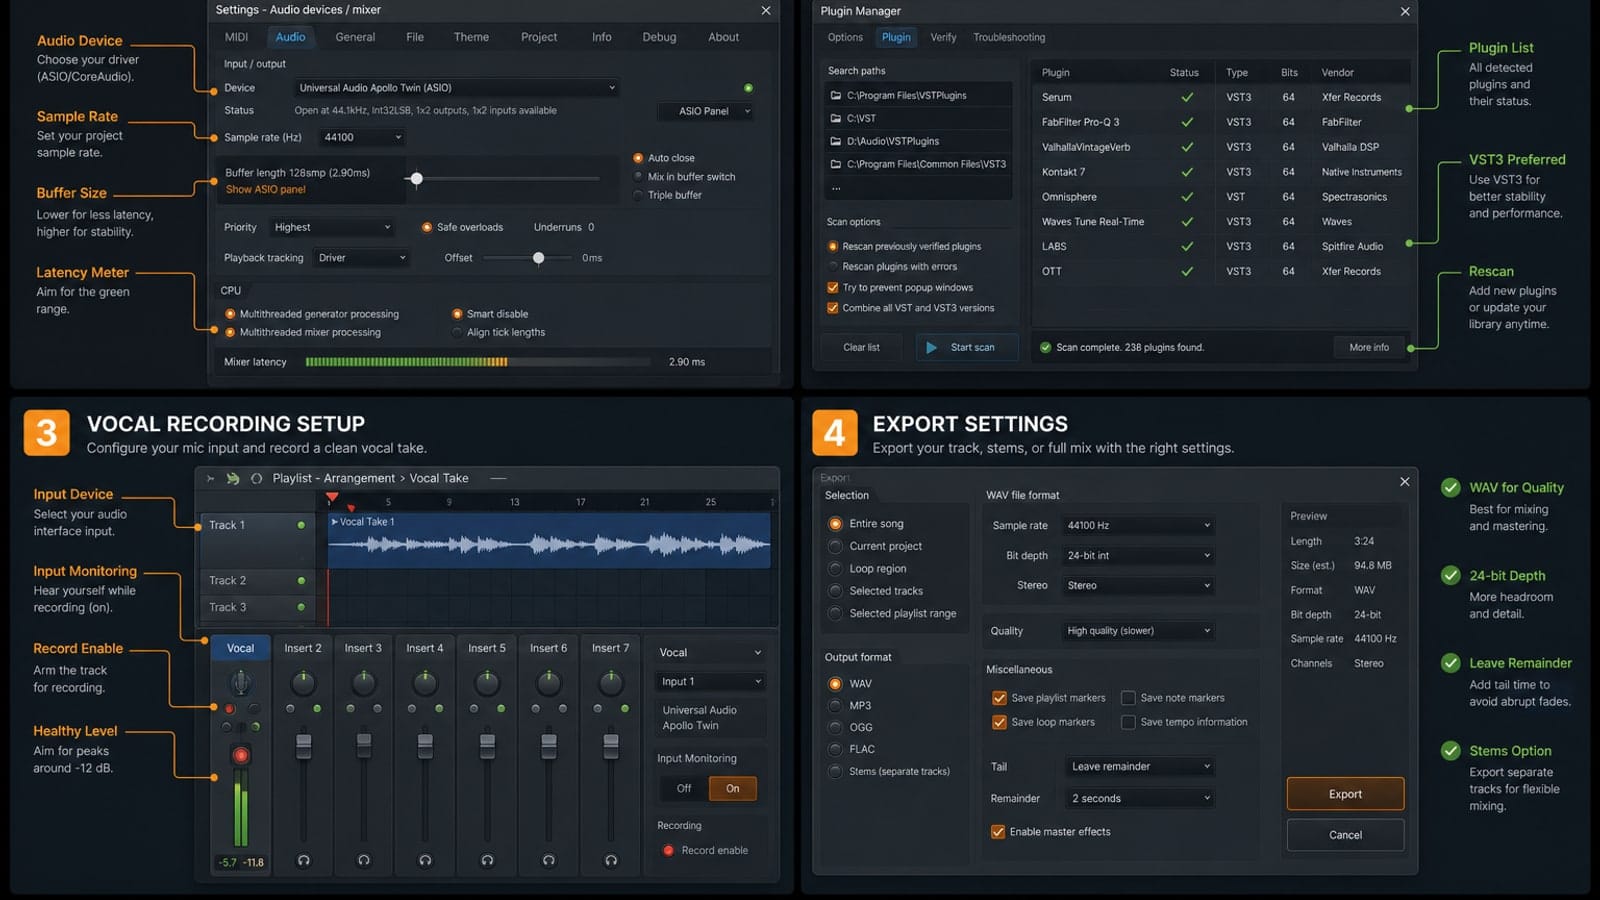
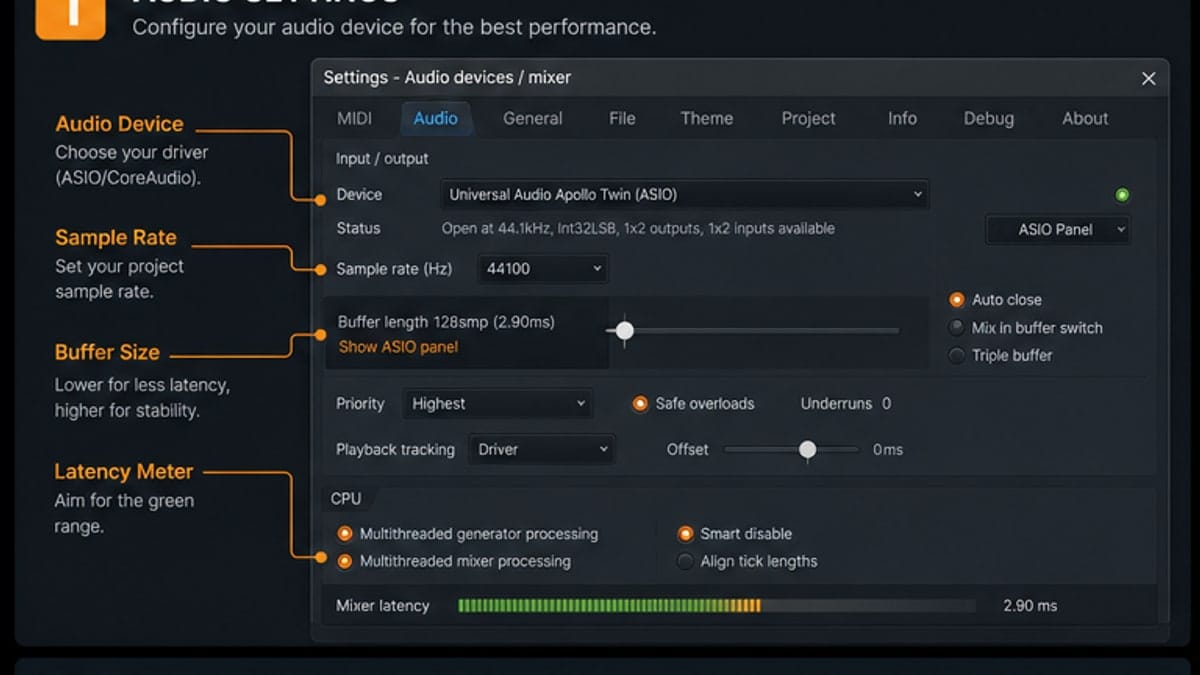
Step 1: Set audio driver and buffer
Use your audio interface ASIO driver on Windows or Core Audio on macOS. Keep the buffer low enough that the singer does not feel delay, usually 128-256 samples if the project can handle it.
Step 2: Choose the microphone input
Select an empty Mixer insert, then choose the mic or interface input from the input menu. If the meter moves when you speak, FL Studio is receiving audio.
Step 3: Link a Playlist audio track
You can assign a Playlist audio track to the Mixer insert. This keeps takes organized and makes it easier to record multiple passes without losing track of where the audio went.
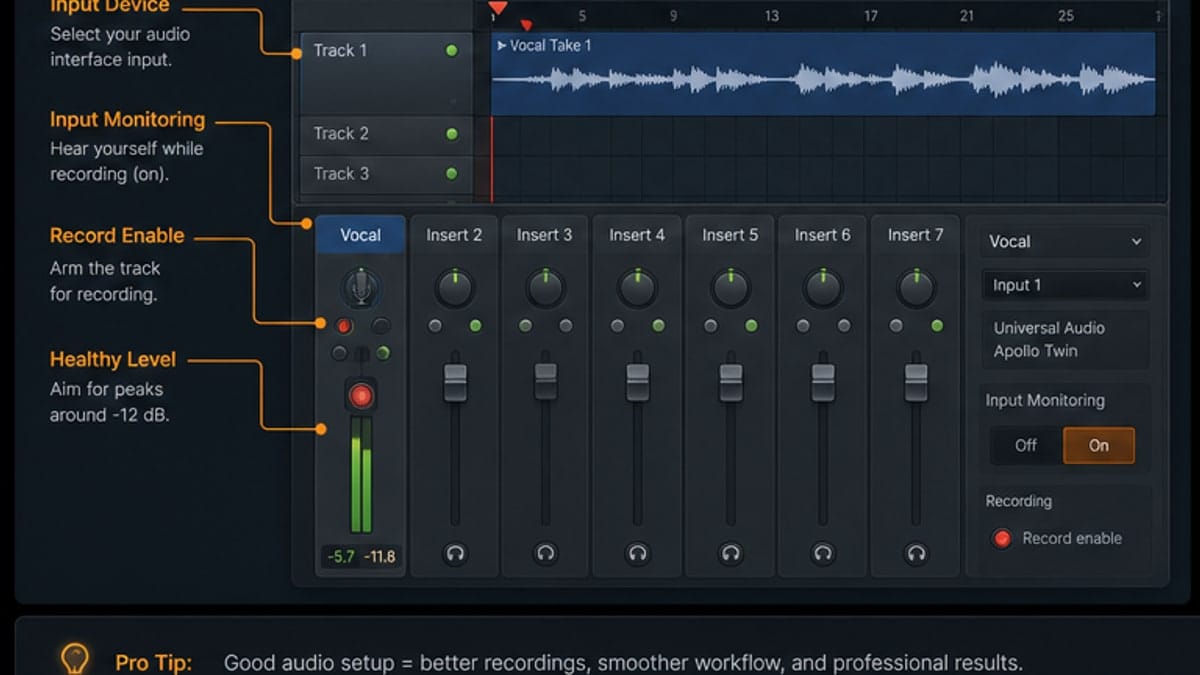
Step 4: Record the clean pickup point
For beginners, use the clean external input pickup point when recording vocals. That means the file captures the microphone before FL Studio effects. You can still add EQ, compression, and reverb after the take.
Fix latency before the singer gets annoyed
If the singer hears a delay, lower the buffer or monitor directly through the audio interface. Do not monitor through both the interface and FL Studio at the same time; that creates a distracting echo.
Use loop recording for multiple takes
Loop recording is useful for hooks, ad-libs, and difficult lines. Mute old takes between passes if they distract the next recording. Keep the best takes and delete or archive the rest after comping.
Sources and reference pages
Image-Line recording overview, Image-Line audio recording manual, Image-Line Mixer manual.
Room and performance matter before plugins
A clean vocal starts before FL Studio. Turn off loud fans, keep the singer away from hard reflective corners, and make sure the headphone level is comfortable. A nervous performance through an expensive chain still sounds nervous. A confident dry take through a basic interface is easier to mix.
Record a short test line before the real take. Listen for room ring, plosives, clipping, headphone bleed, and delay. Fix those before recording a full verse.
Take naming and Playlist discipline
Vocal sessions get messy quickly. Name the main vocal track, keep doubles and ad-libs on their own lanes, and mute rejected takes instead of stacking them under the main comp. When you open the project later, the best take should be obvious.
If a take is special, color it or move it to a keeper lane. Small organization choices keep creative momentum alive when the session has twenty clips.
FAQ
How do I record vocals in FL Studio?
Choose the microphone input on a Mixer insert, arm that insert or linked audio track, choose a clean pickup point such as EXT, enable recording, and record into the Playlist as an audio clip.
Why do I hear delay while recording vocals?
The buffer may be too high, or you may be monitoring through both FL Studio and your interface. Lower the buffer and avoid double monitoring.
Should I record vocals with effects on?
Record the clean input unless you have a specific reason. You can monitor with effects, but the safest beginner workflow is to capture a dry take.
Why is my vocal clipping in FL Studio?
The recording level is too hot before it reaches FL Studio. Lower the gain on the audio interface or mic input so peaks stay safely below clipping.
Before-recording checklist
- Audio interface selected as the driver.
- Buffer low enough for comfortable monitoring.
- Mic input selected on one Mixer insert.
- Recording level peaks below clipping.
- Headphones used to avoid speaker bleed.
- Old takes muted if loop recording.
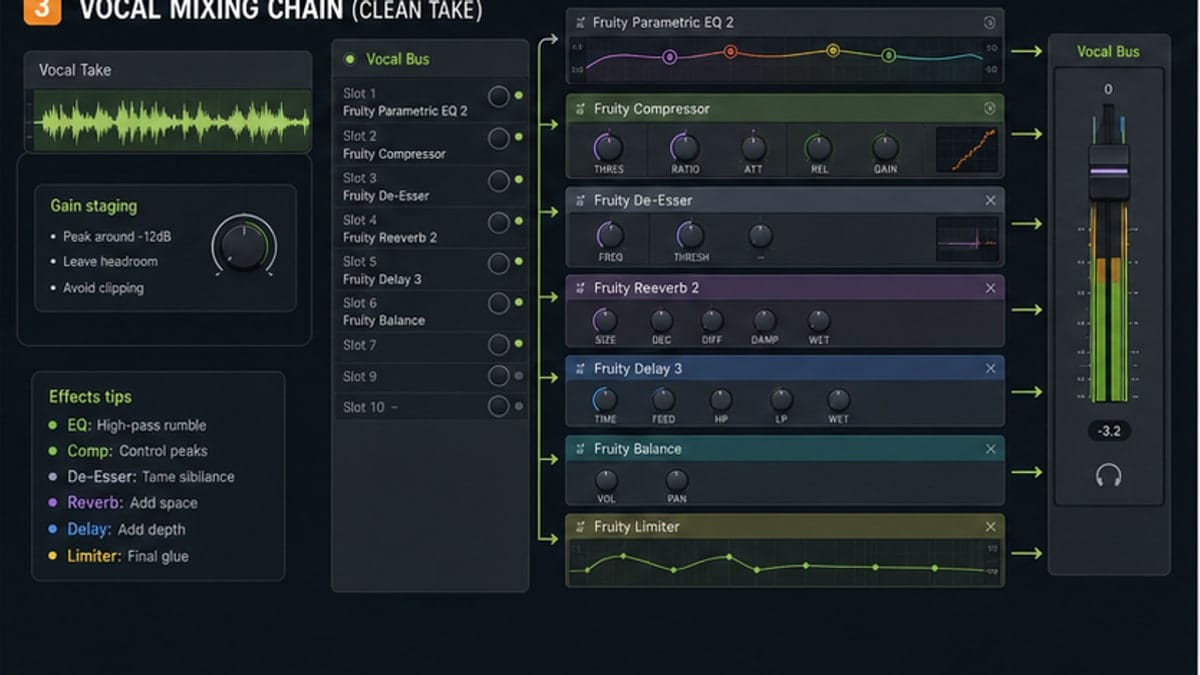
Record dry, monitor wet if needed
The safest workflow is to record the dry microphone input and add processing after the take. If the singer needs reverb in headphones, use monitoring effects carefully, but avoid printing heavy effects into the recorded file unless you are sure.
Gain staging for vocals
Set gain at the interface first. FL Studio cannot unclip a clipped microphone signal after it arrives. Peaks around a safe level are better than a take that looks loud but distorts on strong words.
Comping takes without chaos
Name the vocal track, keep takes in one Playlist area, and mute weak takes instead of deleting everything immediately. After choosing the best phrases, consolidate or clean the comp so the session stays readable.