FL Studio
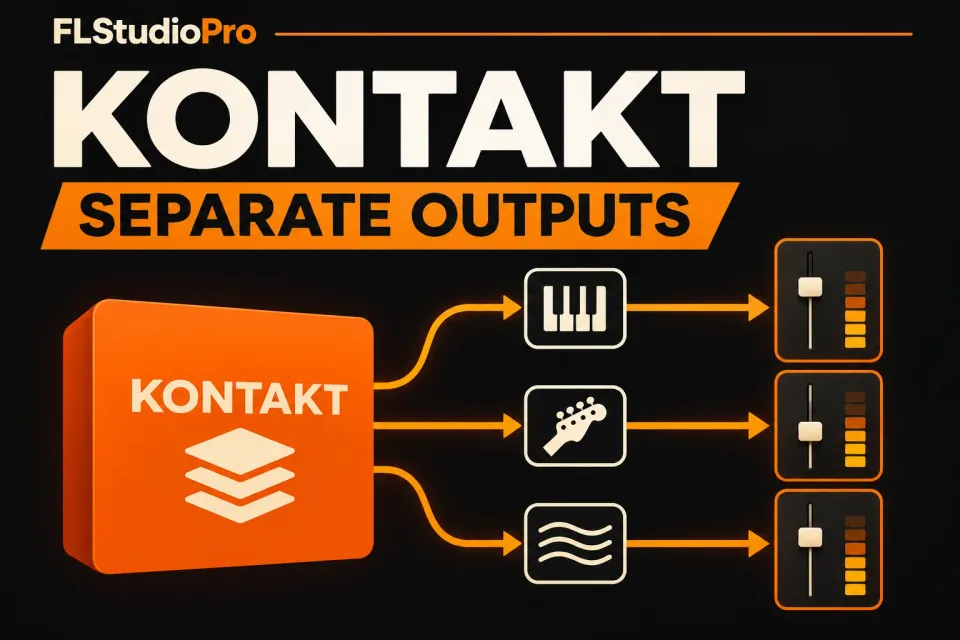
Give each instrument its own Kontakt output, then open the FL Studio wrapper’s Processing > Connections section and click Auto map outputs. In Kontakt 8.8, switch to Classic View to reach the Outputs panel. I’d start with two instruments and two unused Mixer tracks, because you can hear a routing mistake before it spreads through a whole rack. Add MIDI Out channels afterward if you want a separate Piano roll for each instrument.
Open Kontakt’s Outputs panel in the right view
Use the Kontakt VST instrument inside FL Studio. Native Instruments’ FL Studio routing instructions use the VST plug-in; that format also avoids the Mac-only AU dependency when sharing with Windows. If Kontakt isn’t in your plug-in list yet, finish the Native Access installation and FL Studio scan before configuring outputs.
Save a copy of the FLP before changing an existing rack. For the setup below, use a new Kontakt instance and leave its default configuration alone until the routing works.
- Kontakt 8.8 interface: click Play, then use the Kontakt logo menu to switch to Classic View. Open Outputs with the button at the bottom right. NI’s 8.8 interface guide places Outputs in Classic View, so looking for the old Workspace menu in Default View sends you down the wrong path.
- Earlier interface with a Workspace menu: enable Workspace > Outputs. The panel appears below the instrument rack.
Kontakt’s internal output strips and FL Studio’s Mixer tracks are separate stages. Creating three strips in Kontakt doesn’t complete the connection to three Mixer tracks.
Create separate stereo outputs inside Kontakt
Here’s a three-part example: keys, bass and pad. Each gets its own stereo output. The same method works with two parts; expand it only when you need another independently processed sound.
Don’t clear an established output setup. The option Delete existing channels before creating new ones replaces the current output strips. Use it only in the new, unconfigured instance below. In an existing routed rack, add the missing outputs instead and start their host assignment at the next unused pair.
- Click + in Kontakt’s Outputs section.
- For the new instance, set Quantity to 3 and Number of channels to 2. Quantity counts output strips; Number of channels makes each strip stereo.
- Under Soundcard / Host output, choose the first available plug-in output. NI’s example calls it Kt. st. 1 [1]; read the available label in your instance rather than looking for an audio-interface socket.
- Enable Ascending output assignment. In this new instance, enable Delete existing channels before creating new ones so the result is three outputs in total.
- Leave Make this your default configuration off while setting up this project, then confirm with OK.
NI’s output-configuration instructions explain those controls. Ascending assignment gives each new stereo strip its own host pair: 1/2, 3/4, 5/6 in this example. If all three strips still point to 1/2, they’ll share the same host output despite having different names.
Now load the three instruments. In each instrument’s header, choose a different Output: the first strip for keys, the second for bass, the third for pad. Kontakt normally puts newly loaded instruments on the first stereo output. Changing a MIDI channel won’t change that audio destination.
Map Kontakt’s outputs to FL Studio Mixer tracks
Reserve a clear block of Mixer tracks first. I’d keep the block together, because moving Kontakt’s base Mixer assignment later also changes the destinations calculated from it.
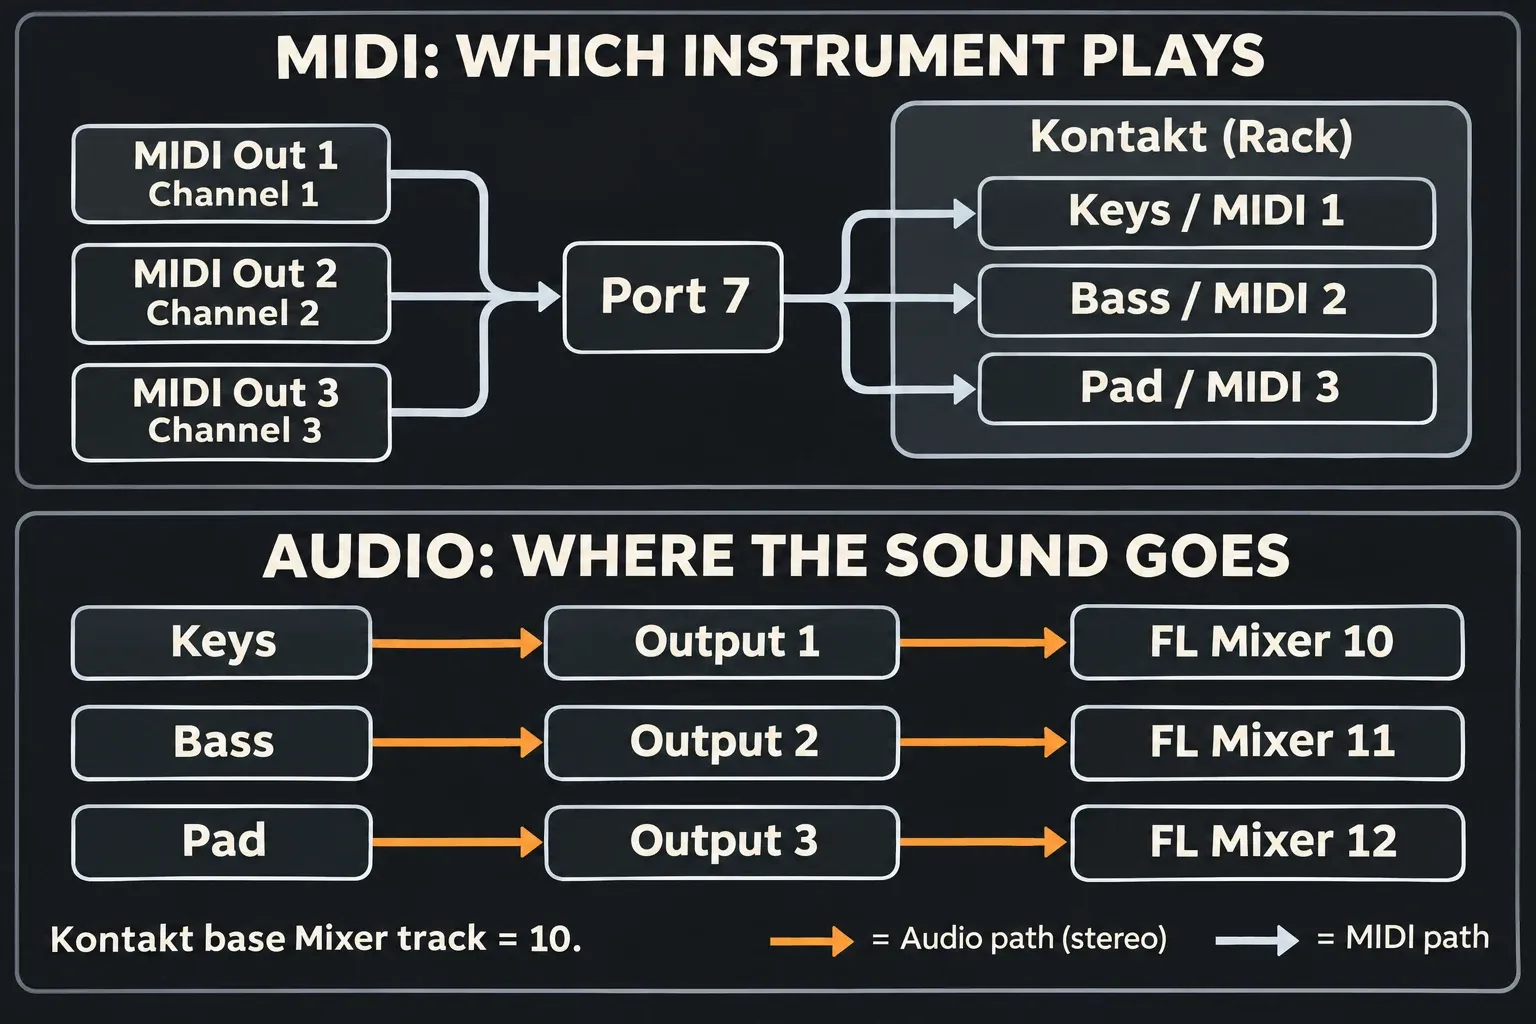
- Set the Kontakt Channel’s Mixer track assignment to an unused starting track. For this example, use 10 and keep tracks 10–12 available.
- Open Kontakt’s FL Studio wrapper settings, then Processing.
- In Connections, click Auto map outputs. Inspect the assignments for the three output strips you created.
- Play one instrument at a time and check which FL Mixer meter moves. Name the destination tracks Kontakt Keys, Kontakt Bass and Kontakt Pad.
The wrapper numbers are offsets from Kontakt’s assigned Mixer track. Image-Line’s Connections reference explains the relative assignments. With Kontakt on track 10, offset 0 means track 10, offset 1 means track 11, and offset 2 means track 12. A stereo pair such as 3/4 is a Kontakt audio connection; it doesn’t mean FL Mixer tracks 3 and 4.
| Part | Kontakt host pair | Wrapper offset | FL Mixer track |
|---|---|---|---|
| Keys | 1/2 | 0 | 10 |
| Bass | 3/4 | 1 | 11 |
| Pad | 5/6 | 2 | 12 |
These are example assignments, not required track numbers. Extra Kontakt outputs or Aux channels can also appear in the wrapper: inspect their names and destinations rather than assuming every row is another rack instrument. To change a particular destination, right-click its output number in Connections and choose the appropriate offset.
Use separate Piano rolls with MIDI Out
Audio routing decides where an instrument sounds. MIDI routing decides which instrument plays. If you’re layering instruments from the same notes, you may already have the MIDI behavior you want. For independently written parts, use one MIDI Out per part.
- In Kontakt’s FL wrapper Settings tab, set its MIDI Input port to an unused number. We’ll use 7.
- Add three MIDI Out channels in the Channel Rack. Set each MIDI Out’s Port to 7.
- Set their Channel selectors to 1, 2 and 3, respectively.
- Set the matching Kontakt instrument headers to MIDI channels 1, 2 and 3. An instrument set to Omni responds across channels, so use a specific channel when you need independent parts.
- Write and play each part from its MIDI Out channel’s Piano roll. Check the intended Kontakt instrument and its assigned Mixer track together.
Image-Line documents matching MIDI Out’s Port to the VST wrapper Input port. The port is an arbitrary connection number; it doesn’t need to equal a Mixer track or MIDI channel. Choose another unused port for a second Kontakt instance to keep its MIDI connection separate.
I’d use MIDI Out here for the separate Piano rolls. If you prefer a single Piano roll, FL Studio can also address MIDI channels with note colors through Map note color to MIDI channel. Keep the note-color and MIDI-channel relationship in mind before recoloring a Kontakt part.
Fix the point where the signal stops
Everything still reaches one Mixer track: play each instrument alone and watch Kontakt’s own output meters. If they all move the first strip, change the instruments’ Output selectors. If separate Kontakt strips move but FL Studio receives only one destination, inspect their host pairs and the wrapper’s Connections assignments.
The wrapper doesn’t show the outputs you added: use Refresh plugin properties in the wrapper’s Settings tab, then return to Processing and inspect Connections. The wrapper’s refresh command checks input and output counts. Don’t confuse it with Reload plugin, which resets the plug-in to its default settings.
There’s only one stereo host output to choose: confirm that this instance is the VST instrument used by NI’s FL Studio guide. On a Mac, check the format before rebuilding an AU instance’s routing. Don’t replace the plug-in in your only copy of an existing project. If a fresh VST instance still exposes only one pair, NI provides a procedure for resetting Kontakt’s output preferences. Save the project and preserve your custom output setup before following it; resetting preferences is a later step.
One MIDI Out plays every instrument: check for Omni assignments in Kontakt. If it plays nothing, match that MIDI Out’s Port and Channel against the wrapper Input port and the intended instrument’s MIDI channel before changing audio routing.
You want separate kick, snare and room microphones from one drum instrument: configure that library’s own mixer or output controls too. NI’s Studio Drummer routing example assigns its internal mixer channels to Kontakt outputs. A rack instrument’s main Output selector doesn’t by itself create a separate feed for every kit piece. The library’s manual determines which signals can be separated.
Save the project and check the actual result
Play a short passage from each part individually. Its assigned FL Mixer track should respond, while the other parts’ destination tracks remain quiet. The Master can still show all three, because those Mixer tracks feed the final mix. Check the normal track-to-Master routing if an individual meter moves but you hear nothing.
Save the FLP copy, close it and reopen it. Repeat the same three-part check before adopting the setup as a template. If you also want this Kontakt output layout in future instances, use its output-default saving option only after the routing is correct; saving a project and changing Kontakt’s output default serve different purposes.
For separate audio files, name the destination Mixer tracks and follow the Split mixer tracks export workflow. Export one short section first and listen to the resulting files. Separate meters confirm the live route; the files confirm the deliverable you’ll send to someone else.
My choice is one shared Kontakt rack when I want a coordinated set of instruments with independent FL effects. For a single sound, I’d keep the ordinary one-instrument, one-track setup: there’s no routing work to maintain. Build the multi-output rack around a mixing need, then save it once each MIDI part and audio destination match.