FL Studio
To record in FL Studio without hearing yourself, select your mic's Mixer insert, open the Recording Pickup selector beside its input menu, and set Monitor external input > Off. For a clean recording into the Playlist, use External input only (EXT). Your mic can still be recorded while the backing track plays.
If your voice is still in the headphones, check the audio interface's direct monitoring too. That is a separate listening path. I would decide whether you want no vocal in the headphones or a dry vocal without the delayed FL Studio return, then set up that one path.
Record to the Playlist with mic monitoring off
This method is for recording an external mic or instrument to the Playlist. Image-Line's audio recording requirements specify Producer Edition or higher; Windows also needs an ASIO driver selected in Audio Settings. If you have not selected a working input yet, start with our vocal recording setup.
- Select the insert receiving your mic. Use a dedicated Mixer insert rather than the Master. For one microphone plugged into one interface input, choose that input from the mono section of the input menu. The device's names will vary.
- Set the recording pickup to EXT. Click the small selector immediately before the input menu. Under Record, choose External input only. This takes the interface input before FL Studio's insert effects or other audio routed to that track.
- Turn off the software return. In that same menu, under Monitor external input, select Off. Image-Line gives this exact setting in its echo and feedback fix. Do this on the mic's insert; changing the Master's input monitoring will not switch off monitoring on a different insert.
- Keep the recording path armed. To give the take its own lane, right-click a Playlist track header and choose Track mode > Audio track, then select the mic's Mixer insert. Check its record-arm control. Right-click the main Record button and make sure Audio is enabled.
- Record in Song mode. Arm the main Record button, then press Play. Stop when the take is finished. With Auto-create audio clips enabled in the Mixer menu's Disk recording options, the recording appears in the Playlist.
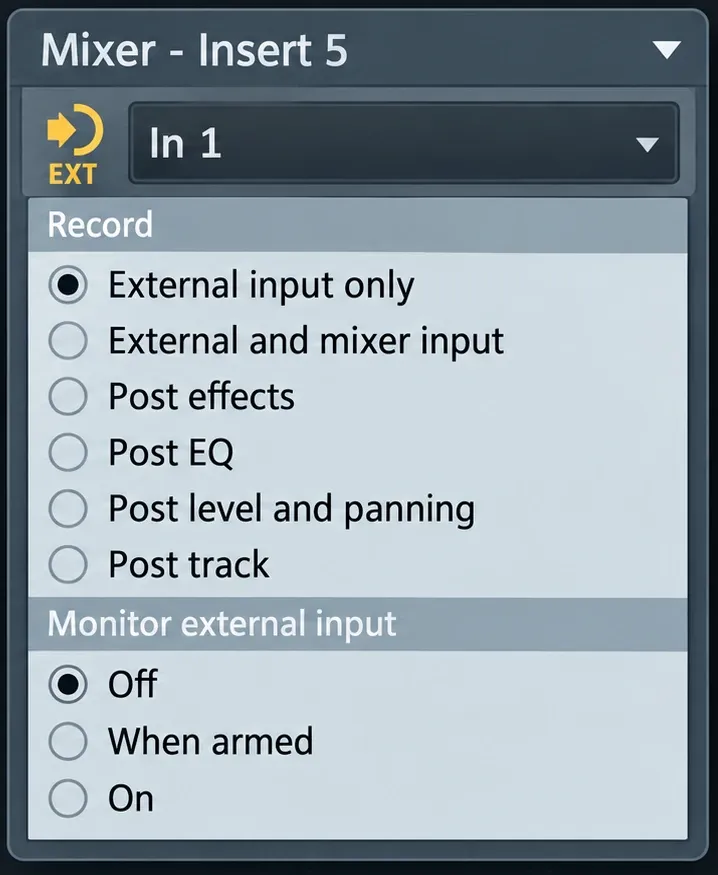
Leave the mic input selected. Changing it to (none) removes the source you want to record. Muting the Master also silences the backing track. Neither is needed to stop the live mic return.
At EXT, the interface controls the recording level. Pulling down an FL Studio fader is not a way to fix an overloaded mic input. Set the input gain on the interface and keep the incoming signal from clipping.
No voice, a dry voice, or effects in the headphones?
“I don't want to hear myself” can mean two different things: no electronic vocal return at all, or no delayed copy of the voice. Choose the row that matches the performance you want to hear.
| What you want to hear | FL Studio input monitoring | Interface direct monitoring |
|---|---|---|
| Backing track only | Off | Off, or remove the live input from the headphone mix |
| Backing track plus a dry live vocal | Off | On, if the interface supports it |
| Vocal with FL Studio effects | On, or When armed while recording | Off to avoid a second dry return |
Direct monitoring sends the input to the interface's outputs without making the round trip through FL Studio. It avoids the delay from that software path, but it also bypasses the effects on your FL Studio insert. A direct-monitored voice will not include the reverb or tuning you added there.
Image-Line's monitoring guidance recommends turning FL Studio's monitoring off when using an interface's direct monitor. If both paths are audible, a dry voice and a delayed software copy can overlap.
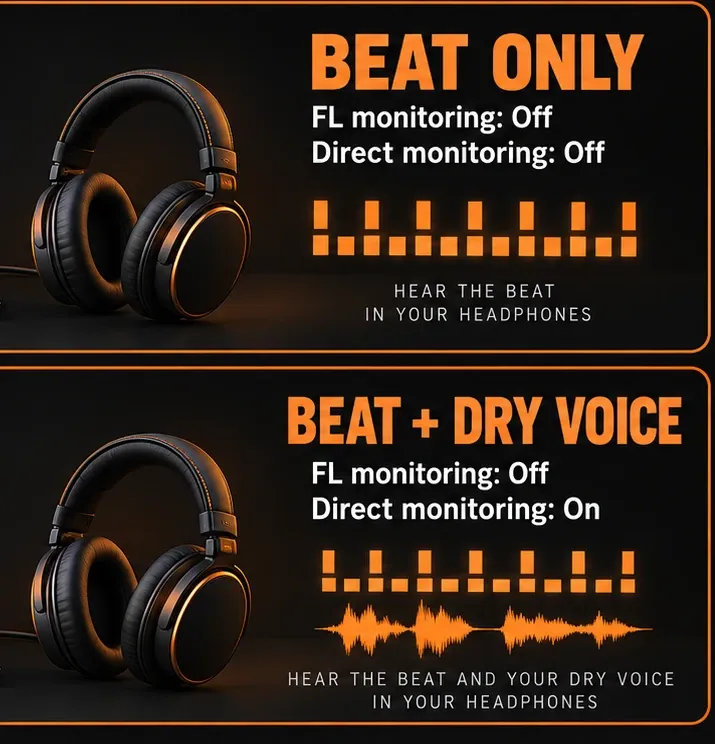
The hardware control may be a Direct Monitor button, an Input/Playback mix knob, or routing in the interface's control app. Follow that model's manual. On an Input/Playback control, the playback side is the computer return; do not turn down the whole headphone output if you still want to hear the beat.
A USB microphone with its own headphone jack may have a separate mic-monitoring control too. FL Studio cannot remove a live return that the device itself is adding. If no vocal return is your goal, both the FL Studio path and that hardware path need to be quiet.
Why the voice comes back when you arm the track
Check whether the menu says When armed. It allows the live input through FL Studio whenever that Mixer track is armed. Selecting an input can automatically arm the track, so the return may appear before you press Play.
For this setup, choose Off explicitly. On always monitors the external input; When armed is useful when you want FL Studio monitoring during a take. The Mixer input and monitoring options define all three states.
If the meter looks inactive with monitoring off, open the Mixer menu and enable View > Always show external input levels. That input-level display option lets the meters respond with monitoring Off or When armed. A listening setting and a meter display are different checks; an inactive display alone does not prove the mic is disconnected.
Using Edison instead of Playlist recording
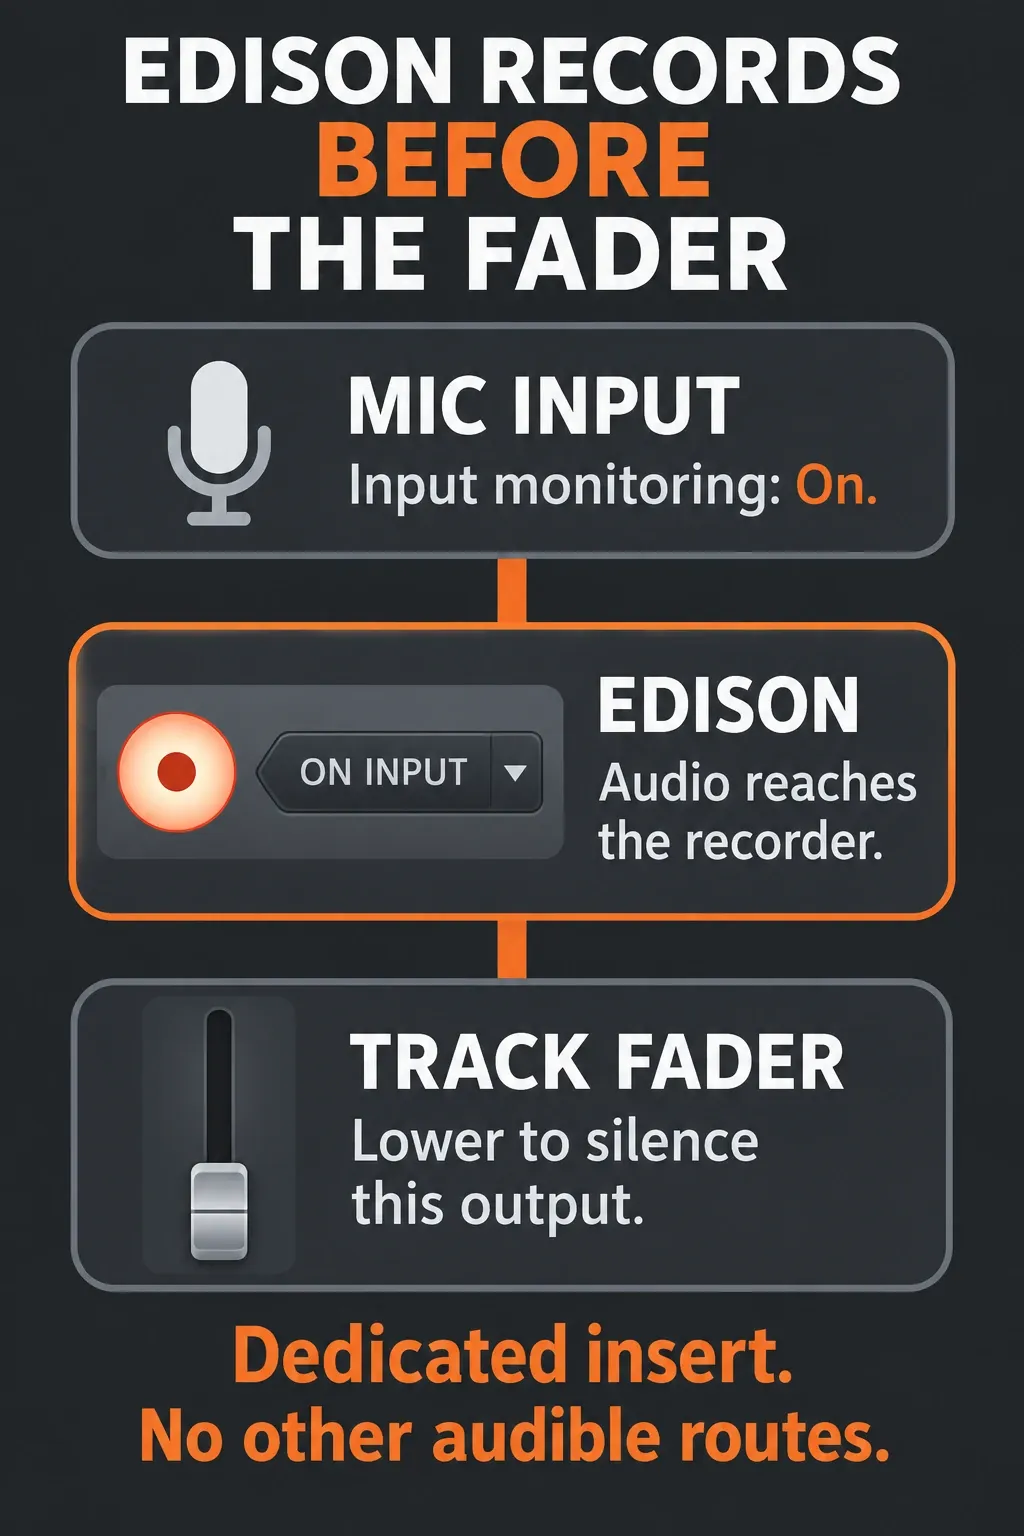
Edison records at the effect slot where you load it. The EXT pickup choice belongs to the Mixer recording path; it does not turn Edison into a recorder directly attached to the interface input.
For a dedicated Edison recording insert, keep the external input reaching the effects chain and silence the insert later in the path. Load Edison before any effects you do not want recorded, use Monitor external input > On, and lower that insert's fader fully. Turn off the hardware direct monitor as well if you want no live voice in the headphones.
This works because Edison receives audio before the Mixer track fader. Lowering that fader does not lower Edison's recording level. Use it on a dedicated insert with no other audible sends or direct hardware-output routes; a separate route can still carry the voice to your headphones.
Use Edison's own Record control and recording mode. Restore the insert fader before auditioning through that track, or send the take to a separate playback insert. If Edison loses its input after you change monitoring, restore the input path rather than changing the mic to (none). Our Edison recording and export guide covers the rest of that workflow.
If you still hear an echo
Start by finding out whether the repeat is only in your headphones or is already in the saved take. Stop recording, disable the live mic return, and listen to the recorded clip on its own. These are different problems.
The saved take is clean
Check every insert receiving the same physical mic input, then the interface's headphone mix. Also check whether another recording or voice app is returning the mic. Disabling FL Studio monitoring only removes FL Studio's live return.
If you want to hear effects while singing, you need the software path. Lower the audio buffer gradually and remove unnecessary processing that adds delay. There is no universal buffer value that every project and interface can run without crackles. Our audio settings guide explains the driver, buffer and plugin-delay decisions.
The repeat is in the recorded file
Recheck the pickup location. EXT records the external input; MIX and later positions can include other routed audio, and later positions can include effects. A delay printed through a post-effects pickup remains in that take even after you turn off monitoring.
Also listen for the beat or previous vocal coming from speakers and entering the mic acoustically. Use headphones and turn the speakers down while recording. EXT separates FL Studio's internal routing from the input; it cannot remove sound that has already reached the microphone.
For another pass, mute the previous vocal clip if you do not want it in the headphone mix. Keep the backing track running, record the mic through EXT, and leave only the monitoring path you actually want to hear. That keeps the performance comfortable without changing what goes into the new take.