FL Studio
A microphone that suddenly screams through your speakers needs a quieter output before it needs another plugin. Turn the speaker level down or mute the speakers, lower the headphone level, and stop recording. In FL Studio, select the mic's Mixer insert, open the Recording Pickup selector beside the input menu, then choose Monitor external input > Off. That stops FL Studio from sending that live input back to the output; it does not switch off your microphone or stop an armed EXT recording.
If the screech continues with the speakers muted, check for a loopback or hardware monitoring route. A speaker feeding an open mic and a computer output feeding its own recording input need different fixes. I would trace those paths before changing drivers or buying another microphone.
Stop the live mic return in FL Studio
Image-Line's feedback and echo fix points to the input-monitoring setting. Use a dedicated Mixer insert for the microphone so you can change its return without turning down the entire beat. The capture steps below use Mixer-to-Playlist audio recording, which requires Producer Edition or higher.
- With the speakers muted, select the Mixer insert receiving the mic. Check the input selector at the top of its effects area; do not assume the selected insert is the one receiving audio.
- Click the Recording Pickup selector immediately to the left of that input selector. When external-only capture is selected, it shows EXT.
- Under Monitor external input, select Off. The other choices, When armed and On, can make the input audible when their conditions are met.
- For a clean Playlist recording of the mic, keep External input only selected and arm that insert for recording. Monitoring and recording pickup are separate settings in the same menu.
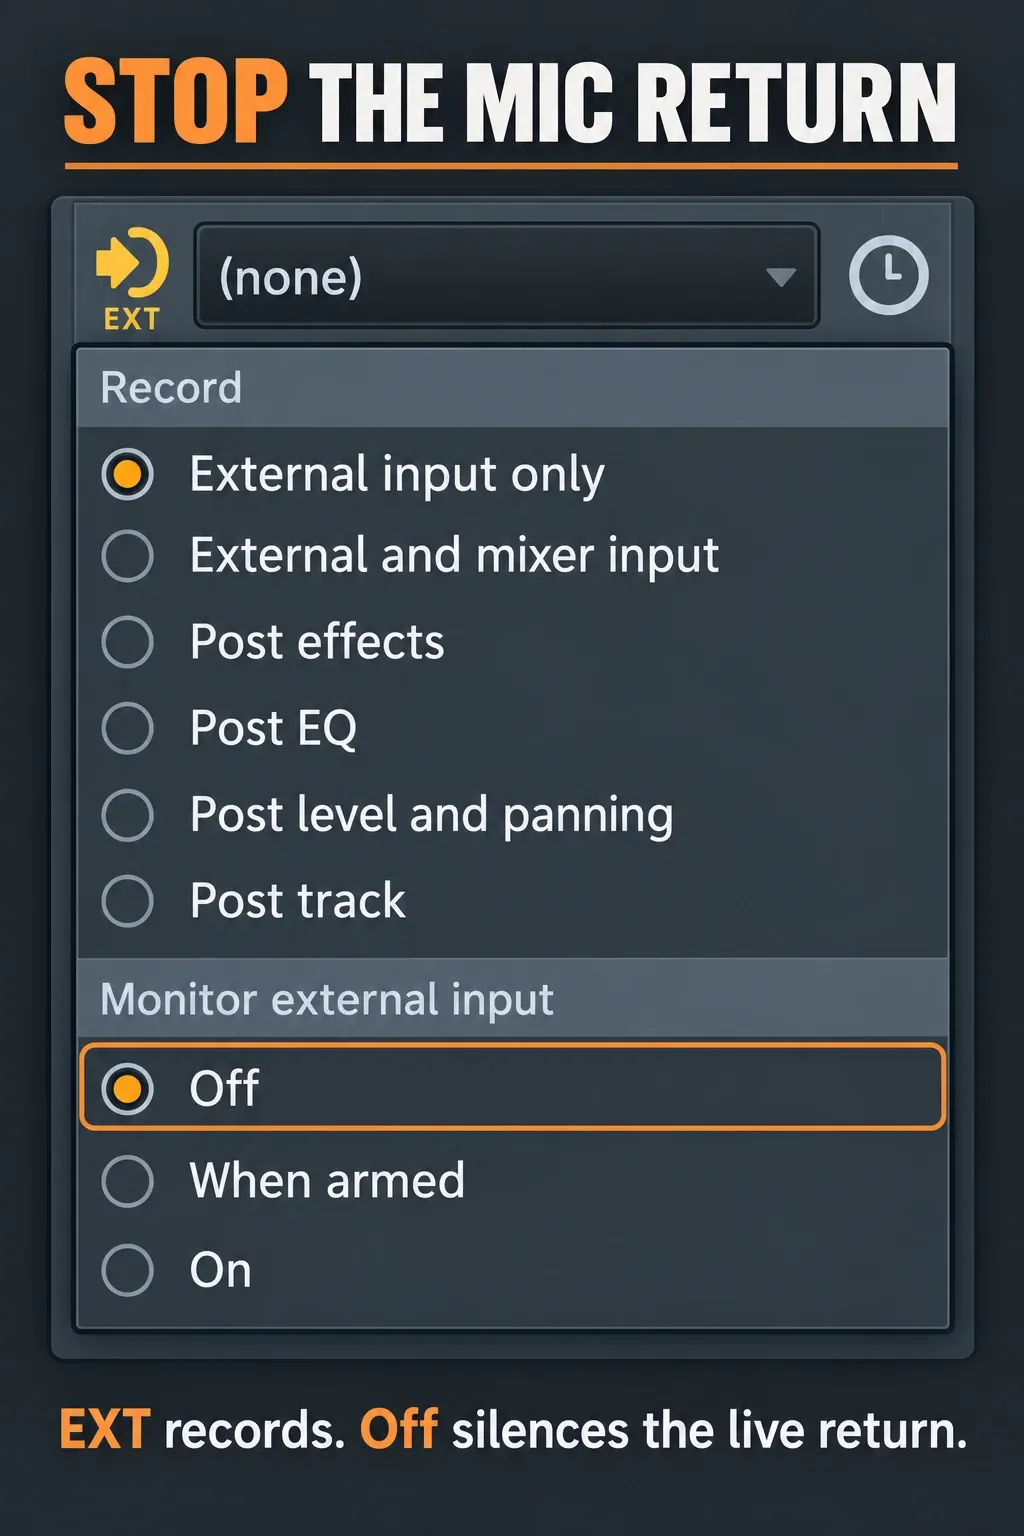
The Mixer Track Properties manual distinguishes what gets recorded from what you hear. With EXT capture, the interface controls the recording level. Pulling down the Mixer fader is therefore not a reliable way to reduce the level written into that recording.
Leave the Master available for the song. Turning it down is useful to stop a sudden blast, but it also silences the music and leaves the cause in place. Likewise, removing the mic input entirely stops the signal you wanted to record. If you need the complete capture setup, follow the guide to recording audio in FL Studio.
If it happens through speakers, break the acoustic loop
Acoustic feedback forms when a speaker plays the mic signal, the mic picks that sound up, and the system amplifies it again. It may ring, whistle, howl, or build into a screech. Shure's explanation of microphone and loudspeaker feedback identifies speaker placement, microphone placement, and excessive gain as contributing factors.
For a vocal take, use headphones and keep the speakers muted. This removes the loudspeaker-to-mic path while leaving the backing track available in your headphones. Start at a low listening level. Headphones are not a reason to turn a suspected loop back up, and loud headphone spill can still reach a nearby mic.
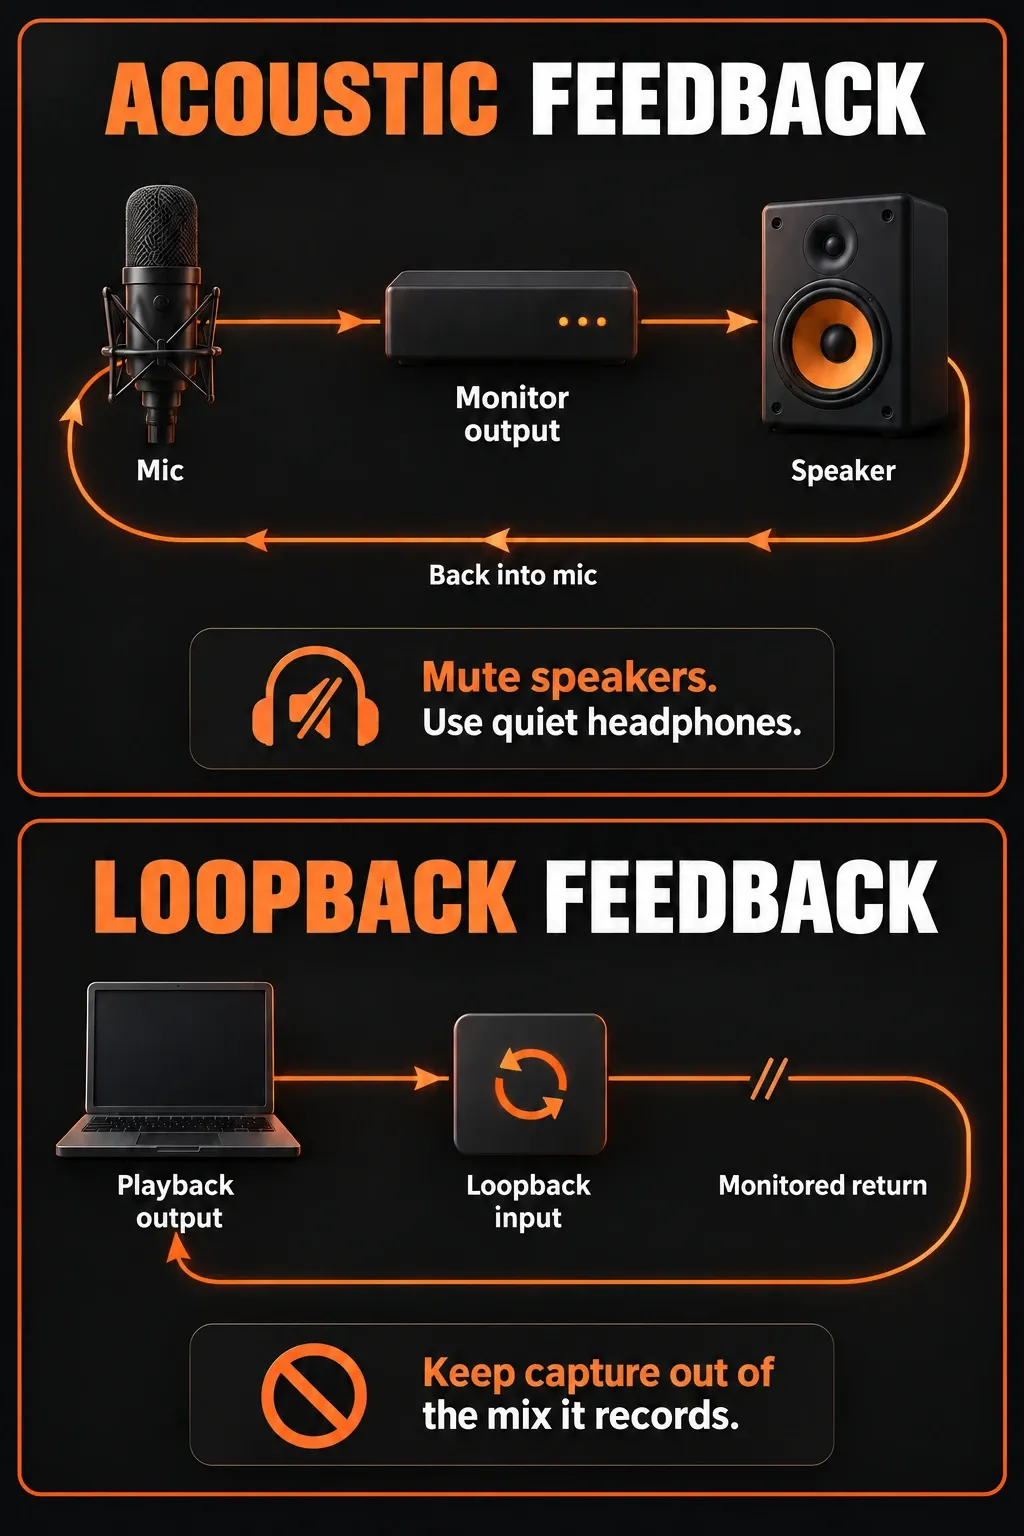
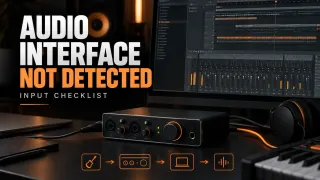
Check the interface too. Direct monitoring sends an input to the interface's outputs without traveling through FL Studio. Image-Line documents this separate path in its audio recording and monitoring guide. Turning software monitoring Off will not remove a hardware return that still feeds the speakers.
Your interface may have a Direct Monitor button, an input/playback blend knob, or a control application. Use its manual to find which outputs receive the mic. Keep the speaker outputs down; if you want to hear your voice, arrange a quiet headphone return. There is no universal knob position that fits every interface.
If speakers must remain in use, reduce their level, keep them away from the microphone, and respect the mic's pickup pattern. For routine recording at a desk, I would solve the monitoring arrangement first. A notch EQ or noise gate is a poor starting point when the mic is still listening to its own amplified output.
If headphones also screech, check the selected input
With the speakers muted, an acoustic speaker loop should no longer explain a continuing howl. Keep the listening level down and check whether FL Studio is receiving the physical microphone input or a copy of the computer's output.
Loopback inputs are designed to bring playback back into a recording application. If that recording channel is then monitored into the same playback mix, it can return its own output repeatedly. Focusrite explicitly warns against this in its Focusrite Control 2 loopback instructions. This is a routing problem that can exist without any sound traveling across the room.
For an ordinary microphone take, select the actual mic input on the dedicated insert. A single mic connected to one interface socket normally needs that socket's mono input, not a stereo playback or loopback pair. FL Studio's input menu separates stereo inputs from mono inputs; the names and numbers come from the active device and driver.
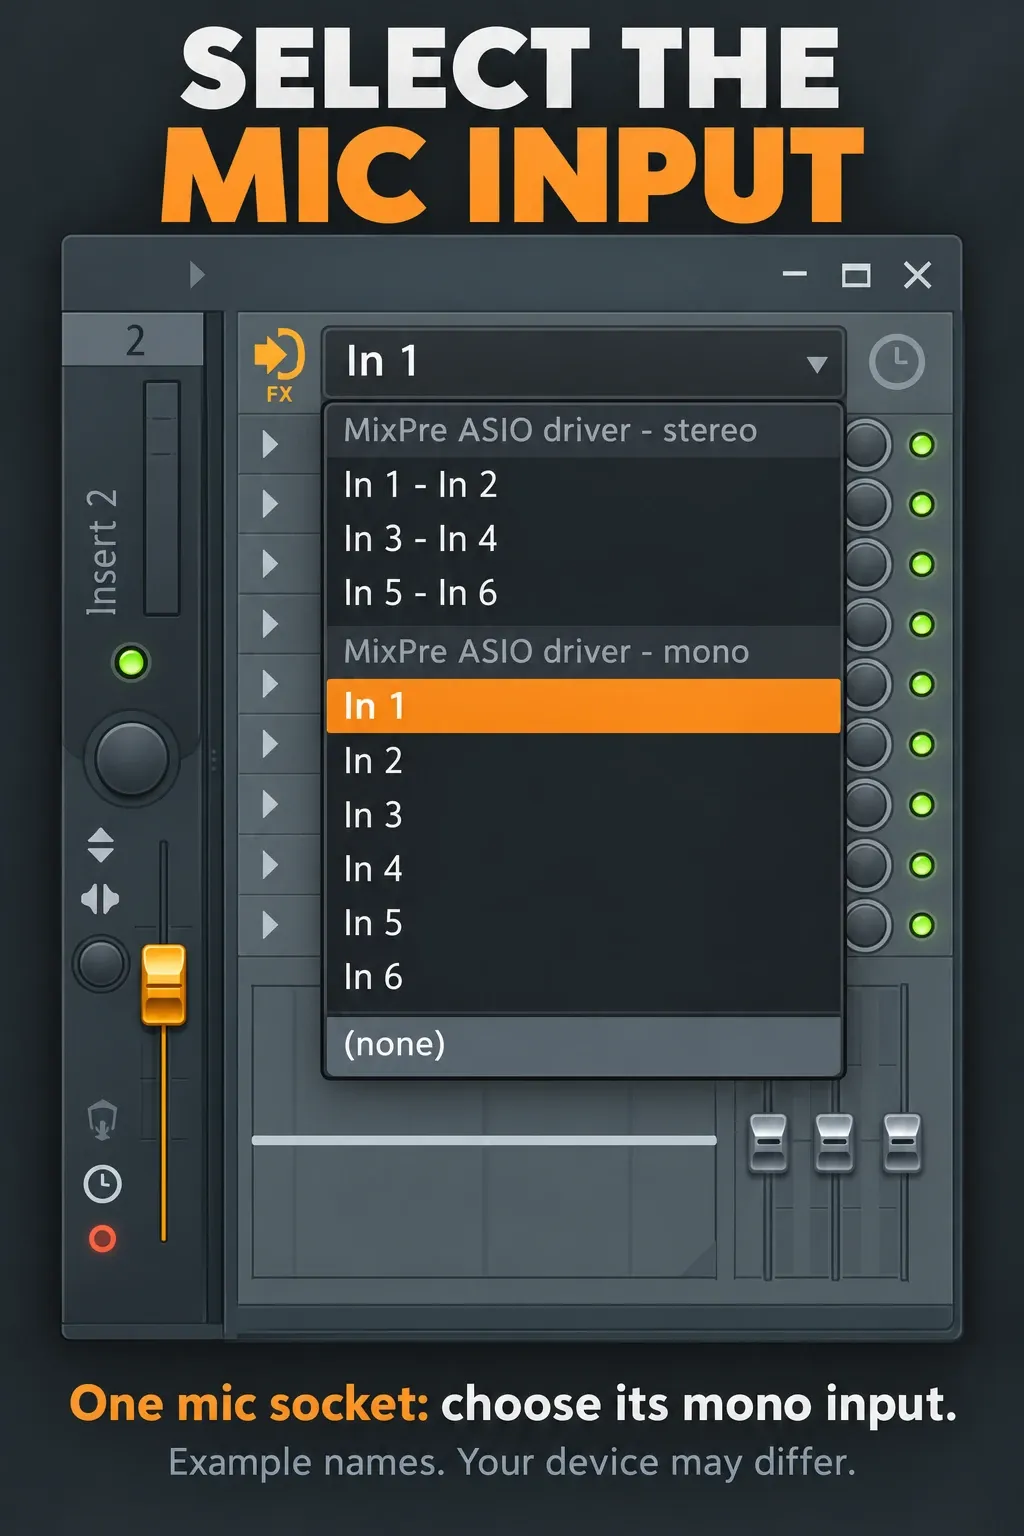
Check any interface mixer, virtual cable, streaming application, or system playback-capture source involved in the setup. Look for the same output being sent back to the input you are monitoring. Disable that return, or keep the capture channel out of the output mix it records. If you intentionally need computer audio, use the separate computer-audio recording workflow rather than treating loopback as a microphone input.
Also inspect other Mixer inserts with external inputs selected. Switching monitoring Off on one insert does not change another insert receiving the same device. A simple mic setup is easier to troubleshoot when one dedicated insert owns that input.
Make sure the noise is actually feedback
“High-pitched noise” describes a sound, not a diagnosis. Use the behavior of the noise to choose the next check. Do not repeatedly recreate a loud squeal to identify it.
| What you notice | What to check next |
|---|---|
| A tone grows when the mic is monitored through speakers | Acoustic feedback: mute speakers, use quiet headphones, and stop the live mic return. |
| A howl persists with speakers muted and a playback-capture input selected | Output-to-input routing: remove the loopback return to the mix it captures. |
| The voice distorts on loud words and the interface input clips | Input overload: lower the interface's input gain and leave recording headroom. |
| Clicks or crackles occur during playback or CPU-heavy sections | Driver and buffer behavior, particularly if the problem remains with the mic input disconnected. |
| A steady hiss, hum, or whine remains at a similar level | The input chain, cable, power, or device noise; the sound alone does not establish a feedback loop. |
For overload, lower the input gain at the interface. Focusrite's gain-staging guidance explains why digital recording needs headroom. A lower playback fader cannot undo distortion already captured at the input.
For crackling, Image-Line's Audio Settings documentation explains that a longer buffer can reduce audio glitches at the cost of more delay. On Windows, use the interface manufacturer's ASIO driver when available. Those are useful checks for the relevant symptoms; neither removes a speaker-to-mic feedback path. Our audio settings guide covers that branch.
If the input behaves strangely only through a Windows recording-device path, review any enabled processing for that device. Microsoft documents disabling microphone audio enhancements as an input troubleshooting step. The available controls depend on the device and Windows interface. This is a secondary check after routing, not a guaranteed cure for screeching.
Resume the take with the routing fixed
Keep the speakers muted, select the intended physical input, and decide whether you need a live headphone return. Use one deliberate monitoring arrangement, with the input gain below clipping. Then make a short, quiet-level recording check before continuing the take. For permissions, missing inputs, or no meter activity, use microphone-not-working troubleshooting; a silent input is a different problem.
If the screech is already in a recorded clip, changing monitoring only fixes the next take. Keep the original file before editing. Feedback captured with a vocal, especially an overloaded recording, may not be cleanly recoverable; rerecording after fixing the loop is often the more dependable choice.