FL Studio
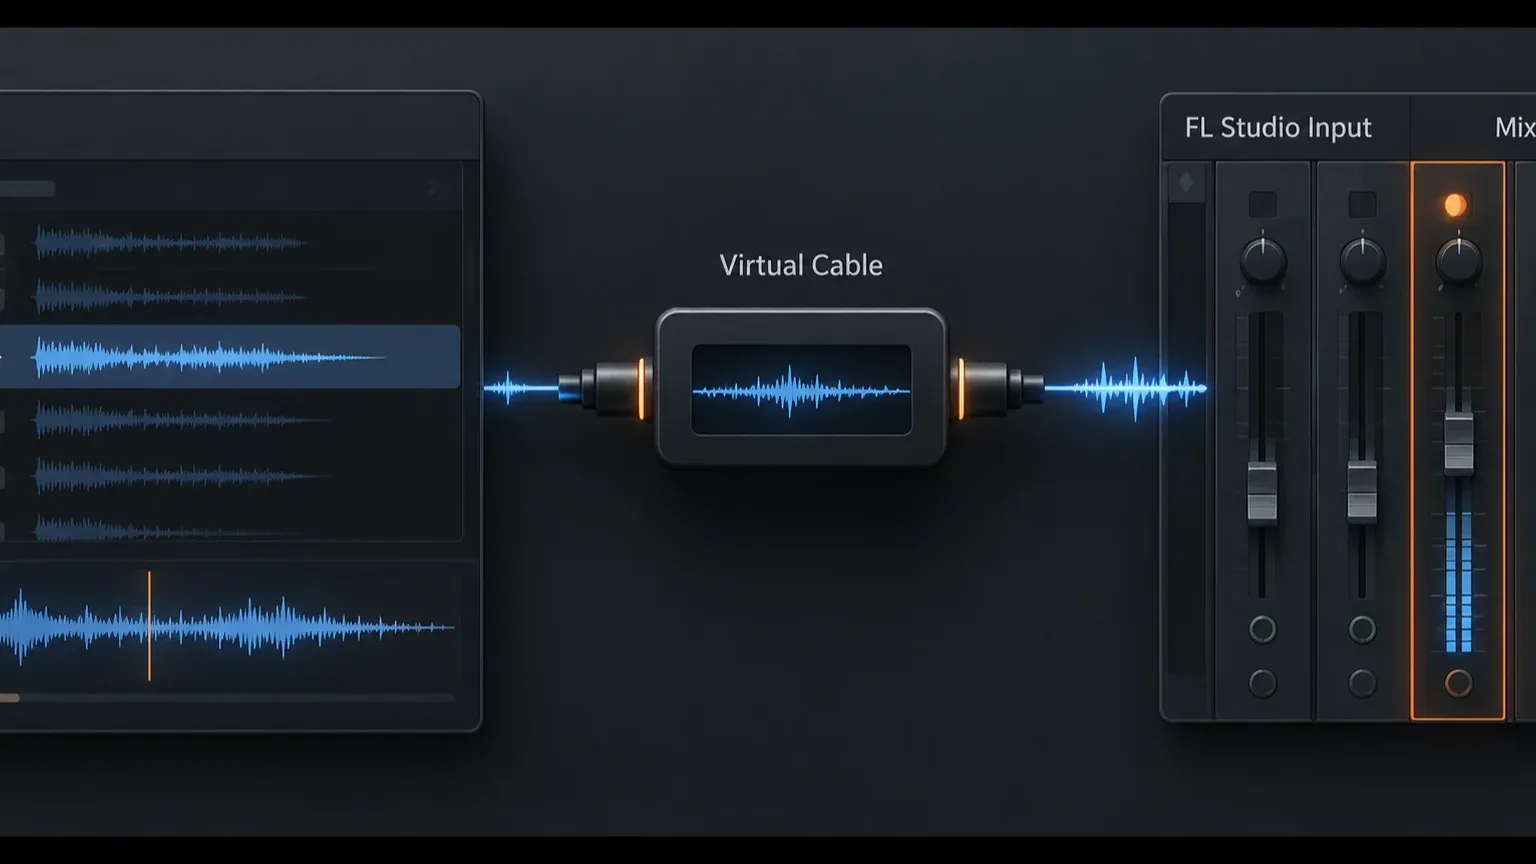
FL Studio can record computer audio, but the computer’s playback device is not automatically an input inside FL Studio. You need to route the browser or application into a virtual cable, software router, or physical loopback, then choose that route on a Mixer Insert. From there, record the signal in Edison or into the Playlist.
The cleanest setup depends on your operating system. Windows users normally choose VB-CABLE or a mixer/router such as Voicemeeter. macOS users can use BlackHole, a physical loopback input, or another audio-routing utility. The important part is the signal path: computer playback → routed input → FL Studio Mixer Insert → Edison or Playlist.
Choose the right way to capture computer audio
Use this workflow when the source is outside FL Studio: a browser, video call, media player, game, or another desktop application. If the sound already exists inside your FL Studio project, routing it through the operating system adds unnecessary failure points. Use resampling in FL Studio for a focused internal source, or export the project audio when you need a finished file.
Audio Logger solves a different problem. The FL Studio Audio Logger guide covers recovery of audio that has already played through the Master output. It is useful when you forgot to record a moment, but it is not a replacement for setting up a deliberate input route.
Windows: route desktop audio through VB-CABLE or a mixer
On Windows, install and configure one virtual audio route. VB-CABLE’s official documentation describes the basic idea: audio sent to the virtual cable’s playback side appears at its virtual recording side. In practical terms, Windows sends the browser to the cable, and FL Studio receives the cable as an input.
Simple route with VB-CABLE
Set the browser or the Windows output device to CABLE Input. In FL Studio, select an ASIO driver that exposes the cable’s recording endpoint, then choose CABLE Output as the input on an unused Mixer Insert. The names are intentionally confusing: the application plays into the cable’s input side, while FL Studio records from the cable’s output side.
You do not have to make the entire computer use the cable. Routing only the target browser or media application keeps notifications and unrelated system sounds out of the take. Windows’ current per-app output controls let you choose a different output device for an individual application when the driver and application support it.
Use Voicemeeter when you need a monitor mix
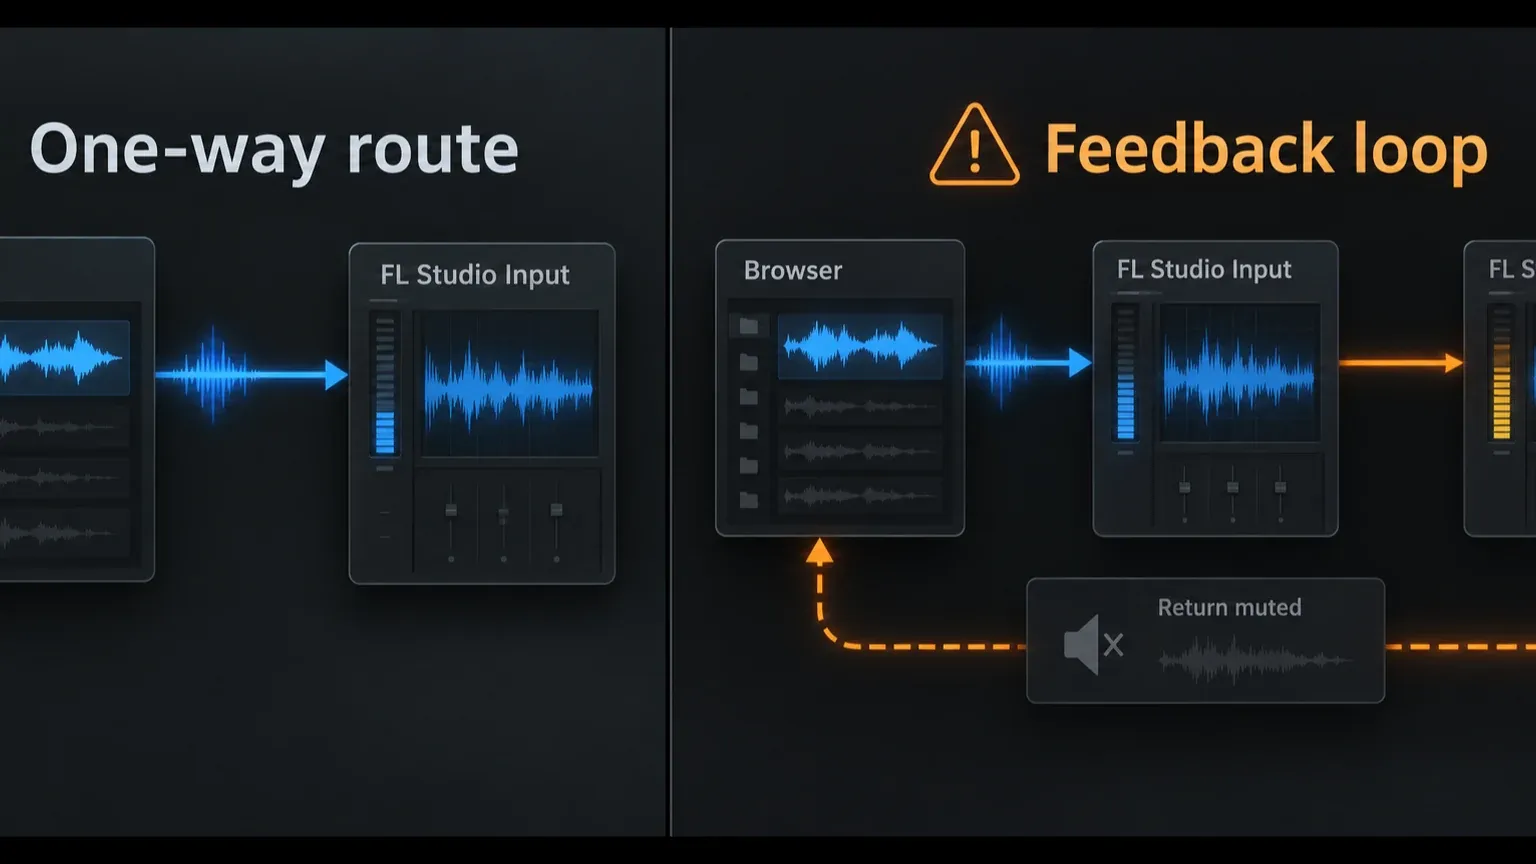
A virtual cable is enough for a one-way capture. Use a software mixer such as Voicemeeter when you need to hear the browser, your microphone, and FL Studio together while deciding which signals should be recorded. Keep the route one-way for the input you are capturing. If the same signal returns from FL Studio to the Windows playback bus and comes back again, you will hear a loop or doubled sound.
Start with one destination and one recording source. Add a monitoring return only after the signal reaches the FL Studio meter. This makes it clear whether silence comes from the operating system route, the driver, the Mixer input, or the recording control.
macOS: use BlackHole or a physical loopback
macOS does not expose the system playback stream as a normal microphone input. A virtual driver such as BlackHole can provide that route. Apple’s Audio MIDI Setup documentation explains how macOS audio devices and aggregate or multi-output devices are configured.
Virtual route with BlackHole
Send the browser or system output to BlackHole, then select the corresponding BlackHole input in FL Studio. If you also need to hear the computer through headphones, create a monitoring arrangement that includes your physical output. Check the levels carefully: a monitoring device should let you listen without sending the returned FL Studio signal back into the same input.
Physical loopback when the interface provides it
Some audio interfaces provide a loopback channel. The interface mixes computer playback into a virtual input that FL Studio can select. This can be more stable than creating an aggregate device, but the exact controls depend on the interface. Follow the manufacturer’s routing names and keep the loopback return separate from the signal you are monitoring.
If macOS shows the device but FL Studio does not, quit applications that hold the audio device, reopen the driver selection, and check macOS microphone or audio permissions. Do not keep changing Mixer controls until the operating system and selected driver expose the route.
Set the audio driver in FL Studio
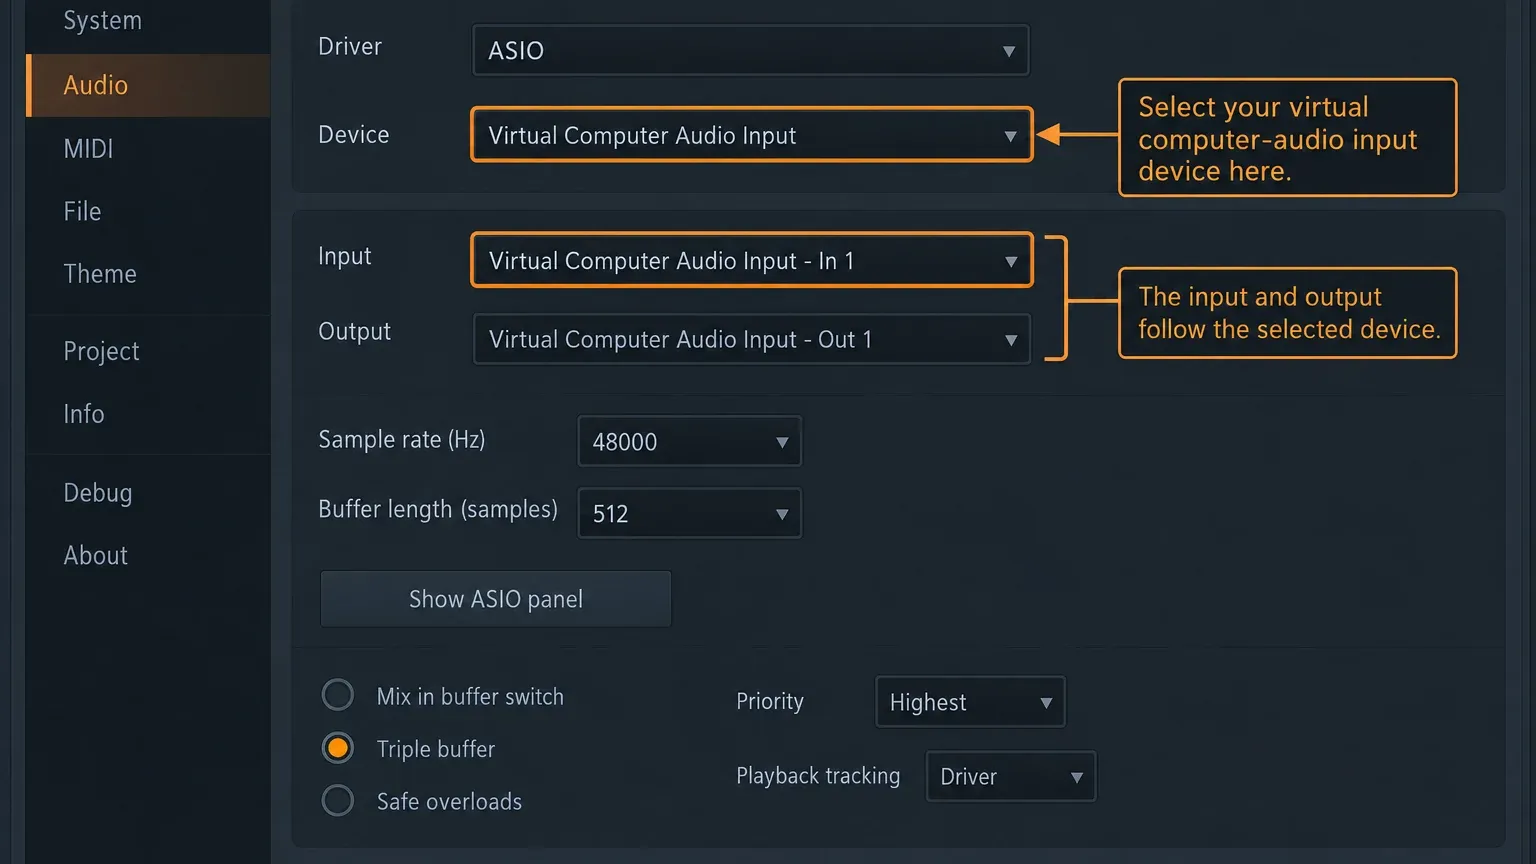
Open FL Studio Audio Settings and select a driver that exposes both playback and input devices. On Windows, this is commonly an ASIO driver. On macOS, select the available Core Audio device or the virtual or aggregate device that contains the route.
Play the browser audio and watch whether the input appears anywhere in FL Studio. If the driver exposes only the physical interface but not the virtual cable, the Mixer cannot select the signal yet. If FL Studio sees the input but the browser is silent, the problem is before the Mixer: check the browser’s output device and the operating system’s application routing.
Keep the buffer reasonable for the job. Computer-audio capture does not need an ultra-low live-monitoring buffer unless you are also performing through the route. A smaller buffer can reduce monitoring delay but may increase clicks or underruns when the project is heavy. The same Audio Settings workflow explains the driver and buffer controls in more detail.
Select the routed signal on a Mixer Insert
Choose an unused Mixer Insert and select the virtual cable or loopback input from its input menu. Select the input that corresponds to the routed source, not the physical microphone input and not the Master output. Image-Line’s Mixer manual explains how Insert Tracks receive external audio inputs. For a stereo browser stream, choose the stereo input when it is available. A mono selection can collapse the source or leave one side missing.
Play a clear section of the browser audio. The Insert meter should move before you press record. If the meter moves, the route has reached FL Studio and you can choose a recording destination. If it does not move, stay on this step and diagnose the route; recording controls cannot create a signal that is absent from the Insert.
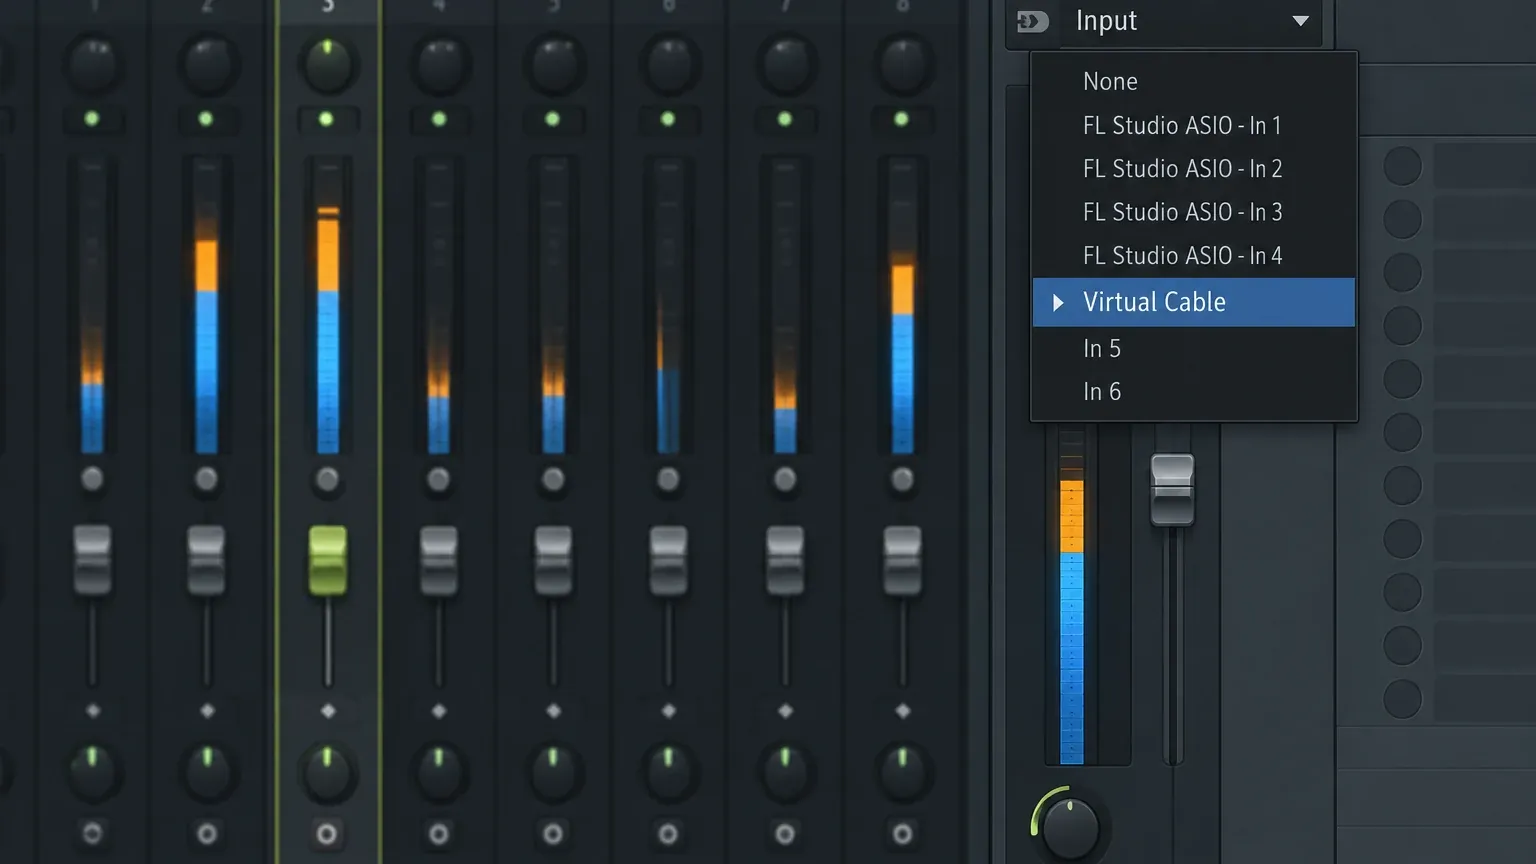
Keep the capture Insert separate from the Master when you want only the browser or application. Recording the Master can include the entire FL Studio project, monitoring returns, and anything else reaching the output. A dedicated Insert gives you a cleaner decision about what is being recorded.
Record a focused passage in Edison
Edison is useful when you want a self-contained recording of a section, a sound-design pass, or a short reference. Click an empty slot on the routed Mixer Insert and open Edison. Use the Edison record control, start the browser playback, then stop when the passage is complete.
Listen back before saving. Trim only what you understand, name the file with the source and date, and use Edison’s save or drag destination according to the next step in your project. The FL Studio Edison guide covers focused editing and file handling. Image-Line also documents the broader audio recording workflow for external and internal sources.
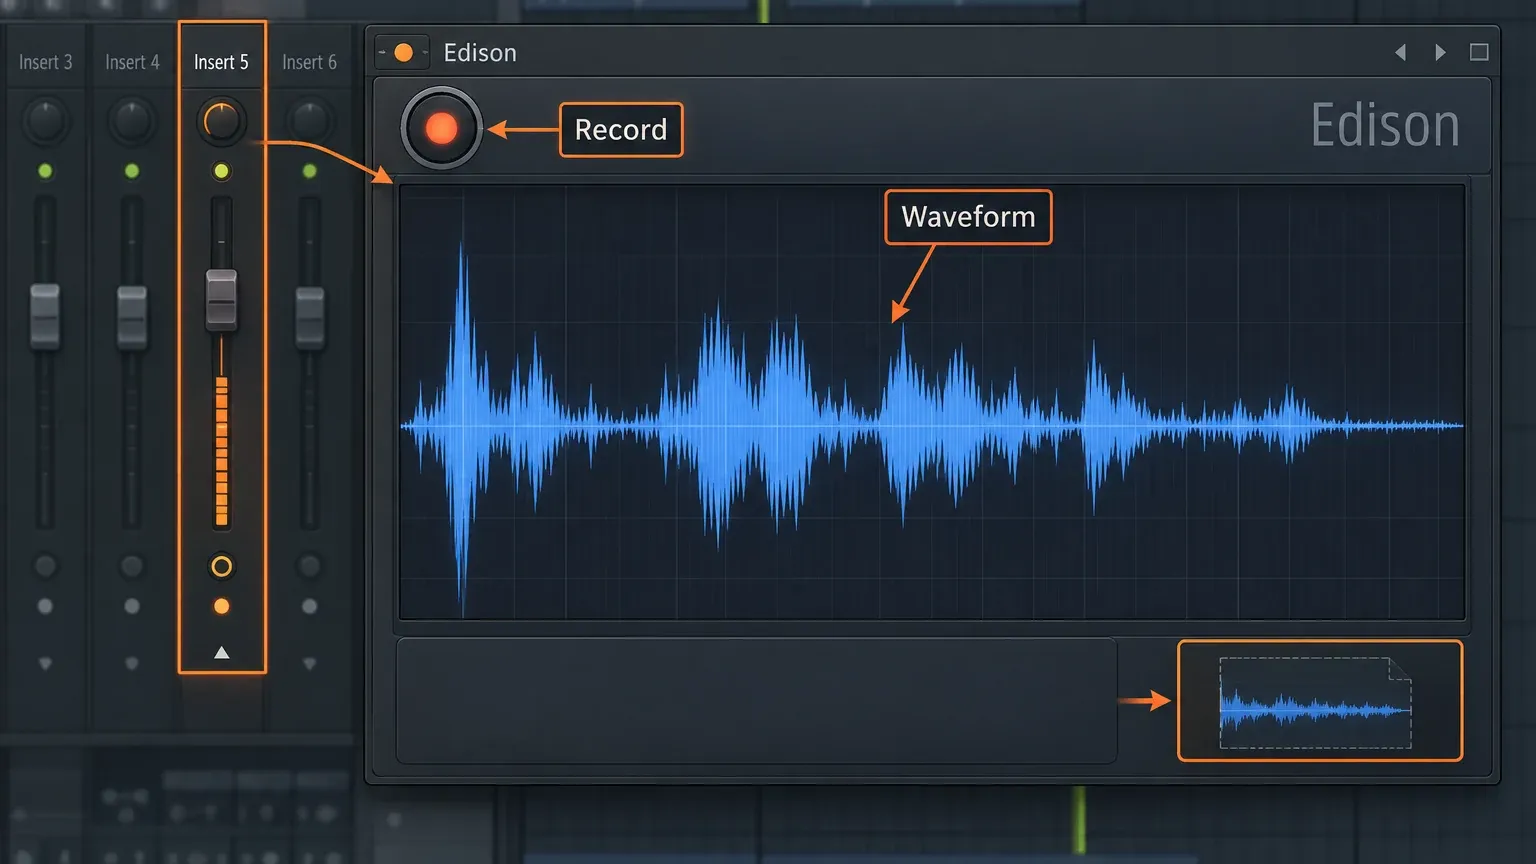
For a long recording, watch disk space and stop the source cleanly. A browser stream may contain silence, notifications, or an unexpected change in playback. Mark the usable section after you have heard the complete capture.
Record the routed audio into the Playlist
Use the Playlist when the computer audio needs to line up with your arrangement. Arm audio recording, choose the Playlist recording option, and record in Song mode if the capture must follow the project timeline. Keep the routed signal on its dedicated Mixer Insert and confirm that the Audio recording filter is enabled.
Start playback of the browser or application after the count-in. The resulting clip should appear on the linked Audio Track or the selected recording location. If the timing matters, create a short sync reference first and compare the beginning of the captured clip with the original playback. Browser applications can buffer or change timing independently of FL Studio, so long recordings may need inspection at several points.
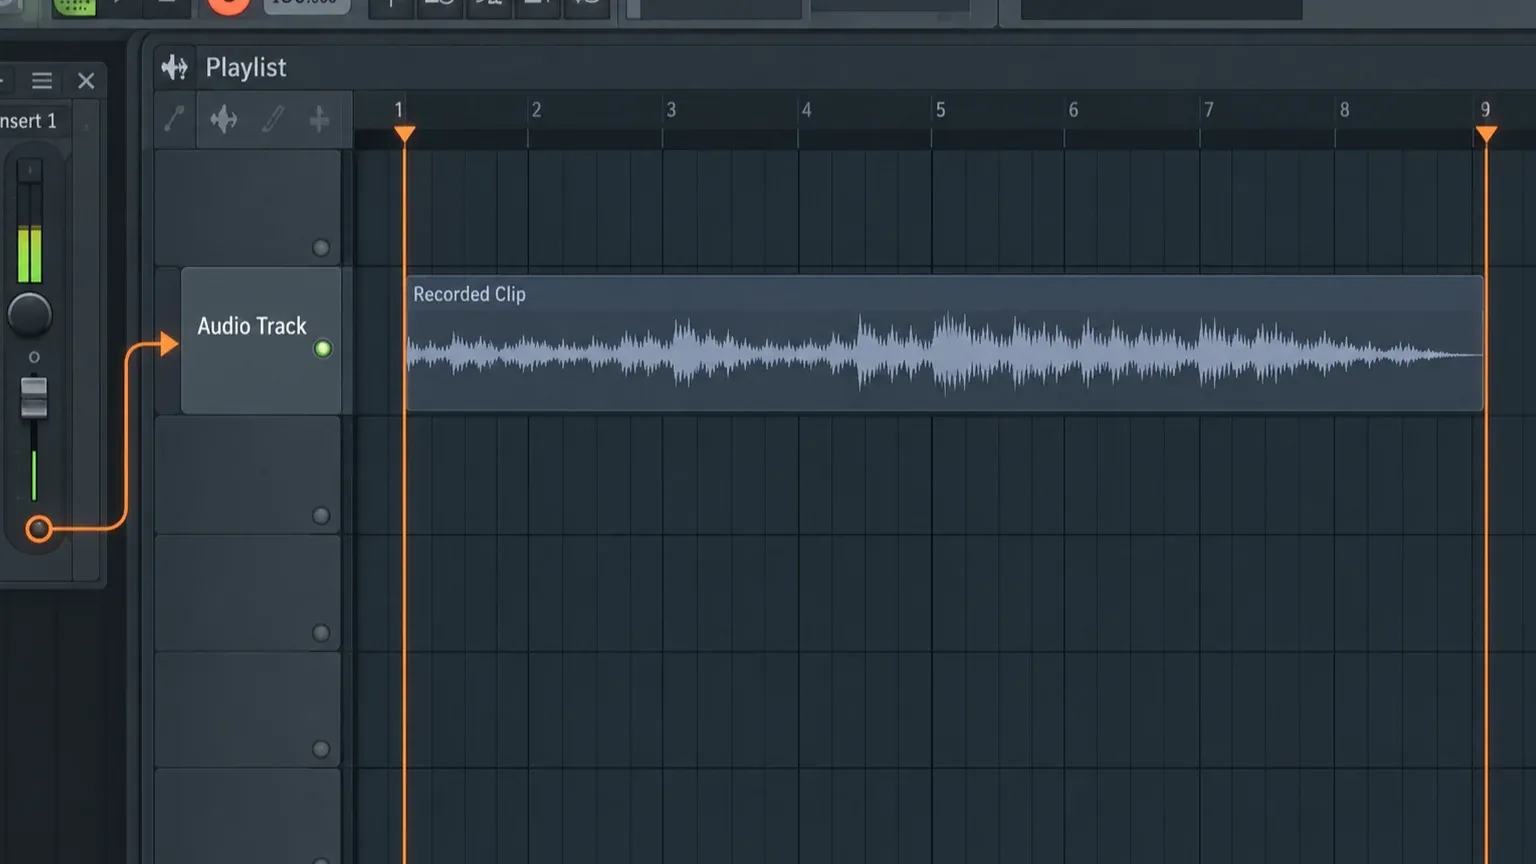
Do not use a loud Master recording as a shortcut when you only need the browser. A dedicated Audio Track gives you a source that can be muted, trimmed, processed, or replaced without carrying the rest of the project into the file.
Prevent feedback and doubled monitoring
Feedback usually starts when the captured signal has two destinations: the intended recording input and a return path that sends it back to the same virtual device. Doubled sound can also happen without a full loop when you monitor the browser directly and hear the same browser signal through FL Studio a moment later.
Choose one monitoring path. Either listen to the browser through the operating system or interface, or monitor the signal through FL Studio. If you need FL Studio effects, mute the direct return and keep the FL Studio return active. If you need the lowest-risk capture, monitor the source directly and keep the FL Studio Insert from sending its input back to the virtual playback device.
Fix silence, missing inputs, clicks, and drift
The Mixer input menu does not show the virtual device
Recheck the selected FL Studio driver and the operating system’s audio device. A virtual device can exist on the computer while the active driver exposes only a physical interface. Close applications that may hold the device, reopen Audio Settings, and select the driver that contains the required input channels.
The input is listed but the meter stays still
Play the source and verify its output destination. The browser may still be using the speakers while FL Studio listens to the virtual cable. Check the per-application output, the cable’s playback and recording side, and any mute or fader in the software mixer. Follow the signal in order instead of changing all controls at once.
The recording contains clicks or dropouts
Clicks usually point to an unstable driver, buffer, sample-rate conflict, or overloaded routing chain. Match the sample rate across the operating system, virtual device, interface and FL Studio where the controls allow it. Raise the buffer enough to make the route stable, then repeat a short capture. Do not judge a long recording after one noisy start.
The recording slowly drifts out of sync
Separate timing drift from a fixed start offset. A fixed offset can often be trimmed or aligned. Drift means the source and FL Studio clocks are not running at exactly the same rate, which can happen across aggregate or virtual devices. For long captures, shorten the recording, use a clock-stable physical loopback, or plan to align sections after capture.
The capture includes the FL Studio project or microphone
You are probably recording the Master, a monitor bus, or a software-mixer mix that contains more than the target application. Move the route to its own Mixer Insert and select the virtual cable input directly. Mute unrelated sources while confirming the signal path.
Choose the best tool next time
Use a virtual cable or loopback when the sound begins outside FL Studio and you need a planned recording. Use Edison for a focused passage that you want to inspect or save as a self-contained file. Use the Playlist when the capture belongs on the project timeline. Use resampling or export when the source is already inside FL Studio. Use Audio Logger when the sound has already played and you need to recover it.
Before recording, answer one question: where does the source exist right now? If the answer is “in another application,” build the input route and watch the Mixer meter. If the answer is “inside this project,” keep the audio inside FL Studio and choose the native tool that preserves the edit you still need.
Computer-audio recording checklist
- Browser or application output is routed to a virtual cable, software mixer, or loopback input.
- FL Studio’s selected driver exposes that device.
- The routed signal is selected on a dedicated Mixer Insert.
- The Insert meter moves before recording begins.
- Edison or Playlist recording matches the length and timing you need.
- Only one monitoring path is audible.
- The capture is separate from the Master when you need only the external source.
- A short test has no clicks, missing channels, feedback, or unexpected project audio.