FL Studio
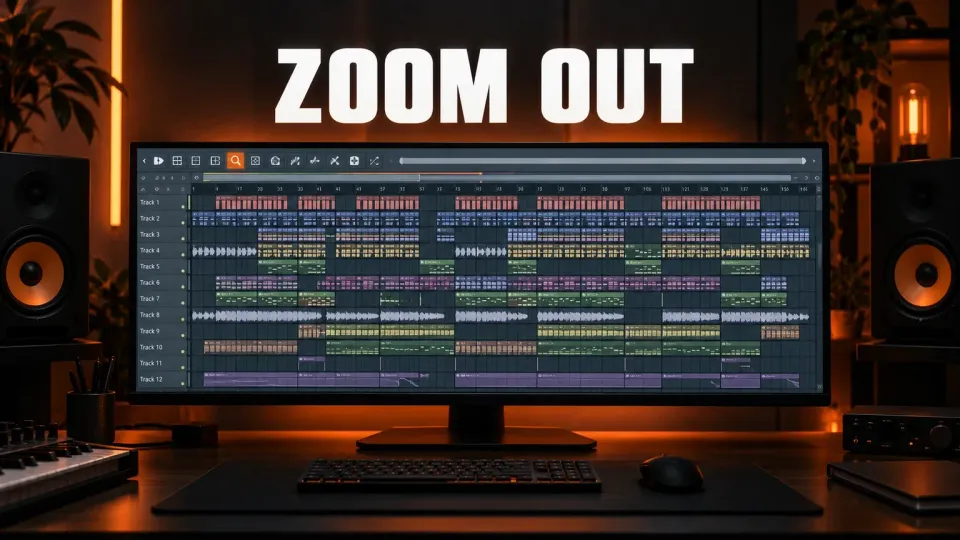
To zoom out in FL Studio, hold Ctrl (Cmd on a Mac) and roll the mouse wheel over the Playlist, press Page Down, or press Shift+4 to see the whole song. Ctrl+right-click (Cmd+right-click) an empty Playlist area for full view, then do it again to go back. For vertical zoom, drag the track height control. If every right-click zooms in or out, the Zoom tool is still selected: press P for the Draw tool or B for Paint.
The Playlist, the Piano roll and Edison each have their own zoom controls. The Mixer only scrolls. If it's the whole FL Studio window that looks too big or too small, you're looking at interface scaling, which has its own section below.
FL Studio zoom shortcuts at a glance
The zoom keys are the same in the Playlist and the Piano roll, according to Image-Line's keyboard shortcut reference, and on macOS Ctrl maps to Cmd and Alt to Opt. Mouse-wheel zoom is documented for the Playlist.
| What you want | Windows | Mac | Works in |
|---|---|---|---|
| Zoom in or out around the mouse cursor | Ctrl+mouse wheel | Cmd+mouse wheel | Playlist |
| Zoom in or out one step | Page Up / Page Down | Page Up / Page Down (Fn+Up Arrow / Fn+Down Arrow on compact keyboards) | Playlist, Piano roll |
| Zoom all the way out horizontally | Shift+4 | Shift+4 | Playlist, Piano roll |
| Full view, then back to where you were | Ctrl+right-click an empty track area, repeat to return | Cmd+right-click, repeat to return | Playlist |
| Zoom to an area you draw | Ctrl+right-click and drag | Cmd+right-click and drag | Playlist, Piano roll |
| Zoom to one clip | Ctrl+Shift+right-click the clip | Cmd+Shift+right-click the clip | Playlist |
| Zoom to the selected time range | Shift+5 | Shift+5 | Playlist, Piano roll |
| Three preset zoom levels | Shift+1, Shift+2, Shift+3 | Shift+1, Shift+2, Shift+3 | Playlist, Piano roll |
| Fit the Performance zone | Shift+6 | Shift+6 | Playlist |
| Center the view on the playhead | Shift+0 | Shift+0 | Playlist, Piano roll |
| Vertical zoom | Drag the track height control (Playlist) or the vertical zoom box (Piano roll) up or down | Same | Playlist, Piano roll |
Most Mac laptop keyboards don't have Page Up or Page Down keys. Apple's list of Mac keyboard shortcuts gives Fn+Up Arrow and Fn+Down Arrow as Page Up and Page Down, so that's the pair to try for stepped zoom.
Stuck zoomed in? Fixes by symptom
Every right-click zooms in or out
The Zoom tool is still active. It's the magnifier in the editor's toolbar, and while it's selected, right-click flips between the zoomed and unzoomed view instead of deleting or opening menus. Image-Line's Playlist documentation describes exactly that: right-click again to swap between zoom and unzoomed modes. To get your normal mouse back, pick another tool. In both the Playlist and the Piano roll, P selects the Draw tool and B selects Paint, or you can click the pencil or brush icon.
Letter and number shortcuts do nothing
Typing keyboard to piano is probably on. According to the shortcut reference, single-key shortcuts only work when it's off, so P, B, Z and the plain number keys trigger notes instead. Press Ctrl+T (Cmd+T) to turn it off. If you use that mode for note input, the computer keyboard as piano guide explains it.
You zoomed into one clip and lost the rest of the song
Ctrl+right-click (Cmd+right-click) an empty part of the Playlist without dragging. That zooms to full view, and doing it again takes you back to the previous zoom and position. Shift+4 also zooms all the way out horizontally; the Playlist's Zoom tool menu describes it as switching between that view and your previous zoom level.
Tracks got huge after zooming out
Full view changes horizontal zoom, but track height is a separate setting. In a December 2023 Image-Line forum thread, a user on FL Studio 21.2.2 for Windows reported that zooming out with Ctrl+right-click also made Playlist tracks taller when the project had only a few tracks, so they had to resize them every time. Whatever the cause, the fix is the same: drag the track height control to set all tracks at once, or Alt+click (Opt+click) the divider under a track name to reset that track's height. If one track should never change size, right-click its name and choose Lock to this size.
Pressing number keys changed the clips
The zoom presets need Shift. In the Playlist, plain 5 and 6 do zoom (to the selection and to Performance clips), but plain 7 and 8 transpose the selected clips down and up and 9 reverses selected Audio Clips. If a clip suddenly plays in a different key or backwards, press Ctrl+Alt+Z (Cmd+Opt+Z) to step back; the undo and redo guide explains why Ctrl+Z normally toggles the last edit unless Alternate undo mode is enabled.
Everything in FL Studio looks too big
When menus, toolbars and plugin windows are all oversized, no zoom shortcut will help. You're looking at the Main GUI scaling setting, covered in the GUI scaling section below.
How to zoom in the Playlist
The Playlist gives you three ways to change horizontal zoom, and they suit different moments:
- Ctrl+mouse wheel (Cmd+mouse wheel). Put the cursor on the part of the song you care about first. The Playlist documentation says to place the cursor over the location you want and then zoom, so that spot stays under the mouse.
- The scroll bar edges. Drag the left or right edge of the horizontal scroll handle at the top of the Playlist. A short handle means you are zoomed in; drag an edge outward to see more of the song.
- Page Up and Page Down. These zoom in steps and, according to the Zoom tool menu description, center on the cursor position.
If you want to jump instead of step, the Zoom submenu in the Playlist menu has fixed levels: Shift+1 to Shift+3 for three quick zoom levels, Shift+4 for the minimum horizontal zoom, Shift+5 to zoom to the selected time range (it's greyed out when nothing is selected in the timeline), and Shift+6 to fit the Performance zone if you use performance mode.
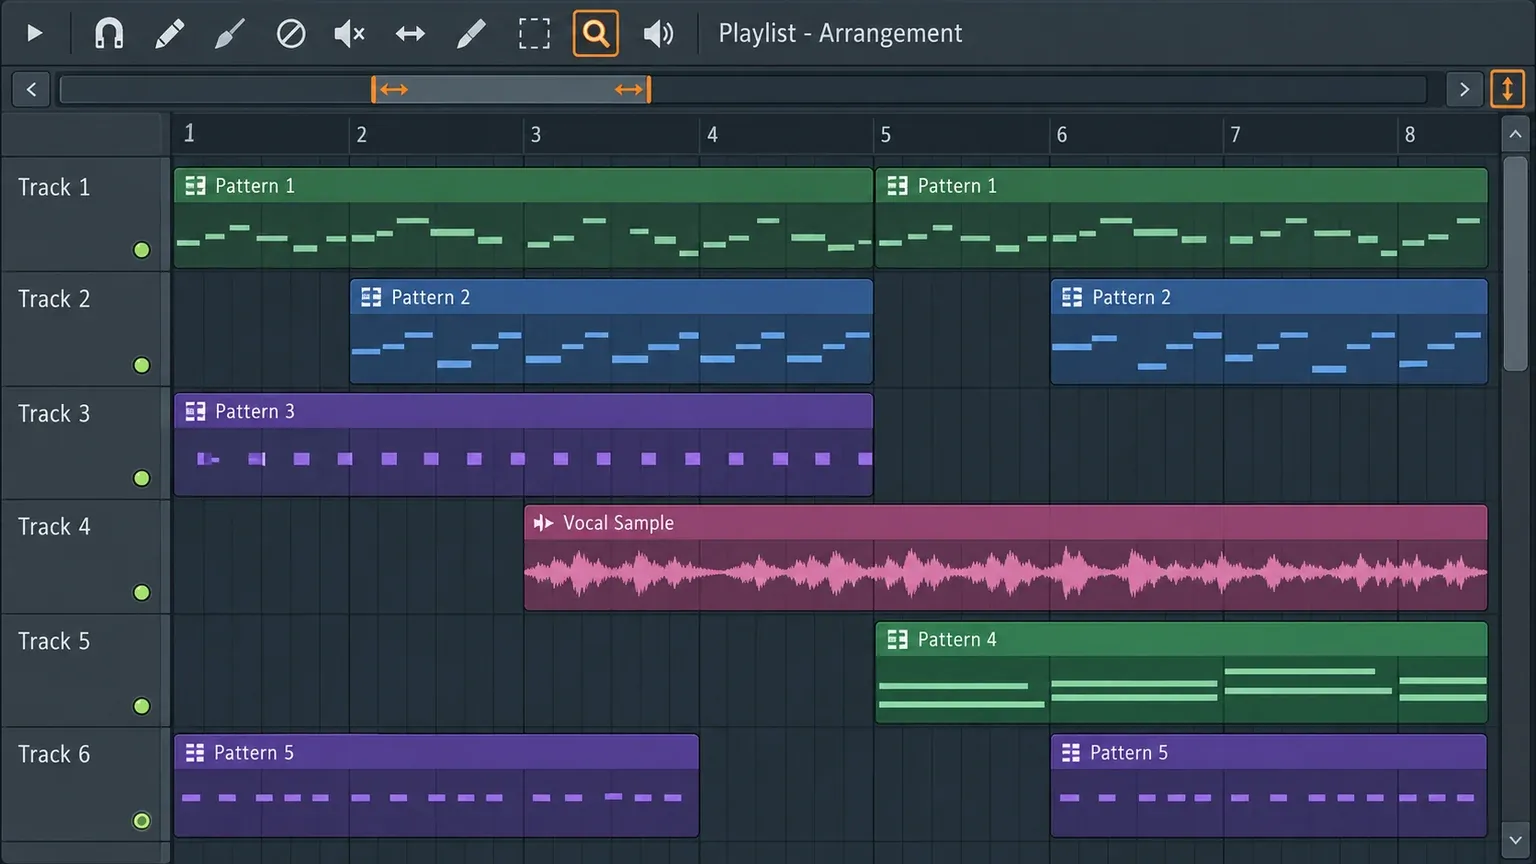
To zoom into one part of the arrangement, hold Ctrl (Cmd), right-click and drag a box around it. To fill the screen with a single clip, Ctrl+Shift+right-click (Cmd+Shift+right-click) that clip. The Zoom tool does the same job without a modifier, which is handy for a few quick looks, but I'd switch back to Draw or Paint as soon as you're done so right-click goes back to deleting clips.
Vertical zoom and track height
Playlist vertical zoom is the small track height control in the top-right corner of the Playlist, at the right end of the Zoom & Scroll bar and just above the vertical scroll bar. Drag it up or down to resize every track at once. For one track, drag the divider between track names to make it taller or shorter; Alt+click (Opt+click) a divider to reset that track to its default height. Tracks set to Lock to this size hold their height while the others change, which is handy for a drum track you always want compact.
Move around without changing zoom
Zooming in is only half the job. You also have to move the view. Hold the middle mouse button and drag to scroll in both directions at once. Left-Shift+right-click pans too, and the interface basics page notes that dragging the Playlist or Piano roll scroll bar with the right mouse button moves the view horizontally and vertically together. When the playhead has drifted off screen, Shift+0 centers the view on it.
Watch out for the Shift+wheel combinations. Over the Clip Track label area, Shift+mouse wheel re-orders Clip Tracks, and Shift+Alt+mouse wheel (Shift+Opt) over a clip nudges its position. Neither one scrolls, so if tracks swapped places while you were navigating, that's why.
The Playlist won't zoom in any further
Maximum zoom and snap resolution depend on the project's timebase. According to the Playlist documentation, you can raise it with the Project Timebase (PPQ) setting in the project's general settings (F11), and the default is adequate for most projects; the interface page puts that default at 96 PPQ. I'd only change it when you're editing very short sounds or tight timing. The guide to nudging audio by milliseconds covers when a higher PPQ is worth it, and the Playlist guide covers everything else about arranging.
How to zoom in the Piano roll
The Piano roll shares Page Up, Page Down and Shift+1 to Shift+5 with the Playlist (there's no Shift+6). Where it differs is the mouse. Image-Line's Piano roll documentation lists these controls:
- Zoom tool (Z). Left-click and drag to zoom to an area, left-click the background to zoom back out. Right-click toggles between zoomed and unzoomed. With any other tool selected, Ctrl+right-click and drag (Cmd+right-click) zooms to an area instead.
- Horizontal zoom. Click the edge of the horizontal position slider and drag.
- Vertical zoom. Click the small vertical zoom box in the top-right corner, at the right end of the horizontal slider, and drag it up or down.
- Keyboard zoom. Middle-click the piano keyboard on the left and drag up or down. The vertical zoom changes around the note you clicked, which is the quickest way to make one octave fill the screen.
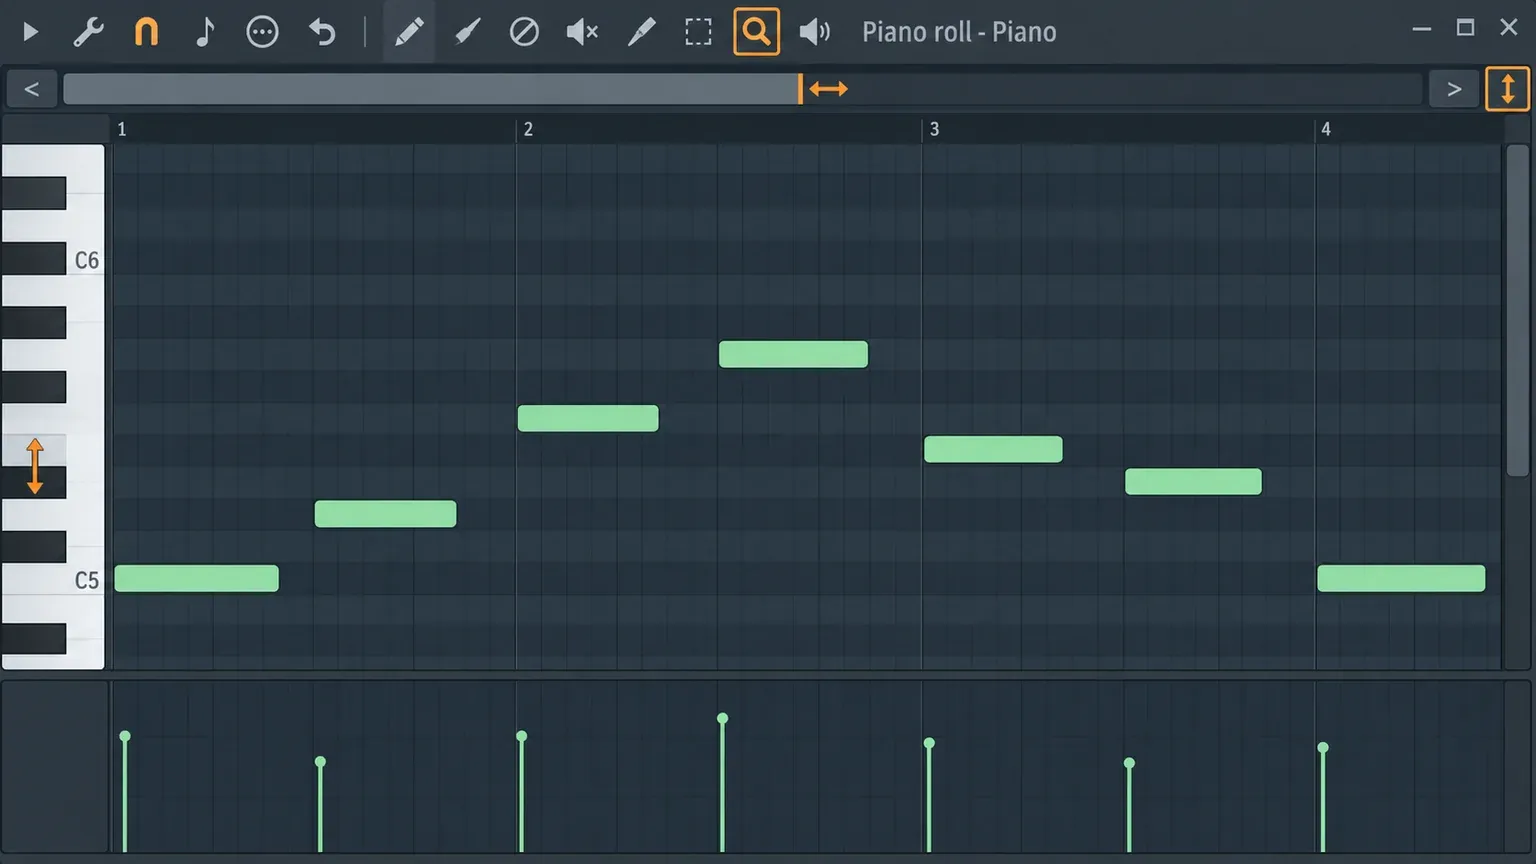
If you'd rather not zoom by hand every time you open a pattern, Options > General settings has Auto zoom in piano roll under Miscellaneous. Image-Line's General settings documentation says it sets the vertical and horizontal zoom to fit the note data. One catch: the Line snap setting follows your zoom level, so a wider view also gives you a coarser grid when you draw notes.
Wheel moves that edit notes instead of zooming
Several wheel and arrow combinations in the Piano roll look like navigation but change your notes:
| Input | What it actually does |
|---|---|
| Alt+mouse wheel (Opt+mouse wheel) | Changes the selected note property under the mouse |
| Ctrl+Alt+mouse wheel (Cmd+Opt+mouse wheel) | Fine-tunes that note property |
| Shift+Alt+mouse wheel (Shift+Opt) on notes | Nudges the notes under the mouse |
| Ctrl+Up / Down Arrow (Cmd) | Transposes the selection by an octave |
| Ctrl+Left / Right Arrow (Cmd) | Selects the time before or after the selection |
Ctrl+mouse wheel isn't in the Piano roll's list of zoom controls. Over the Target Channel selector in the Piano roll title bar, it shows used and unused channels instead. So if a vertical zoom tip tells you to hold Ctrl+Alt and scroll, check your notes before you trust it. The Piano roll guide covers note editing in detail.
How to zoom in Edison
Edison has its own Zoom/Scroll bar, which Image-Line calls useful when you're working on long sounds. The Edison zoom documentation describes three moves: drag the left or right edge of the highlighted section to zoom (a double-headed arrow appears), drag the middle of it to scroll, or click and hold the mouse wheel (middle button), then move up or down to zoom and left or right to scroll. That last one is the quickest when you're trimming the start of a long recording. The Edison guide has more on editing.
The Mixer scrolls, it doesn't zoom
The Mixer does not use the Playlist’s time-axis zoom controls. Its layout menu and window resizing change track widths and the controls visible; use those when the channels are too small. To see other tracks, use the Track Scroll Bar below the Send switches, or roll the mouse wheel over the track names and peak meters, as the Mixer documentation describes. Don't add Shift: Shift+mouse wheel moves the selected Mixer tracks left or right, and so does Alt+Left or Right Arrow (Opt). If your routing looks rearranged after scrolling, undo it. The Mixer guide has the rest.
FL Studio too big or too small: GUI scaling
When the problem is the size of everything, change the scaling, not the zoom:
- Open Options > General settings and find Main GUI Scaling / resizing.
- Leave it on System to follow your operating system's display scaling. The General settings page gives the example of FL Studio scaling to 200% when the system is set to 200%.
- Or choose a custom percentage. Image-Line says 125% to 200% usually works on displays between 3840×2160 and 5120×2880, and that the best value also depends on monitor size and eyesight.
- Restart FL Studio. The setting applies after a restart.
Pop-ups and toolbars have their own scaling options, and changing those needs a restart too. Set them to Main to follow the main setting, or shrink just the toolbars on a small tablet screen. Most FL Studio plugins rescale with the Scaling factor in the plugin wrapper menu. There's also a Legacy scaling fallback in the Advanced settings, which only offers 100%, 200%, 300% and 400%. Third-party VST, AU and CLAP plugins use the wrapper's own rescaling options instead.
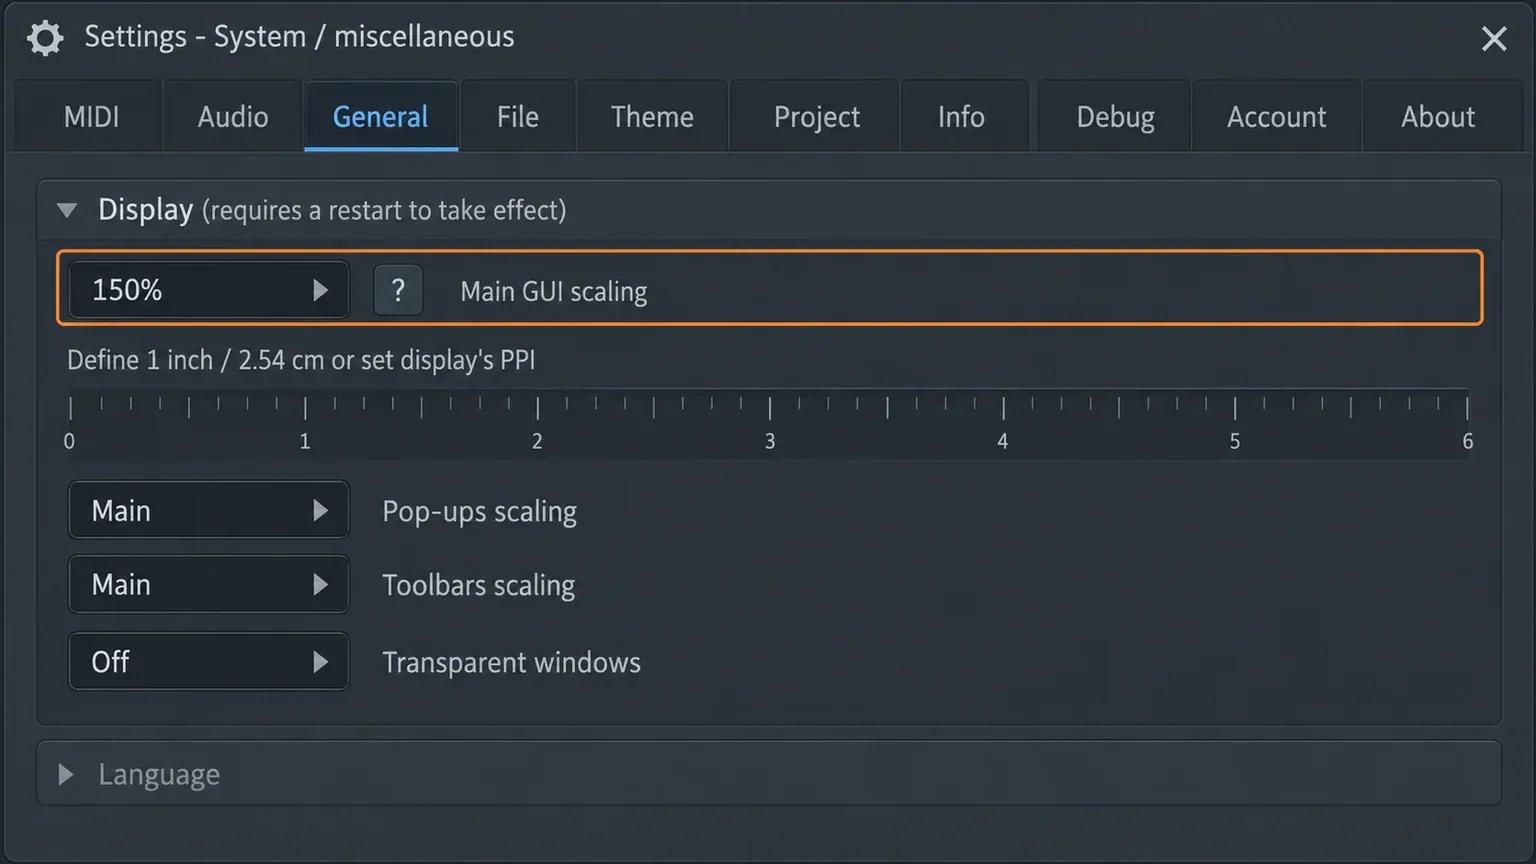
If the size problem only appears when you drag FL Studio onto a second display, the multiple monitors guide covers mixed-resolution setups and plugin windows.
Zoom on a Windows touch screen
On a Windows touch monitor, select Options > General settings > Optimize for 'Multi-touch monitor', then switch the Multi-touch control icon off. That icon toggles between touch control of knobs and faders and touch gestures, and only gestures mode zooms. The interface basics page lists these gestures for the Playlist and the Piano roll:
- Pinch to zoom.
- Two-finger rotate for vertical zoom.
- Two-finger tap to zoom out fully.
- Zoom to an area by tapping and holding its top-right corner first, then its bottom-left corner.
Image-Line documents these as Windows Touch gestures. It doesn't list any trackpad gestures for macOS, so on a Mac I'd stick to Cmd+wheel and the keyboard shortcuts.
Zoom without a mouse
Page Up and Page Down step the zoom. Shift+1 to Shift+3 jump to preset levels, Shift+4 shows the full length, Shift+5 fills the screen with your time selection, and Shift+0 brings the playhead back into view. In the Playlist, plain 5 and 6 zoom too, as long as Typing keyboard to piano is off.
If you remember three things, make them these: Ctrl+wheel (Cmd+wheel) over the Playlist, Shift+4 to see the whole song, and P or B to get out of the Zoom tool. Everything else on this page is for the moments those three don't cover.