FL Studio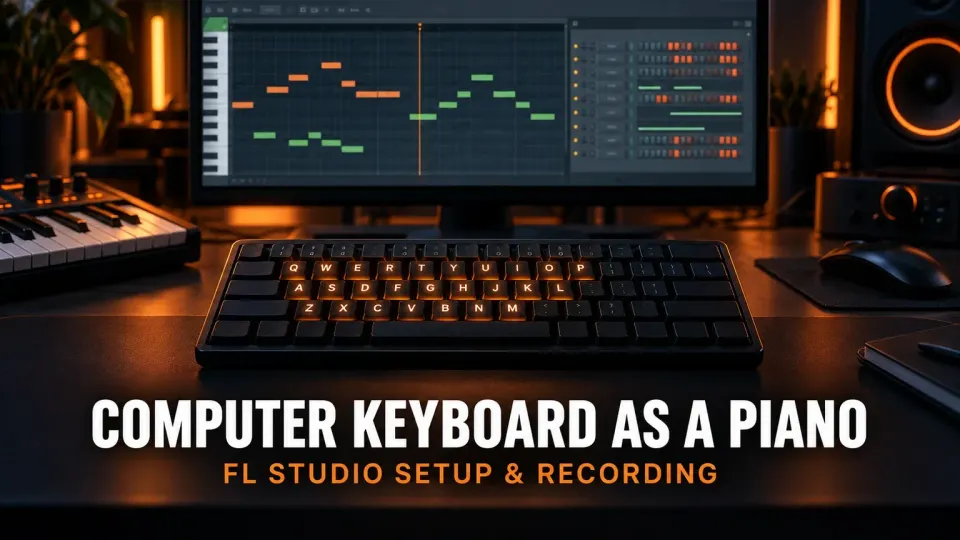
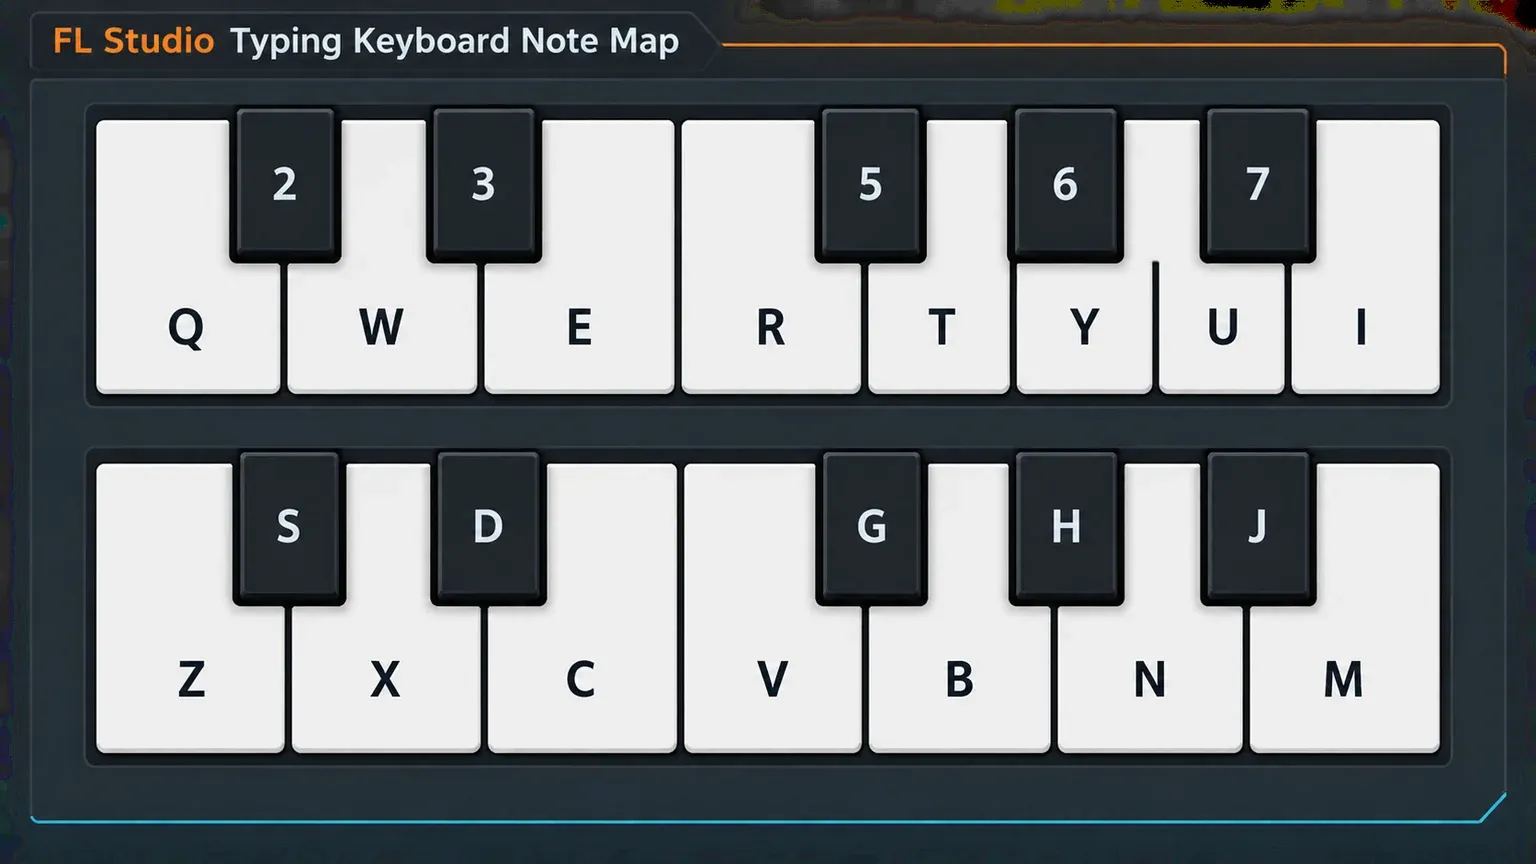
Turn on Typing Keyboard to Piano in the FL Studio toolbar, select an instrument in the Channel Rack, and use the letter rows as piano keys. The official shortcut is Ctrl/Cmd+T. In the standard piano layout, the Z row plays a lower run of white notes, the Q row plays the next run, and the S/D/G/H/J and 2/3/5/6/7 positions supply the black notes.
This is the fastest way to audition a sound or record a small idea when no MIDI controller is connected. It is also easy to misread: the same letters normally trigger FL Studio commands, velocity is not pressure-sensitive, and some laptop keyboards cannot register large chords. Set the mode deliberately and the limitations become manageable.
Enable Typing Keyboard to Piano
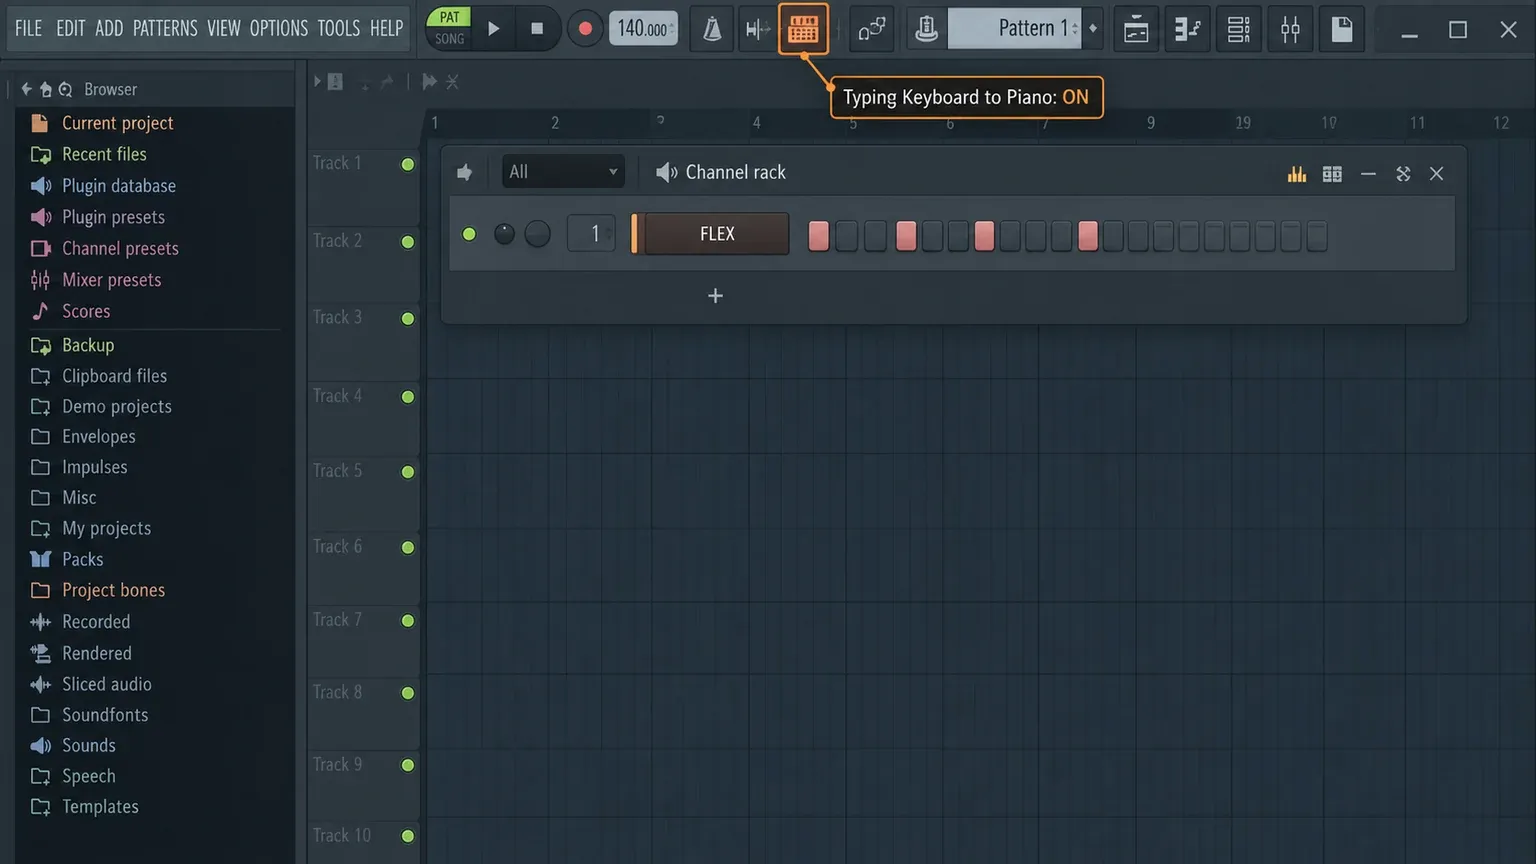
Find the small keyboard icon in the top toolbar and click it so the control is active. Image-Line calls this mode Typing keyboard to Piano keyboard. The official keyboard shortcut list assigns Ctrl+T on Windows and Cmd+T on macOS to the toggle, while the toolbar manual describes the same control as typing-keyboard MIDI input.
If the shortcut does nothing, use the toolbar button. Keyboard layouts, operating-system shortcuts and a focused plugin window can change which application receives a key combination. The toolbar state is visible, so it is the safer check when troubleshooting.
Next, click a generator in the Channel Rack: FLEX, FL Keys, Sytrus or any other instrument that accepts notes. The highlighted channel receives what you play. If a sample channel is selected, the keys transpose that sample instead of opening a piano instrument. That behavior is useful, but it can be confusing when you expected a synth.
Use the default QWERTY note layout
The standard layout copies the shape of two piano octaves onto two typing rows. Start with the white-note pattern:
- Z X C V B N M moves upward through the lower white notes.
- Q W E R T Y U I moves upward through the next white-note row.
- S D G H J and 2 3 5 6 7 occupy the black-key positions above those rows.
That staggered pattern matters more than memorizing note names. Play Z, X and C, then add S between Z and X when the phrase needs the first sharp. The same visual relationship repeats on the Q row. On non-US keyboard layouts the printed characters can differ, but the physical key positions remain the useful guide.
FL Studio names middle C as C5, while some other DAWs call the same pitch C3 or C4. That is a label convention, not a pitch error. Judge the audible register and the notes recorded into the Piano Roll rather than comparing the octave number with a different program.
Change octave, root note or keyboard layout
Right-click the Typing Keyboard to Piano toolbar button. FL Studio opens choices for root note, octave, standard keyboard layouts and scale snapping. This is the clean way to move the playable range rather than transposing the instrument or dragging every recorded note afterward.
Pick a lower octave for bass parts and a higher one for leads. If a custom layout is selected, the default Z/Q map in this guide no longer applies. Return to the standard piano layout whenever the letters seem to trigger unexpected intervals.
I recommend changing one thing at a time. First select the instrument, then set the keyboard range, then play. If you transpose the generator, change the typing root and later transpose the Piano Roll notes, it becomes difficult to tell which stage caused the pitch shift.
Handle velocity and expression after note entry
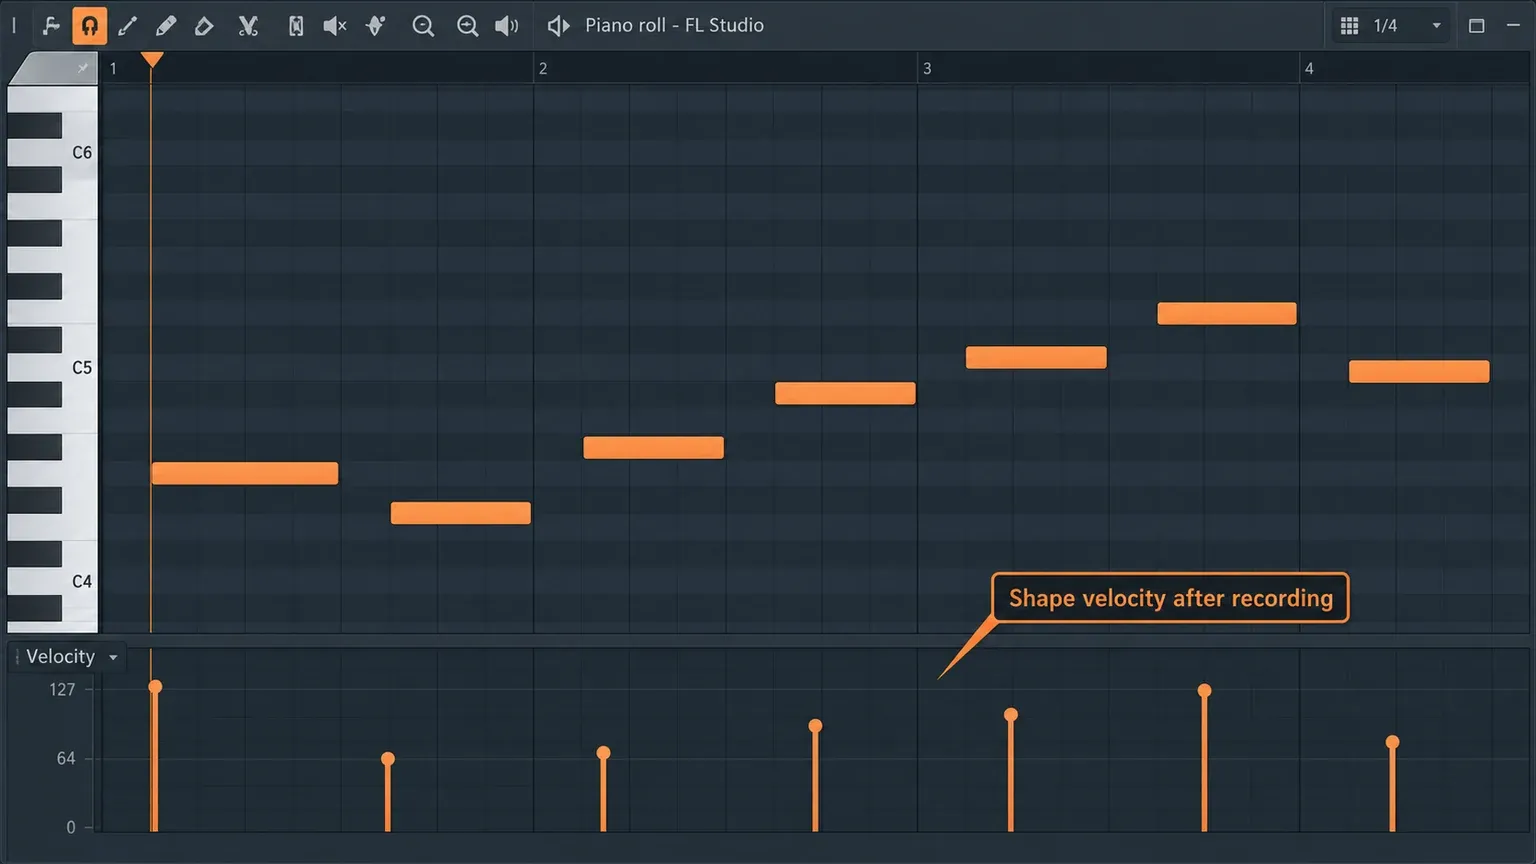
A computer keyboard reports whether a key is up or down; it does not sense how hard you played. Typing Keyboard to Piano therefore gives you note entry without the touch response of a MIDI keybed. The notes remain normal MIDI data, so velocity, pan, fine pitch and other note properties can be edited afterward in the Piano Roll.
Open the lower control lane in the Piano Roll and choose Velocity. Draw a musical contour instead of random values: stronger notes on the pulse, softer notes between them, and a clear accent only where the phrase needs one. Our Piano Roll velocity guide explains the control lane and scaling tools.
For pitch bends, modulation and sustain performed in real time, use a controller that sends those messages or automate the relevant plugin parameter. Do not invent a typing-key combination and expect every generator to respond; pitch-bend range and MIDI handling differ between instruments.
Play chords without losing notes
Press several note keys together to play a chord. Two- and three-note shapes usually work well, but the result depends on keyboard rollover. Many laptop keyboards cannot report every combination of three or more keys. This hardware limit is called ghosting: one note may disappear even though the instrument is polyphonic.
If a chord drops the same note repeatedly, try a different inversion or record the notes in two passes. You can also place the chord directly in the Piano Roll. Changing the synth’s polyphony will not fix a typing keyboard that never sends the missing key.
Use this mode for harmonic sketches, not for judging a difficult performance. A physical MIDI keyboard is the better tool when velocity, sustain, aftertouch or reliable large chords affect the musical decision.
Record the computer keyboard into the Piano Roll
Create or select the Pattern that should hold the performance. Click the target instrument in the Channel Rack, enable Typing Keyboard to Piano, then press the main Record button. Choose Notes and automation when FL Studio asks what to record. Start playback and play the phrase.
Count-in gives you time to move both hands into position. Wait for input can be useful for a short phrase because recording begins with the first played note. Image-Line’s recording notes documentation explains the recording filter and note-capture options in detail.
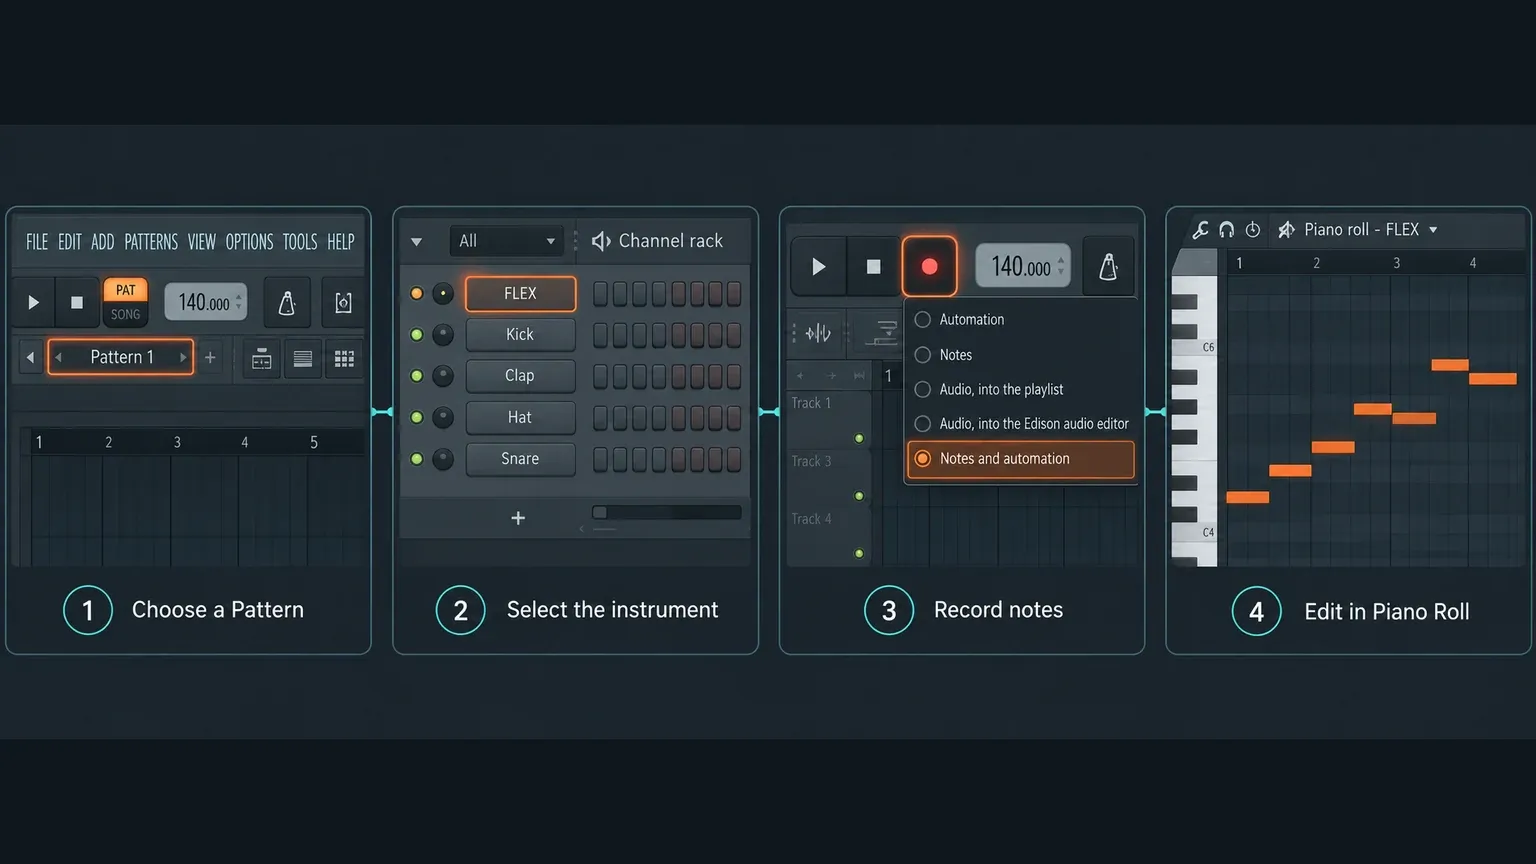
After the take, stop recording and open the instrument’s Piano Roll. Quantize only as much as the part needs. A full snap can repair obvious timing misses, but it can also remove the small offsets that made the phrase feel natural. Our MIDI recording guide covers overdub, countdown, note filtering and cleanup in more depth.
Fix letters playing notes instead of FL Studio commands
When Typing Keyboard to Piano is enabled, letters are reserved for notes and related performance controls. That is why a familiar one-letter command may appear broken. Turn the mode off with the toolbar button or Ctrl+T, then try the command again.
This is a mode conflict, not a damaged shortcut file. Keep the keyboard mode on while performing and off while editing if you rely heavily on single-letter commands. The FL Studio shortcuts guide separates global, window-specific and typing-keyboard conflicts.
Also check the focused window. A plugin can capture typing input while its preset browser, search field or text box is active. Click the Channel Rack or main FL Studio window, confirm the keyboard icon is lit, and try a simple Z–X–C phrase. That sequence isolates focus from instrument and audio problems.
Reduce the delay between pressing a key and hearing sound
The typing keyboard sends the note immediately, but the audio system still has to process the instrument and output buffer. If the sound arrives late, select the correct low-latency driver and reduce the buffer carefully. A smaller buffer feels quicker but gives the processor less time to finish each audio block.
Close heavy generators and effects while diagnosing the delay. Test one light native instrument in an empty Pattern. If that feels responsive, the original project load is the likely cause. If every project is delayed, inspect the driver, buffer and wireless audio path. Bluetooth headphones add latency that a buffer change may not remove.
Use the steps in our FL Studio audio settings guide instead of choosing the smallest possible buffer blindly. Pops and underruns mean the system needs more time or a lighter project.
Recording can still look late even when monitoring feels acceptable. Before moving notes by hand, check whether Global Snap or input quantization is changing their start positions. Image-Line also documents a Playback tracking offset for persistent system timing errors, but that is a calibration step after snap and buffer settings have been ruled out.
When a MIDI keyboard becomes the better choice
Keep using the computer keyboard for sound selection, quick bass lines, simple chords and note entry away from the studio. It costs nothing, is always available and records normal MIDI notes that remain editable.
Move to a hardware MIDI keyboard when the performance depends on touch. Image-Line’s controller documentation points to velocity and additional controller data as the main advantage. Sustain pedals, mod wheels, pitch wheels and wider reliable chord voicings also change what can be performed in one take.
The practical dividing line is simple: if you are drawing most expression after recording because the typing keys cannot capture it, hardware will save time. If you only need notes for editing, the laptop keyboard may be enough.
A dependable computer-keyboard workflow
Select the instrument and Pattern first. Enable Typing Keyboard to Piano, choose the register, play a short phrase, and plan the velocity edit before recording. If a chord loses notes, suspect keyboard ghosting. If commands stop working, switch the mode off. If notes sound late, diagnose the audio path rather than the letter layout.
That order keeps four separate problems from looking like one. The mode controls what the letters mean, the active channel controls which instrument responds, the recording setup controls where notes land, and the audio settings control when you hear them.