FL Studio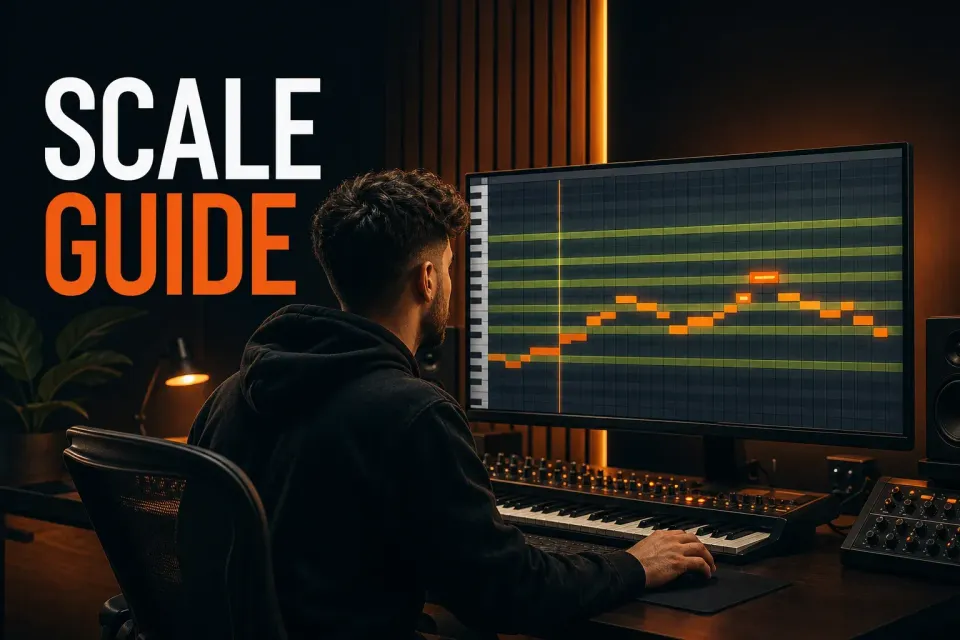
FL Studio scale highlighting marks the Piano Roll lanes that belong to a chosen root and scale. Treat it as a map: set the musical reference, keep the shading visible, then decide separately whether FL Studio should constrain edited notes or incoming MIDI. Highlighting on its own won’t move a chromatic note, and it doesn’t declare that note musically wrong.
The key distinction is simple. Shading shows where scale tones are. Snap to scale changes where certain notes can land. Automatic detection guesses a likely scale from the notes already there. Once you treat those as three separate tools, you avoid the familiar mess where the grid looks right but notes still move freely, or where notes refuse a pitch you actually want.
Choose the root and scale before changing note behavior
Open the intended Channel’s Piano Roll and right-click the note-shaped scale control. Choose the scale type first, then the root: the current Image-Line instructions say root notes become available after you select a scale. For a first exercise, choose Major (Ionian), then C. The reference notes are C, D, E, F, G, A and B.
- Open the Piano Roll for the instrument you mean to edit.
- Right-click the scale control and choose a scale type.
- Choose the root note that matches the song’s key.
- Select a shading mode that makes valid lanes easy to read.
- Leave Snap to scale off while you confirm the visual map.
- Play the phrase and verify the choice by ear before constraining edits.
If note drawing, selection or Pattern context is still the sticking point, go back to the FL Studio Piano Roll guide. Scale highlighting is there to help with pitch orientation, not basic editor navigation.
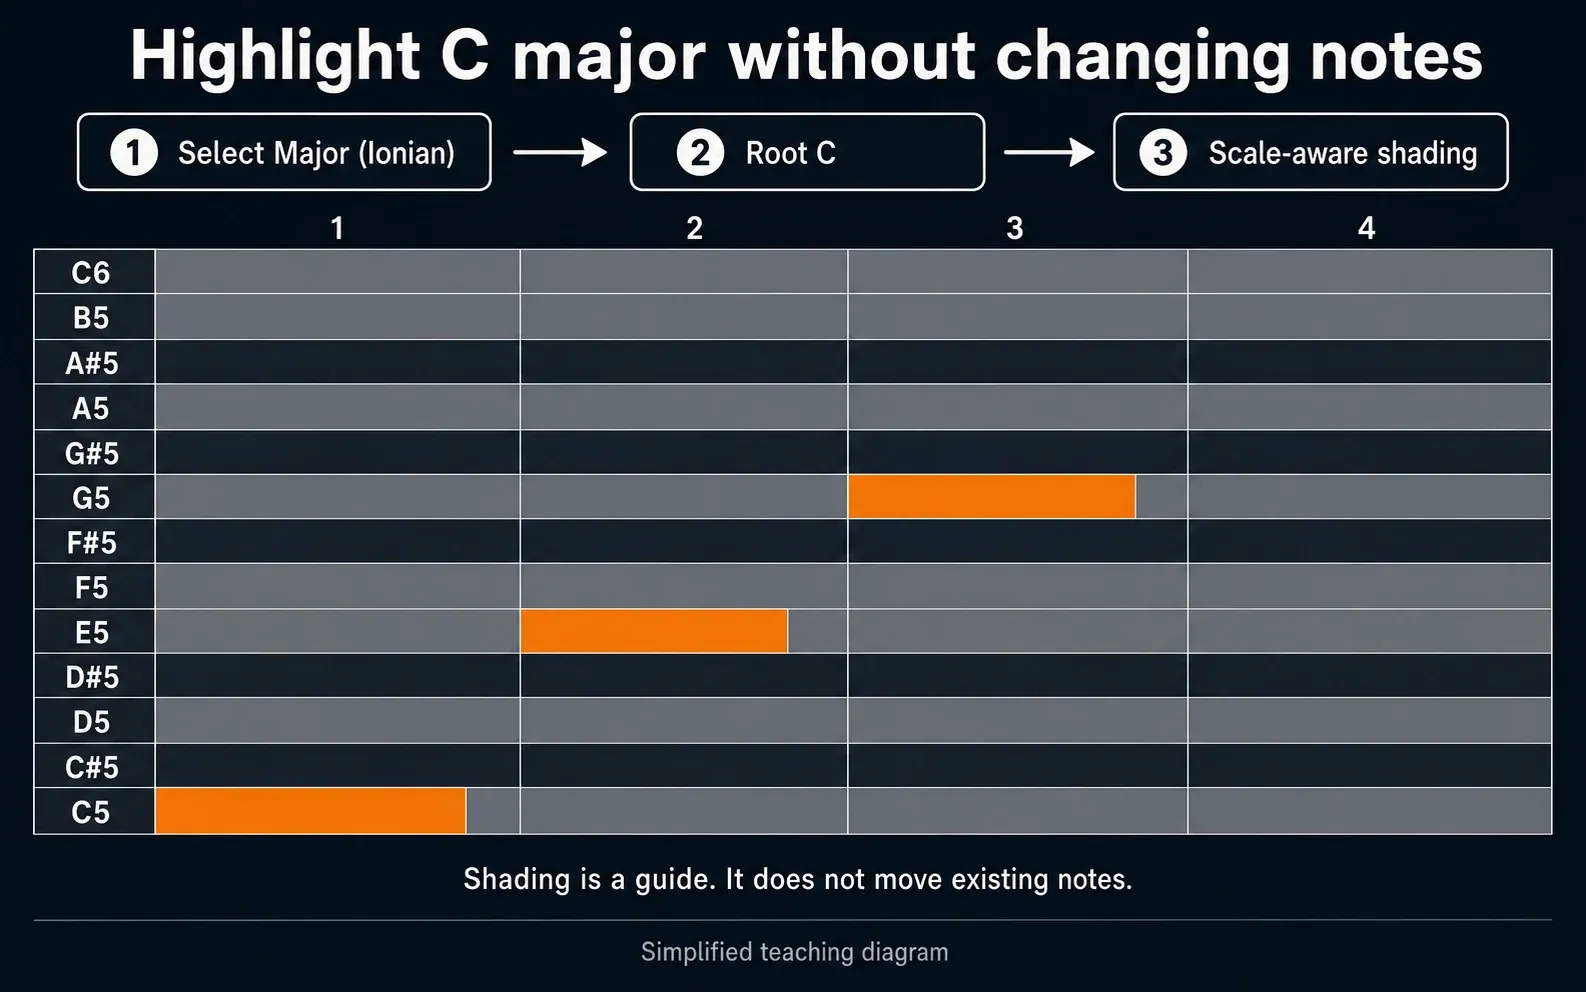
Pick shading that answers the current question
For a fixed key, choose the scale and root yourself. In the current toolbar documentation, Auto shading follows that choice, and Default removes shading. The separate Automatic option in the Piano Roll’s View helpers tries to detect a scale from your score. Keep those apart: one is a display choice, the other asks FL Studio to analyze your melody.
There’s a naming wrinkle here: Image-Line’s toolbar and menu pages describe Black notes differently, so don’t rely on that label alone to confirm the key. Check the actual rows against your chosen scale. In the C major exercise, C through B with no sharps or flats should be the reference lanes. If the contrast is missing, check View > Note grid highlights and the shading settings. A dark row in a scale-aware view isn’t a forbidden note; it can carry a passing tone or deliberate tension.
Scale lanes and FL Studio Ghost Notes are different things. Highlighting comes from a root/scale choice, while Ghost Notes come from notes that other Channels or overlapping Pattern Clips actually contain. The first is theoretical guidance; the second is arrangement context.
Separate highlighting from Snap to scale
With highlighting visible and Snap turned off, you can put notes on any pitch. The grid shows which lanes fit the chosen scale, but FL Studio leaves each note exactly where you placed it. That’s the better mode when a phrase uses accidentals, blues notes, borrowed chords or a brief key change.
Enable Snap PR notes to scale when you want edited notes held to valid pitches. It affects pitch placement, not the horizontal time grid. A note can be right for the key and still land early, and timing repair belongs in the FL Studio quantize workflow.
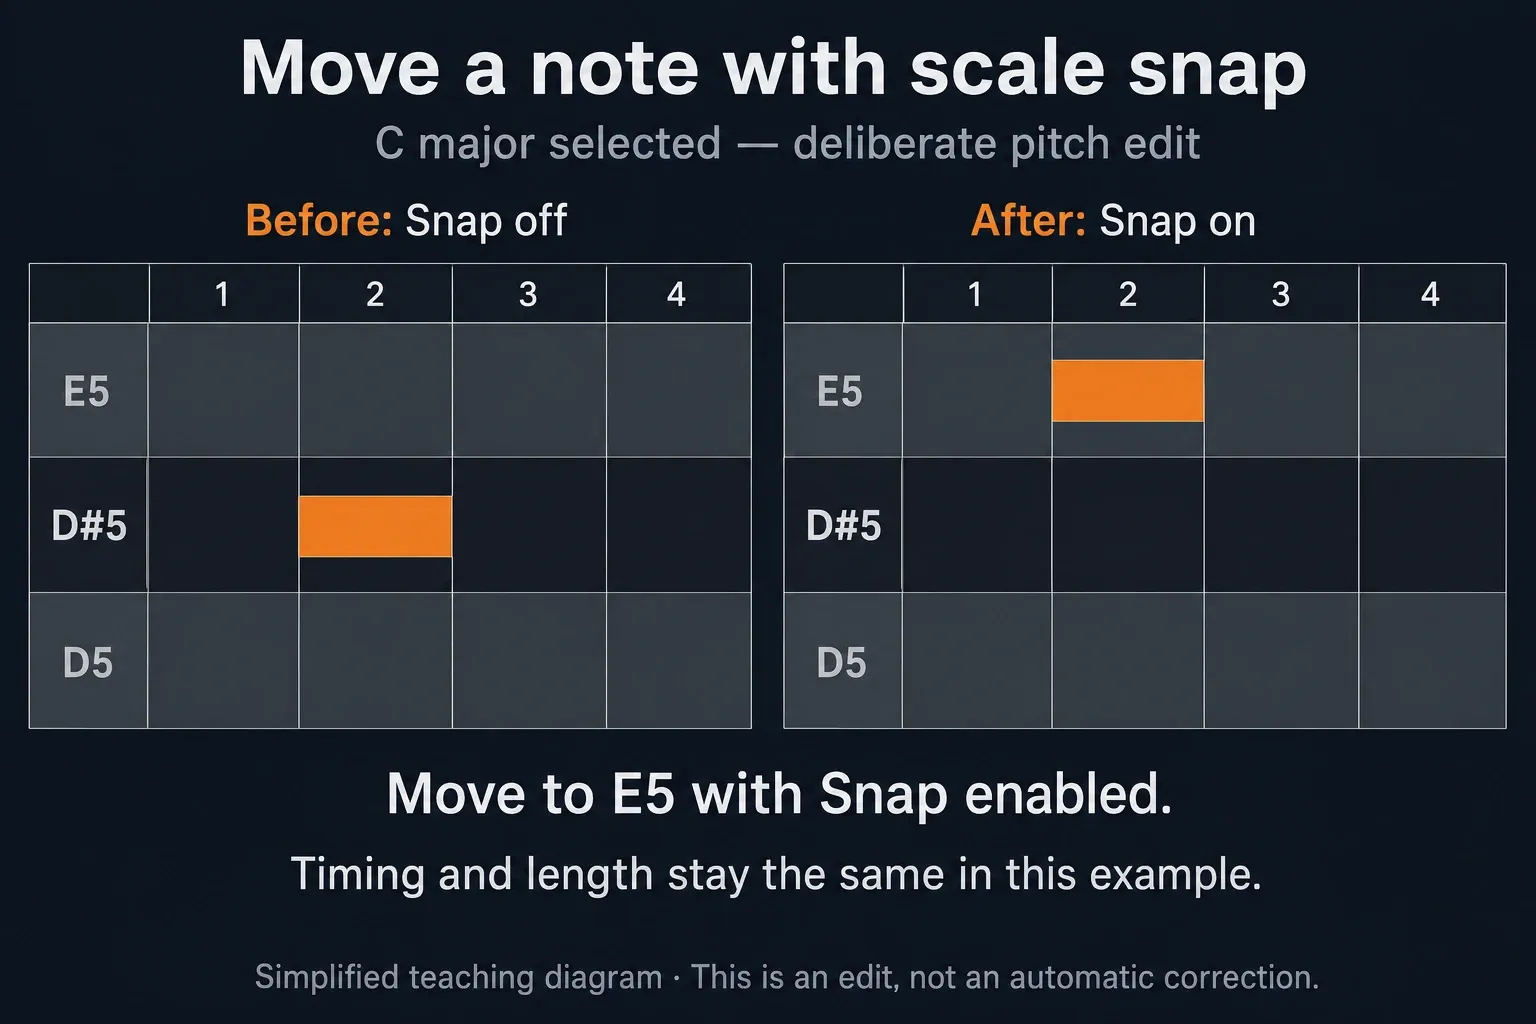
If FL Studio jumps over a chromatic lane while you drag, Snap to scale is probably on. Switch it off for the exception, place the note and listen in context. Forcing the whole song into one scale won’t do your harmony choices for you.
Choose whether incoming MIDI is constrained
Snap incoming MIDI works on a separate scope. Its All devices and Typing keyboard to piano options constrain the matching played or recorded input, shifting any out-of-scale pitch to a nearest valid pitch. That’s a different switch from Snap PR notes to scale, which governs note editing.
It can help while you audition ideas on pads, but it also breaks the link between the physical key you press and the note FL Studio records. Leave it off when you’re learning your way around the keyboard, recording intentional chromatic parts or diagnosing a controller that seems to send the wrong pitch. If the controller produces no notes at all, use the MIDI input checklist; scale settings can’t fix a device FL Studio doesn’t see.
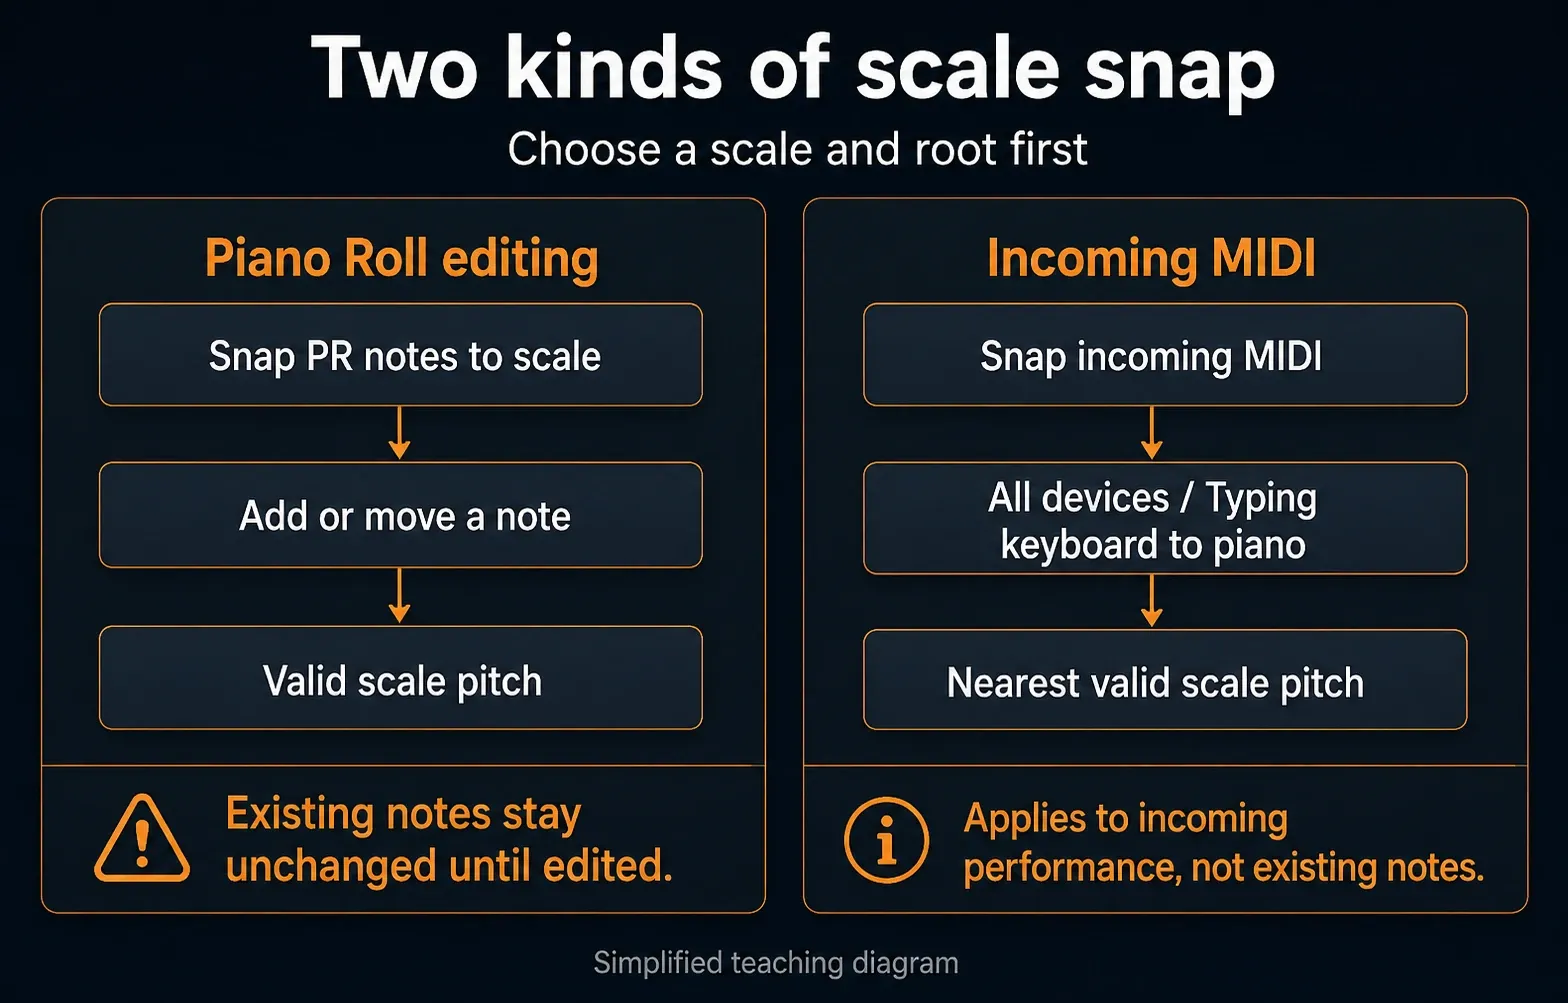
Understand why existing notes do not jump automatically
Changing the selected scale won’t quietly rewrite an existing score. Even with Snap PR notes to scale on, existing notes stay put until you edit or move them. That’s a safety feature, not a sign that highlighting is broken.
To adapt imported or existing MIDI, duplicate the Pattern first. Choose the intended scale and root, enable Snap PR notes to scale, then select the notes you want to change. Image-Line documents dragging the selection up and down one semitone to trigger snapping. Compare with the untouched copy afterward, since snapping can change the harmony and moving back won’t necessarily restore the original notes. Use Undo or the copy if the result is worse.
If the notes haven’t reached the right instrument yet, follow the MIDI import guide first. Once they’re in the intended Piano Roll, decide whether their pitches should stay exactly as imported or get edited to fit another scale.
Use Automatic detection as a clue, not a verdict
Automatic scale detection looks at the whole score when nothing is selected or at the current selection when one exists. The Piano Roll Menu documentation says it needs several notes and uses an average detection; the detected name appears in the Hint Bar.
A two-note fragment can fit several scales. A progression may borrow a chord, and a melody may avoid the root altogether. In those cases, Automatic can hand you a plausible label that doesn’t match the musical center you hear. Select a representative phrase, compare the result with the chords and confirm it by ear.
Handle borrowed chords and key changes without flattening the song
One scale setting works best while a passage has a stable center. If the progression borrows a chord or the song modulates, don’t force every note back into the original highlighted lanes. Work on a copy of the Pattern, switch to highlighting-only mode and judge the transition against the chords on either side.
For a real new key section, pick the new root and scale while you edit that passage, and leave Snap off until the new map matches what you hear. Then turn constraint on only for the notes you still need to write or clean up. That way the modulation survives instead of getting “corrected” away.
Naming Patterns by section or key makes later editing easier. The Piano Roll also documents Time markers > Add key marker for a key signature, but neither a marker nor a new scale choice transposes your whole arrangement. Check the actual notes in each part instead of assuming a changed label rewrote them.
Following an older tutorial? FL Studio 21.1 introduced note placement and movement snapping, and 2024.2 added incoming MIDI snapping. Those are historical milestones, not the current version number. An older installation may show scale highlighting without both of the newer controls.
Fix scale highlighting and snapping problems
The grid does not change when you choose a scale
Confirm that a scale and root are selected, then check the Piano Roll shading and Note grid highlights controls. Default/no shading can leave the scale choice active without the visual contrast you expected.
Notes can still land outside the highlighted scale
Highlighting is only visual. Enable Snap PR notes to scale if you want pitch constraint while adding or moving notes.
Existing notes remain outside the new scale
Choose the intended scale, enable Snap PR notes to scale, then deliberately move the selected notes if you want them processed. Keep a copy of the original Pattern and compare the harmony after the edit.
A MIDI keyboard records different pitches
Check Snap incoming MIDI for devices and Typing keyboard to piano. Disable the relevant option before investigating other causes. Image-Line’s pitch troubleshooting checklist also covers Channel pitch, sample root-note metadata and other controls; scale snapping is only one possible cause.
Automatic detects the wrong key
Select a longer, representative phrase and try again. Then compare with the chord progression and your ear; Automatic is an average estimate, not a harmonic ruling.
You cannot place one intentional accidental
Temporarily disable Snap to scale or work with highlighting only. Place the chromatic note and judge its function against the full harmony.
Frequently asked questions
How do I highlight a scale in FL Studio?
Open the Piano Roll, right-click the scale control, choose a scale and then its root note. Select scale-aware shading so the valid Piano Roll lanes are visually distinct.
What is the difference between scale highlighting and Snap to scale?
Highlighting changes the visual guide but leaves notes free. Snap to scale constrains added or edited Piano Roll notes to pitches in the selected scale.
Why did changing the scale not move my existing notes?
FL Studio does not automatically rewrite existing notes when the scale changes. With Snap PR notes to scale enabled, a deliberate edit or move lets it constrain those notes. Without that setting, moving a note does not make scale highlighting correct its pitch.
Does Snap incoming MIDI affect my keyboard?
Yes. When it is enabled for the relevant input, notes played or recorded outside the scale are shifted to valid pitches. Disable it when you need the physical keys and recorded pitches to correspond directly.
Is Automatic scale detection always correct?
No. It averages the notes in the score or selection and needs several notes. Short, ambiguous or borrowed-harmony passages can produce a plausible result that is not the song’s intended key.
Keep highlighting on when it helps you see, and switch constraint on only when it helps you decide. The Piano Roll & MIDI guides connect this pitch exercise with note editing and recording. Continue through the FL Studio beginner tutorial for a full project route, or use the Workflow hub to plan your next editing step.