FL Studio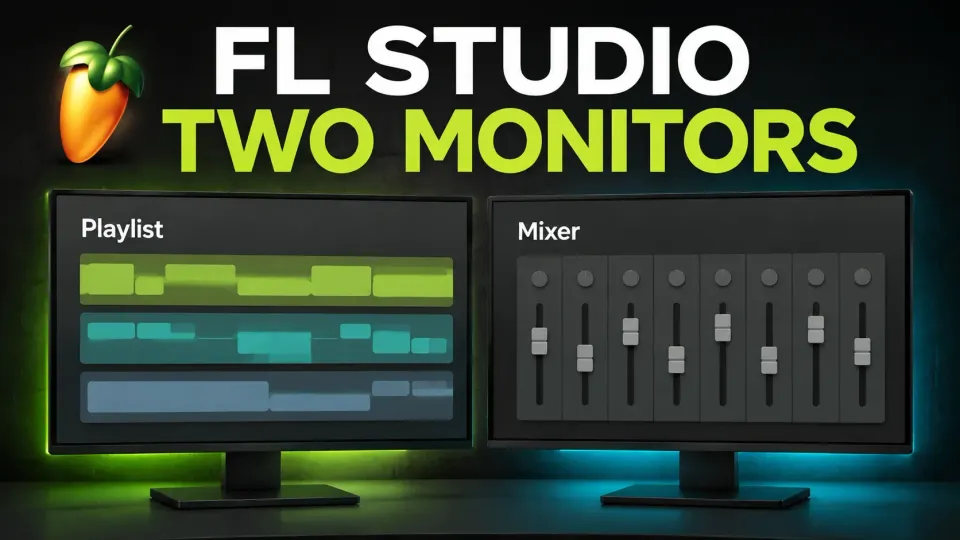
To use FL Studio on two monitors, first give the computer an extended desktop, then detach the Mixer or another component window and move it to the second display. You can also stretch the main FL Studio desktop across both screens. Start with one detached Mixer: it is a manageable first layout, especially if your laptop regularly leaves the desk.
The extra screen gives you room to see the song and its controls together. It does not change audio routing or automatically improve sound quality, latency or CPU performance. A useful layout keeps the next decision visible without covering both displays with plugin editors.
Before connecting, disconnecting or rearranging displays, preserve useful work and close FL Studio where possible. Image-Line warns that changing the monitor layout while the program is open can leave windows off-screen. In the standard time-unlimited Trial, saved projects cannot be reopened until purchase and unlock. Save needed work and export usable audio before a necessary restart; do not close a valuable Trial session just to experiment with window placement.
Put the Mixer on a second monitor in seven steps
- Confirm an extended desktop. Both displays should be available to the operating system, with an arrangement that matches your desk. Mirroring the same picture is not extra workspace.
- Open the Mixer. In FL Studio, choose
View > Mixer, or use F9. Leave the Playlist visible on the main display. - Enable Detached. Open the Mixer's own top-left menu and select
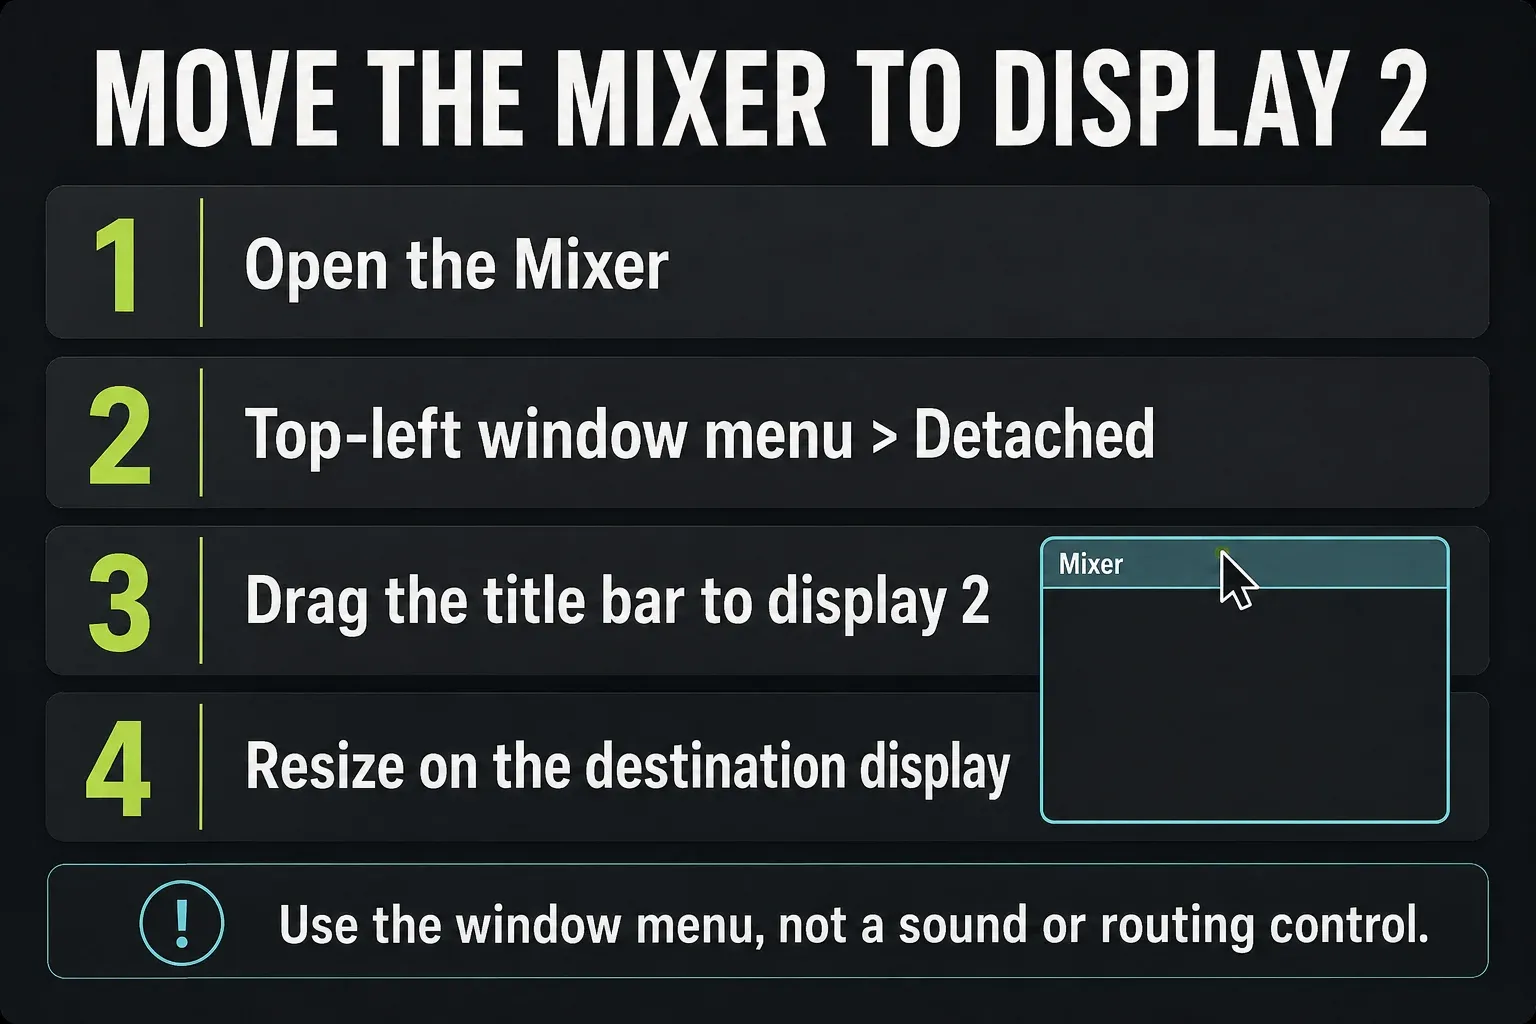
Detached. This releases the window from the main FL Studio desktop. - Drag the title area. Move the Mixer to the second display using its title bar, not a fader or another control inside it.
- Resize on the destination. Give the Mixer enough room to read track names and controls. Keep its title bar accessible before trying a maximized layout.
- Check the working session. Switch between Playlist and Mixer, then open the plugin editors you actually use. Check text size, input focus and access to the main transport.
- Save the useful layout. Use
View > Arrange windows > Save custom layout. You can recall it withCustomin the same menu. Save the project separately; a layout command is not a backup of the song.
This sequence deliberately starts with the Mixer. The Browser has a different undocking gesture, and plugin editors have their own controls and platform limits; those cases are covered below.
Choose detached windows or one stretched desktop
The Multi-Screen Support instructions describe two approaches. A detached component can live on a monitor outside the main FL Studio desktop. With a stretched desktop, the main application surface covers multiple displays and attached components stay inside that larger boundary.
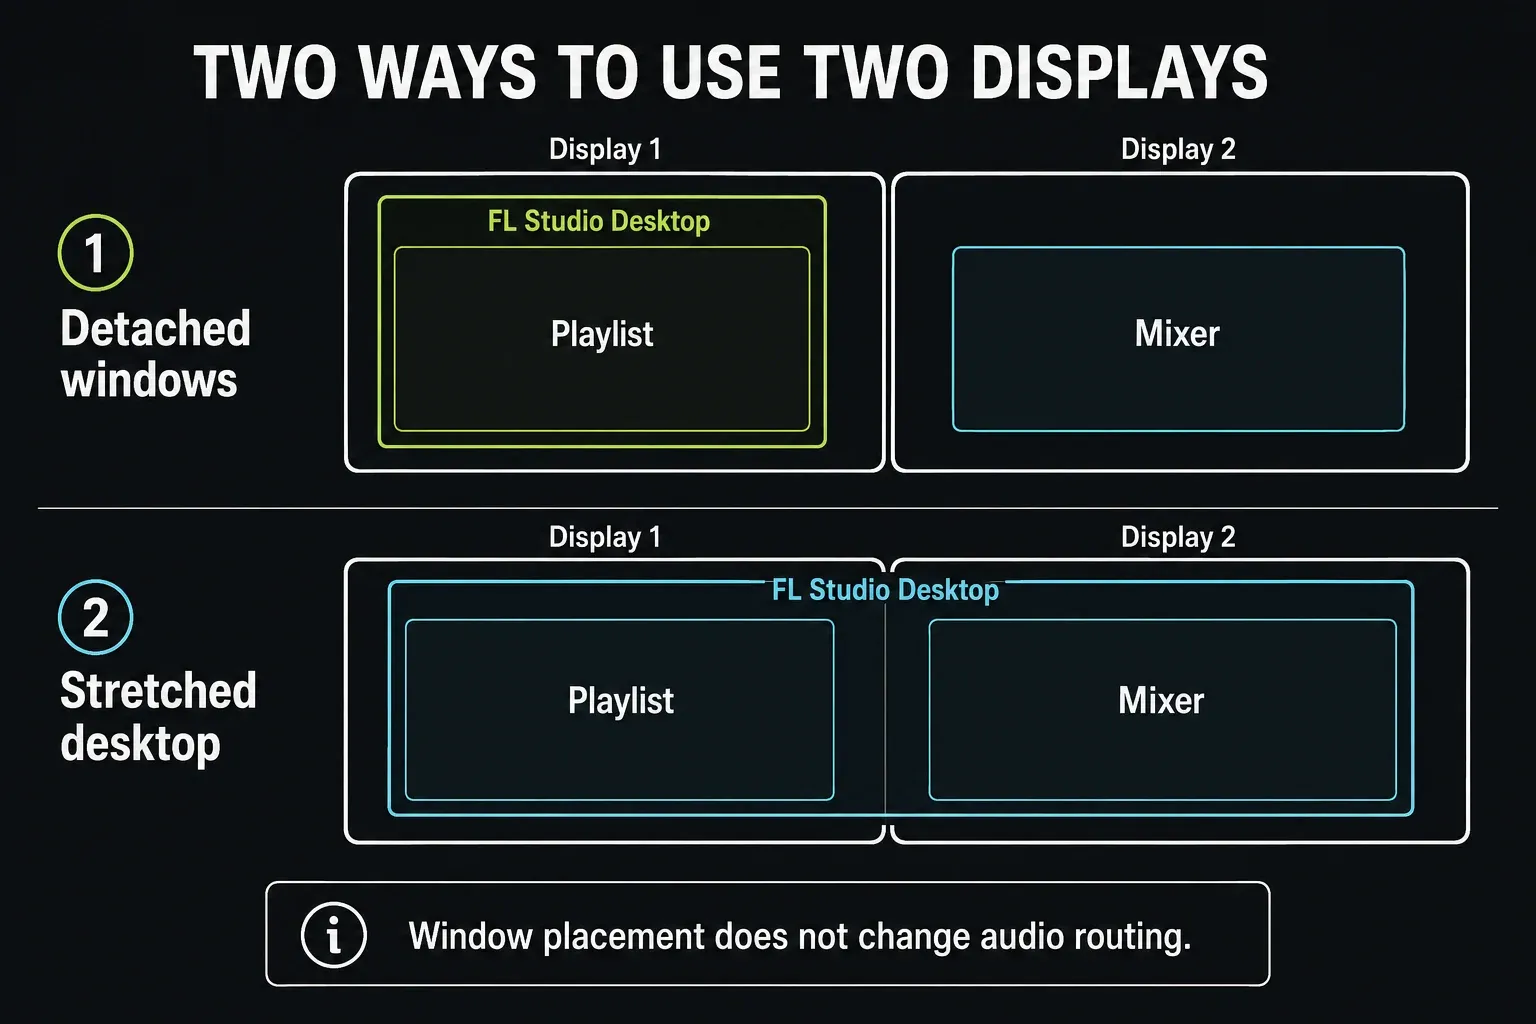
Selective detaching makes sense when you want the timeline on one screen and the Mixer on another. Stretching can suit a permanent desk where one continuous surface feels comfortable. Neither choice connects a Playlist lane to a Mixer insert, changes Track Mode or reorganizes project files.
Extend the operating-system desktop first
If the mouse cannot reach the other display, solve the computer's display setup before looking for an FL Studio option. Check that your computer and dock support the connected displays and that both appear in the operating system.
- Windows: press
Win+Pand chooseExtend. InSettings > System > Display, use Identify and arrange the display rectangles to match their physical positions. Microsoft's multiple-monitor instructions recommend checking the result by moving the pointer between displays. - macOS: open
System Settings > Displays, select the display and useUse asto choose the extended-desktop role. Apple's extend-or-mirror guide separates this from showing the same desktop on every screen.
Do planned cable, orientation and display-order changes with FL Studio closed after preserving your work. Once the desktop is stable, reopen the app and build the layout. Standard Trial users should use a disposable session for restart-dependent experiments or postpone them until the needed work can be reopened.
Give the second screen a job
For arrangement, keep the Playlist large and put the Mixer and Browser where you can consult them without hiding the timeline. For note editing, give the Piano roll the clearer view and leave the Channel Rack or Playlist nearby. For recording, prioritize the timeline and the meters you need to watch.
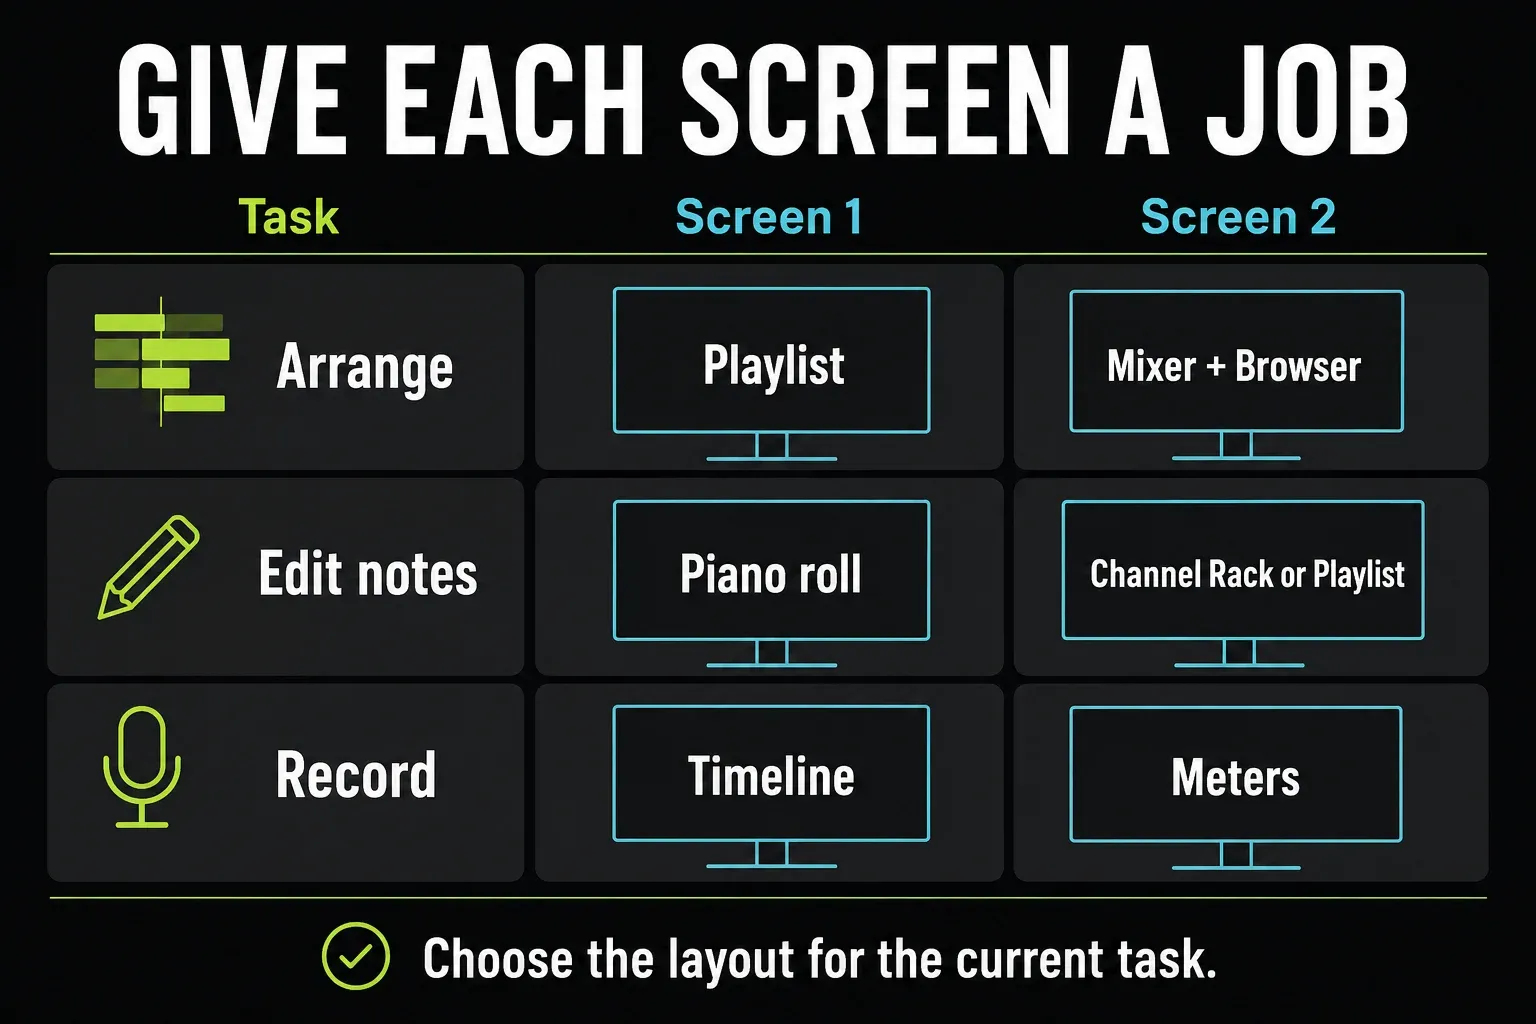
These are starting layouts, not a requirement to keep every panel open. If choosing an effect hides the part you are editing, move or close that editor before adding another window. More visible controls are useful only when you can still find the relevant ones.
Keep placement separate from project housekeeping. The project-organization guide covers names, colors, versions and file associations; moving a window does not change those relationships.
Move component windows and undock the Browser
For the Playlist, Mixer, Piano roll and Event editor, use the component's top-left menu and enable Detached. Drag the title area to the other display, then resize it. Avoid dragging inside the editor: there you may move notes, clips or controls rather than the window.
The Browser is different. Its docking instructions say to drag the header area to undock it; dragging the word Browser to the left or right edge docks it again. Do not hunt for an identical Detached menu item in every panel.
If a detached Browser disappears after you drag a sample into the project, check its View > Hide while dragging (when detached) option. That behavior is intended to get the Browser out of the way; it is not necessarily an off-screen-window fault.
Stretch the main desktop without closing FL Studio
On Windows, right-click the main window's X control and choose the all-monitors maximize command. Image-Line's interface page calls it Maximize to all monitors; the Toolbar reference uses Maximize for all monitors. These are descriptions of the same spanning task, not a reason to left-click X and close the session.
You can instead restore the main window to a resizable state and drag an edge across the displays. An empty area of the Toolbar moves the main window; the edge resizes it. On macOS, Image-Line describes using the green window control to leave full-screen/maximized mode and work with a windowed, resizable desktop. Do not apply the Windows X-menu recipe to the Mac controls.
Different screen heights and scaling can make a single large surface awkward. Try individual detached components if spanning leaves important areas clipped. macOS full-screen, Spaces and Stage Manager also affect how windows share displays. Apple's Desktop & Dock settings reference explains that separate Spaces affects the Dock and is required for Stage Manager and Split View on other displays. Do not change that system-wide setting blindly as a guaranteed FL Studio fix.
Use the right detach control for existing or new plugins
Three controls solve different jobs:
- One existing editor: use
Detachedin that plugin's Wrapper menu. - The current set of editors: in
Tools > Macros, findSwitch all plugin editors toin the Misc group and chooseDetached. The Tools reference also lists Attached; the macOS third-party limitation below still applies. - Plugins added later: enable
Detach all new pluginsin General settings. It does not retrospectively change existing editors.
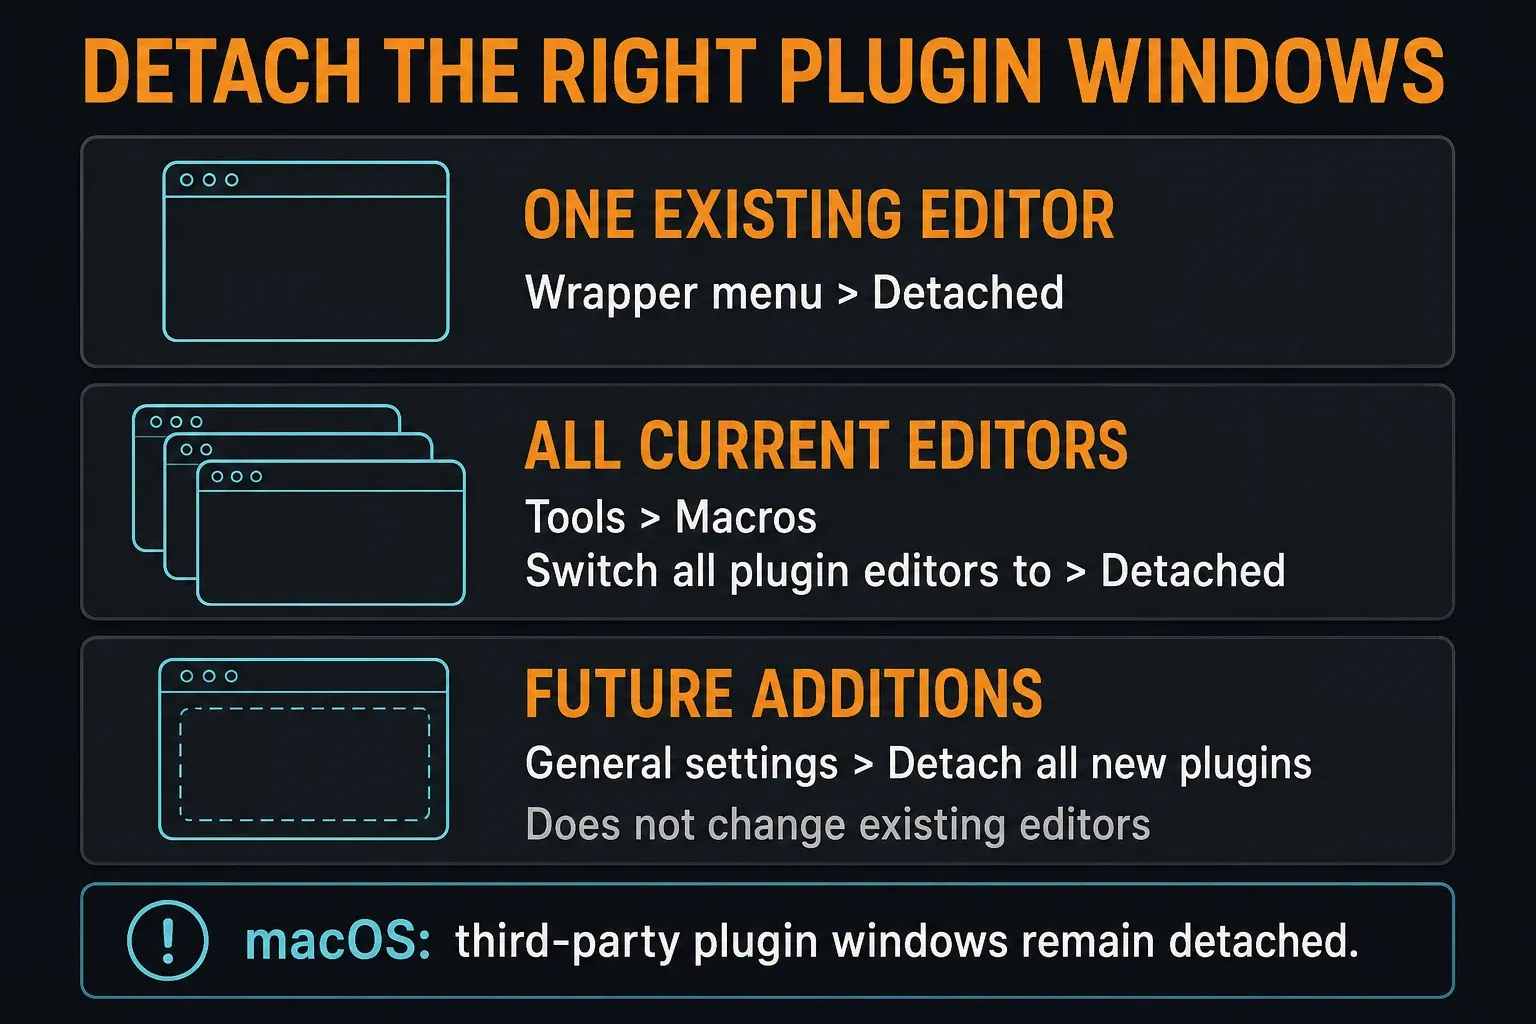
Changing editor placement does not add a second plugin instance. Test the windows you already use before making a bulk change, and do not expect turning the new-plugin option off to reattach a project full of existing editors.
For editors opening on the wrong screen, check Open detached plugins with the FL Studio window in General settings. This puts detached openings on the display containing the main FL window; it is not a promise of an exact pixel position for every plugin.
Handle the macOS foreground limitation
Image-Line's current macOS support note says third-party plugins remain detached. Their editors may cover other windows or stay in the foreground when switching apps. Do not treat the global toggle or Attached macro as a guaranteed override of that limitation.
The documented workaround is to detach the main FL Studio component windows when plugins cover them, and close third-party editors before switching apps. Option+F12 closes all plugin windows on Mac. Closing an editor is different from deleting its plugin from the project.
Check input focus before changing audio settings
The Wrapper documentation warns that detached plugins on Windows can interrupt MIDI input when focus changes. Refocus FL Studio and try the same notes before changing Channel or Mixer routing.
Audio-device focus can also be involved in some configurations. If sound stops when you select an editor, compare that action with clicking back into FL Studio, then follow the Audio Settings guide for the driver and device settings. Do not change several unrelated audio options merely because the plugin is on another monitor.
Fix scaling one layer at a time
In the General Settings display controls, Main GUI scaling can follow System or use a chosen value. Changing Main GUI scaling requires restarting FL Studio. Preserve needed work first, including the Trial caution above.
This is not a documented independent scale control for each detached Mixer. A setting that makes the laptop comfortable can make the other screen crowded. Judge text and controls on the actual destination display instead of assuming a universal percentage for every 4K-and-1080p pair.
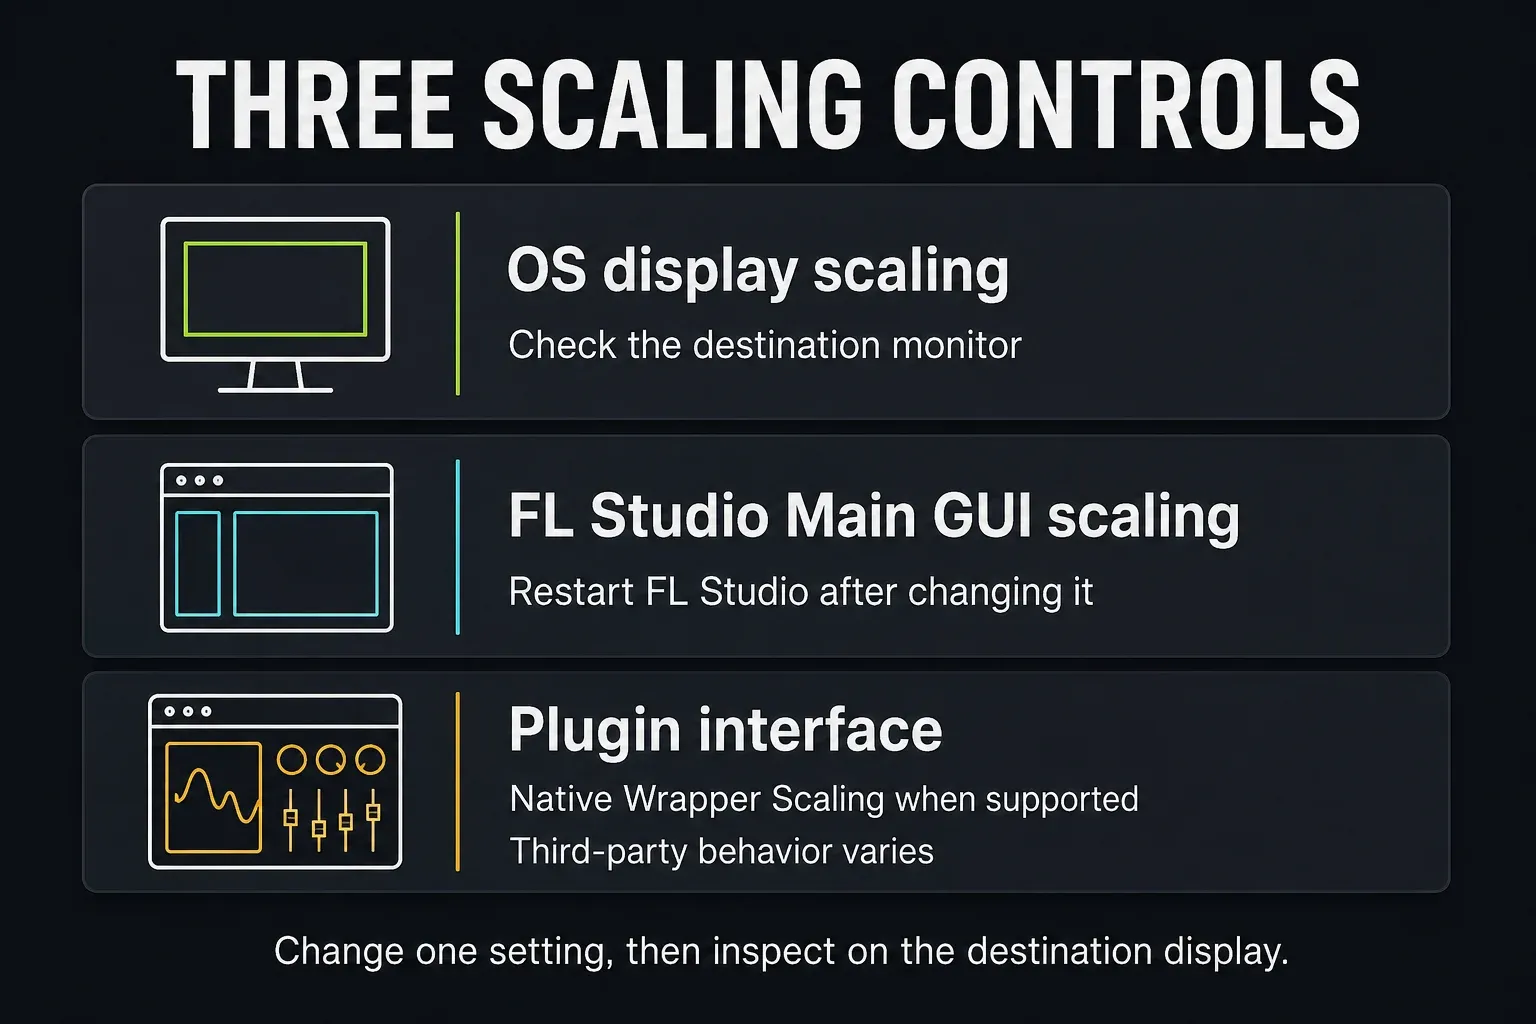
Most supported native FL Studio plugins have a Wrapper Scaling option with Host, System or a custom factor. That native-plugin control is not a universal resizer for third-party VST, AU or CLAP interfaces. Check the third-party plugin's own zoom and the relevant Wrapper guidance; available options depend on the plugin and platform.
Change one setting, apply any required restart, then inspect the result. Altering OS scale, FL Studio scale and plugin zoom together hides which one helped. The General Settings one-inch/PPI calibration is for touch accuracy, not a replacement for GUI zoom. Close unused editors too: another display is not a reason to keep every plugin interface running.
Save the layout separately from the project
Once the arrangement is useful, choose View > Arrange windows > Save custom layout. To restore it, choose Custom in that menu. The View menu documentation specifically recommends saving the layout before changing screen resolution.
Keep a screenshot or written record of a custom layout you still need before replacing it. Saving the FLP and saving the window layout serve different purposes. Neither promises that every third-party editor will return to a useful position after a dock, display order or scaling change.
On a licensed installation, check the saved project after restarting with the intended displays connected. In standard Trial, keep useful work open and postpone a restart-dependent check until you can reopen that project. Saving a layout does not unlock saved projects.
Recover an off-screen window before resetting preferences
Start with View > Arrange windows > Into workspace. It brings windows into the visible FL Studio desktop. Image-Line's missing-window instructions give this command for inaccessible plugin editors.
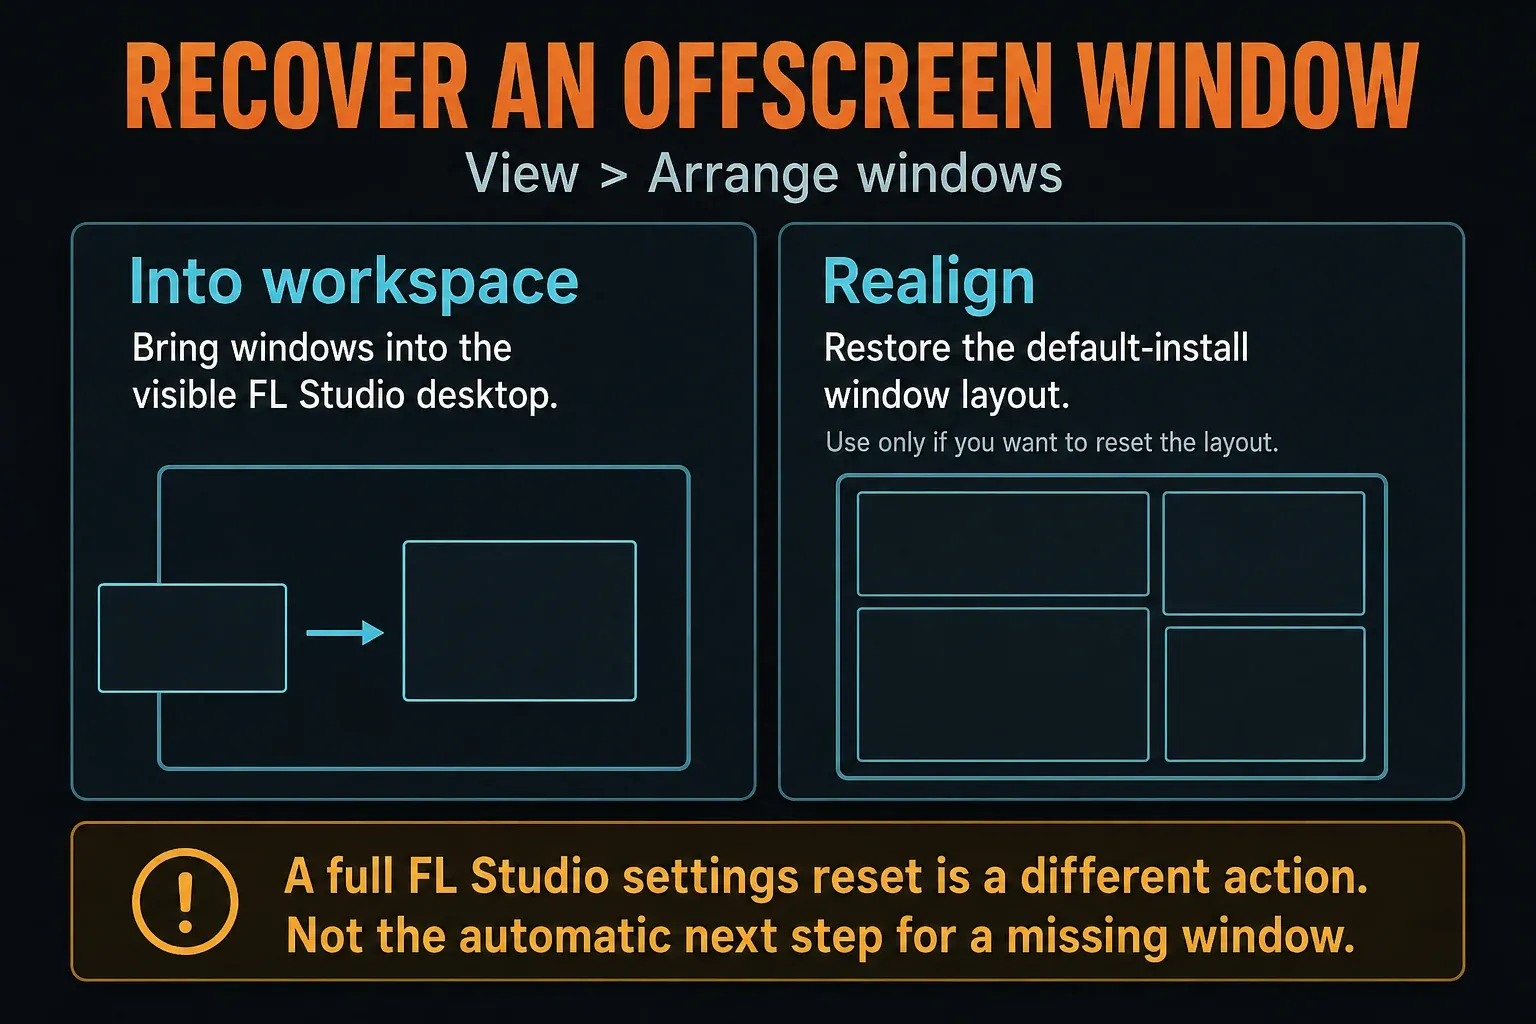
Realign in the same menu restores the default-install layout. Use it when that is what you want, not as an obligatory second step after Into workspace has already solved the problem. It is not the same as resetting all application preferences.
Also check General settings > Advanced > Don't limit windows to screen. The manual advises turning it off if you lose windows outside the visible area. If the Toolbar itself is hidden, the missing-window instructions give Ctrl+F11 to bring it back; menu and keyboard behavior can depend on focus.
The monitor-change warning points persistent cases toward a full settings reset. Treat that as a separate last resort. The reset procedure removes custom MIDI, Audio, General and File settings, so record or capture those settings beforehand and follow the instructions for your platform. A copied FLP does not preserve all these preferences. Diagnostics is unavailable in Trial; do not delete random folders or reinstall while needed work exists only in an open session.
Two-monitor checklist
- The computer recognizes both displays and uses Extend rather than mirroring.
- The display arrangement and pointer movement match the desk.
- Only the component windows that need to leave the main desktop are detached.
- Browser undocking and plugin editor controls are handled separately.
- Existing-editor and future-plugin settings are not confused.
- Text, controls, MIDI focus and the main transport remain usable.
- Main scaling changes are checked after any required restart, without sacrificing Trial work.
- Custom layout and project state are saved separately.
- Into workspace, Realign and full settings reset are understood as different actions.
When the windows stop getting in the way, return to the Workflow hub for the next production task.
Frequently asked questions
Can FL Studio use two monitors?
Yes. With an extended operating-system desktop, detach individual component windows and move them to another display, or stretch the main FL Studio desktop across the screens. Start with one detached Mixer if you want a small, reversible setup.
How do I move the FL Studio Mixer to a second monitor?
Open the Mixer, enable Detached in its top-left menu, then drag its title area to the second display. Resize it there and keep the title bar reachable. The Browser uses header dragging to undock rather than the same generic menu instruction.
Why does Detach all new plugins not change existing plugins?
The General setting applies to later additions, not existing editors. Use one plugin's Wrapper Detached control or find Switch all plugin editors to in Tools > Macros and choose Detached. Image-Line currently documents that macOS third-party plugins remain detached.
How do I recover a window from an old monitor?
Try View > Arrange windows > Into workspace. Realign restores the default-install layout if that broader change is wanted. A full settings reset is different and loses custom application preferences; record those settings before following the official reset procedure.
Can I scale the detached Mixer independently?
The current General Settings documentation does not provide a separate scale control for each detached Mixer. Main GUI scaling affects the main interface and requires a restart after changes. Supported native plugins have their own Wrapper Scaling option; third-party interfaces need their own compatibility checks.
How do I save a two-monitor layout?
Use View > Arrange windows > Save custom layout and recall it with Custom. Save the FLP separately. Test the result with the intended displays connected; standard Trial users cannot reopen their saved projects until purchase and unlock.
Do two monitors make FL Studio run faster?
Adding a display does not automatically improve CPU performance, latency or audio quality. A useful layout can reduce window swapping, while keeping extra plugin editors open can add interface work. Choose the layout for visibility, not as an audio-performance upgrade.