FL Studio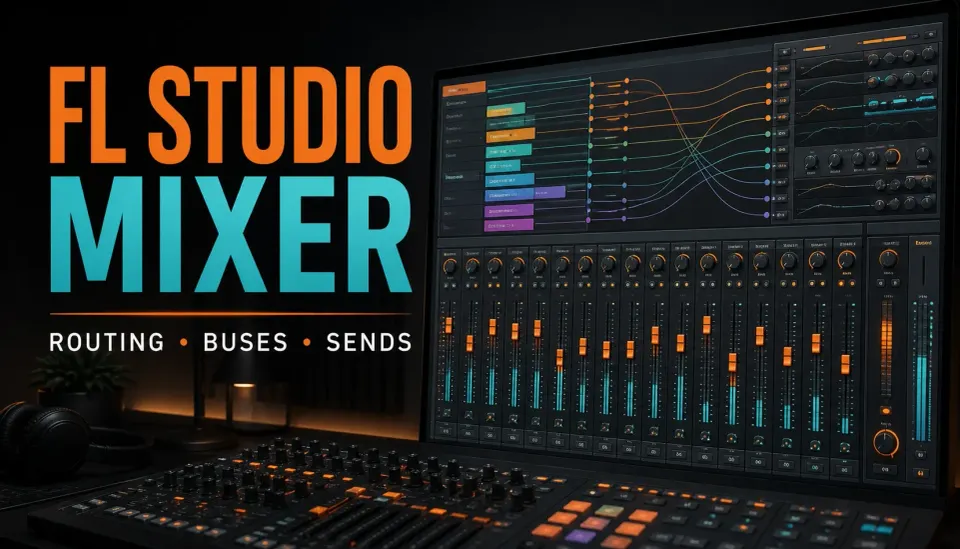
The FL Studio Mixer isn't a polishing room you visit at the end of a project. It's the path every sound takes on its way to your speakers and your export. Once that path clicks, inserts, buses, sends, effects, and the Master stop feeling like a pile of separate features.
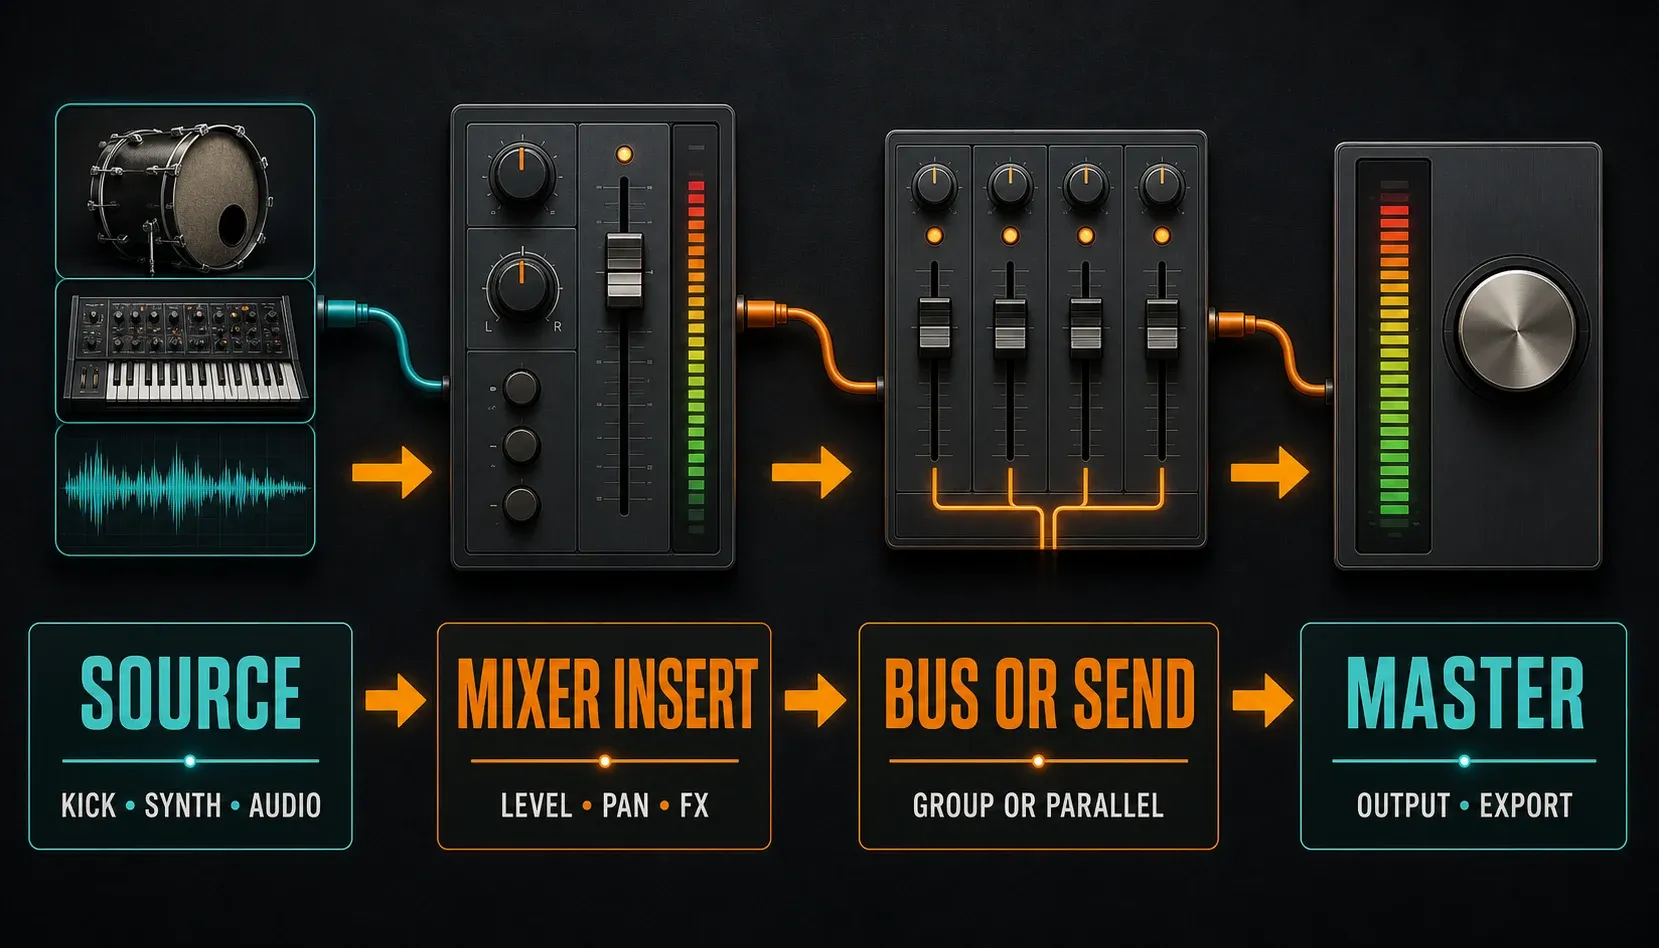
Press F9 to open it. Then follow the signal from left to right: a Channel Rack instrument or audio input lands on a Mixer insert, runs through that insert's effects, follows any bus or send routes, and normally ends up at the Master.
FL Studio Mixer signal flow in one minute
The current Image-Line Mixer manual says all audio in FL Studio passes through the Mixer. A new Channel Rack channel is audible even before you assign it, because its default destination is the Master.
| Stage | What it decides | Typical example |
|---|---|---|
| Source | What creates or receives audio | Kick channel, synth, Audio Clip, microphone input |
| Insert track | Where that source gets its own level, pan, effects, and routes | Kick, Bass, Lead Vocal |
| Bus or send | Whether several tracks are grouped or a parallel effect is blended | Drum Bus, Reverb Send |
| Master | What reaches the main output and normal full-song render | Complete mix |
The current FL Studio 2026 Mixer gives you 500 insert tracks, plus the Current utility track and the Master. That number mostly matters because old tutorials still talk about a 125-track ceiling. The skill worth learning early isn't filling hundreds of strips; it's keeping the ten you actually use easy to follow.
The Mixer layout without the wall of controls
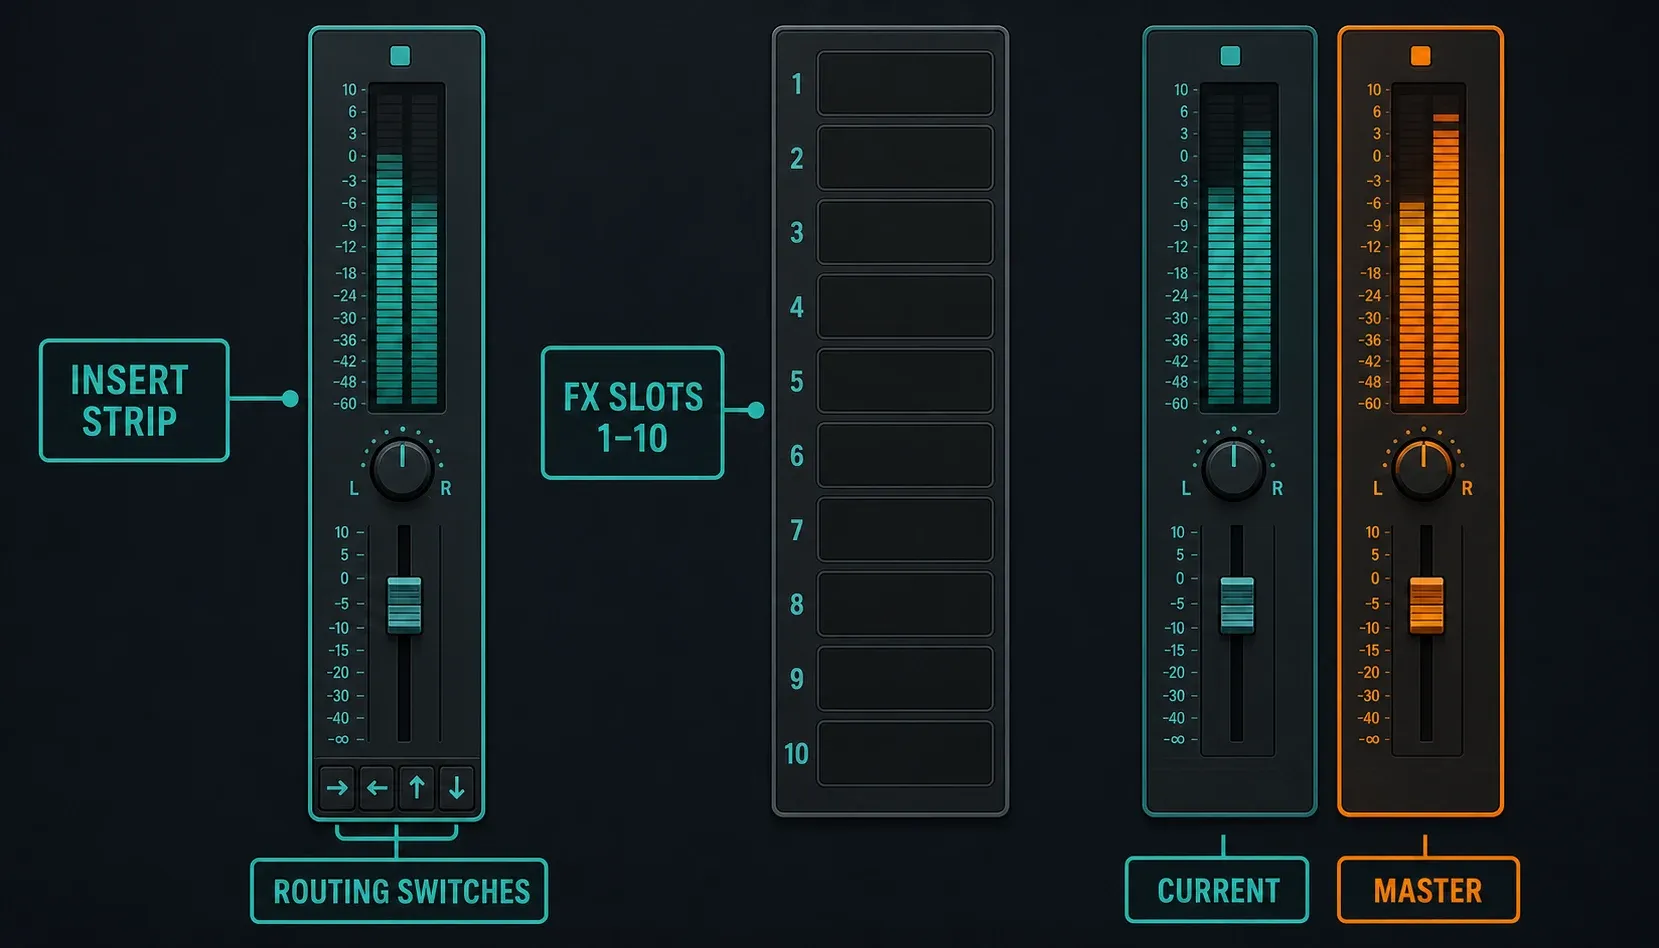
Select one insert and the window gets simpler. The center strip shows its meter, mute/solo state, pan, level, and name. The inspector shows ten effect slots and the track properties. The routing switches along the bottom tell you where the selected track sends audio and which tracks feed into it.
- Insert tracks hold sources, groups, or effect returns. Those are roles you choose; FL Studio does not require a special “bus” track type.
- Master normally feeds the main audio-device output and the full-song render.
- Current follows whichever Mixer track is selected. It is useful for a shared analyzer or Edison, but effects placed there will touch every track you select.
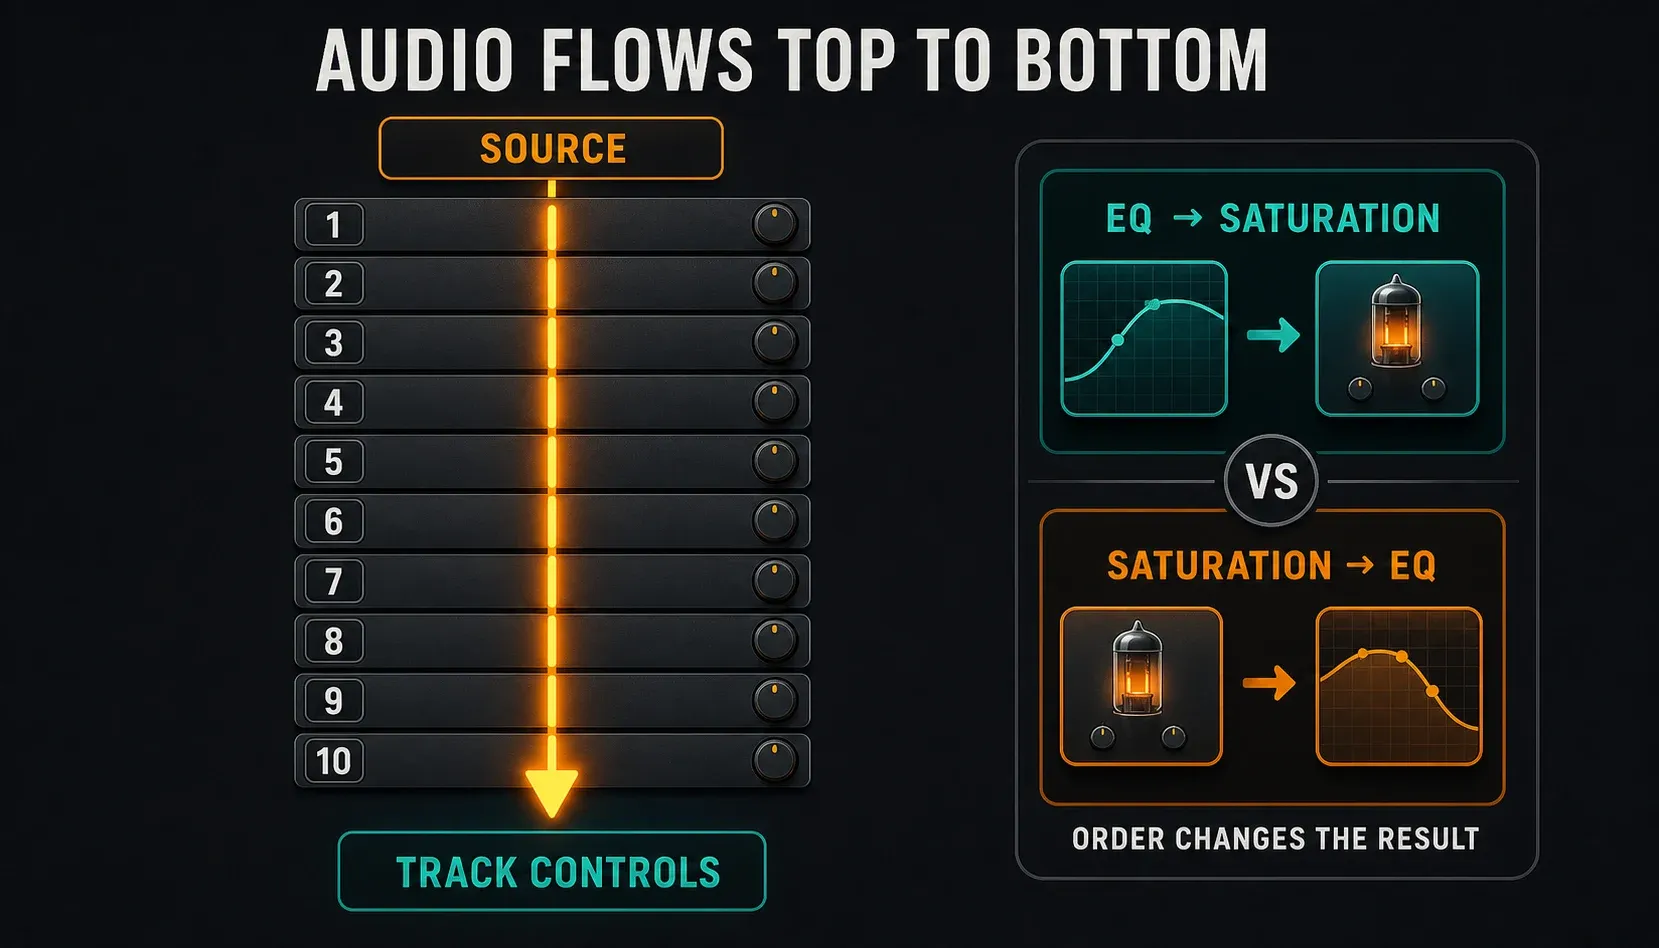
- FX slots process from slot 1 at the top to slot 10 at the bottom.
Rename the inserts you use with F2, give related tracks matching colors, and keep groups next to their sources. “Insert 17” makes you remember. “Drum Bus” tells you what the path is doing.
Route Channel Rack sounds to Mixer inserts
Playlist lanes and Mixer inserts are not automatically the same thing. FL Studio's Playlist documentation explains that Pattern Clips trigger Channel Rack instruments, and those channels decide which Mixer tracks carry the sound. The Channel Rack reference labels this control as Mixer Track Routing, while the Mixer manual documents the matching route from instrument channels to Mixer tracks. Instrument Track or Audio Track mode can create a linked Channel–Playlist–Mixer relationship, but an ordinary Playlist lane remains flexible.
For a single Channel Rack sound:
- Select the instrument or sample channel.
- Use its Mixer track routing selector to choose an insert, or click the TRACK auto-assign label where available.
- Press
F9, play the project, and confirm the intended insert meter moves. - Rename that insert before routing the next source.
For several channels, select them in the Channel Rack, then right-click the target Mixer insert. Channel routing → Route selected channels to this track (Ctrl/Cmd+L) sends them to that insert; Route selected channels starting from this track (Ctrl/Cmd+Shift+L) spreads them across consecutive inserts. The FL Studio shortcuts reference keeps the complete key list.
A tidy beginner project might use Kick, Snare, Hats, Bass, Chords, Lead, and Vocal inserts. Sending everything to one insert throws away separate level and effect control, while giving every tiny layer its own insert can get crowded before the arrangement needs it.
Insert effects and why their order matters
Each Mixer track has ten effect slots. According to the Image-Line Effects Slots manual, audio enters at slot 1, passes downward through slot 10, then reaches the integrated track controls.
That's why effect order is something you can hear. A saturator before an EQ gets the unfiltered signal; move the EQ first and the saturator reacts to a different balance. A compressor before reverb controls the dry source, while a compressor after reverb also reacts to the reverb tail.
- Load only the processor that solves the next audible problem.
- Level-match its bypassed and active states closely enough to avoid choosing “louder” by accident.
- Move it one slot at a time and listen for a reason to keep the new order.
- Use the track FX switch to compare the complete chain, then return to individual bypass switches to find the stage doing the real work.
Ten slots aren't a target. If a useful chain really needs more, another routed insert or Patcher can extend it. A chain you can't explain is harder to fix than a short one with an obvious job.
Bus versus send: the routing decides the job
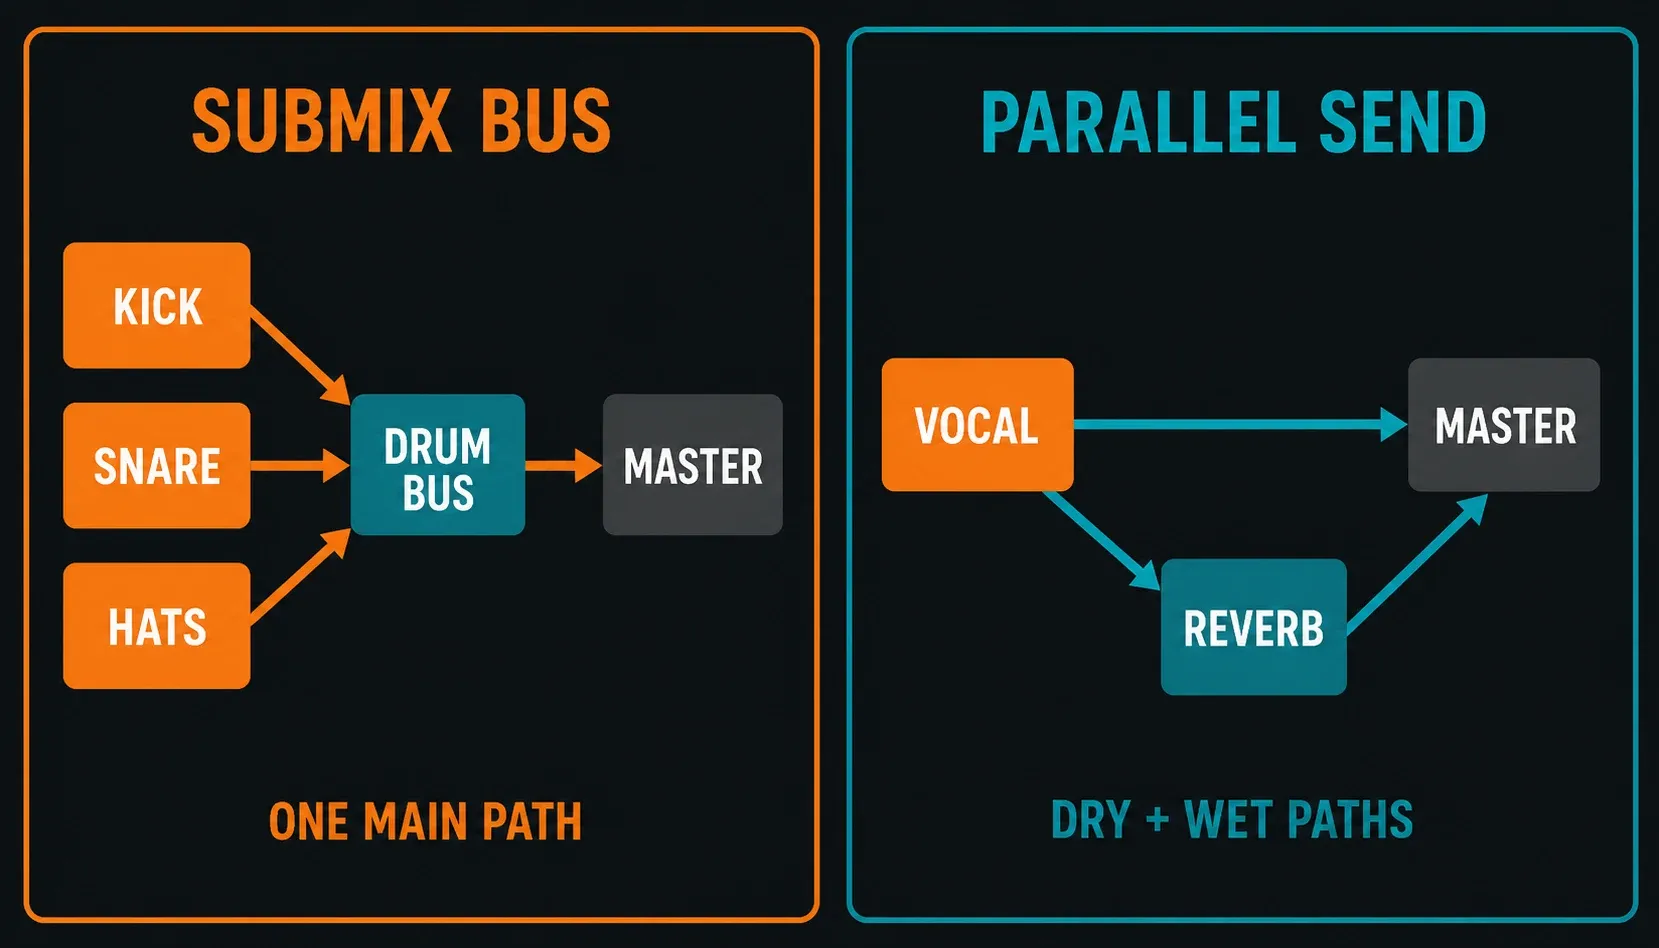
A bus and a send can both be ordinary insert tracks. What sets them apart is what happens to the source's direct path to Master.
| Routing job | Direct source-to-Master path | Use it for |
|---|---|---|
| Submix bus | Usually disabled; sources reach Master through the bus | One fader and shared processing for drums, backing vocals, synths |
| Parallel effect send | Kept; the effect track adds a second wet path | Shared reverb, delay, parallel compression |
| Sidechain-only route | Kept unless the audible routing needs something else | Unheard control signal for a compatible plugin |
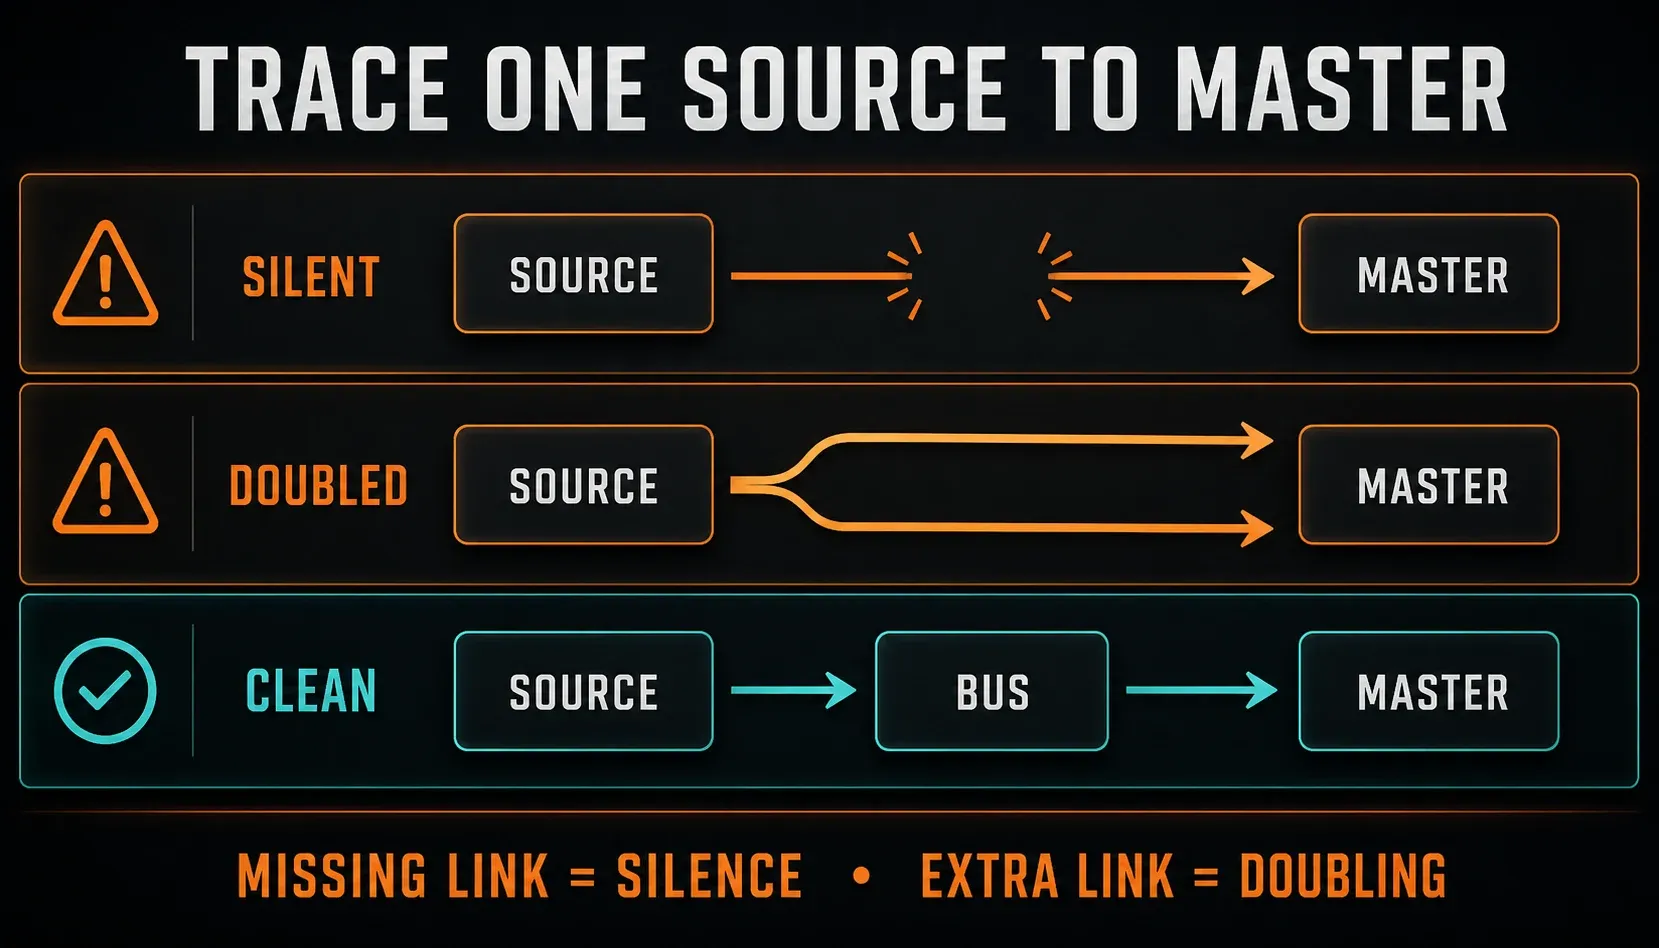
To build a drum bus, pick an empty insert and name it Drum Bus. Select each drum source, route it to the bus, and turn off each source's direct Master route so the dry drums don't arrive twice. The bus stays routed to Master.
To build a reverb send, pick an empty insert, load one reverb, set the plugin itself fully wet, and leave the source track's Master route on. Select the dry source, click the send switch on the reverb destination, then bring up the send amount until the space supports the source instead of swallowing it.
That wet/dry setup isn't a law for every creative effect, but it keeps the routing readable: the source fader owns the dry level, the send amount decides how much goes into the effect, and the reverb-return fader owns the shared wet result.
Post-fader and pre-fader sends in FL Studio
Normal FL Studio Mixer sends are post-fader. Pull the source fader down and less signal reaches the send. That's convenient for reverb and delay, because the effect return follows the source level instead of hanging around after you've pulled the dry part down.
A pre-fader send takes its copy before that fader. Image-Line uses Fruity Send in an effect slot for this job; the slot position also decides whether earlier effects are included. Pre-fader paths make sense for special cue mixes or effects that should continue independently of the source fader. They are not automatically “more professional.”
Sidechain-only routing is different again: the destination plugin can read the control signal, but the route itself is not intended as an audible copy. The FL Studio sidechain guide handles compressor setup and ducking decisions rather than burying them inside this Mixer foundation.
Set levels without chasing a magic number
Start with the arrangement playing and pull competing parts down before you reach for processors. Build the balance around what matters musically, not around every meter hitting the same mark. Solo briefly to diagnose a sound, then go back to the full mix to decide whether the change works.
Image-Line's levels and clipping guidance explains that FL Studio's floating-point internal insert path can carry peaks above 0 dB without immediately clipping. The Master, a track sent to hardware, or a render to a fixed bit depth can clip. That is not permission to run every insert unnecessarily hot. Keep real-world outputs out of clipping, preserve room for later decisions, and compare effects at a sensible listening level.
No rule says every unfinished mix has to peak at exactly −6 dBFS. A number can't tell you whether the kick masks the bass, the vocal is buried, or the reverb is eating the consonants. The FL Studio mastering guide covers final delivery level and limiter decisions.
Save a Mixer track state, not just one plugin preset
Right-click the selected track and use the Mixer menu's file options to Save mixer track state. A track state keeps the track setup and plugin chain so it can be opened on another Mixer insert later. Save it with a name that describes the source and job, not a promise such as “Perfect Master.”
An individual effect preset stores one plugin's settings. A Mixer track state stores the wider track setup. That's really the answer when people ask how to save a mixer preset: decide whether you want one compressor setting or the whole insert chain.
Presets are starting points, especially since input level changes how compression, saturation, gates, and dynamic EQ react. Load the state, play the new source, and retune it; a saved chain is no proof that the mix is finished.
Why a Mixer route is silent, doubled, or confusing
| What you hear or see | Trace this first |
|---|---|
| The intended insert meter never moves | Check the Channel Rack routing selector or linked Instrument/Audio Track, not just the Playlist lane number |
| A bus sounds louder after routing | Look for both the original Master route and the new bus route; the source may arrive twice |
| A reverb send is silent | Confirm the source is selected, the destination send switch is active, the send level is up, and the return reaches Master |
| Lowering a source also lowers its reverb | That is normal post-fader send behavior |
| The mix changes when selecting another track | Inspect the Current track for an effect or EQ that follows the selection |
| A route option is unavailable | FL Studio may be preventing a feedback loop or the source/destination direction may be reversed |
| The Mixer looks choppy but audio is clean | Separate meter animation from audio underruns before changing sound settings |
| Audio crackles or records late | Move to the FL Studio audio settings guide for device, buffer, driver, and monitoring checks |
A clean Mixer setup for a first full project
- Route every important sound to a named insert and confirm the meter.
- Balance faders and pan before building long effect chains.
- Create buses only for groups you want to control or process together.
- Create parallel sends only when several sources need a shared effect or a separate wet path.
- Check that every intended source reaches Master once through its chosen main path.
- Save a useful track state only after you understand why each processor is there.
If those steps still feel abstract, the first-song FL Studio tutorial gives you a small project to route. From there, the FL Studio guide library splits Mixer basics apart from sidechaining, vocal work, automation, mixing, and mastering.
After the routing is stable, move to the job that depends on it: build controlled ducking in the FL Studio sidechain guide, organise lead, doubles and effect returns in the vocal-mixing workflow, then check the complete mix and export path in the stock-plugin mastering guide. Those pages assume the source-to-Master route explained here already works.
Frequently asked questions
How do I open the Mixer in FL Studio?
Press F9 to show or hide the Mixer. On a laptop that reserves function keys for system controls, you may need Fn+F9.
How do I route a Channel Rack sound to the Mixer?
Select the Channel Rack instrument or sample and set its Mixer track routing selector to the intended insert. Play the project and confirm that insert's meter moves before adding effects.
Are Playlist tracks linked to Mixer tracks?
Not by default. Pattern Clips trigger Channel Rack instruments, and the channel routing decides which Mixer insert carries each sound. Instrument Track and Audio Track modes can create a linked Playlist–Channel–Mixer relationship.
What is the difference between a bus and a send?
A submix bus usually replaces each source's direct route to Master, so the whole group passes through one shared track. A parallel send keeps the dry Master route and adds a second effect path alongside it.
Are FL Studio sends pre-fader or post-fader?
Normal Mixer send switches are post-fader. Use Fruity Send in an effect slot when you need a pre-fader copy; its slot position determines which earlier effects are included.
How do I save a Mixer preset in FL Studio?
Use the selected track's Mixer menu and choose Save mixer track state to preserve the track setup and plugin chain. Save a plugin preset instead when you only need one effect's settings.
Why does routing to a bus make the sound louder?
The source may still feed Master directly while also feeding the bus, which gives you two audible paths. For a normal submix, remove the source's direct Master route and let the bus carry it to Master.