FL Studio
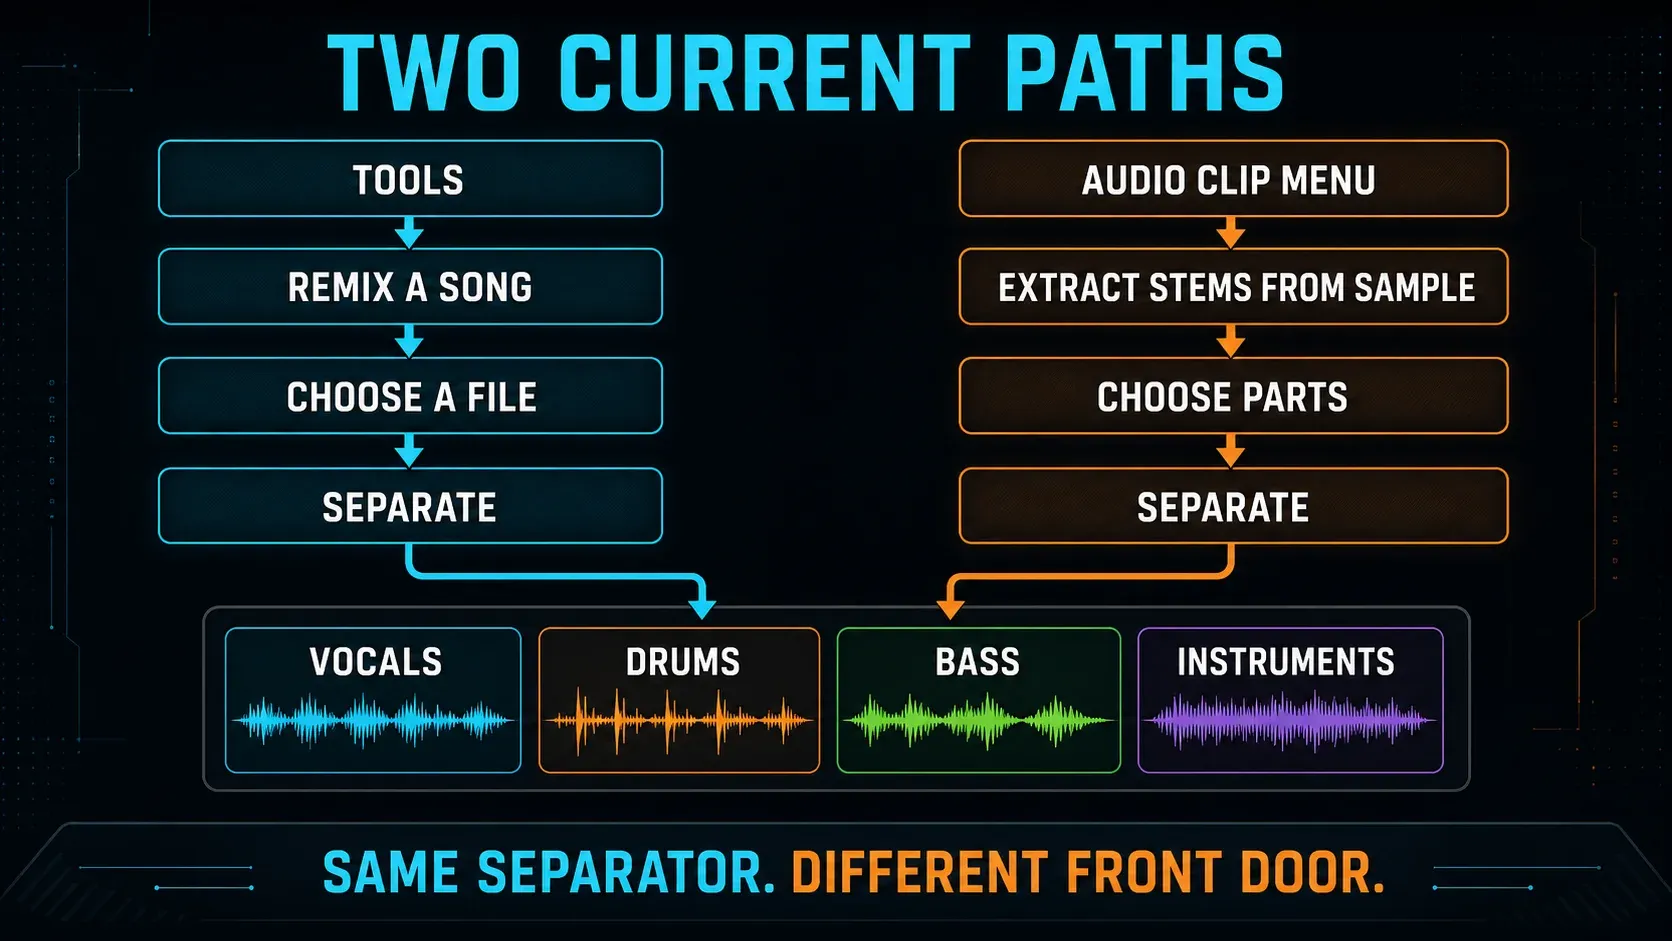
FL Studio can split a mixed song into vocals, drums, bass and instruments. In FL Studio 2026, open Tools > Remix a song for a guided start, or choose Extract stems from sample from an Audio Clip’s menu. Among paid editions, the built-in separator is included with Producer Edition and higher. The menu paths and edition boundary were checked against Image-Line’s documentation on September 12, 2026.
Clicking the button is the easy part. The real work is deciding what those four estimates can safely do. A vocal can sound great inside a busy remix and then reveal watery reverb the moment you solo it. A bass stem can keep the notes but lose its attack.
You’ll find the current menus, the first-use download, the quality check and the repair path below. One honest limit up front: no software can pull an original multitrack back out of a finished master.
FL Studio stem separation: the quick answer
| Your starting point | Use | What you get | Do not confuse it with |
|---|---|---|---|
| One finished WAV or MP3 | Stem Separation | Estimated vocals, drums, bass and instruments | The original recording-session files |
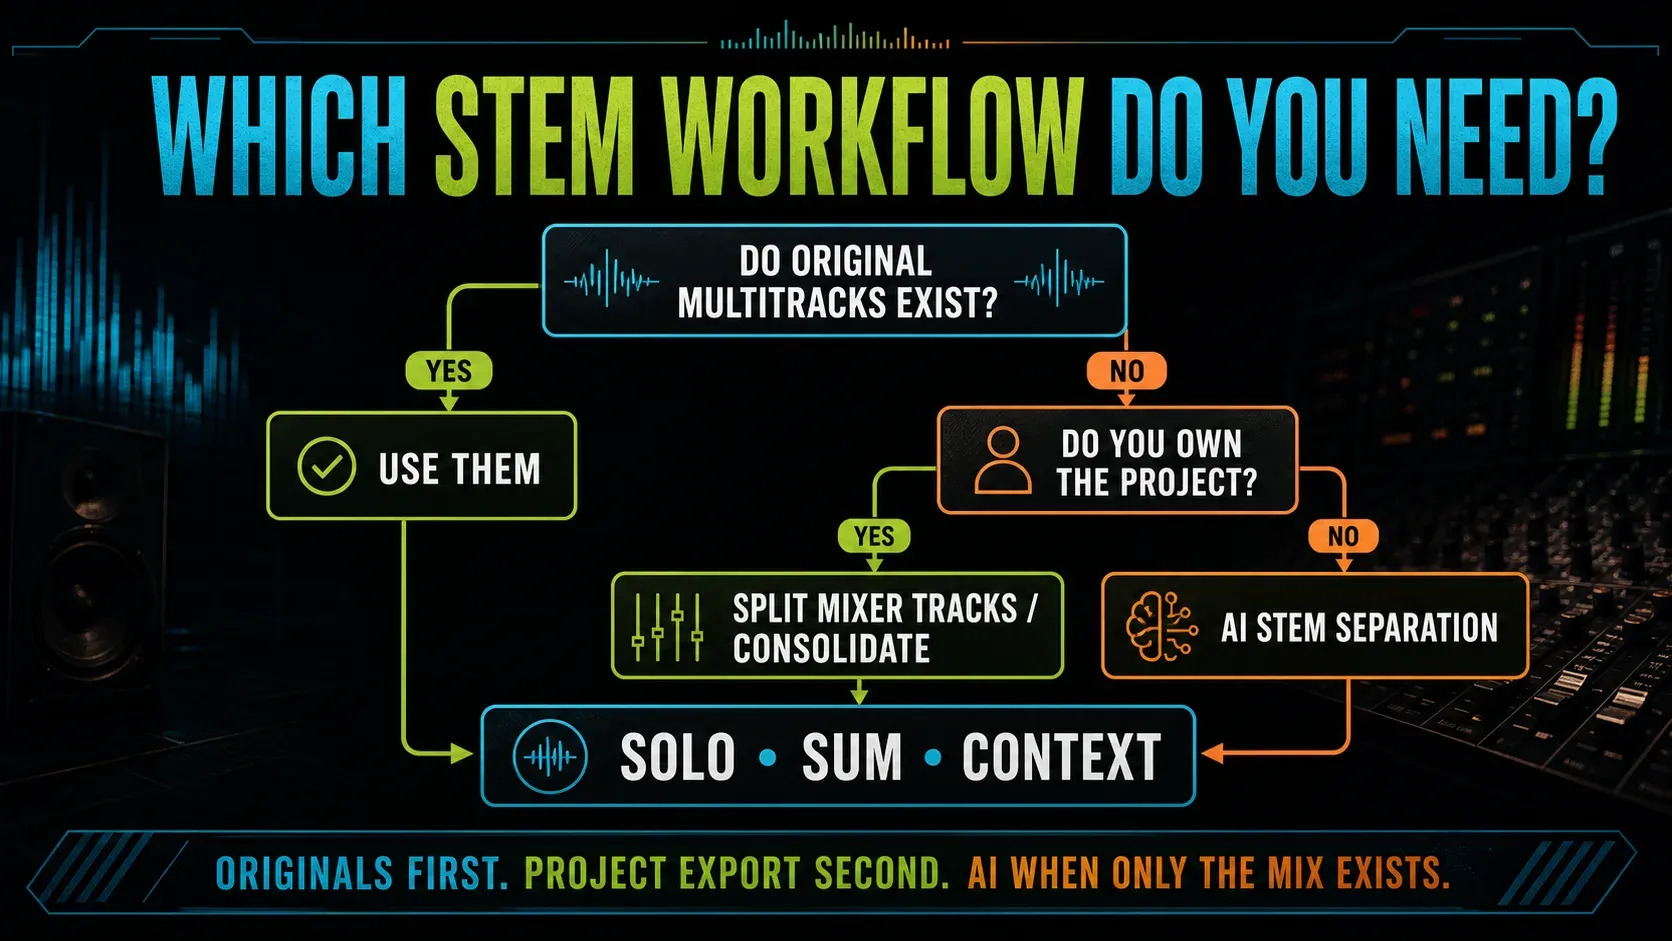
| Your own FLP with separate channels | Split mixer tracks or Playlist export/consolidation | Rendered tracks or groups from the real project | AI source separation |
| Original multitracks from the artist | Use those files | The closest thing to the actual recorded sources | A reason to run separation again |
| FL Studio Mobile project | Split mixer tracks | Exports of your Mobile Playlist tracks | The desktop Extract stems command |
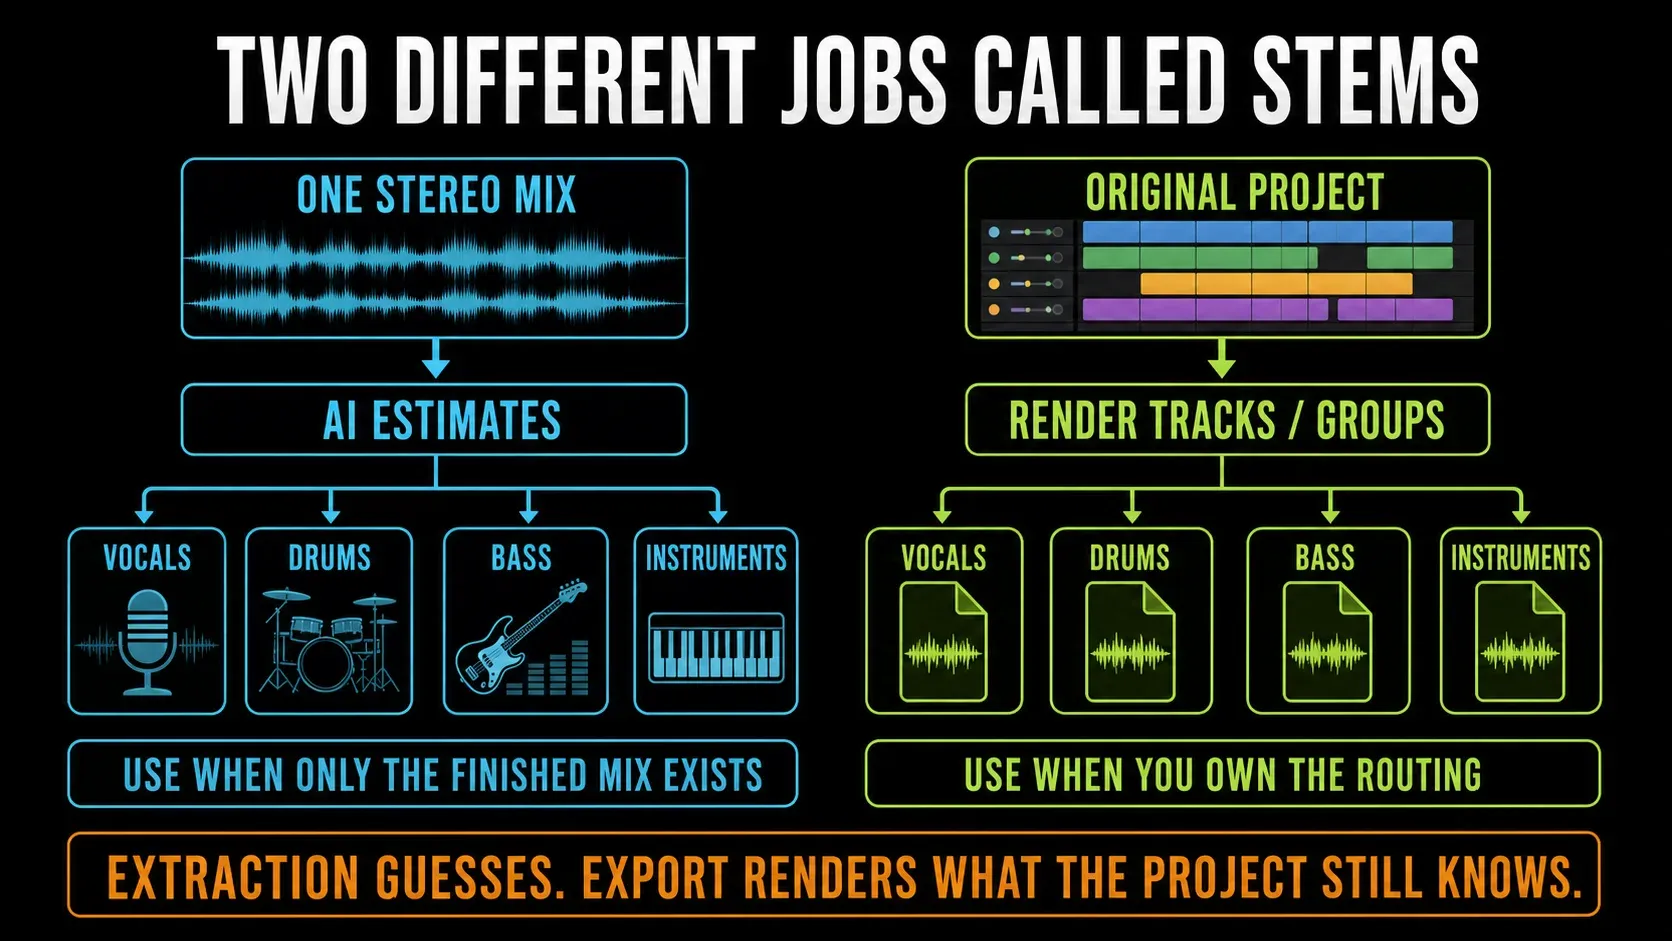
Keeping that difference in mind clears up most bad advice about “FL Studio stems.” If you own the project, render the parts before they get folded into a stereo master. If all you have is the master, the machine-learning model estimates which sound belongs in each category. It’s a remarkable editing tool, but it can’t turn back the clock. A dedicated separator such as RX 12 Music Rebalance makes the same kind of estimate with separate gain controls per element.
What FL Studio actually extracts
Image-Line’s current Playlist manual documents four selectable outputs: Drums, Bass, Instruments and Vocals. Each output you select becomes a new Audio Clip on a child Playlist track under the source track. You can ask for all four or just the part you need.
“Instruments” is one combined category; you won’t get a separate file for every guitar, piano, string or synth. Listen for spill between the outputs: cymbals may leak outside Drums, distorted bass can overlap with guitars, and vocal ambience can hang around in the accompaniment. These are estimates made from a finished mix, not recovered session tracks.
So the better question isn’t “Is the vocal perfectly clean?” Ask instead, “Is it clean enough for the moment where I’ll expose it?” A two-second phrase behind new drums has a very different quality bar from a full a cappella intro. Your intended edit decides whether an artifact matters.
Searches for vocal isolation or an acapella usually end up at the same Vocals output. The label changes how you plan to use it, not the underlying model, so you still have to judge bleed, ambience and exposed artifacts against the exact section you want.
Before you separate: make the source easy to judge
Save the project first. Put the source file on a clear Playlist track, start it at a bar you can find again and leave the original untouched. If you plan to remix, detect or confirm the tempo before you chop up the results. Separation doesn’t set the legal or musical context for you, and it doesn’t give you permission to release someone else’s recording.
Use a lossless source you legitimately have whenever one exists. Converting a low-bitrate MP3 to WAV changes the container, not the missing detail. Don’t upsample to 96 kHz hoping the separator will rebuild information thrown away upstream. Keep one unprocessed copy so every stem can be compared against the same reference.
A separated result isn’t the “pre-master”; the stock-plugin mastering workflow starts from a mix you control, not an AI estimate of one.
For a first test, prepare a separate short audio file with a tricky passage: an exposed vocal, a dense chorus or a cymbal-heavy transition. Shortening the visible Audio Clip doesn’t shorten the file underneath. A thirty-second test is just a sensible suggestion, not a processing limit or a guaranteed runtime.
Method 1: use Tools > Remix a song
The clearest beginner route is the current Tools menu command:
- Save an empty or disposable project. Keep the original audio file outside the project folder as a reference copy.
- Open Tools > Remix a song. The wizard asks for the track and prepares the Playlist for separation.
- Select only the stems you need. Choose Vocals, Drums, Bass and/or Instruments rather than generating files you will never audition.
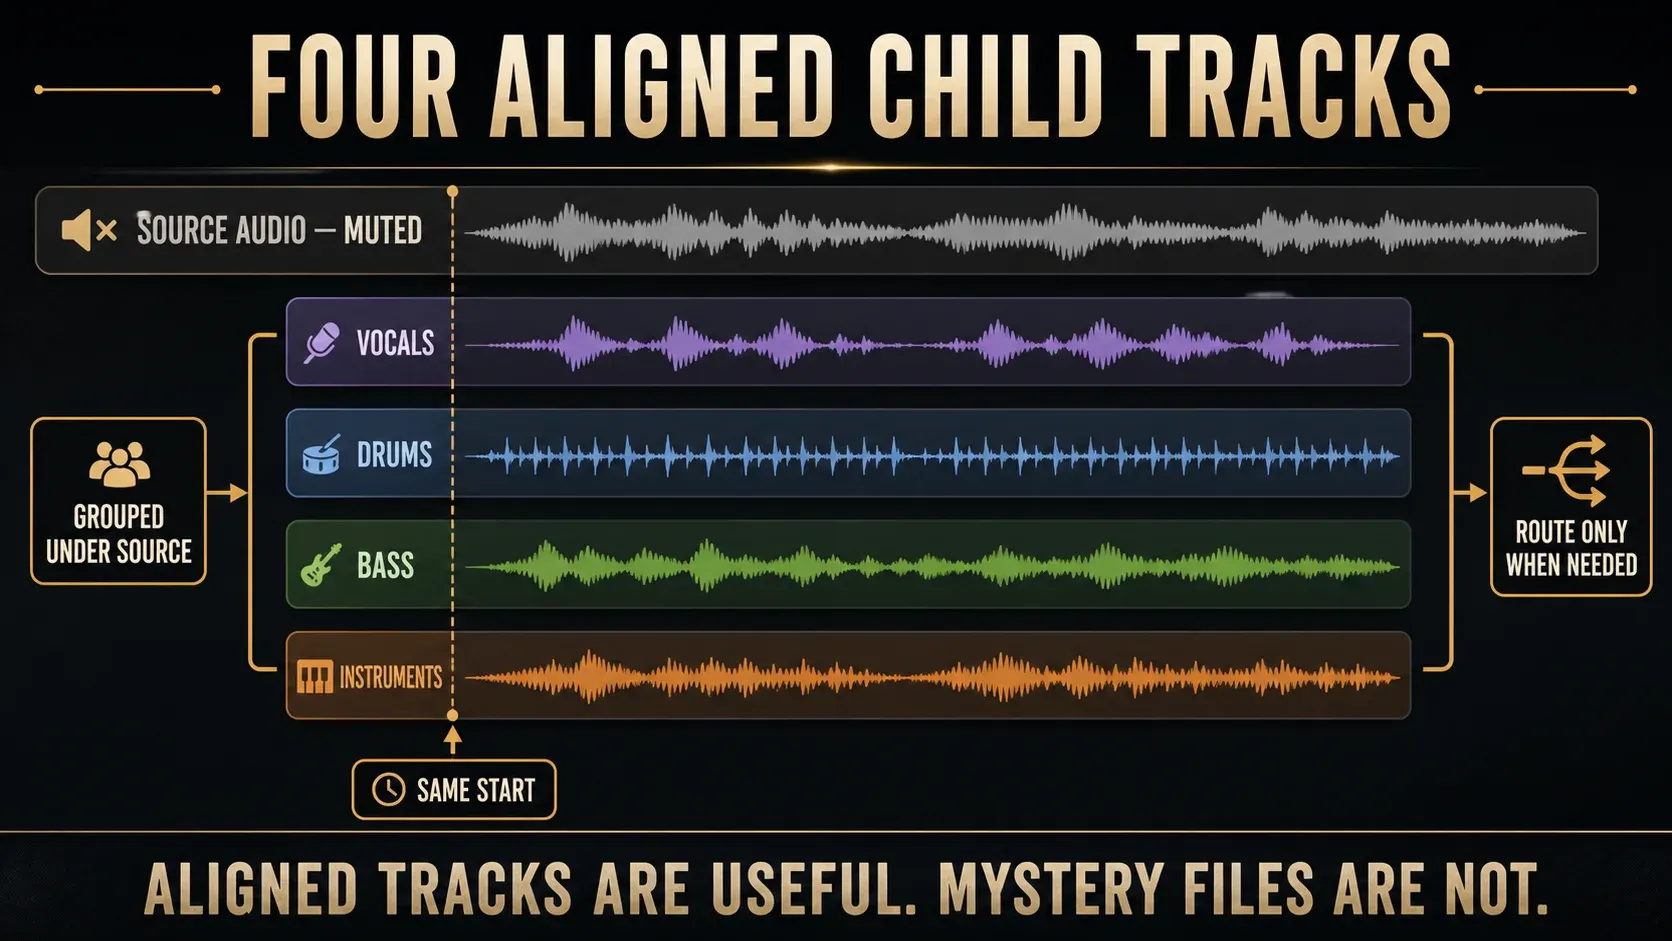
- Group the Playlist tracks and mute the source. This keeps the aligned results under one parent while preventing the original from doubling the sound.
- Run the extraction and leave the project alone. First use may download the model; track-length processing can make FL Studio temporarily unavailable.
- Audit each stem and the intended remix. Mark bleed, warble, missing transients and weak notes before adding effects. Compare the sum with the original only when you extracted all four categories.
- Print one short musical test. Build the hardest exposed moment first; continue only if the stem survives the context you need.
The wizard builds a remix project around the song you choose. Use a separate project for this route, and switch to the Audio Clip command when the source already lives in an arrangement you want to keep.
Method 2: extract stems from an Audio Clip
Drag the source onto the Playlist as an Audio Clip. Open the small clip menu at the clip’s upper-left corner, go to the Sample section and choose Extract stems from sample. The path matters here, because the command belongs to an Audio Clip. If you look for it in a Pattern Clip, automation lane, Mixer effect menu or the Channel Rack, a perfectly current installation can look like it’s missing the feature.
The first-song FL Studio tutorial explains how the Channel Rack, Playlist and Mixer fit together. For this job, drop the audio into a clear Playlist lane and work from that clip’s menu.
The first time you use it, FL Studio asks to download the optional machine-learning model. Let that finish on a stable connection. The separator is built into the desktop product, but the model files download separately, so a broken optional-feature download doesn’t mean you need some random third-party stem website.
Choose the separation options deliberately
| Option | Use it when | What it does not mean |
|---|---|---|
| Vocals / Drums / Bass / Instruments | You need that category as its own child track | Each instrument inside “Instruments” becomes separate |
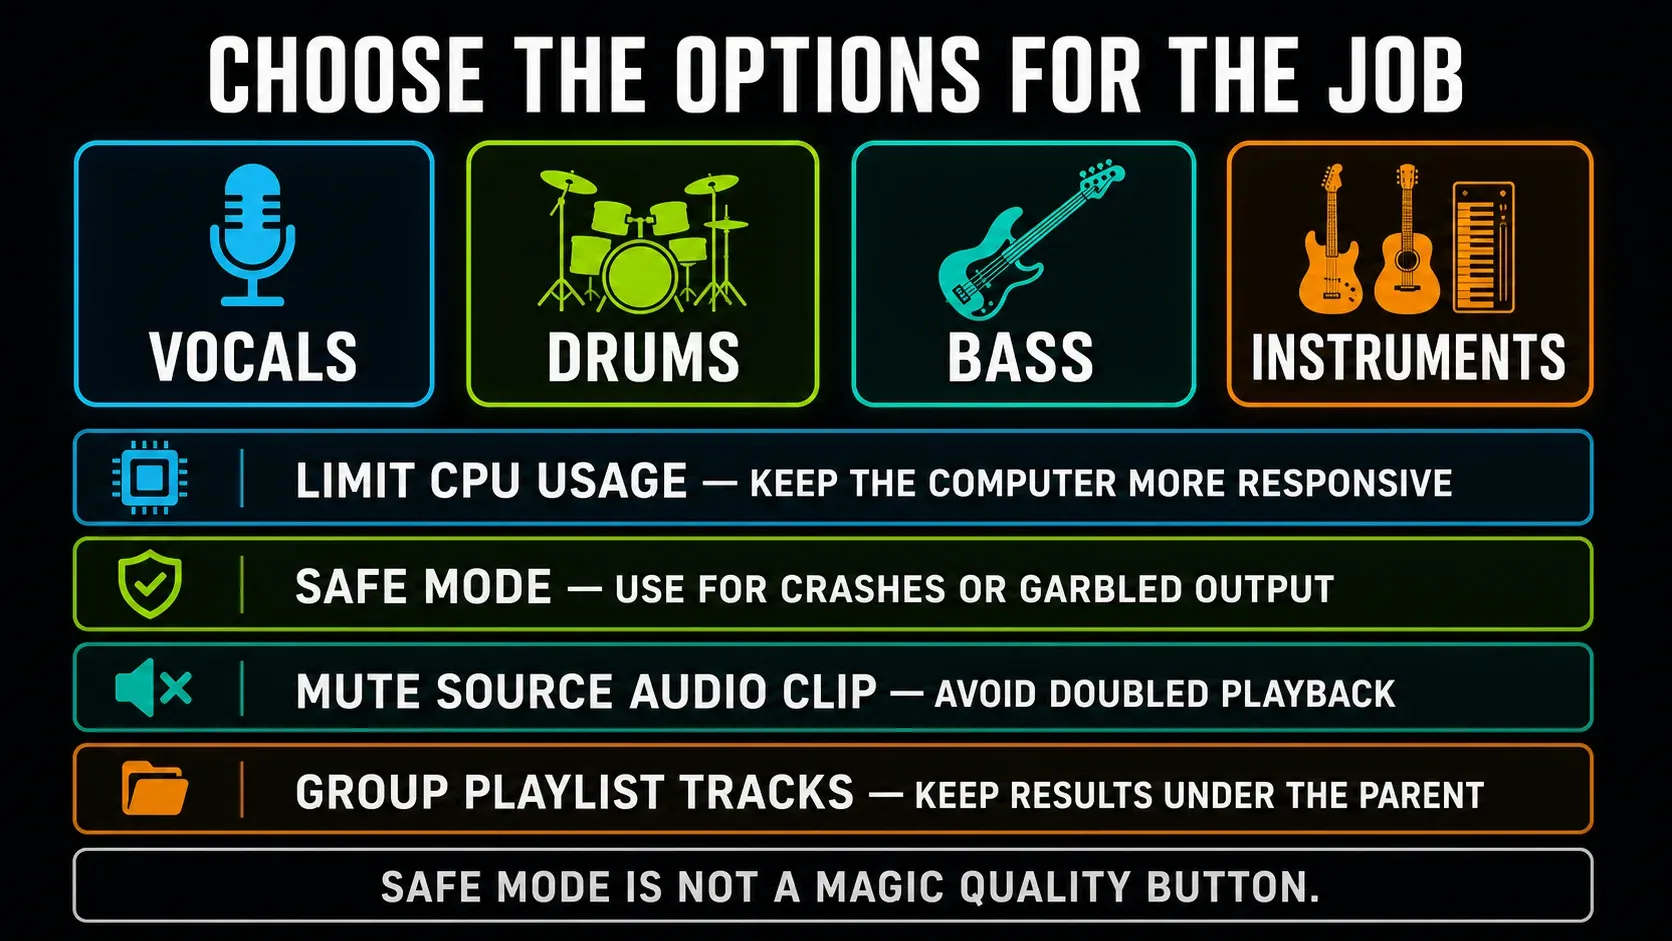
| Limit CPU usage | You need the rest of the computer to remain more responsive | The separation finishes faster or sounds better |
| Safe mode | The normal pass crashes or creates obviously garbled audio | A universal high-quality setting |
| Mute source Audio Clip | You want to audition the reconstructed stems without doubling | The source file is deleted |
| Mute Source Track | The track contains only the source you want silent | Every clip elsewhere is protected from your routing choices |
| Do nothing | You need the source audible for a deliberate comparison | All stems plus source will play at the correct level automatically |
| Group playlist tracks | You want the four results organized under their parent | The stems are permanently mixed together |
For a first pass, select all four, group them and mute the source Audio Clip. Leave Safe mode off unless you actually have the symptom it’s meant for. Limit CPU usage is about responsiveness; it isn’t a hidden “best quality” switch.
What should happen after extraction
The selected stems should show up as aligned child Playlist tracks under the source. Keep their starts together and check which output is which before you rename them. If you want separate processing, route each Audio Clip to a named Mixer insert; the FL Studio Mixer guide explains that routing. You don’t need extra buses just to audition the extraction.
For a reconstruction comparison, extract all four categories. Play those four together with the original muted, then switch between their sum and the original at a similar listening level. If you extracted only Vocals, or only Drums and Bass, the missing categories are expected and don’t mean the separation failed. Image-Line doesn’t promise a perfect digital null against the original.
Then solo each part. Mark the moments where an artifact becomes exposed, and skip every faint trace you can dig up at maximum headphone level. You’re making a musical decision here, not proving the neural network left no residue.
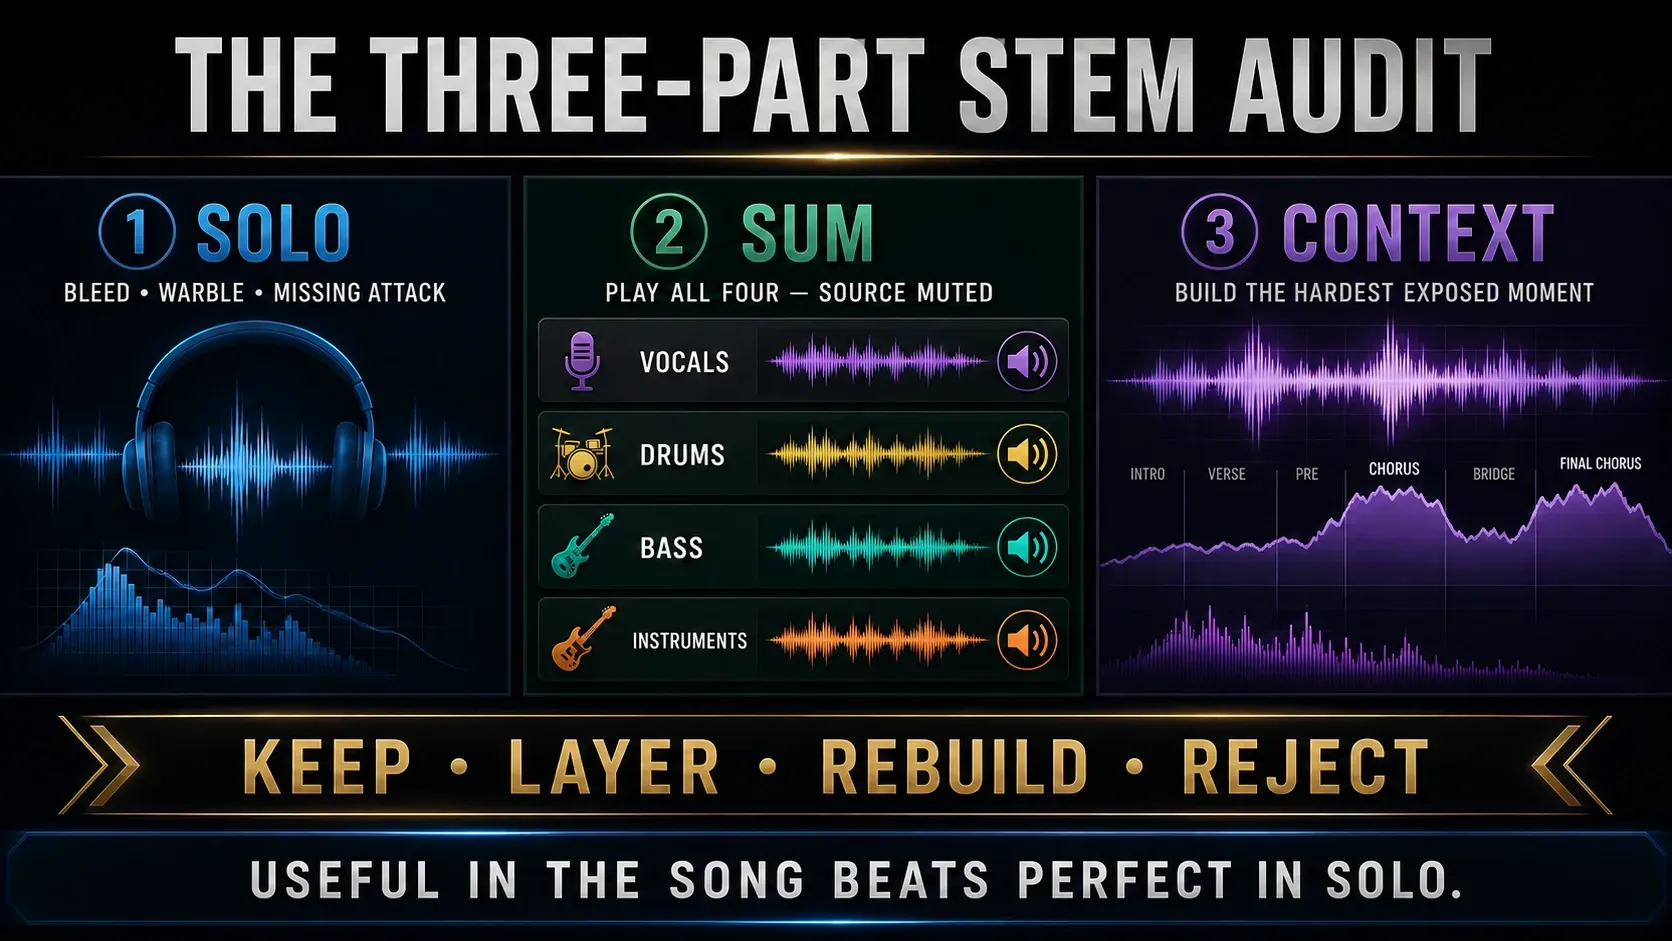
Run a three-part quality audit before processing
Solo test: listen to the part where it will be most exposed. On Vocals, check consonants, breaths, reverb tails and moments shared with cymbals or lead synths. On Drums, check kick attack, hi-hat wash and snare ambience. On Bass, follow sustained notes and the boundary between low synths and kick. On Instruments, listen for holes created by everything removed.
Reconstruction test: compare all four outputs together with the original, alternating which one is audible. Start with untouched stem levels and no added effects. Check ambience, attacks and low-end balance; investigate any unexpected change before processing the individual parts. Skip this test when you have deliberately extracted only a subset.
Context test: build the exact moment you need. Add the new drums under the extracted vocal, or mute the original vocal while keeping the generated instrumental. A stem that sounds fragile alone can work behind a dense arrangement. A stem that sounds impressive alone can fall apart after compression makes the spill jump forward.
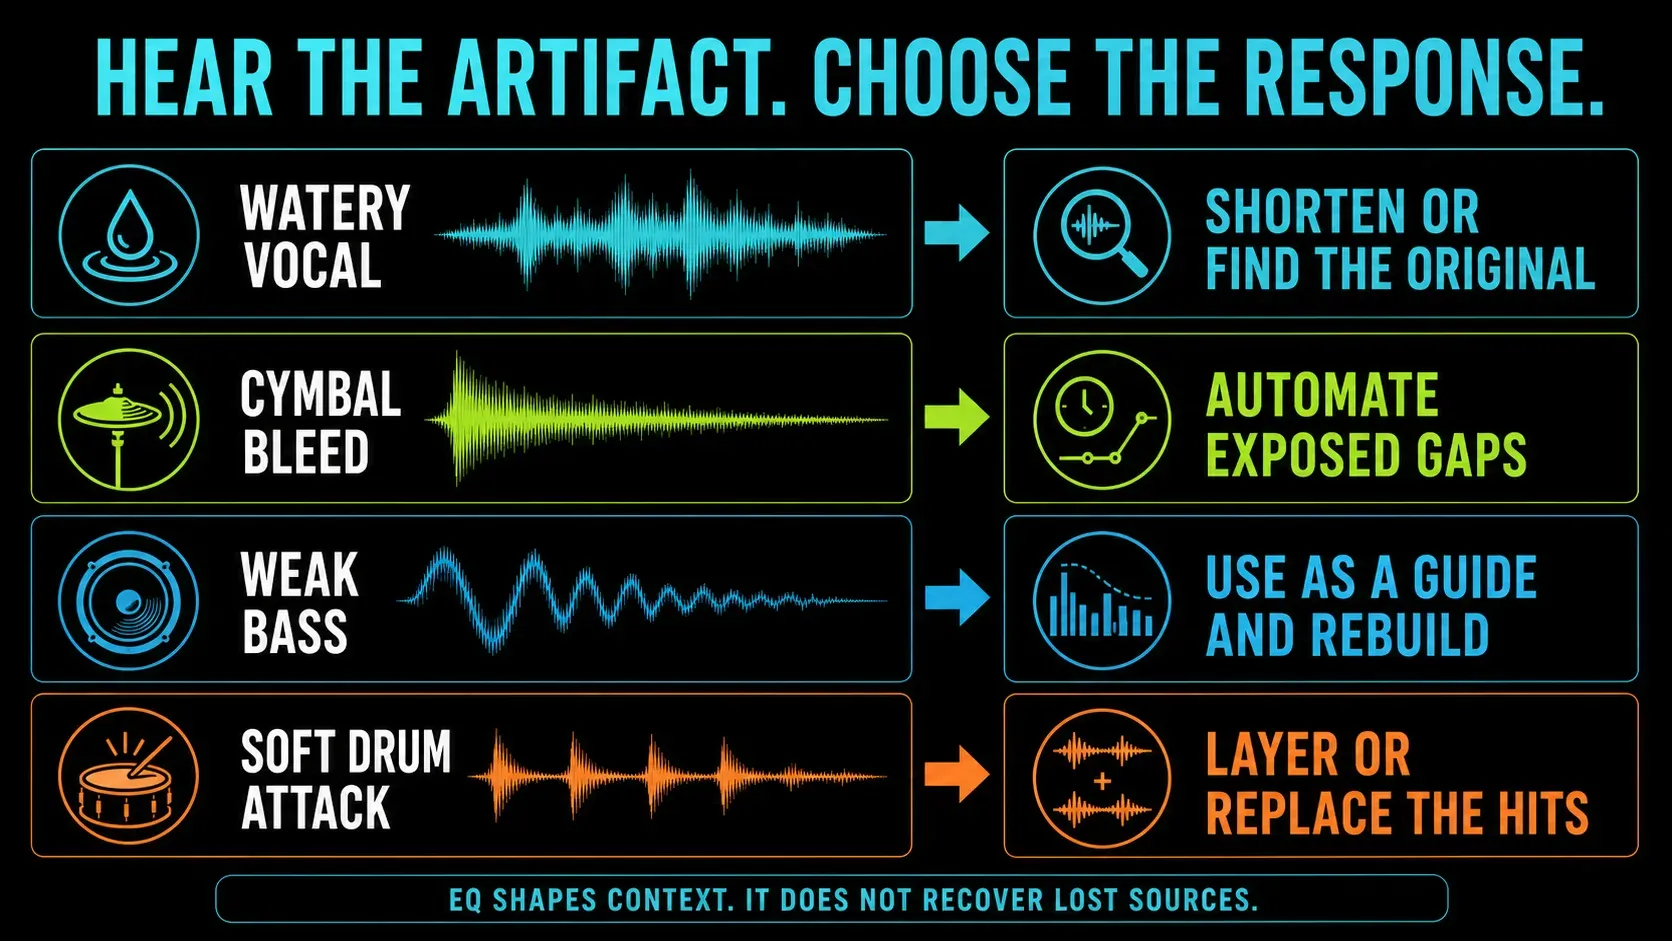
Common artifacts and the honest response
An artifact matters when it gets in the way of your edit. The checks below are listening prompts, not a diagnosis of what the model decided internally. Two songs can need different responses even when the unwanted sound seems similar.
| You hear | Possible overlap to investigate | Useful response |
|---|---|---|
| Watery or chirping vocal | Voice shares harmonics/reverb with the remainder | Use shorter phrases, layer in context or find the original vocal |
| Cymbals inside Vocals | Broad high-frequency energy overlaps consonants and ambience | Automate exposed gaps; do not crush the whole vocal with a narrow cure |
| Weak or wandering bass | Kick, bass synth and low instruments share energy | Use it as a note/timing guide and rebuild the bass when exposed |
| Soft drum transients | Attack energy was distributed across categories | Layer/rebuild the hits rather than over-compressing the residue |
| Instrument stem has holes | Removed sources carried shared reverb or harmonics | Keep it under new material, rebuild the exposed part or request original tracks |
| All stems sound phasey together | Source-dependent reconstruction artifacts or accidental source doubling | Confirm the source is muted, then compare normal and Safe mode only if output is garbled |
EQ can make spill less noticeable, but it can’t recover information the finished stereo file no longer holds separately. Heavy denoising, expansion and compression can make the model’s texture stand out more. Make one audible move at a time and bypass it at matched level. For a full vocal chain once the stem passes this audit, move on to the FL Studio vocal-mixing workflow.
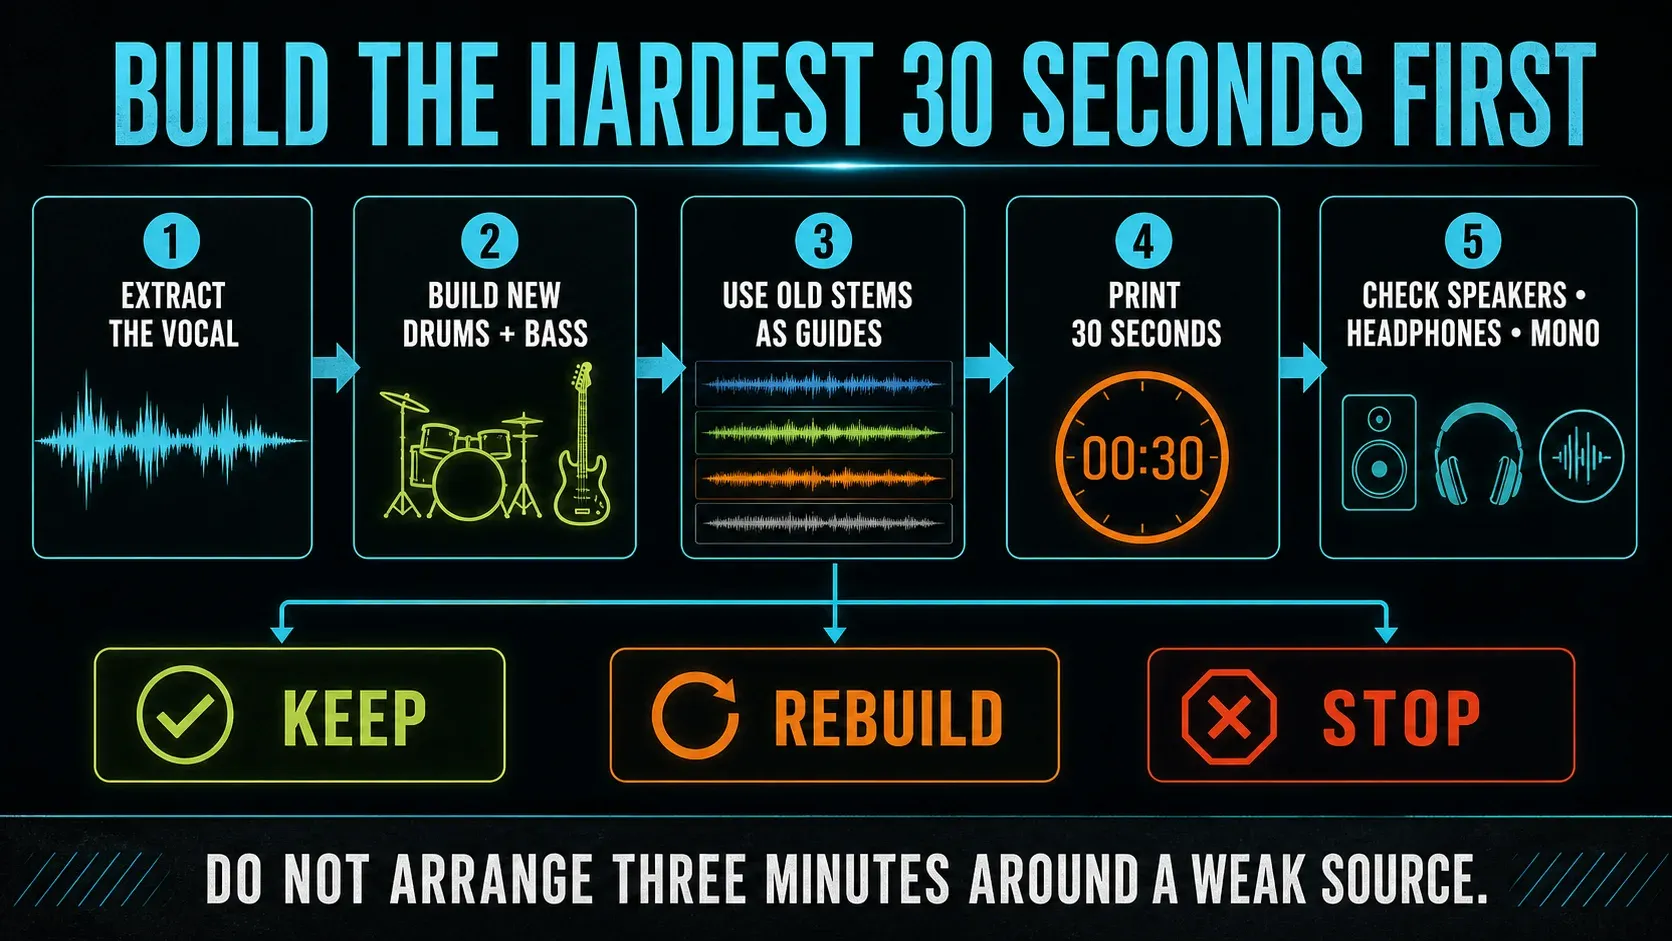
A remix workflow that does not worship the separator
Start with the one part you can’t easily recreate. For many remixes, that’s the vocal performance. Mute the other generated stems and build eight bars around the vocal with your own drums and bass. If the vocal survives its hardest exposed line, keep going. If it doesn’t, shorten the phrase, keep more of the original context, or stop before you arrange three minutes around a weak source.
Use the Drum and Bass stems as maps even when they are not release-ready. They reveal entrances, fills, note lengths and groove. Rebuild those decisions with clean sounds, then remove the guide. A separated Instruments stem can become a texture after filtering, chopping or resampling, but do not call a damaged remainder “vintage” simply because fixing it is difficult.
Route the rebuilt elements deliberately. If the original groove depends on pumping, recreate it with the sidechain method that matches the job rather than expecting isolated files to preserve a bus relationship from the master. Use the automation workflow for phrase-specific cleanup instead of applying one destructive setting to the entire stem.
Print a thirty-second draft early. Listen on speakers, headphones and mono before building the full structure. Separation is valuable because it makes an edit possible; the finished remix still succeeds or fails on arrangement, sound choice and balance.
Stem separation is not Split mixer tracks
If you made the song in FL Studio, don’t bounce the master and ask AI to rediscover your kick, vocal and synth. When the job is to export stems from your own FLP, render from the original routing. The Playlist manual documents Split mixer tracks plus Playlist-track export and consolidation methods. Those render material the project still knows about, while separation guesses after the parts have been combined.
The right export depends on buses, master effects, automation and sidechains. A per-insert render can lose the interaction that made the mix move, and a bus render can keep the processing but combine more sources than the recipient wants.
For your own project, follow the stem-export workflow or consolidate the required tracks. Those methods render your existing sources and routing. They do not run the AI separator.
For a handoff, line up all true stems from bar 1 or include an obvious sync point. State the tempo and sample rate. Print any native or third-party sound the receiver can’t recreate. Don’t label separated estimates as original multitracks, because that changes what another engineer will reasonably expect.
Why Extract stems from sample is missing
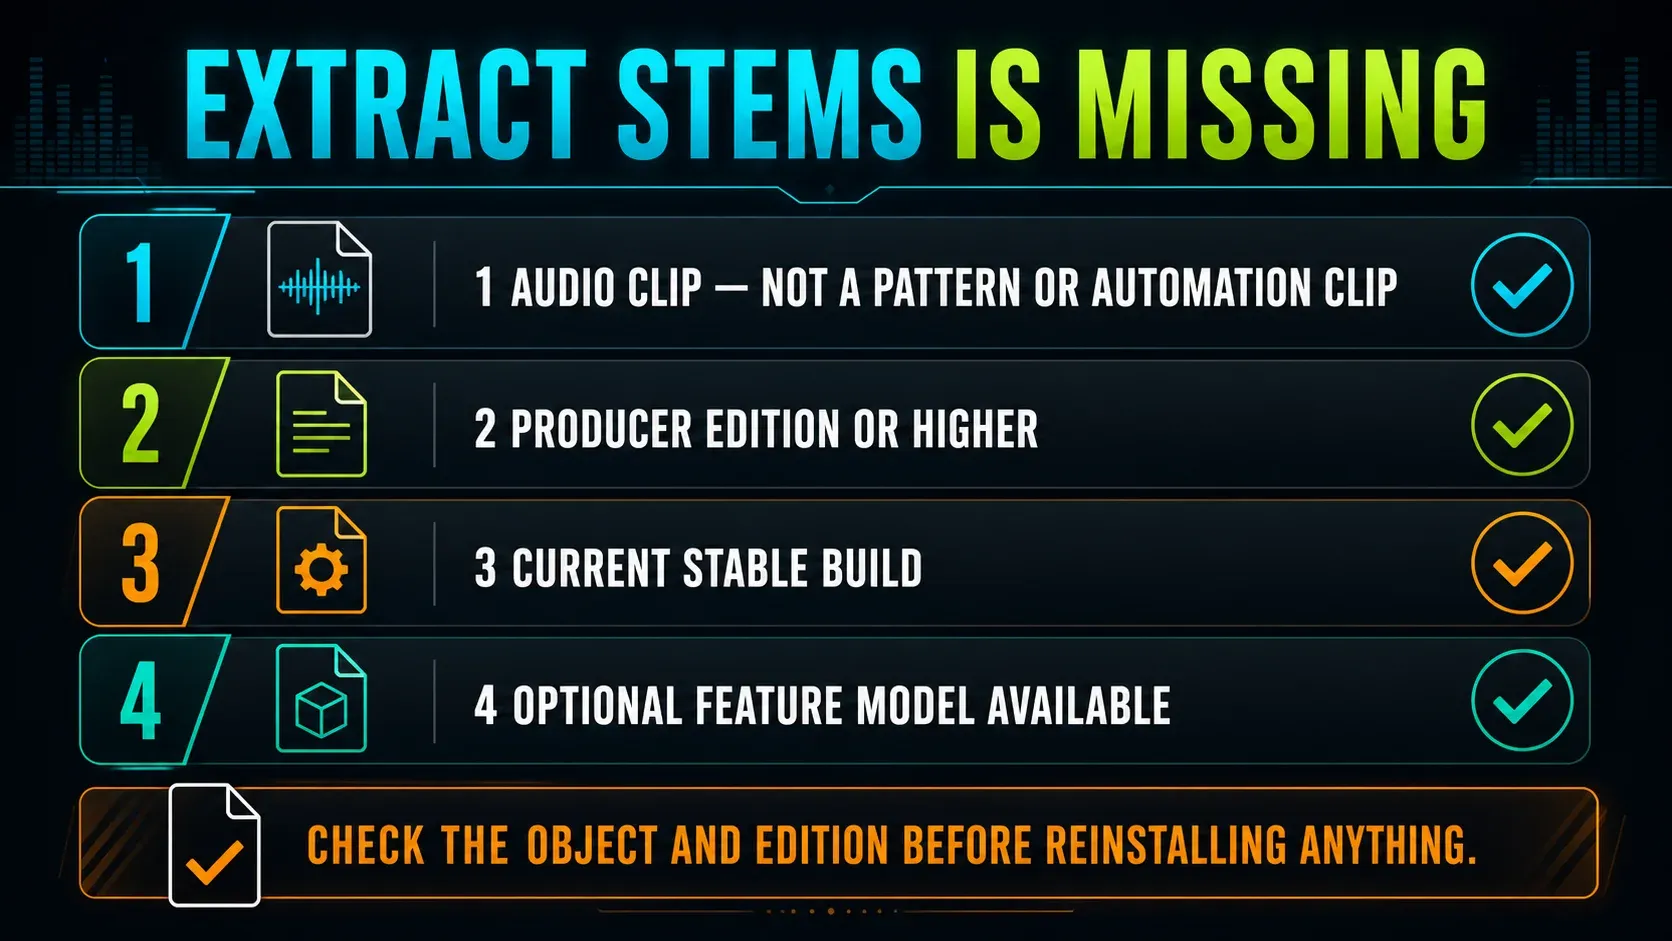
Check the object first. The command appears for an Audio Clip, and a Pattern or Automation Clip has a different menu. If the source is sitting only in the Browser or Sampler, drag it onto the Playlist as an Audio Clip and open that clip’s menu.
Check the edition next. Image-Line’s current edition comparison lists Stem Separation for Producer Edition and higher, so Fruity Edition isn’t the paid tier for this feature. Use the FL Studio editions guide for the full license decision instead of buying an expensive bundle just because one menu is missing.
Finally, update to the current stable release. Old tutorials may use an earlier version number. The FL Studio 2026 release page confirms the Remix a Song workflow with BPM and stem separation, which isn’t a separately purchased stem-separation plugin.
Fix a failed download, crash or garbled result
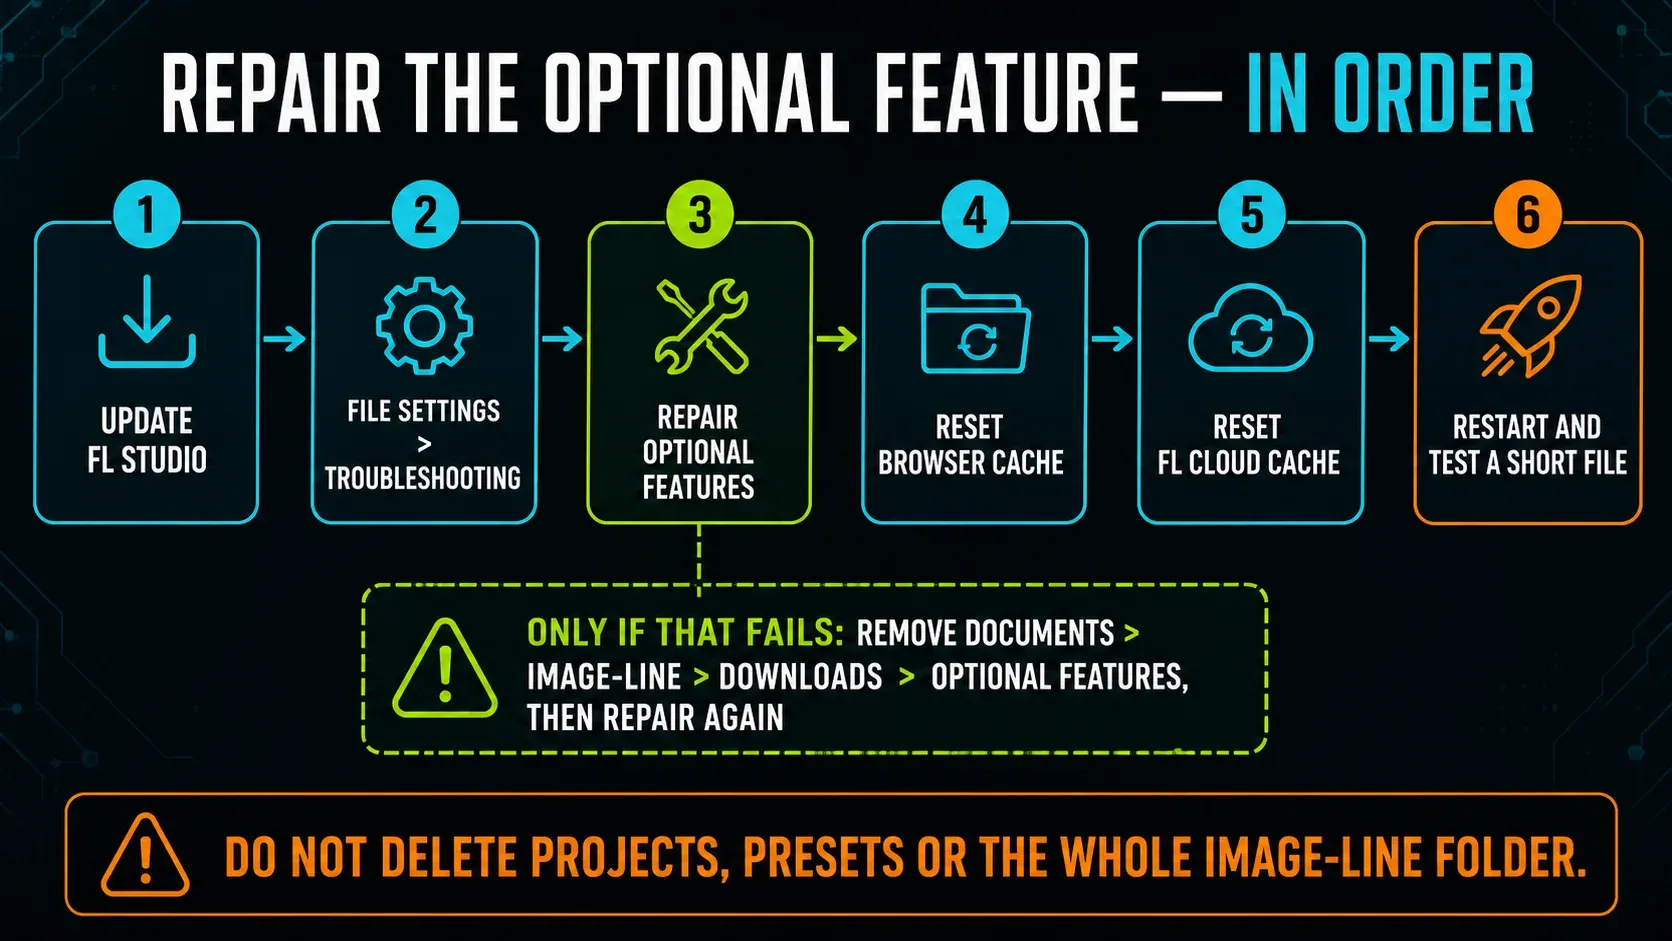
Stem separation is an optional downloadable feature. Image-Line’s current repair article says corrupted optional files can cause crashes or unexpected behavior. Follow its order rather than deleting the whole user-data tree:
- Close FL Studio and update to the latest stable release.
- Open FILE Settings > Troubleshooting and click Repair optional features.
- Click Reset browser cache and wait for its completion message.
- Click Reset FL Cloud cache and wait again.
- Restart FL Studio and test a short known source.
If that repair fails, close FL Studio and locate the Downloads > Optional Features folder inside your actual User data folder. The usual location is Documents > Image-Line > Downloads > Optional Features; a relocated User data folder will have a different starting path. Image-Line’s deeper repair removes only that Optional Features folder. Reopen FL Studio, run Repair optional features and wait for the button to become active again. Then run Reset browser cache, wait for completion, run Reset FL Cloud cache, wait again and restart FL Studio. Do not remove the whole Image-Line folder, projects, presets or backups.
If extraction runs but the audio comes out obviously scrambled, and not just imperfect, repeat with Safe mode. If FL Studio simply looks frozen while a long file is processing, wait: the manual says the application blocks project changes while it creates the new tracks. Force-quitting during a normal long pass can turn a bit of patience into a repair job.
Speed, CPU and storage: what to expect
Nobody can honestly give you a universal minutes-per-song number. File length, processor generation, operating mode and the source all matter. Image-Line documents that track-length audio can take minutes and that FL Studio may be unavailable during the operation. Limit CPU usage keeps the rest of the computer responsive, but it won’t speed anything up.
Save before you start, leave free storage for the output files and avoid kicking off other demanding work during extraction. Asking for just the part you need keeps the project simpler; ask for all four when you want to compare their sum with the original.
For playback problems that continue outside extraction, use the FL Studio high-CPU diagnosis. Offline extraction and the real-time audio meter measure different work. Changing the audio buffer is not a documented separator-speed fix; use the audio-settings guide for playback latency and drivers.
Safe mode is a compatibility fallback, mainly for crashes or clearly garbled output on some older CPUs. Don’t let it become a ritual checkbox. Compare it only when the normal path fails, with the same short source and the same listening level.
Does this work in FL Studio Mobile?
The current FL Studio Mobile manual documents Split mixer tracks: exporting the Playlist tracks of a Mobile project as stem files. It does not document the desktop Extract stems from sample machine-learning path.
So Mobile can create real stems from a project whose tracks are already separate, but this desktop tutorial shouldn’t be read as a Mobile tap sequence. For one finished stereo song, use a current supported desktop FL Studio installation or another tool whose current platform documentation clearly covers separation. Check the Mobile release notes again before assuming that boundary will never change.
Frequently asked questions
Does FL Studio have built-in stem separation in 2026?
Yes. Current Image-Line documentation includes native machine-learning Stem Separation. Use Tools > Remix a song or an Audio Clip menu > Extract stems from sample. A search result claiming FL Studio 2026 has no native separator is incorrect.
Which FL Studio edition has Stem Separation?
Image-Line’s current edition comparison lists Stem Separation in Producer Edition and higher: Producer, Signature Bundle and All Plugins Edition. Fruity Edition is not the paid native-separation tier.
How do I separate vocals from a song in FL Studio?
Place the song in the Playlist as an Audio Clip, open the clip menu, choose Extract stems from sample, select Vocals and any comparison stems you need, group the tracks and mute the source. After processing, audit the vocal solo and inside the intended remix.
Why is Extract stems from sample missing?
Confirm you opened an Audio Clip menu, not a Pattern, automation or Mixer menu. Then confirm Producer Edition or higher and update the current stable build. If the command exists but its model will not run, repair optional features.
Why does FL Studio freeze during stem separation?
The current manual says FL Studio is unavailable while it creates the stem tracks so project changes cannot conflict with the process. A track-length file can take minutes. Save first and wait unless the application actually crashes or produces a documented error.
Why do separated vocals sound watery or contain drums?
The model is estimating overlapping sources inside a finished stereo mix. Reverb, cymbals, synths and vocal harmonics can share time and frequency content. Test the vocal in context, use shorter exposed phrases or obtain the original vocal when the artifacts remain audible.
Can FL Studio Stem Separation create an instrumental?
Yes. Extract the parts and mute Vocals, or request the categories you need and combine Drums, Bass and Instruments. The result is an estimated instrumental and may differ from the original mix where vocal processing shared buses or ambience.
Is stem separation the same as exporting stems?
No. Separation estimates categories from one mixed file. Exporting stems renders separate tracks or groups from an original project. Use the original project export whenever you control it; use separation when only a finished stereo source exists.
Can I release a remix made from separated stems?
The tool does not grant rights to the recording or composition. Use audio you own, licensed material or a workflow cleared by the relevant rights holders. The U.S. Copyright Office’s derivative-work guidance describes the right to make a new version as an exclusive right of the copyright owner; technical access to a vocal is not release permission.
For your next step, take the Mixing route: prepare the source only when you need to, then work on routing, vocal processing and the final mix.
The useful finish line
FL Studio’s separator already comes with Producer Edition and higher. The reliable path is short: start from an Audio Clip or Remix a song, pick the parts, group them, mute the source, wait for the model and judge the result in the exact musical context you need.
The habit that matters most comes after extraction. Keep original multitracks when you have them, treat AI estimates as edit material instead of recovered truth, and rebuild any exposed part that makes you fight the artifacts harder than the song. One convincing thirty-second section is a better green light than four impressive-looking waveforms.