FL Studio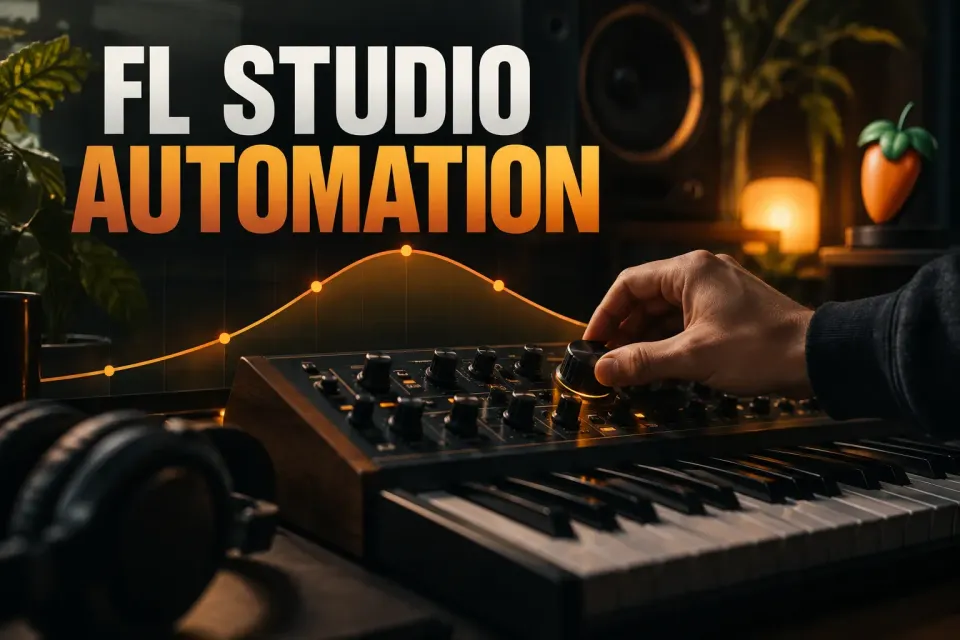
Select the bars you want to automate in the Playlist, set an automatable native knob to its starting value, then right-click it and choose Create automation clip. Move the clip’s points and play the arrangement in Song mode. For a third-party plugin, move its control first, then use Tools > Last tweaked > Create automation clip.
Drawing a filter rise is the easy part. Things get messy when the curve moves the wrong plugin, changes several vocal slices at once or snaps back to an old value at playback. This FL Studio automation guide shows you how to pick the target, shape the movement and check what else shares the same control.
Before changing links, converting data or deleting automation, use File > Save new version to keep a separate project version. Image-Line’s project-file documentation describes this backup command. Keep the source audio and plugin dependencies too; an FLP alone does not contain your audio samples.
Decide what should move before creating a clip
Start with the change you want to hear: open a filter into the chorus, raise a delay send on one word, fade a bus. Then pick the control that actually affects that material. An Automation Clip is an internal controller, not an audio recording. It moves linked controls and can sit in the Playlist independently of a Pattern.
| Musical job | Target to consider | Check first |
|---|---|---|
| Open a filter | Instrument or effect cutoff | Which sound passes through that filter? |
| Fade one vocal slice | Local Audio Clip gain or fade envelope | Use per-instance controls, not shared channel volume. |
| Fade a whole routed track | Mixer fader or gain plugin | Check every source and send affected by that route. |
| Move several parameters | One clip with deliberate target links | Each target needs its own suitable response. |
The FL Studio Mixer guide explains routing when several sounds reach the same insert. For a reusable control panel inside a plugin chain, use the Patcher macro workflow and automate its chosen Surface control.
Create your first Automation Clip without getting a full-song line
Try it on a filter cutoff for a sound that’s already playing in your arrangement. A short Playlist time selection keeps this first edit easy to inspect. With no selection, a newly created Automation Clip spans the whole song length instead of just the transition you had in mind.
- Select the intended time range on the Playlist ruler.
- Set the native control to the value you want before the movement.
- Right-click the control and choose
Create automation clip. - Rename the clip to identify the source and parameter, such as “Lead cutoff”.
- Move the end point to the destination value. Switch to Song mode and play from before the clip through its end.
Song mode plays the Playlist arrangement, so a Pattern-only audition won’t tell you much about an ordinary Playlist Automation Clip. Watch the target control while you listen. A moving curve doesn’t help if it’s linked to a different filter.
Automate a third-party VST or AU parameter
A third-party plugin may have its own right-click menu. In that case, move the control you want with your mouse, open Tools > Last tweaked, confirm the parameter name, then choose Create automation clip. Don’t touch any other control between those steps.
If Last tweaked does not identify the parameter, use the fallback. Open the plugin’s Wrapper menu and choose Browse parameters, or open Browser > Current project > Generators for an instrument or Effects for a Mixer plugin. Expand the plugin, right-click the published parameter and choose Create automation clip. The Wrapper parameter browser exposes the controls available to the host.
If the parameter isn’t there, don’t grab a similarly named control as a stand-in. Check the plugin’s own documentation for MIDI CC assignments or internal modulation. Those are alternatives only when that plugin supports them; they can’t invent a missing host parameter.
Draw curves with fewer points and better timing
Right-click the Automation Clip area to add a point, then drag it to its time and value. Two points are enough for a rise or fade. Add another only when you need a hold, a change of direction or a return.
To change a segment’s curve type, right-click its right-most point. To bend the segment, left-click its tension handle and drag up or down. Right-click the tension handle to reset its tension.
- Single curve: a straight or curved transition, depending on tension.
- Hold: a fixed value followed by a step to the next point.
- Smooth: an S-shaped join for a softer departure and arrival.
- Stairs, Pulse or Wave: repeated movement when that rhythm is intentional.
While dragging a point in the Playlist, hold Shift to lock its vertical value, Ctrl to lock its horizontal position, or Alt to override snapping. The Hint Bar reports point and tension values. The FL Studio shortcuts guide covers other editing commands.
For precise normalized entry, right-click a point and use Type in value with a value from 0 to 1. You can also use Copy value and Paste value between points that must match. A normalized value of 0.5 is the envelope midpoint. That doesn’t necessarily mean half the target frequency, unity gain or neutral pitch: Min/Max scaling, the link’s mapping and the target’s response decide the result.

Limit the range before a macro becomes dangerous
Double-click the Automation Clip in the Playlist to open its settings. Min and Max scale its output without changing the curve you see in the Playlist. So a full-height envelope might control only a small slice of a filter or effect’s range.
Check the bottom, midpoint and top against the actual target. For a delay send, listen for the highest useful level instead of assuming you want the full knob range. These controls scale the clip output, and a mapping formula can then change how an individual linked target responds.
Repeated Playlist instances normally share the same underlying Automation Clip data, so editing one curve changes the others too. To get an independent curve, open its Clip menu > Make unique. Image-Line specifies that the new Automation Clip has no links to the original targets, so reconnect it before you judge whether it works:
- Open the unique clip’s settings and find
Target Links. - Click
+, move the intended target control, then click+again to stop adding targets. - Use
Locateto confirm the destination and play the section in Song mode.
The editor’s Copy/Paste state commands move Automation Clip data between clips. Whether you copy data or make a unique clip, check the destination’s links and range instead of assuming they match.

Automate pitch without guessing what 50 percent means
Start by identifying the pitch control. A channel pitch-bend knob, a plugin’s bend wheel and an oscillator tuning parameter are three different targets. A direct tuning parameter may express pitch in semitones or cents with no separate bend-range setting.
For channel pitch bending, set the channel’s Pitch/Range and check the instrument’s bend response before creating the clip. Image-Line’s pitch-bend troubleshooting instructions explain that a plugin may need its own matching range. Do not enable Send pitch bend range indiscriminately; some plugins interpret those messages incorrectly.
Next, check the clip’s Min/Max and any link mapping. Use the target readout and a tuner or reference note to verify the starting pitch, the destination and the return. An envelope midpoint isn’t a universal zero-pitch command.
If you change a bend range later, recheck the existing clip’s output range and endpoints. The old automation won’t automatically adopt the new interval. Keep the return point explicit when the next phrase should start at the original pitch.
Need a synth patch worth automating? The Sytrus Reese bass tutorial explains the sound’s setup.
Choose the right volume or pan target
For one vocal slice, start with its local gain or fade envelope. The Audio Clip manual distinguishes per-instance controls from shared Channel Settings: local controls affect that Playlist instance, while Channel Settings affect instances sharing the channel.
To edit a local fade in the Playlist, enable Show Fades beneath the Audio Clip focus icon, or press Shift+F while the Playlist is focused. Find the triangular fade handles on the Audio Clip’s upper edge and drag a handle horizontally to set the fade-in or fade-out duration. These fade controls apply to that instance, so you can shorten one phrase’s fade without changing every slice of the same source.
Audio Clip menu > Automate > Volume creates automation for the Audio Clip’s channel volume. It is not the same as a local gain envelope. Other slices or duplicates using that channel can follow the same volume control when they play. The same scope check matters for Automate > Panning.
If you specifically need channel automation for only one instance, make the Audio Clip unique first, then create and verify automation for that new channel. Making the Automation Clip unique only separates its curve; it does not isolate an audio source.
A generator’s Channel volume affects that source. A Mixer fader affects material routed through that track. A gain plugin acts where you place it in the processing chain, so processing after it receives the changed level. Listen through the section and check the other material on the route before deciding the fade is isolated.
Record movement as Event data, then convert it when useful
Live knob movement records as Event data in the selected Pattern, not directly into a Playlist Automation Clip. The automation recording instructions give this sequence:
- Select the Pattern that should hold the movement. Use a separate Pattern if you want to keep the performance apart from your notes.
- Right-click the transport’s Record button and select
Automationin its recording filter. Deselect other recording types if you do not want to capture them. - Click Record to arm recording, press Play, and move the target with your mouse. A hardware knob must already be configured and linked to that target.
- Press Stop, then turn Record off before playback. With that Pattern selected, open the target’s
Edit eventsview to inspect the result.
To place the movement independently in the Playlist, use Event Editor menu > Edit > Turn into automation clip. The Event Editor’s conversion dialog lets you adjust sensitivity and the resulting point count. Keep enough points to hold on to the movement without making later edits a chore.
The reverse operation, Convert to events in an Automation Clip’s Target Links panel, writes Event data for the selected Pattern. The source Automation Clip remains intact and linked. Check for competing control data afterwards. In your saved working copy, keep one intended active source or manage both on purpose, because conversion alone doesn’t disconnect the old clip.

Link one curve to multiple parameters without losing the map
Open the clip’s Target Links panel, click +, tweak the controls you want to add, then click + again. If you’re unsure of the destinations, add them one at a time. Locate opens the target’s window; Animate moves the linked control so you can spot it.
Select a link and use Edit to inspect its Remote Control settings. The internal-controller mapping options include inverted and scaled responses. A rising curve can open one target while closing another, but check each target’s bottom, midpoint and top separately.
Several clips can also target one parameter. That’s supported, but overlapping movements or stray links can make the result hard to predict. Remove only the unwanted link and keep every other destination attached to a useful clip. Global hardware assignments are separate from these project automation links, so don’t create a permanent hardware mapping just to repair a Playlist target.
Fix jumps, wrong targets and automation that will not disappear
An unwanted jump can come from an initialized value, Pattern Event data or another linked controller, and deleting a Playlist block can’t tell those causes apart. Follow this target-specific recovery sequence:
- Preserve the project. Save a new version before changing shared channels, links or Event data. In the standard time-unlimited FL Studio trial, save the project and export the audible result before ending the session; you cannot reopen your own saved project until purchasing FL Studio.
- Identify the target and shared instances. Open the Automation Clip’s Target Links and use Locate. Inspect other uses of that clip and, for Audio Clip volume, other instances sharing the audio channel.
- Remove only the unwanted connection. Delete the incorrect target link if the rest of the clip is useful. Delete the Automation Clip Channel or Picker entry only when you no longer need that clip anywhere; deleting a Playlist instance alone leaves its Channel available.
- Check the initial value. Open Browser > Current project > Patterns > Initialized controls. Right-click the identified target’s entry and choose Delete event to remove that initialization. Alternatively, set the control to the desired start and use Init song with this position.
- Inspect other automation sources. Check the target’s Event data in the relevant Patterns and any other controller links. Remove only the identified unwanted data; deleting an Automation Clip does not erase separate Pattern events.
- Verify playback. Press Stop, turn Record off, then press Play in Song mode from before the affected section. Watch the target through the movement and return, and check other sections that reuse the clip or source.
The manual’s deletion and initialization instructions explain why the remembered start value can survive unlinking or deleting a clip. The Tools menu reference specifies Stop followed by Play when checking a new initial position. You don’t need to change a global automatic-initialization setting to repair one target.
The host trial and plugin trials are separate things. Image-Line documents the standard trial’s save, export and reopening limits; special time-limited trials can have different reopening permissions. Even in licensed FL Studio, native plugins outside your license can stay in trial mode.
Keep an untouched original if a project uses native Image-Line plugins in trial mode. They can reopen as empty Channels or FX Slots. Image-Line warns that reopening and resaving before unlocking those plugins loses their settings. Unlock the required plugins before reopening for full restoration; do not overwrite your only original with a placeholder-loaded project. An audio export preserves what you hear, not editable plugin settings.
Frequently asked questions
How do I make an Automation Clip in FL Studio?
Select the intended Playlist time range, set an automatable native control to its starting value, right-click it and choose Create automation clip. Edit the points and play the arrangement in Song mode. Without a time selection, the new clip spans the song length.
How do I automate a third-party plugin in FL Studio?
Move the plugin control, confirm its name under Tools > Last tweaked, then choose Create automation clip. If that fails, use Wrapper > Browse parameters or Browser > Current project > Generators or Effects. Right-click the published parameter and create the clip there.
How do I automate pitch in FL Studio?
Choose the exact pitch target and set the applicable channel and plugin bend ranges before creating the clip. Direct tuning controls may not use a bend range. Check clip Min/Max, link mapping and the actual starting pitch, destination and return. Recheck existing clips after changing a range; 0.5 is not a universal neutral-pitch value.
Why does my automation jump when the song starts?
The target may have a remembered initial value. Under Browser > Current project > Patterns > Initialized controls, right-click that target’s entry and choose Delete event, or set the desired position and use Init song with this position. Press Stop, then Play to check. If the jump remains, inspect Pattern events and other controller links.
Why did my automation control a different parameter?
Another control may have become the last tweaked target, or the clip may contain an unwanted link. Open Target Links and use Locate to identify each destination. Remove only the wrong link, add the intended target and verify playback before deleting any shared clip.
What is the difference between Event automation and an Automation Clip?
Event automation belongs to a Pattern and can record live controller movement. An Automation Clip is an independent controller you arrange in the Playlist. Use Event Editor > Edit > Turn into automation clip to convert events. In the reverse direction, Convert to events leaves the source Automation Clip intact and linked.
Can one Automation Clip control multiple parameters?
Yes. In Target Links, click +, tweak the desired targets, then click + again to stop adding. Use Locate to confirm them and Edit to inspect each link’s mapping. Test each target’s range separately; one full-height curve need not produce the same response everywhere.
How do I delete automation completely in FL Studio?
Save a new version and identify every source controlling the target. Deleting an Automation Clip Channel or Picker entry removes that clip, so check its other instances first. Initial values, Pattern Event data and other controller links are separate: remove only the unwanted entries for that target. Deleting a Playlist block alone leaves the clip’s Channel in the project.
Once the movement works, keep the target name and return value clear enough to make sense when you reopen the arrangement. If you want another sound to build around it, explore the Sound Design guides.