FL Studio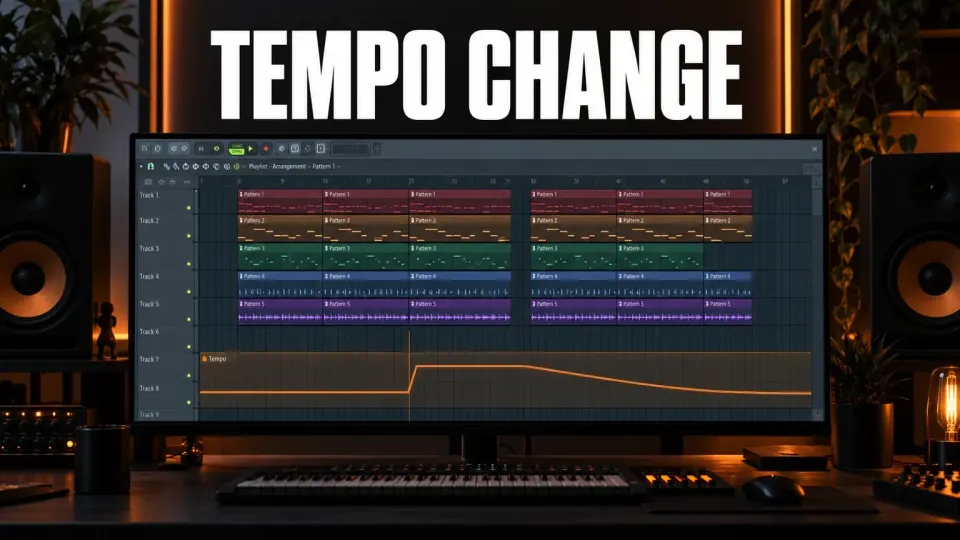
To change the BPM partway through a song in FL Studio, right-click the tempo display in the toolbar and choose Create automation clip. Add a control point on that Tempo clip where the change should happen, type the new BPM into the tempo display, choose Copy value, then right-click the control point and choose Paste value. Set the segment to Hold for an instant beat switch, or keep the default curve for a gradual speed-up or slow-down.
That covers the MIDI side. Audio Clips are where most tempo changes go wrong: by default they keep their original length, so a drum break or vocal that sat perfectly at 140 BPM slides off the grid at 100. Plan the audio step before you call the change finished.
How tempo works in an FL Studio project
An FL Studio project has one master tempo. The large digits in the toolbar show and set it, and Image-Line's tempo control documentation gives that control a range of 10 to 522 BPM. A change that happens later in the song is automation of that one control. There is no separate tempo setting per Pattern; the same manual says that if one Pattern should feel faster or slower, you edit its Piano roll notes or its number of steps instead.
Two neighbors are easy to confuse with a tempo change. A time signature change alters how bars and beats are counted, not how fast the song plays, so a move from 4/4 to 7/8 belongs in the time signature guide. And if you have not decided on the new BPM yet, find it first with tap tempo or by detecting the BPM of a sample.
Tempo automation lives in the Playlist, so audition it with the Pat/Song switch set to Song. In Pattern mode only the current Pattern plays, and you will not hear the arrangement's tempo changes.
Step 1: Create the Tempo automation clip
Decide how much of the song the clip should cover. If you select a time range in the Playlist first, Image-Line's Automation Clip documentation says the new clip is restricted to that range. With no selection it spans the whole song, which is usually what you want for tempo.
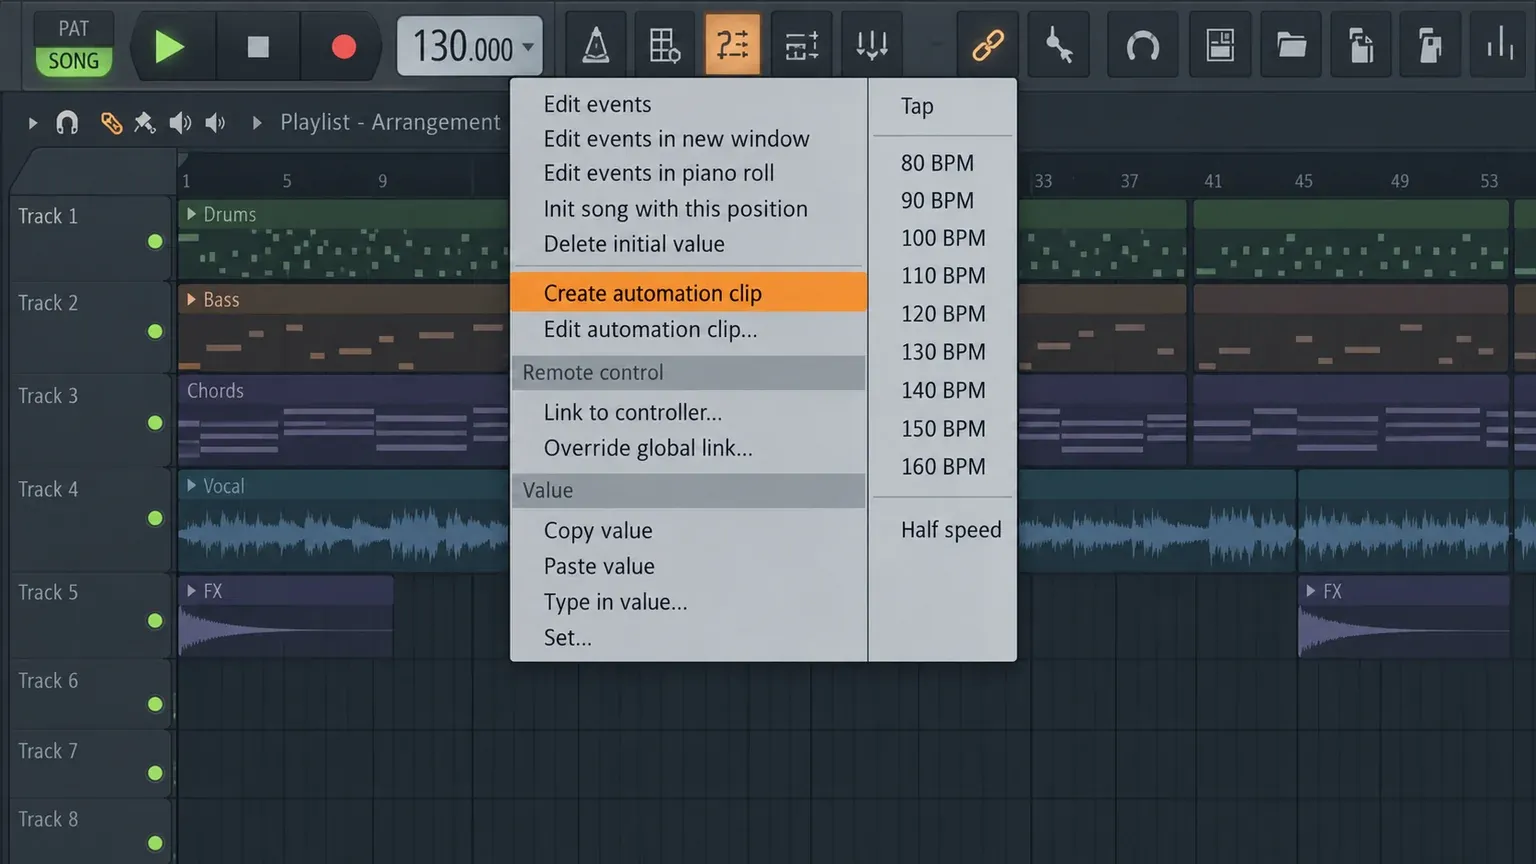
Right-click the main tempo display, the larger digits, and choose Create automation clip. FL Studio adds a Tempo Automation Clip to the Playlist that is linked to the project tempo. A flat line at the current BPM is the starting point.
If the clip is only for an outro or a bridge, I would still let it span the song. Having one Tempo clip that holds the whole tempo map means there is only one place to look when something sounds off later.
Step 2: Widen the BPM range before entering values
This is the step most tutorials skip. Image-Line's guide to automating tempo notes that a Tempo Automation Clip produces tempos between 60 and 180 BPM by default. A trap song at 140 going to 70 fits. A drum and bass section at 174 ramping to 190 does not, because the clip cannot produce anything above 180 until you change its range.
Double-click the clip in the Playlist to open its settings and adjust the Min and Max knobs. The manual describes them as a scaling factor that re-ranges the clip's output, and adds that the Playlist display does not change when you restrict the range. In other words, the drawn points stay where they are while the BPM they produce moves. That is why I would set the range before entering any exact values, then recheck the points once the range is final.
Step 3: Add control points where the tempo changes
Right-click on the clip to add a control point. To add one without bending the existing line, use Shift+Right-click, or Alt+Shift+Right-click when Snap is on (Opt replaces Alt on a Mac). Left-click and drag a point to move it; it snaps to the Playlist grid unless you hold Alt. Right-click a point and choose Delete, with STEP mode off, to remove it.
Set the Playlist snap to Bar or Beat before placing points, so the change lands on a downbeat rather than a few ticks early. If the arrangement is long, a time marker helps: Alt+T adds a named marker above the timeline, and the Playlist time marker documentation covers the other marker types. A marker called "Switch" at bar 33 is easier to aim at than a bar number you have to remember.
How many points you need depends on the shape you want:
- Instant switch: one point at the start of the song holding the original BPM and one point at the change.
- Ramp: one point where the ramp starts and one where it ends, both with exact values.
- Change and come back: add a third point where the original tempo returns.
Step 4: Set each point to an exact BPM
Dragging a tempo point up and down until the display reads 100 is slow and imprecise, and Image-Line says plainly that manually adjusting control points is not a good way to set tempo. The reason shows up when you right-click a point: its own Type in value field expects a number from 0 to 1, not a BPM.
Use the tempo display as the translator instead:
- Right-click the tempo display, choose Type in value... and enter the BPM you want for that point.
- Right-click the tempo display again and choose Copy value.
- Right-click the control point in the Tempo clip and choose Paste value.
- Repeat for every point that needs an exact tempo.
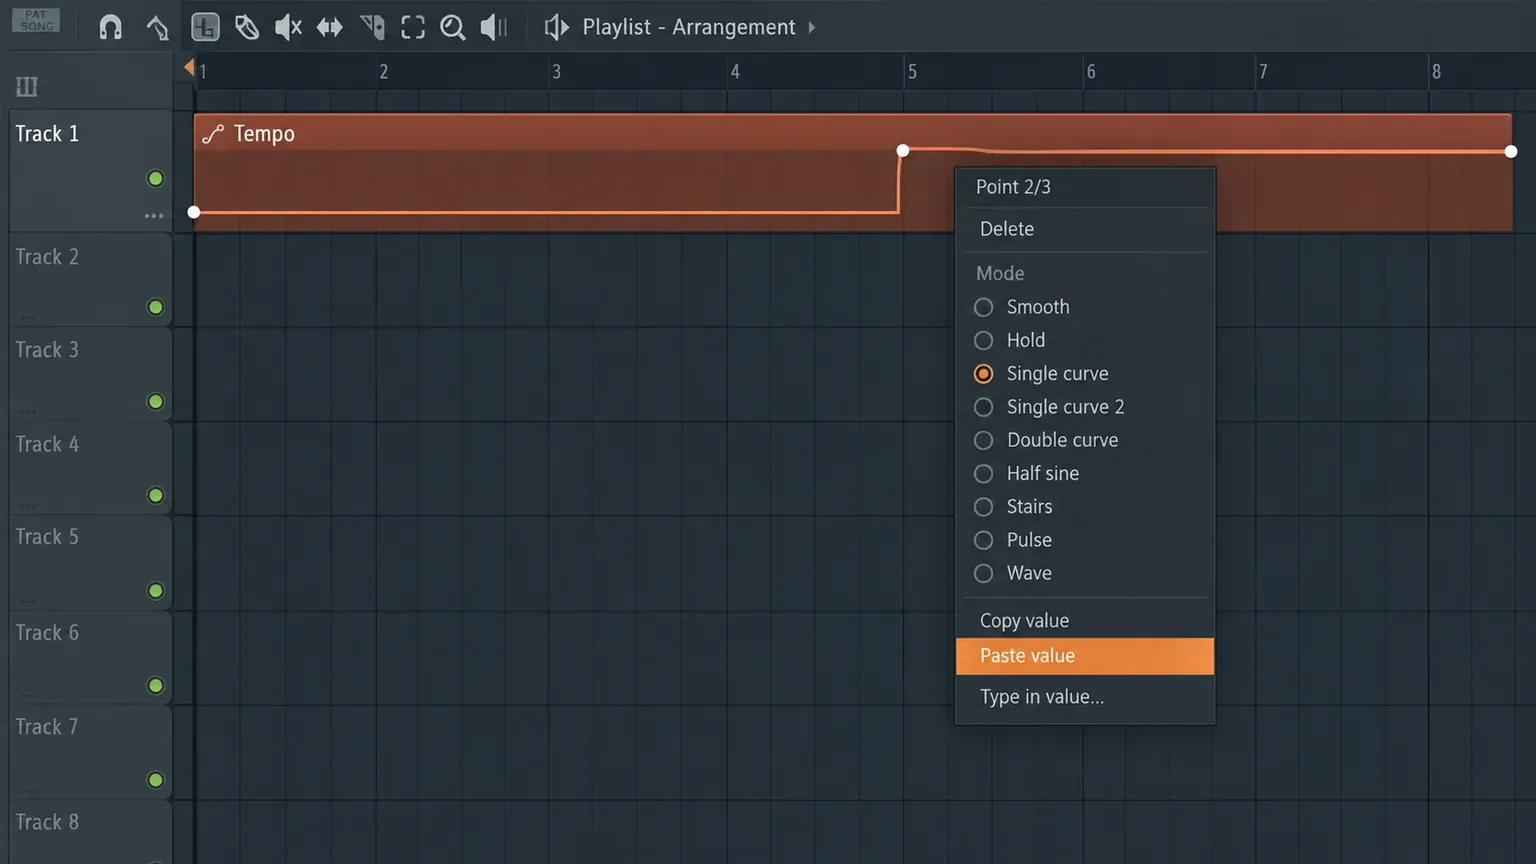
Forum users point to the same copy-and-paste route in an Image-Line forum thread on inserting a new tempo. Once the points are set, play through the change and watch the tempo display. It follows the clip during playback, so it tells you which BPM is actually being produced at each point.
Step 5: Choose a beat switch or a gradual ramp
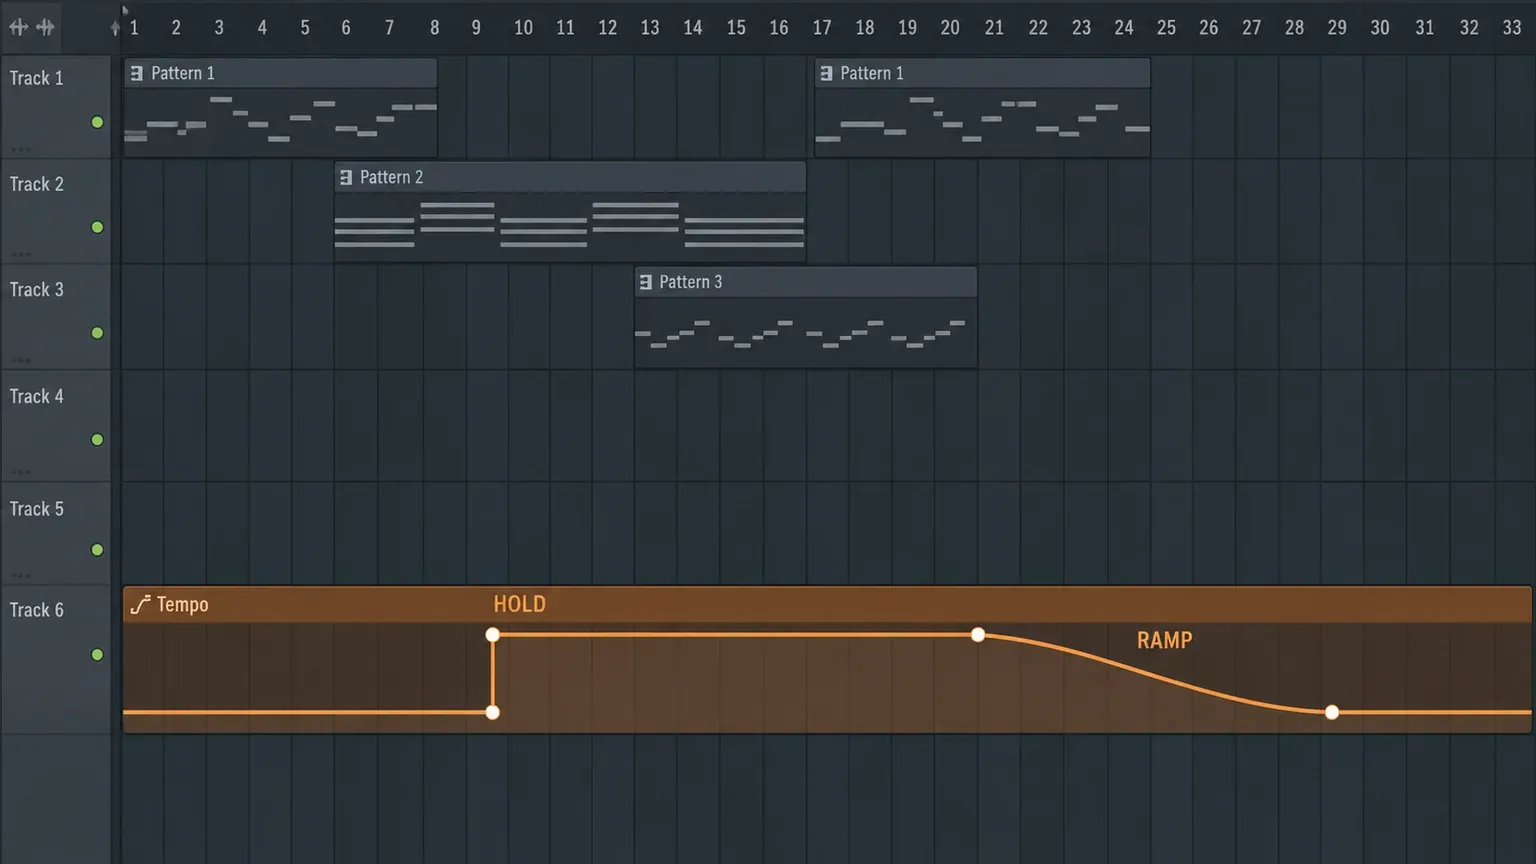
The segment between two points decides what the listener hears. With the default Single curve, FL Studio moves from one value to the next across the whole segment, which gives you an accelerando or a slow-down. Drag the segment's tension handle up or down to bend the ramp, so the change happens mostly early or mostly late. Right-click the handle to reset its tension.
For a beat switch, where the song jumps from one tempo to another on a downbeat, right-click the right-most point of that segment and choose Hold. The curve type menu describes Hold as single steps between points, useful for jumps. The tempo stays at the left point's value until the playhead reaches the right point, then switches.
| What you want | Points | Segment type |
|---|---|---|
| Beat switch from 140 to 100 at bar 33 | Bar 1 at 140, bar 33 at 100 | Hold on the segment ending at bar 33 |
| Four-bar slow-down into the outro | Start and end of the four bars, both exact | Single curve, tension adjusted to taste |
| Speed-up that eases in late | Start and end of the ramp | Single curve with the tension bent toward the end |
| Short half-time section, then back | Change point and return point | Hold on both changes |
One distinction worth keeping in mind: a half-time feel does not have to be a tempo change at all. Writing the drums with the snare on beat 3 keeps the project BPM steady and avoids the audio work below. Use real tempo automation when the whole track, including audio, should actually play slower.
Keep audio clips in time after the change
Notes in Patterns and the Piano roll sit on bars and beats, so they follow the new tempo automatically. Audio is different. Image-Line's time stretching documentation says that with the TIME setting at its default, (none), Audio Clips keep a constant pitch and duration regardless of project tempo. A loop that fit at the old tempo will now run long or short against the grid.
Open the Audio Clip's channel settings and set the time stretching Mode to Realtime > Stretch. The manual recommends Stretch for tempo automation because it keeps samples in key and in time while the tempo moves. When you select Stretch for the first time, TIME locks to the current tempo; if the clip was set up at a different tempo, right-click the TIME knob and choose Project tempo. Stretch pro works the same way and adds formant control.
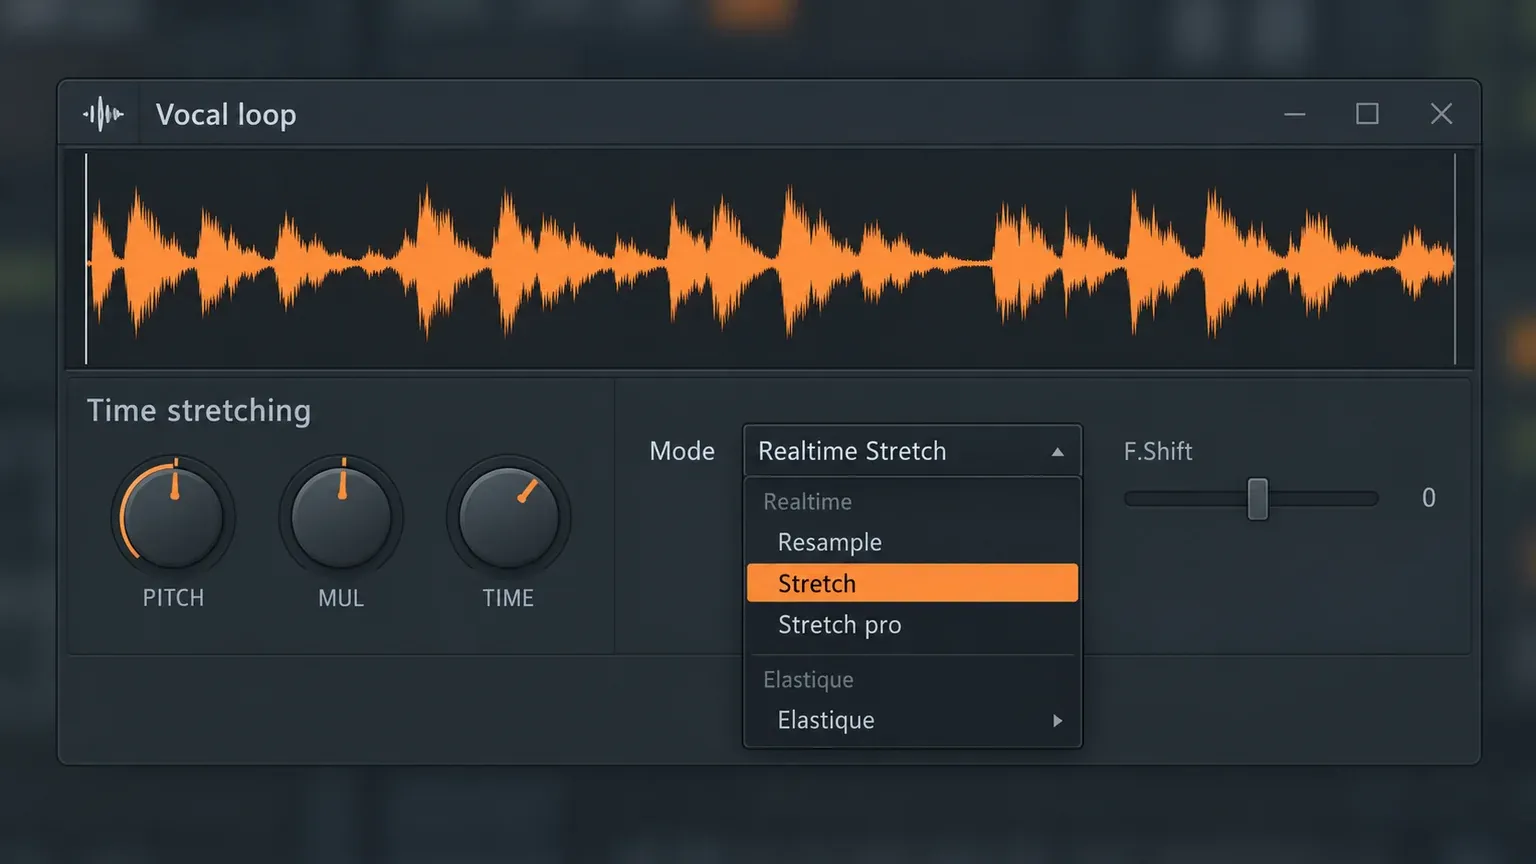
Three other choices behave differently:
- Resample works like tape. Pitch and duration change together with the tempo, which is a deliberate effect, not a fix.
- Elastique methods are offline. The manual says they give the highest quality but do not work with tempo changes, so they are the wrong choice for a clip that has to follow automation.
- (none) leaves the clip alone. That suits a one-shot or a sound effect you want to stay exactly as recorded.
Changing a dozen clips one by one gets old quickly. The Tools menu macros include Switch all audio clip channels to and Switch selected audio clip channels to, each with Realtime, Elastique, Special and Legacy options. Image-Line's sampler documentation notes that its all-audio-clips stretching macro does not affect Sampler Channels, so check any samples you trigger from the Channel Rack separately.
If a clip stretches the moment you import it, before any tempo change, the WAV file may carry its own tempo information. The Read sample tempo information setting controls whether FL Studio uses that metadata. For choosing between stretch methods in more depth, see the FL Studio time stretch guide, and for a live recording whose own timing wanders, NewTime warp markers are the better tool.
When the tempo change does not behave
The BPM jumps back when I press play
Automation Clips move the controls they are linked to, so during playback the Tempo clip overrides whatever you typed into the display. Edit the clip's points instead of the display. If you deleted the clip and the tempo still resets at the start of the song, the Tempo control was initialized when the clip was created. The initialized controls section explains that the original value is remembered after the clip is deleted and restored when the song starts. Remove it from Browser > Current project > Patterns > Initialized controls with Delete event, or set the tempo you want and right-click the display to choose Init song with this position.
Also note that deleting the clip from the Playlist leaves its channel in the project. To remove the tempo automation completely, delete the Automation Clip channel or its entry in the Picker panel.
The tempo changes in places I did not automate
Look for Event Automation. If the tempo display was moved while FL Studio was recording, the change can be saved as event data inside a Pattern. Image-Line's pitch and tempo troubleshooting page points to Browser > Current project > Patterns, where event automation shows with a knob icon and opens in the Event Editor for deletion.
The clip will not go above 180 or below 60 BPM
That is the default Min/Max range from Step 2. Widen it in the clip settings, then paste the exact values again and check them during playback.
Playback is at half speed but the display has not changed
Check the tempo display's right-click menu for Half speed. The manual describes it as a temporary state for recording difficult parts: the song plays at half the BPM while the tempo field keeps showing the original value. Turn it off and the full tempo returns.
The tempo shows decimals I did not set
The smaller digits next to the main tempo are the fine tune control, which adds thousandths of a BPM to the base tempo. Image-Line suggests whole-number tempos for new songs; fine tune is for matching the exact speed of an existing track.
The song is longer or shorter than my calculation
Any duration worked out from one BPM stops being accurate once the tempo moves. The song length calculator assumes a constant tempo, so run it per section and add the results.
Can you change tempo mid-song in FL Studio Mobile?
Not with automation, as far as Image-Line's own forum shows. The Mobile manual describes a single project Tempo setting, and when a user asked how to change tempo mid-song in FL Studio Mobile, a reply in an Image-Line forum thread from July 2024 said tempo automation is not available in FL Mobile; an earlier 2023 thread got the same answer. Mobile features change between releases, so check the current release notes before you plan a song around it. If the arrangement depends on a tempo change today, finish it in desktop FL Studio, where the Tempo clip workflow above is documented.
Once the tempo map is in place, the rest is ordinary arrangement work. The FL Studio automation guide covers the clip editing tools in more detail, and those same curves can drive filter sweeps or volume changes that make the tempo shift land harder.