FL Studio
Mastering cannot reach back into a crowded chorus and quietly turn one synth down. It gets the finished stereo mix and changes all of it at once. That limitation is actually helpful, because before you build a chain you have to decide whether a problem belongs on the Master or back in the mix.
A dependable FL Studio mastering workflow is much smaller than most preset folders suggest. Start with an unclipped mix, compare against a level-matched reference, make only broad changes that help the whole song, control the final peaks without flattening the groove, measure what you cannot judge by ear on the spot, export, and listen to the rendered file. Parametric EQ 2, Maximus or gentle compression, Fruity Limiter or Emphasis, and Wave Candy can cover all of those jobs, yet none of them is required just because it is there. The FL Studio stock plugins guide separates what is included from what each processor is really for.
Mastering is not a rescue chain for the mix
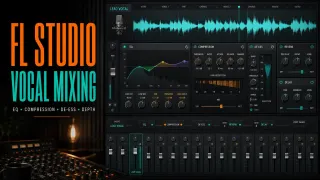
If the vocal is buried, the kick vanishes only in the chorus, or one hi-hat tears at your ear, go back to the mix. For source-specific vocal balance and processing, use the FL Studio vocal-mixing workflow instead of forcing a correction on the master bus. A master-bus EQ cut hits the hi-hat and every guitar, vocal and reverb that shares that frequency. Mastering is better at broad problems: the whole mix leans dark, the low end needs a small global correction, the stereo picture needs a last check, or runaway peaks stop you from reaching a sensible playback level.
The current Image-Line levels and mixing guidance warns that new producers who mix and master at the same time often end up confused. That does not mean the Master has to stay empty while you compose. It means you should know which processors shaped the mix and which decisions belong to final delivery.
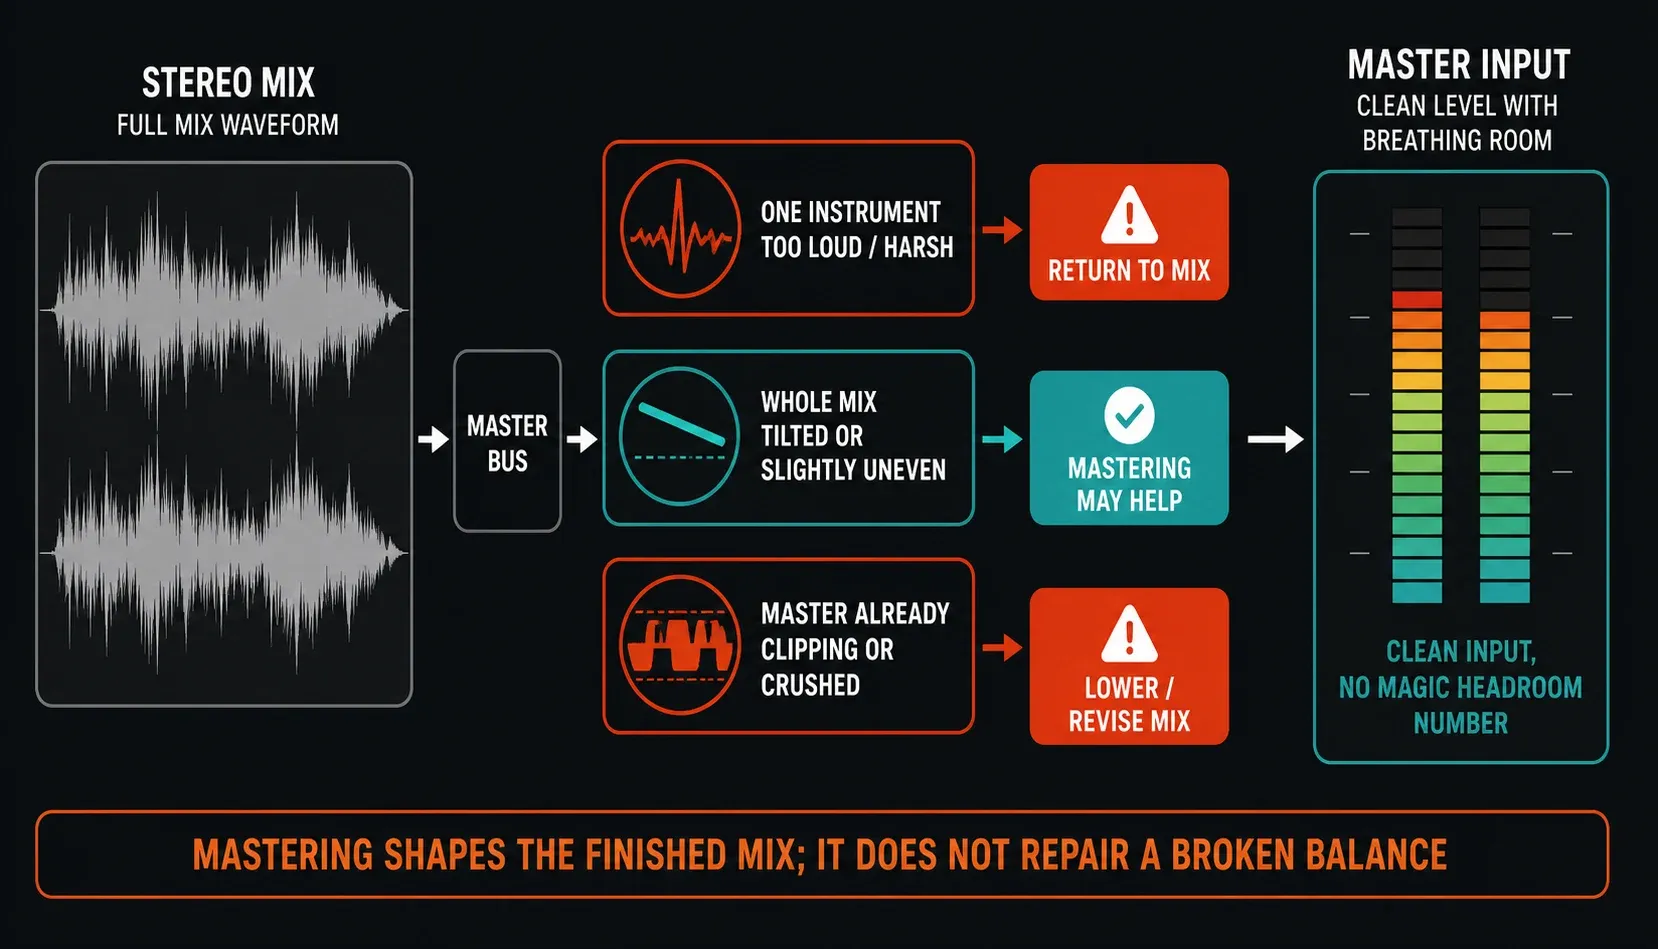
Bypass the existing Master chain before exporting a premaster. If the balance falls apart, the mix may have been built through that processing. Then either master through that deliberate chain and treat it as part of the mix, or revise the mix without it. Removing a processor just to obey a rule makes no sense.
Prepare a clean master input without chasing a magic number
The real requirement is simple: the Master output should not already be clipped or crushed, and you need enough controllable level to work with. No rule says a premaster must peak at exactly -6 dBFS. Lowering a clean floating-point mix by a few decibels does not create musical headroom that was missing; it only changes the level. Fix clipping inside instruments, buses or the final output wherever it actually happens.
- Play the loudest section and watch the Master, not only quiet verses.
- Bypass unintended limiters, clippers and normalization stages.
- Check that fades, automation and song endings behave correctly.
- Leave the Master fader at a known position and use a deliberate gain stage when input needs adjustment.
- Save a dated premaster or duplicate the project before final processing.
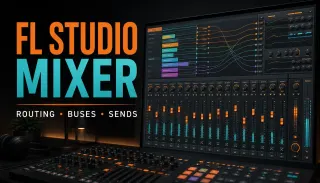
The FL Studio Mixer guide covers routing, buses and the difference between internal insert peaks and clipping at the Master or a hardware output. Fix doubled paths and stray sends there before you blame a mastering plugin.
The stock-plugin workflow from check to export
Build the chain from decisions, not from a screenshot. A sensible order is input control, optional tonal EQ, optional dynamics, final limiting, then metering. Analysis tools can sit at the end, since their job is to watch the delivered signal without changing it.
| Stage | Question | Possible stock tool |
|---|---|---|
| Input | Does the chain receive a controllable clean level? | Fruity Balance |
| Tone | Would one broad change help the entire song? | Fruity Parametric EQ 2 |
| Dynamics | Do sections or bands move too unevenly? | Maximus or gentle compression |
| Final level | Can peaks be controlled without shrinking the record? | Fruity Limiter or Emphasis |
| Measurement | What are peak, averaged loudness and stereo behavior doing? | Wave Candy; Emphasis where available |
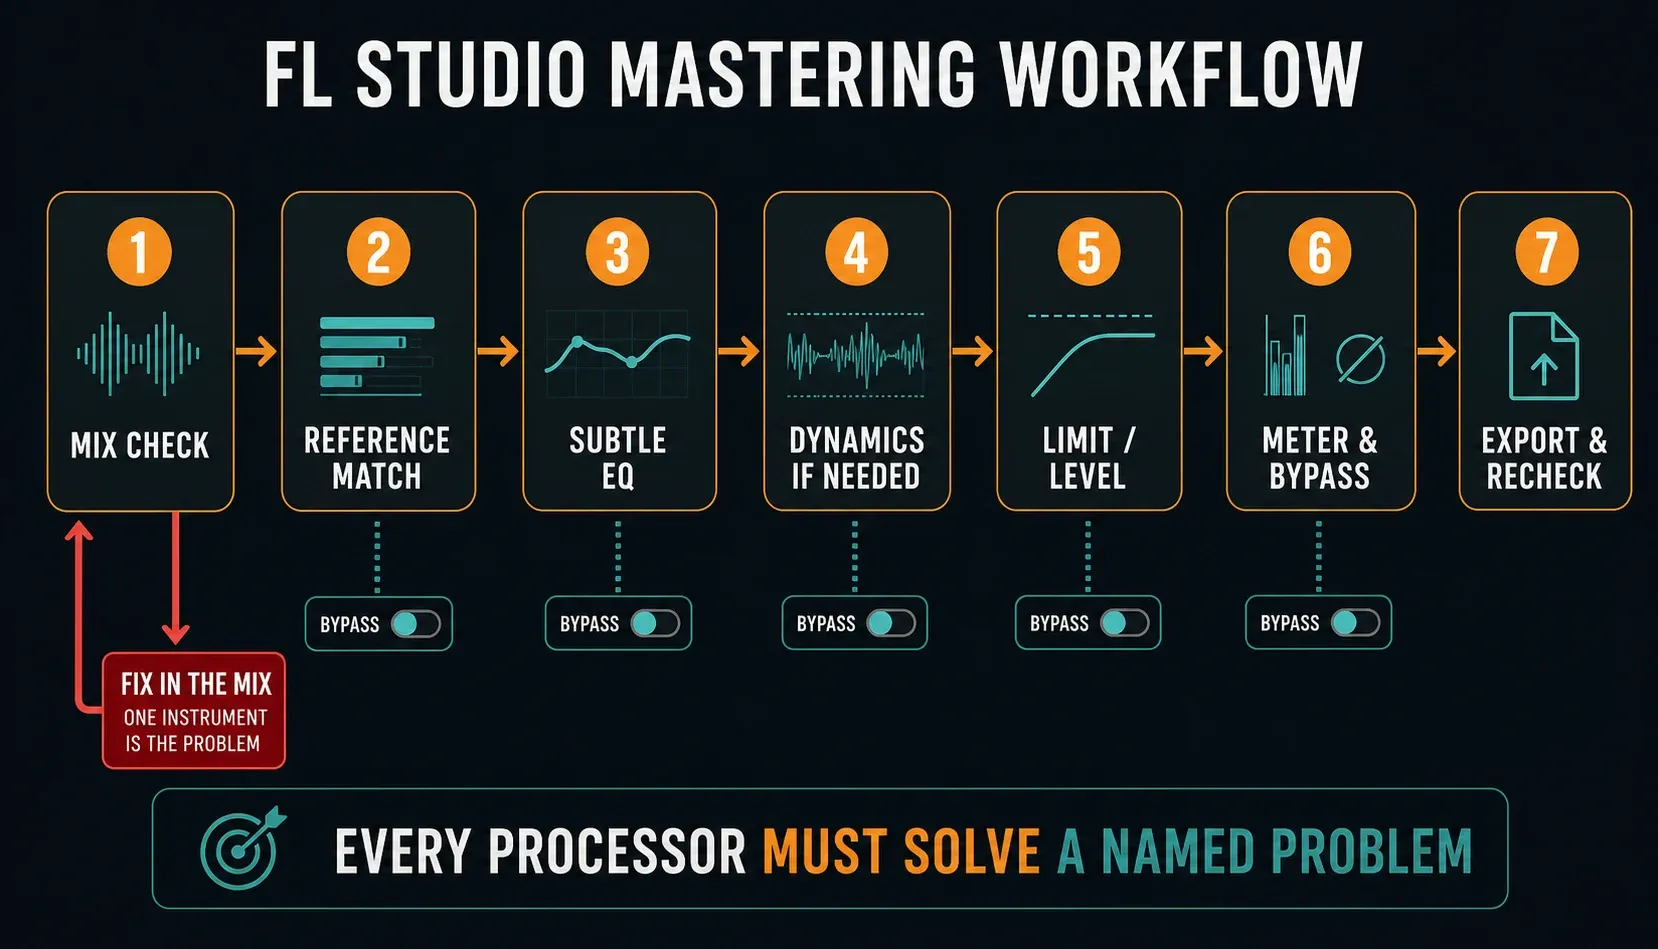
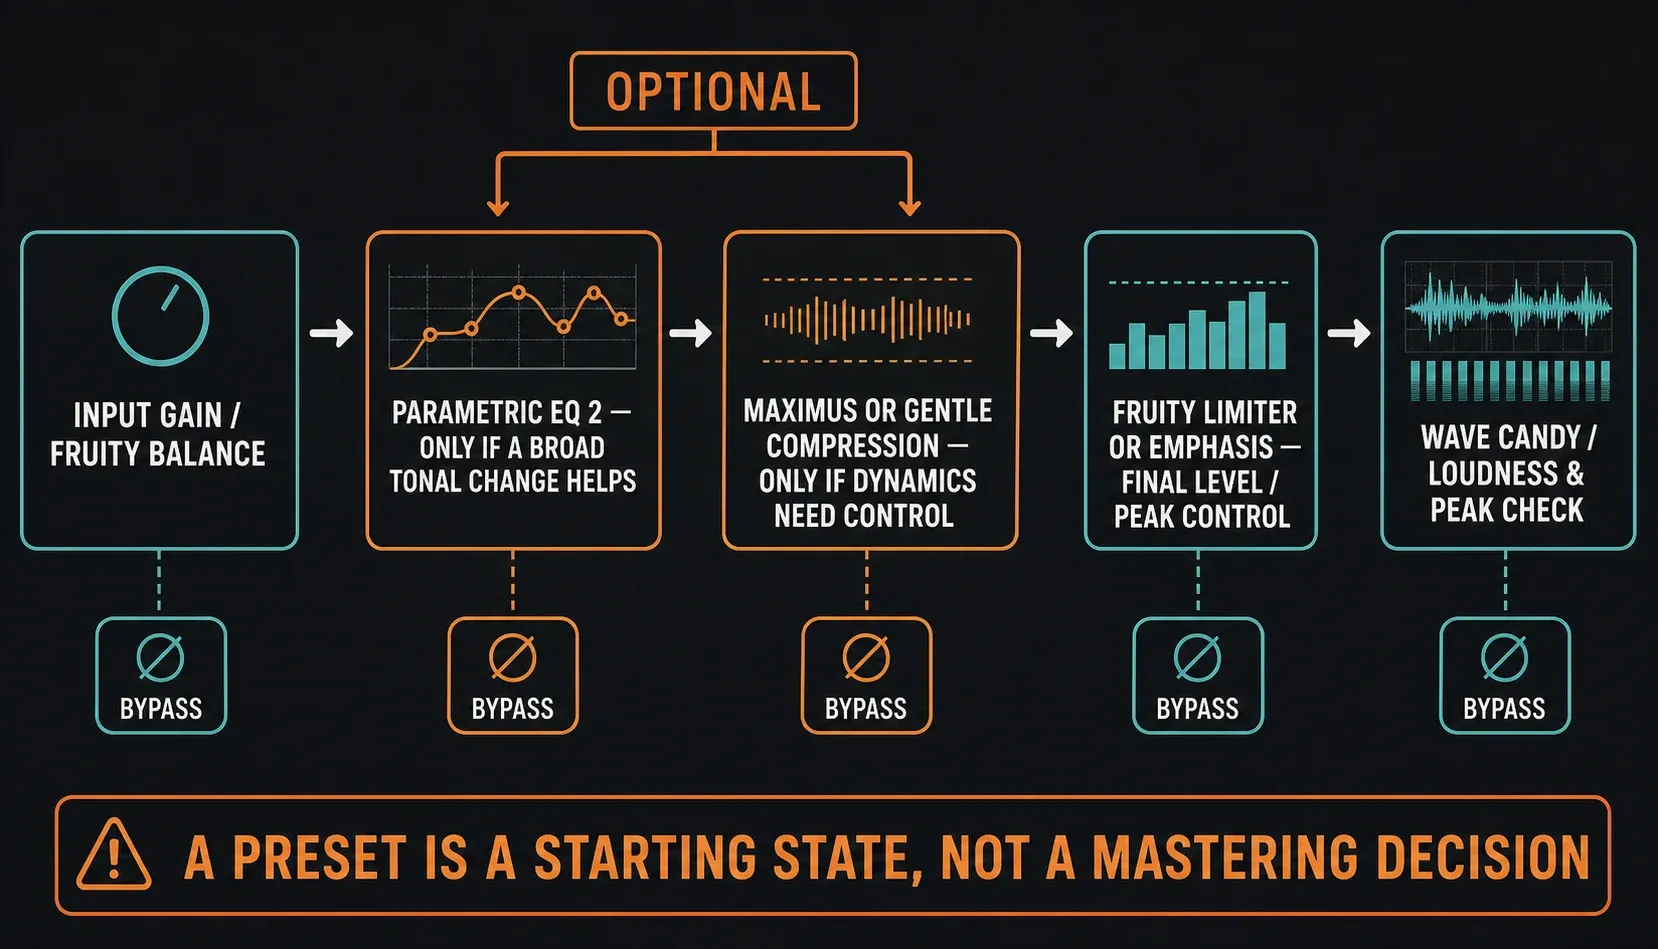
After each stage, match the level of the bypassed version as closely as you can. Louder always feels clearer and wider for a moment, even when a processor only added gain. If you cannot name what got better once the levels match, remove the stage. An empty slot is not unfinished work.
Use a reference without copying its meter reading
Choose a reference track with a related arrangement, similar low-end weight and a kindred aesthetic. Route it so it skips your mastering chain, then turn it down until it sounds about as loud as your work. Compare chorus to chorus or drop to drop. Setting a loud master against a quiet premaster gives you a loudness trick, and tells you nothing about tone.
Listen for relationships rather than exact curves: the vocal against the track, kick length, bass weight, brightness, front-to-back depth and how the transients survive at the intended level. A reference can show you that your whole mix is too dark, but it cannot tell Parametric EQ 2 which band to move without you listening to your own song.
Make a few short comparisons, then stop. Flipping back and forth constantly turns a reference into a copying exercise and wears out your judgment. Drop the monitoring level now and then, because imbalances are often easier to hear quietly.
Make broad EQ changes and know when to return to the mix
Fruity Parametric EQ 2 is a seven-band EQ with standard IIR and linear-phase modes, and Image-Line explicitly lists mastering among its uses. That does not license a dramatic smile curve on every song.
Start by pushing one broad band further than you think you need, find which region controls the problem, then pull the move back until it helps without rewriting the mix. A narrow resonance tied to one instrument usually belongs on that track. A gentle, wide correction that improves both verses and choruses may belong on the Master.
| You hear | Try first | Stop and return to mix when |
|---|---|---|
| Whole song feels cloudy | Small broad comparison around the low mids | Only one instrument causes the cloud |
| Whole song feels dull | Gentle high shelf with level-matched bypass | Added air makes cymbals or sibilance painful |
| Low end is globally heavy | Broad low shelf or mix revision | Kick and bass need different treatment |
| One piercing note repeats | Find the source track | The master cut hollows everything else |
Linear phase is not automatically “more mastering.” It changes the phase behavior in exchange for different artifacts and added latency, so choose it only when that tradeoff fixes something you actually hear.
Use Maximus or compression only when dynamics need control
Maximus combines multiband compression, limiting, expansion and maximization. That makes it capable, and still optional. Start in the full-band Master view or with no compression at all, then ask whether a particular range or section really behaves too unevenly.
Set the threshold so only the moments you mean to catch move the gain-reduction display. Tune the release so the processor recovers with the groove, rather than holding the mix down or pumping between kicks. Watch low-end stability and listen to the snare and kick attacks. If the track gets smaller while the meter gets steadier, the cure is costing too much.
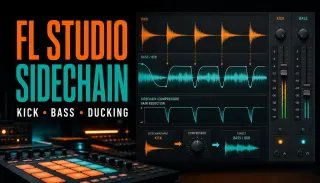
Multiband processing can shift the balance whenever one band crosses its threshold. Use it when bands really need different dynamic behavior; “mastering chains have multiband” is not a reason. For bass ducking triggered by the kick, the dedicated FL Studio sidechain guide covers that detector relationship, but that is not a default move on the Master bus.
Limit for final level without sanding off the record
A limiter lets you raise the average level while stopping the highest peaks at its ceiling. You pay for it in transient shape, low-end movement and constant gain reduction. Raise the input slowly through the loudest section. When the kick loses its front edge, the snare slips backward, the bass distorts or the whole chorus stops breathing, back off.
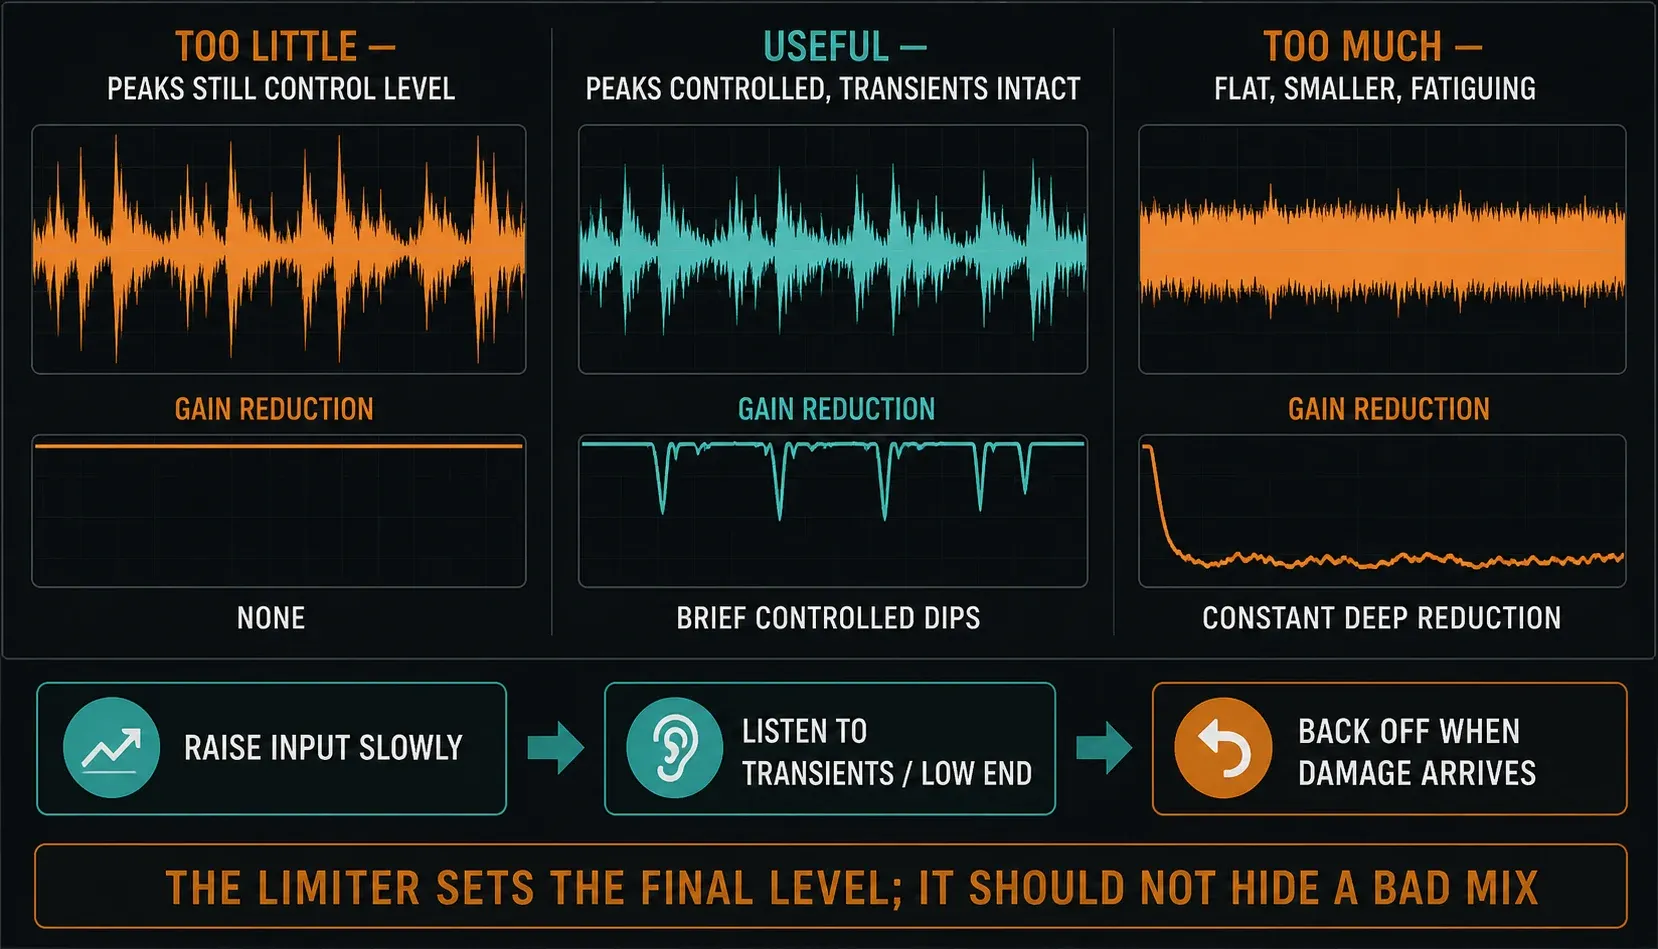
Fruity Limiter can handle sample-peak limiting. Emphasis, if your edition includes it, adds a dedicated mastering design with LUFS displays and a true-peak limiting stage. The FL Studio editions comparison covers the buying decision, and this workflow should still make sense with the tools you already have.
One gain-reduction number is no safety certificate. A brief, deep reduction on a single rogue peak can sound cleaner than constant shallow reduction across a whole chorus. Listen to how it recovers and compare at matched playback level.
Read peak, loudness and true peak as different measurements
Wave Candy offers Peak, RMS and ITU-R BS.1770-style averaged metering, plus spectrum, oscilloscope and vectorscope views. Peak catches instantaneous sample levels, averaged loudness describes energy over time, and true peak estimates the reconstructed signal between samples. Wave Candy does not limit true peaks. For the difference between sample peak and true peak, see what true peak actually measures.
| Reading | Useful for | It cannot tell you |
|---|---|---|
| Sample peak | Instant peaks and final-output clipping | How loud the whole song feels |
| Averaged loudness | Comparing energy across sections or songs | Whether transients and tone still sound good |
| True peak | Estimating peaks between stored samples | The right artistic loudness for every release |
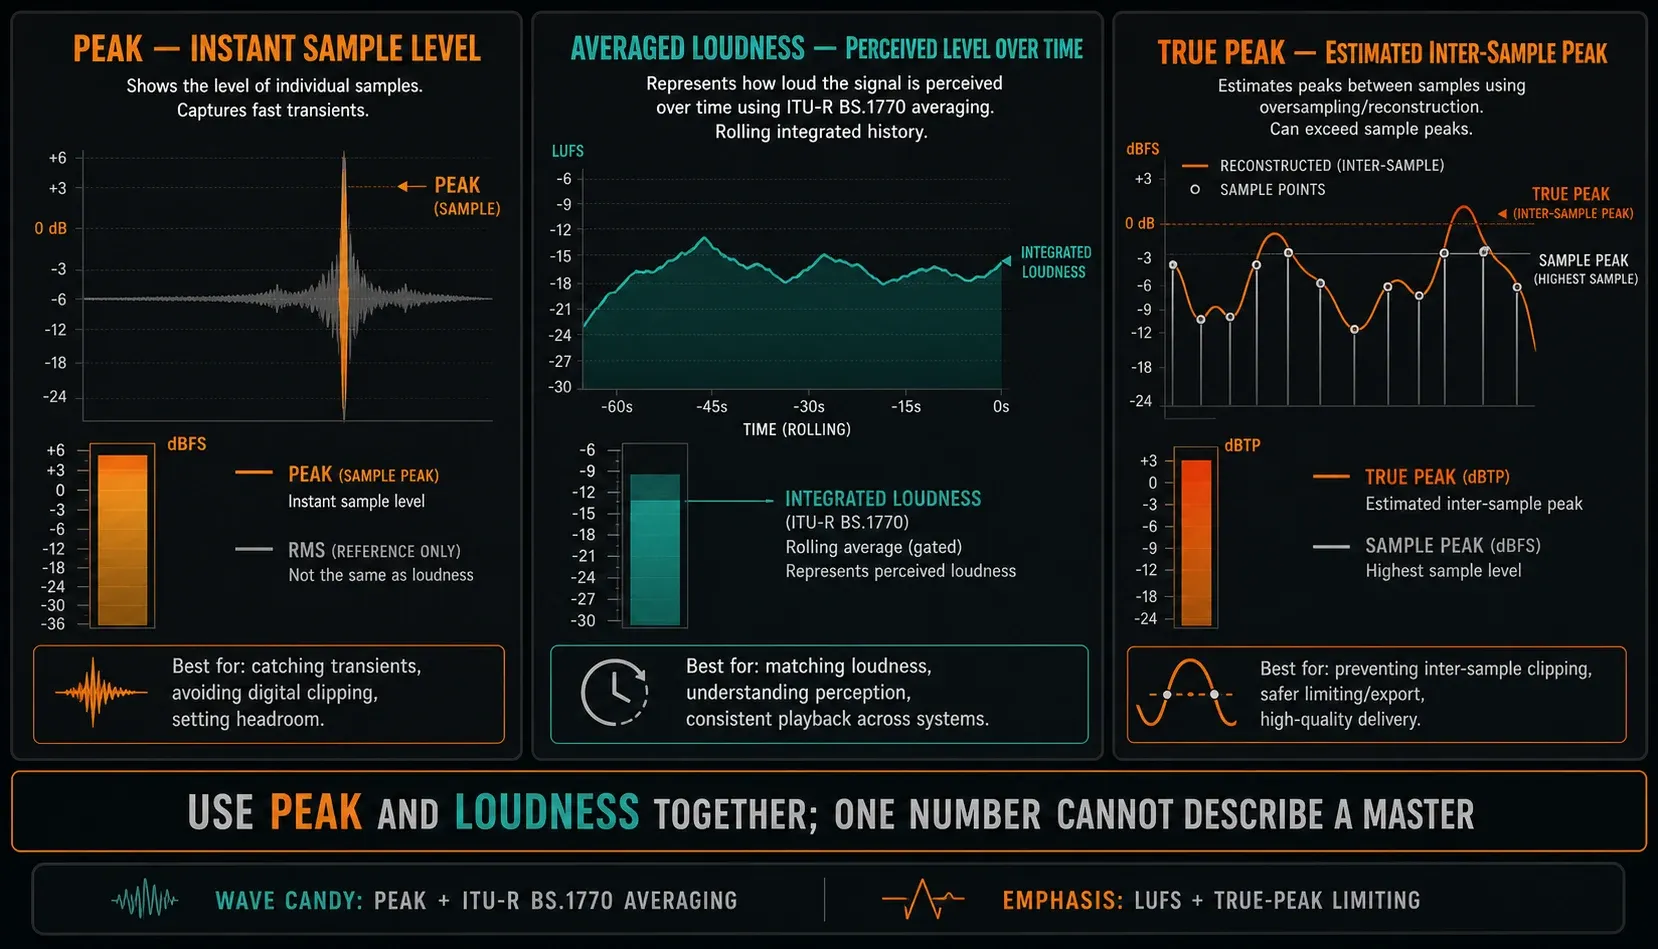
Spotify currently describes Normal playback at -14 dB integrated LUFS and publishes true-peak guidance, but it also offers other listener modes and applies normalization during playback. A loud master usually gets turned down, and a quieter one may be lifted only as far as its headroom allows. That describes how delivery behaves; it does not order every genre to be mastered to exactly -14 LUFS.
When Spotify is a delivery target, follow the current Spotify loudness-normalization guidance, then check your other destinations separately. Pick a loudness because the song survives it, not because a screenshot promised a green number.
Mastering presets and plugin lists are starting points
If you came here looking for “FL Studio mastering presets” or “FL Studio mastering plugins,” here is the direct answer. A preset stores controls and sometimes a chain order. It knows nothing about your balance, reference, transient shape, translation problems or delivery goal. Load one if it speeds up setup, then bypass every active stage and delete whatever cannot justify itself.
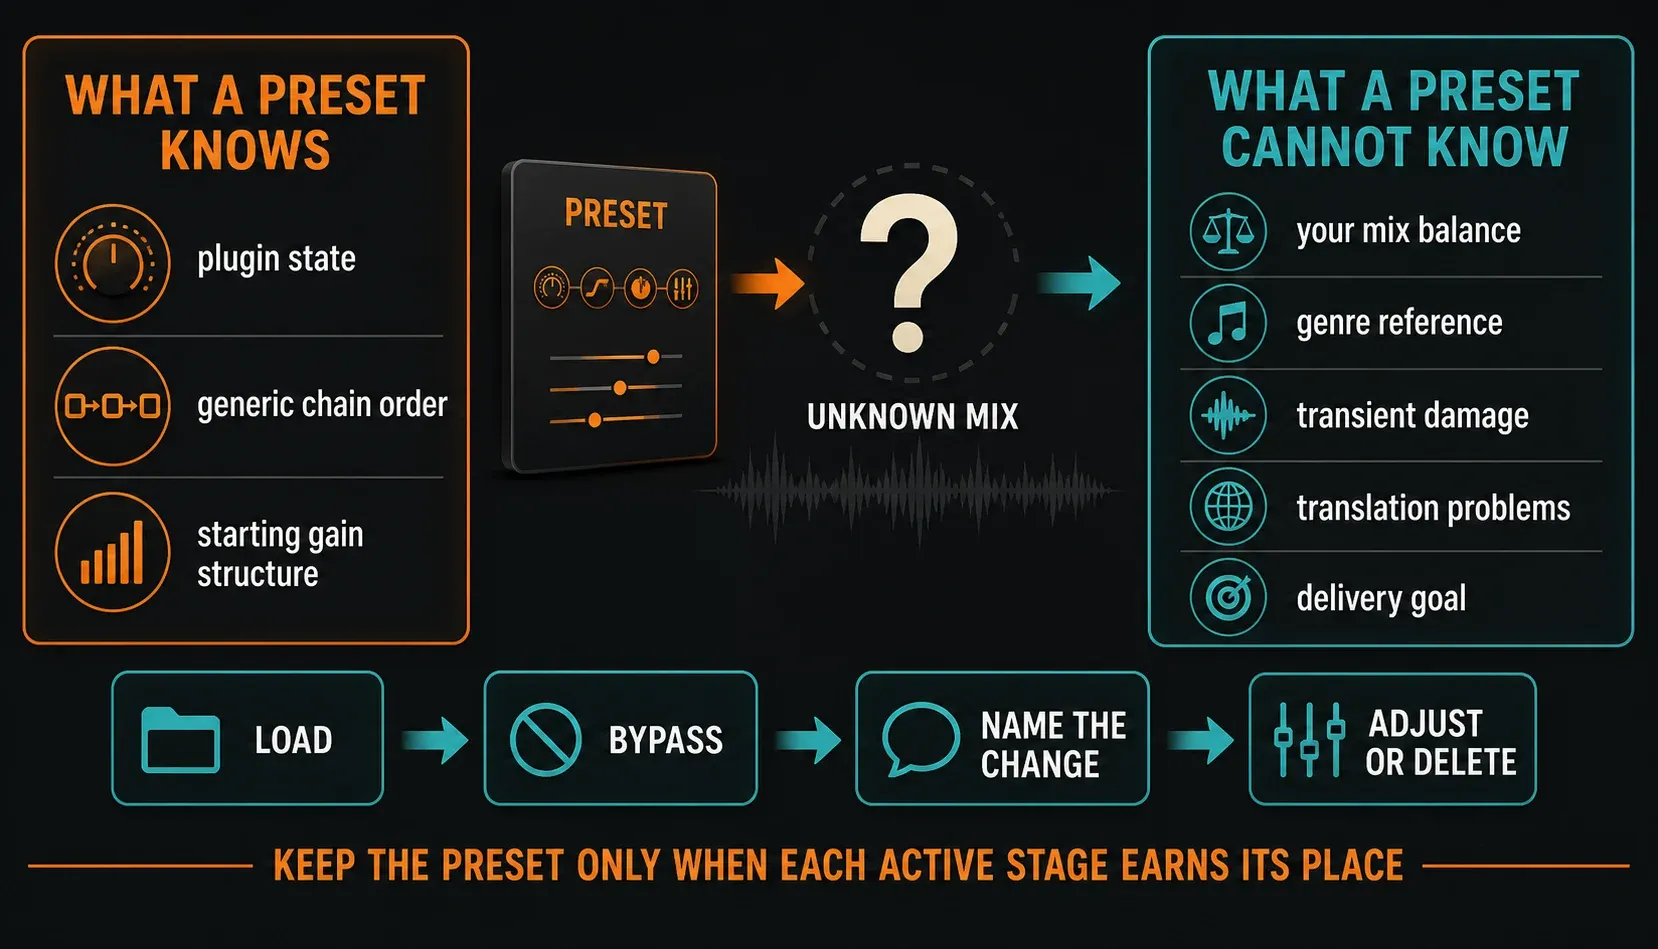
A minimal chain can be just a gain stage, a limiter and a meter. Another mix may benefit from a broad EQ move before gentle dynamics. A longer chain is not a more advanced one. After a successful session, save your own preset as routing and metering scaffolding, without assuming the next song needs the same processing.
Export the master, then test the file rather than the project
Render a lossless stereo WAV that matches the delivery request. The current FL Studio export documentation names 24- or 32-bit WAV for production and archive use, and 32-bit float for a file that will be processed further. Use the sample rate and bit depth the destination asks for, and dither only at the final 16-bit conversion, never on every intermediate export. Reimport the result into a blank project or an audio editor with no mastering chain. Check the first sample, the final decay, fades, unwanted silence, channel balance and whether the waveform or playback clips. Make lossy listening copies separately; they are not your archive master.
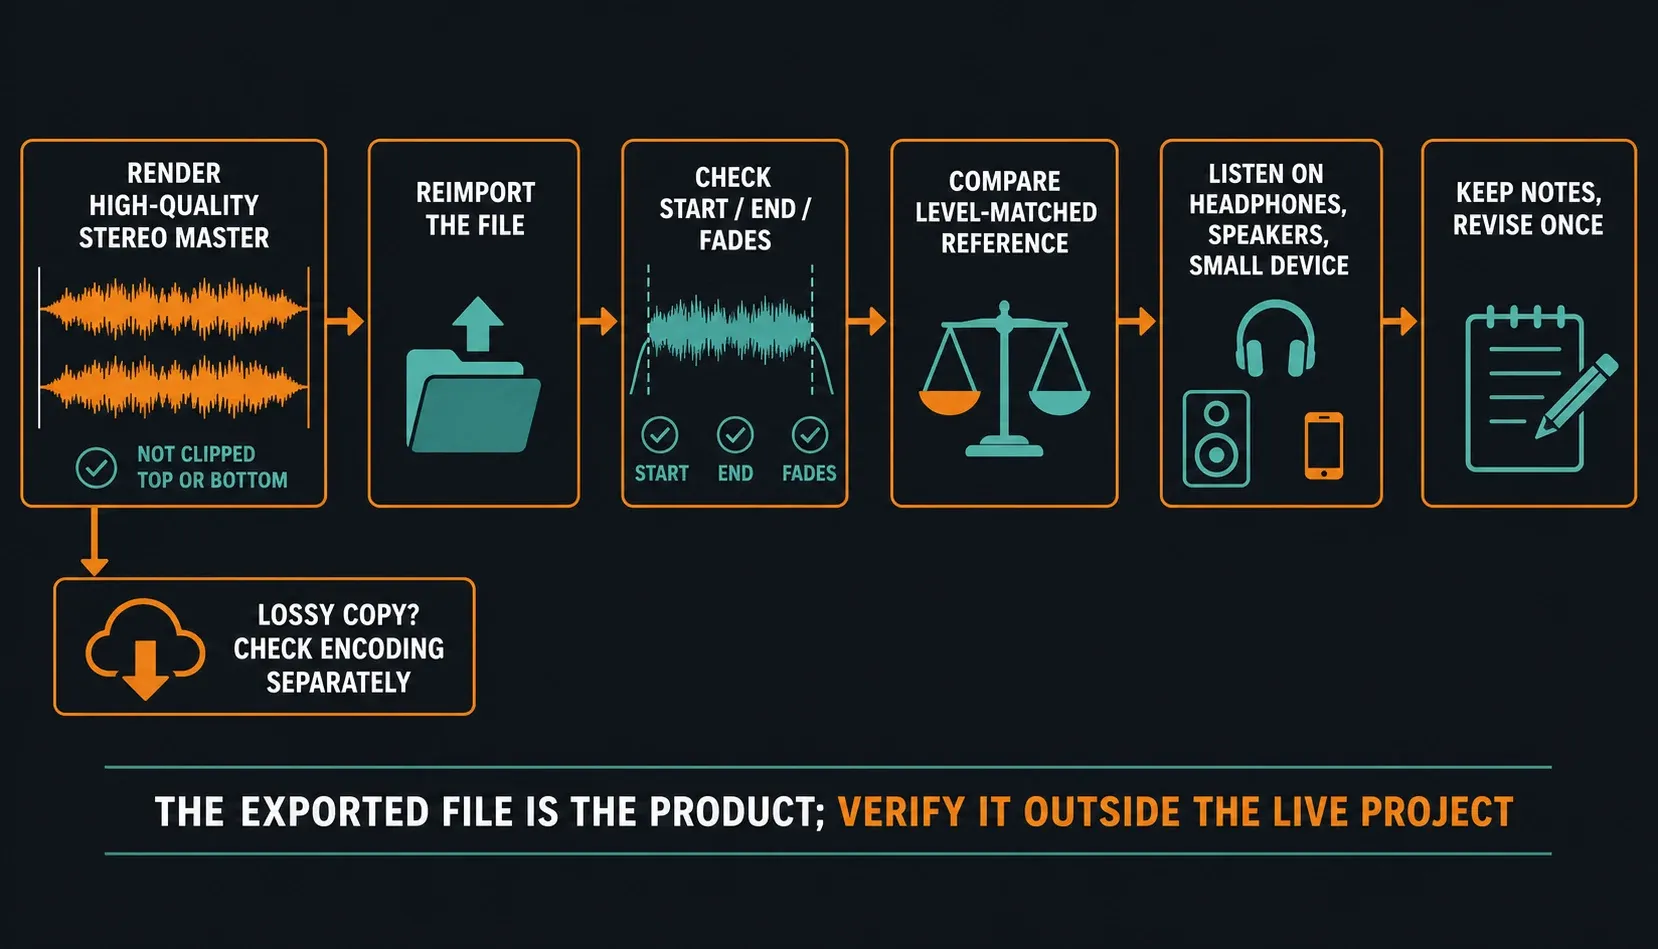
Listen once on your main system, then on headphones, a small speaker and an ordinary phone or laptop. Write down concrete notes like “vocal disappears when quiet” or “bass note blooms in verse two” instead of “not professional.” Make one revision pass, export again and keep your version names. The FL Studio mixing guides keep the upstream fixes close by when the exported file exposes a balance problem.
Frequently asked questions
What is a good FL Studio mastering chain?
A useful starting order is input gain, optional broad EQ, optional dynamics, final limiting and metering. Keep a processor only when it fixes a problem you can name and still earns its place in a level-matched bypass test.
Do I need Maximus to master in FL Studio?
No. Maximus is a capable multiband dynamics and maximizer tool, but a clean mix may need only final level control and measurement. Use Maximus when its dynamics behavior solves a problem you can hear.
Should my premaster peak at -6 dB?
Not as a universal rule. Deliver a clean, unclipped mix with controllable level and no accidental final-output clipping. A fixed -6 dB peak does not repair distortion or create better balance.
Should I master to -14 LUFS for Spotify?
Spotify describes -14 LUFS for its normal playback normalization, but that is not a universal artistic target. Choose a level that suits the music, preserve quality, and follow current platform peak guidance for delivery.
Can Wave Candy measure mastering loudness?
Wave Candy provides peak, RMS and ITU-R BS.1770-style averaged metering that helps compare perceived level over time. Do not confuse its sample-peak display with dedicated true-peak limiting.
Are FL Studio mastering presets worth using?
They can save setup time, but they cannot diagnose your mix. Load a preset as a starting point, bypass each stage, and adjust or remove every processor that does not make this particular song better.
Is it better to master in a separate FL Studio project?
A separate project can simplify routing, reduce accidental automation influence and make reimporting references easier. It is optional; a carefully managed mix project can also produce a valid master.