FL Studio
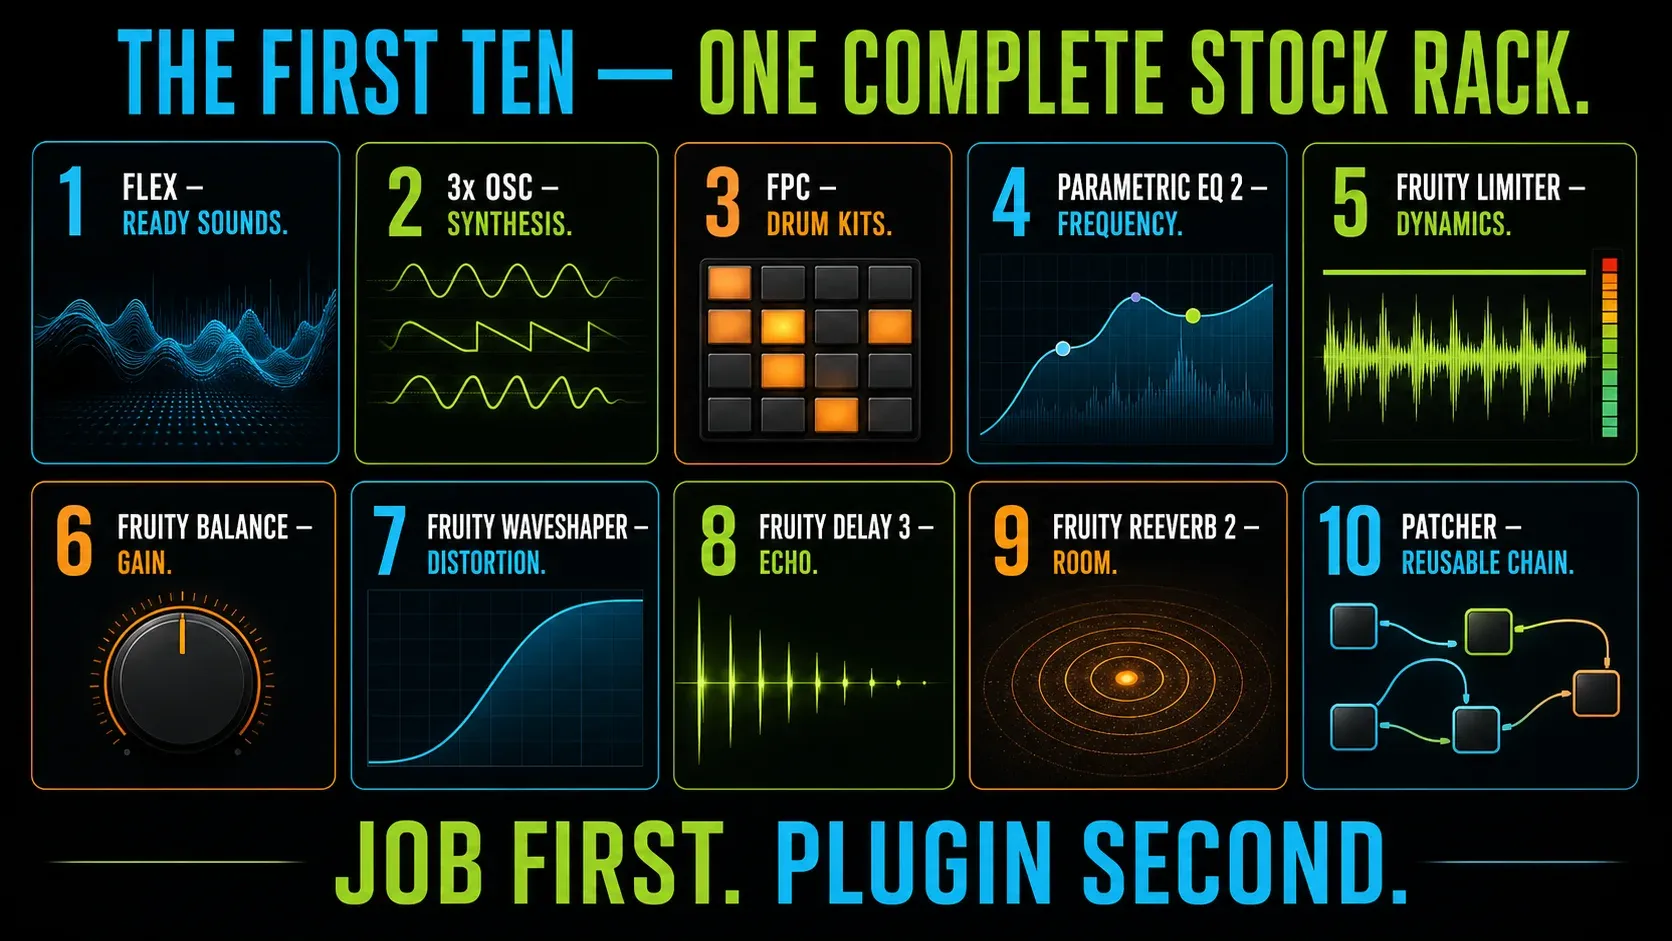
If you want to learn FL Studio’s stock plugins without disappearing into its installed list, start with ten: FLEX, 3x Osc, FPC, Fruity Parametric EQ 2, Fruity Limiter, Fruity Balance, Fruity WaveShaper, Fruity Delay 3, Fruity Reeverb 2 and Patcher. They cover instruments, drums, EQ, dynamics, automation, distortion, space and reusable routing in every current edition.
The other eight earn their place when a song asks for deeper synthesis, sample editing, slicing, multiband control, live time effects, pitch correction or transient/sustain separation. Find out what your license already includes before you buy anything. Use the FL Studio editions comparison when a missing workflow justifies an upgrade; a pretty plugin thumbnail on its own doesn’t.
The first ten stock plugins to learn
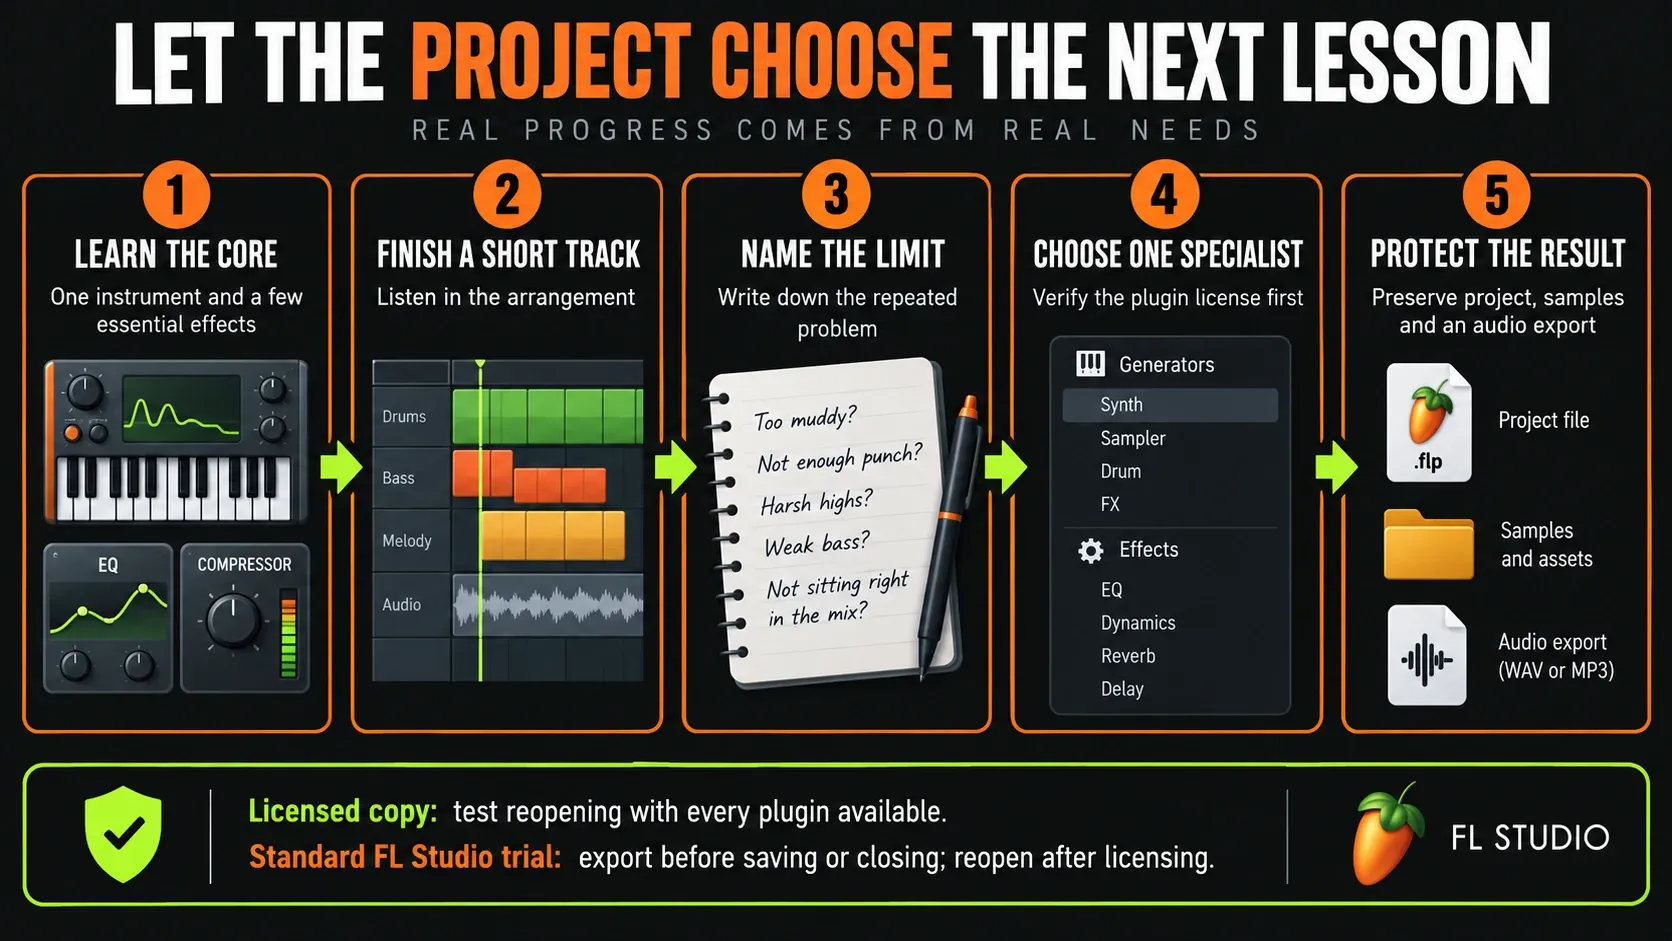
Start with one instrument and one effect for the problem you can actually hear. The ten below make a small learning toolkit, not a required chain, so don’t drop all ten into every song.
- Choose sounds: FLEX.
- Understand synthesis: 3x Osc.
- Build drum kits: FPC.
- Shape frequency: Fruity Parametric EQ 2.
- Control dynamics and sidechain: Fruity Limiter.
- Automate gain cleanly: Fruity Balance.
- Add deliberate saturation or distortion: Fruity WaveShaper.
- Create echoes: Fruity Delay 3.
- Create a room or tail: Fruity Reeverb 2.
- Save a complete reusable chain: Patcher.
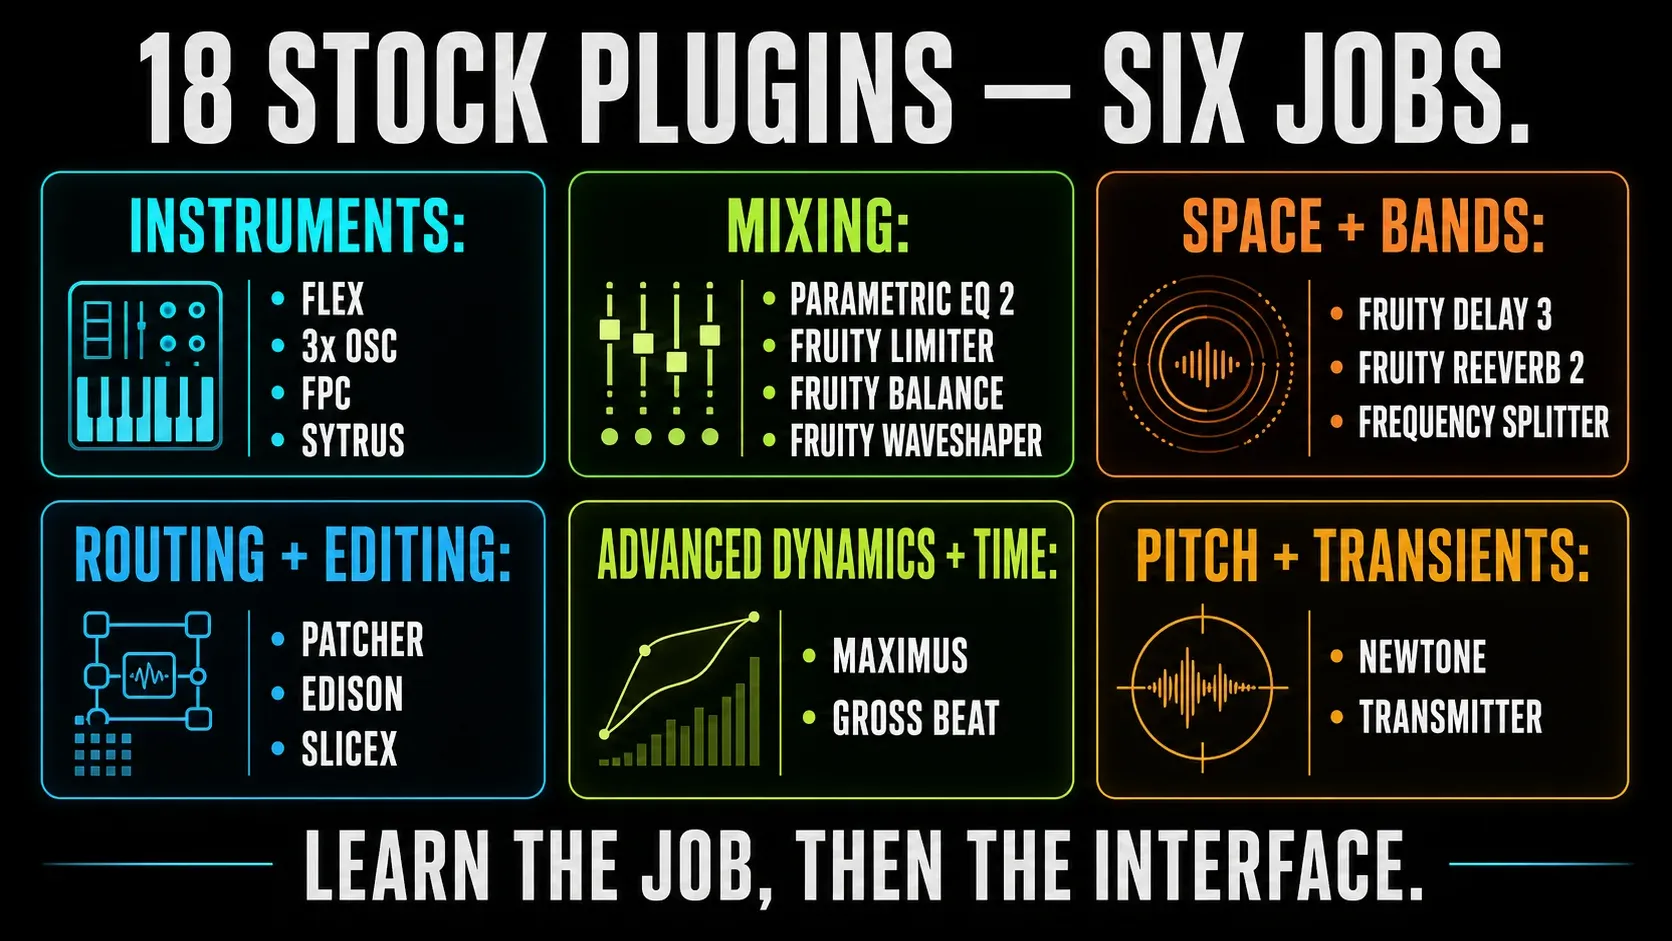
18 FL Studio stock plugins at a glance
| Plugin | Best first job | Minimum current edition | Main limitation |
|---|---|---|---|
| FLEX | Find a finished instrument sound quickly | All editions | Some packs are paid or tied to FL Cloud |
| 3x Osc | Learn oscillator, envelope and filter relationships | All editions | Envelope and filter controls live in Channel settings |
| FPC | Build a velocity-layered drum kit | All editions | Needs deliberate sample and MIDI organization |
| Sytrus | FM, subtractive and hybrid sound design | Producer Edition | Matrix and envelope depth can slow a beginner |
| Fruity Parametric EQ 2 | Correct or shape specific frequencies | All editions | The analyzer cannot decide what sounds better |
| Fruity Limiter | Compress, limit, gate or sidechain one signal | All editions | Look-ahead settings can add latency |
| Fruity Balance | Place automatable gain inside a chain | All editions | It is not a stereo-width processor |
| Fruity WaveShaper | Draw a distortion or clipping curve | All editions | Louder output can disguise worse tone |
| Fruity Delay 3 | Tempo-synced echoes and delay throws | All editions | High feedback can run away quickly |
| Fruity Reeverb 2 | Create a shared room or long tail | All editions | Too much wet low-mid energy muddies a mix |
| Frequency Splitter | Route low, mid and high bands separately | All editions | Main and send paths can accidentally double audio |
| Patcher | Build and save modular instrument/effect chains | All editions | A tidy map still needs correct gain and routing |
| Edison | Edit, clean and capture short audio | Producer Edition | RAM-based; not intended for hours of recording |
| Slicex | Detect, rearrange and play loop slices | Producer Edition | Over-slicing can remove the source groove |
| Maximus | Multiband dynamics, de-essing and final control | Producer Edition | Three bands plus the master stage can overprocess a mix |
| Gross Beat | Live time, volume, glitch and gating effects | Signature Bundle | Visible trial is not the same as owned access |
| Newtone | Offline pitch and timing repair | Signature Bundle | Natural correction still requires manual listening |
| Transmitter | Separate and process transient and sustain | All Plugins Edition | New 2026 specialist tool, not a reason to upgrade alone |
What “stock” means: why a trial plugin can fool you
Here, stock plugins means Image-Line’s native instruments and effects that ship with FL Studio. You can’t download them separately as freeware, and the included set depends on your license. FL’s native format is also different from VST, VST3, AU or CLAP plugins loaded through the Wrapper.
Installed doesn’t mean licensed. Image-Line’s edition and trial documentation explains why plugins outside your edition can still show up as trials. Check your account license and the current plugin-by-edition table before you make one essential to a song. The edition column above shows the lowest bundle that includes each tool; some plugins can also be licensed separately.
Protect trial work before saving or closing. Export the audio you need while the plugin still plays correctly. The standard FL Studio trial can save and export but cannot reopen saved FLPs until you buy a suitable license. A paid FL license does not unlock every trial plugin. If an old project opens with unlicensed-plugin placeholders, do not overwrite the original: a new save can discard its stored plugin settings.
Can’t find an included tool? Look in the Browser under Plugin database > Installed > Generators > Fruity for native instruments, or Installed > Effects > Fruity for native effects. Image-Line explains that removing a favourite does not uninstall the plugin. The Plugin Database guide covers categories and favourites; use the missing-plugin checklist if the installed entry itself has gone missing.
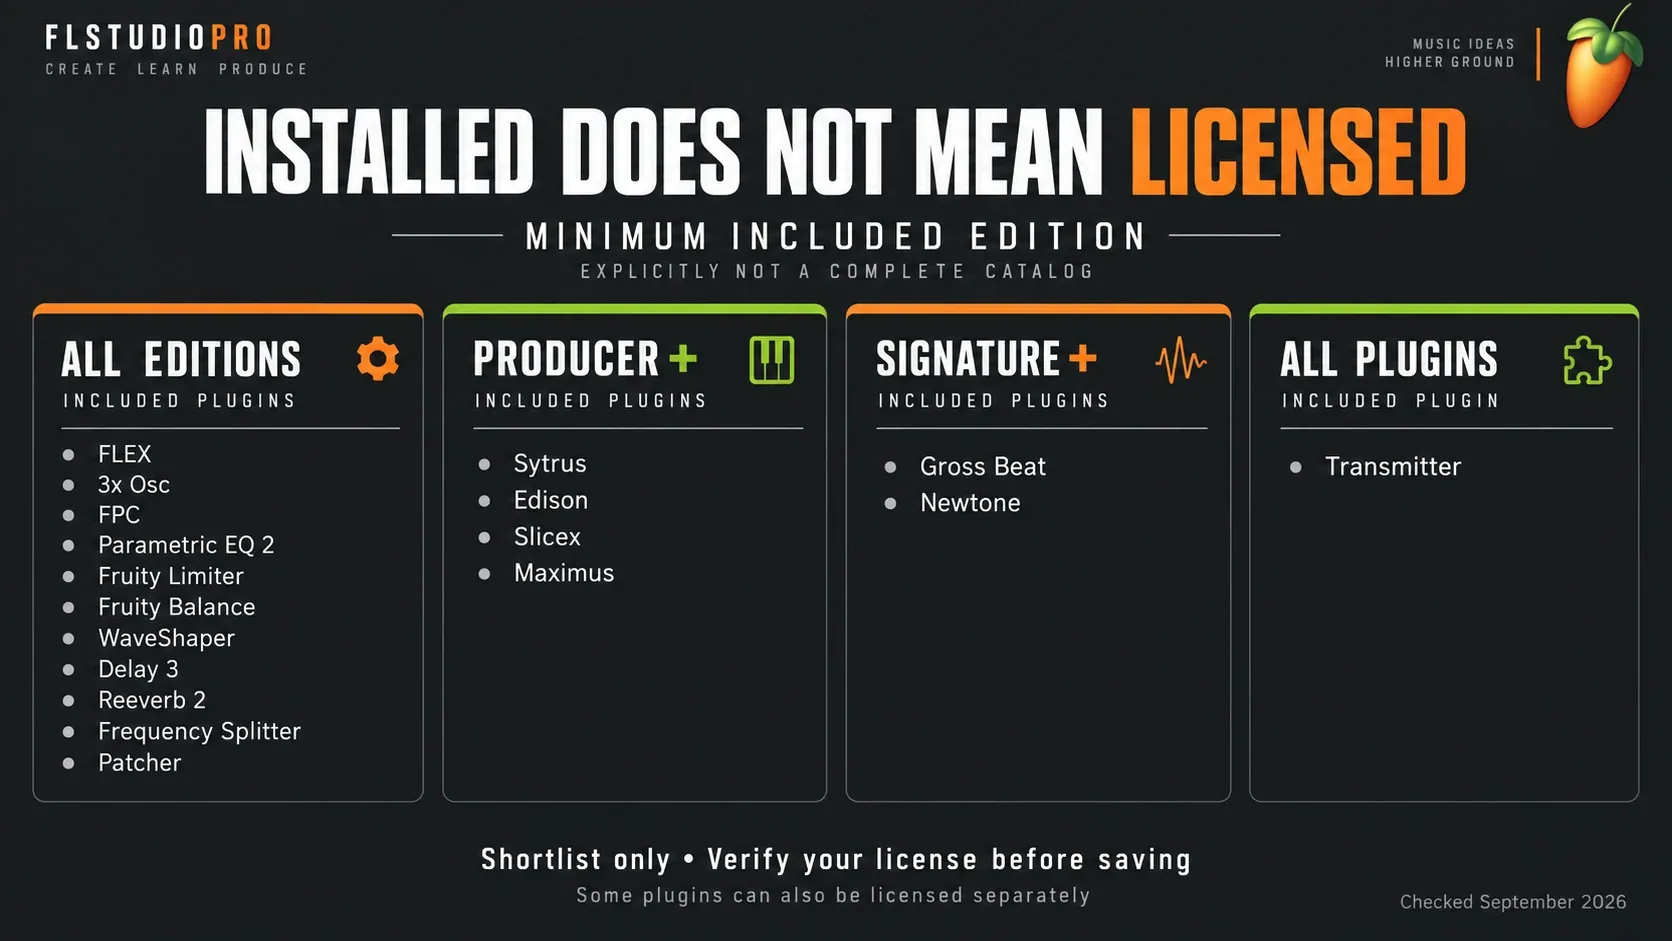
These native licenses are for FL Studio only. The current Image-Line shop states that bundled registrations don’t include VST plugin versions, so buying All Plugins won’t let you load native FLEX or Patcher straight into Ableton or another DAW. FL Cloud’s third-party plugins are a separate offering from that native bundle.
Stock instruments: one for speed, one for learning, one for drums, one for depth
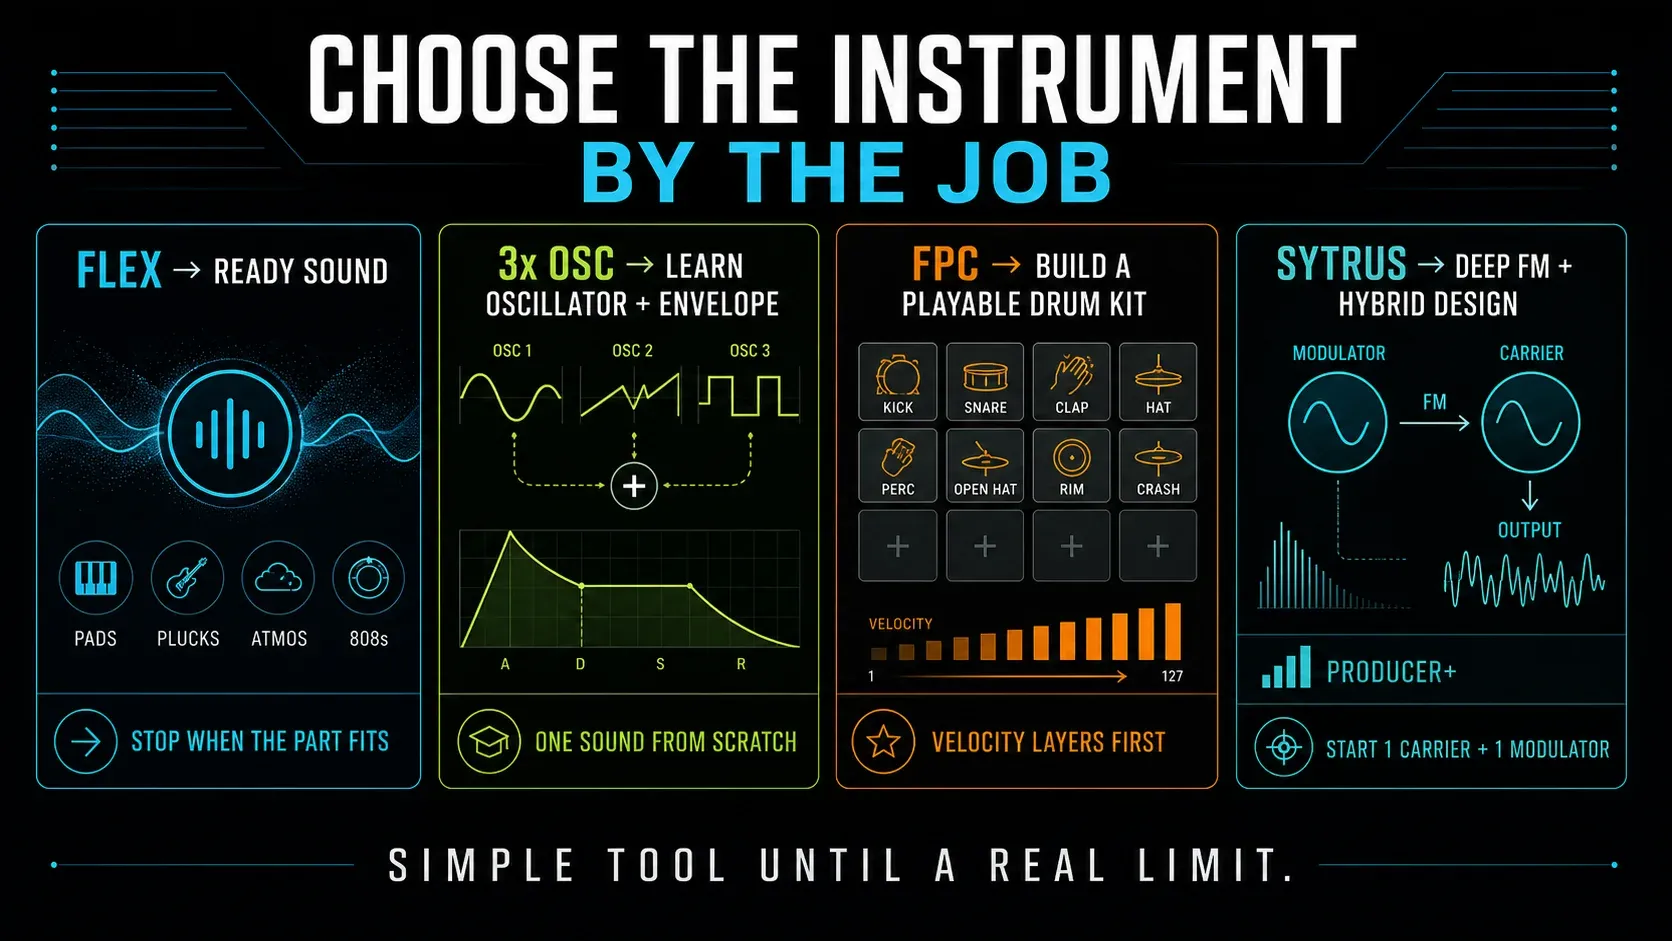
1. FLEX: finish the part before designing the patch
FLEX is a preset-based instrument backed by subtractive, wavetable, multisample, FM and AM synthesis. It’s included in every current edition. The simplified controls are the whole idea: pick a pack, audition a sound inside the arrangement and use the macros to make it fit.
FLEX doesn’t make every pack free. Some packs need a separate purchase or an FL Cloud subscription, so start with sounds your account can keep using. The FLEX packs and macros guide explains the Library, pack access and shaping a preset. Audition it in the arrangement, not just through the browser preview.
2. 3x Osc: the transferable synthesis lesson
3x Osc supplies three oscillators to FL’s Sampler channel. The oscillator panel covers waveform, tuning and mixing; the envelope and filter are in Channel settings, not hidden among those oscillator knobs. Start with one sine for a sub, then compare two detuned saws or a noise layer.
The current plugin has an HQ option, so calling its sound “old and raw” doesn’t really help. Listen for what each change does: detuning changes how the oscillators relate, while phase and the volume envelope shape the start of a note. Follow the first 3xOSC patch to find the controls and save the complete channel state.
3. FPC: drums as one instrument instead of scattered channels
FPC comes with all editions and gives you sixteen multi-layer pads in each of two banks. Drop your own samples onto a pad, stack velocity layers and send MIDI patterns to the Piano roll. That makes it a better choice than a loose sample row when the kit should behave like one playable instrument.
First move: map kick, snare, closed hat and open hat, then make velocity change something you can hear before you load a fifth sound. Use a spare pattern when you try FPC’s MIDI Pattern Manager, because selecting a pattern there replaces the current Piano Roll score. Keep the kit’s source samples with your project, since a preset name alone doesn’t back up external audio.
4. Sytrus: depth after the signal path makes sense
Sytrus is included from Producer Edition upward. It combines FM with subtractive/additive tools, envelopes, filters, waveshaping and effects. It can give you clean bells, aggressive basses, metallic percussion and evolving pads, but its operator matrix pays off best when you walk in with a specific question.
Don’t try to learn six operators at once. Start with one carrier and one modulator, change only the modulation amount, then shape each envelope. If you can’t say which operator reaches the output and which one changes it, adding another won’t help. The Sytrus Reese bass tutorial builds one specific sound once those basics are in place.
Core mixing effects: EQ, dynamics, gain and distortion
5. Fruity Parametric EQ 2: one audible move at a time
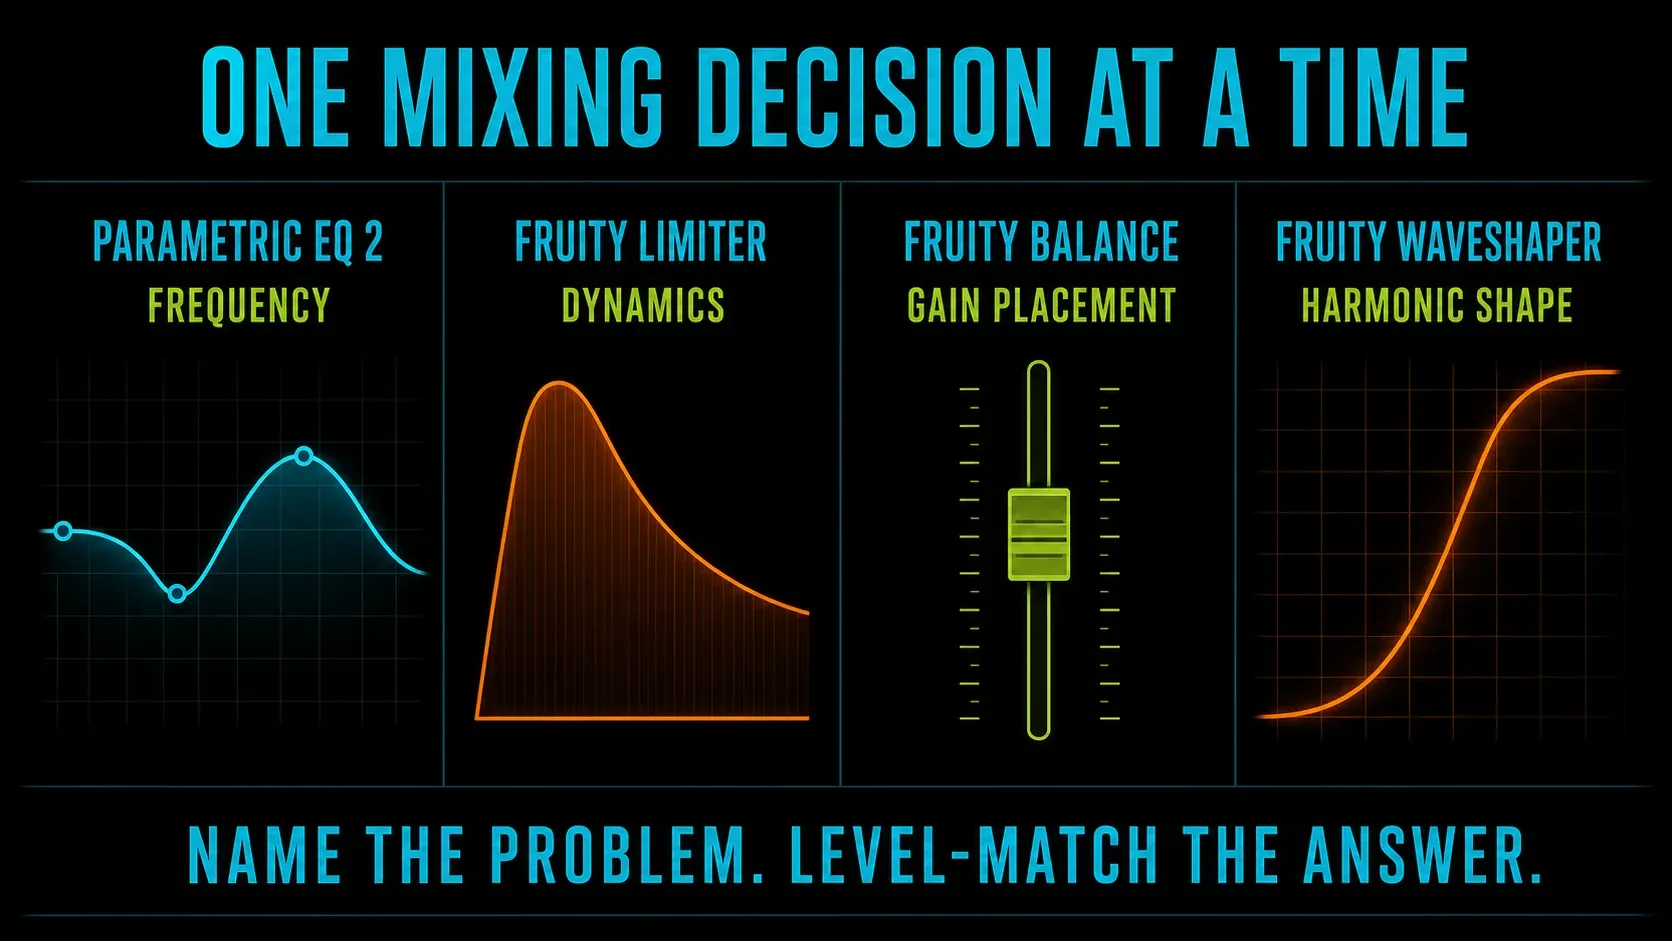
Fruity Parametric EQ 2 is a seven-band EQ included in every edition, with independently selectable filter shapes plus current IIR and linear-phase modes. Reach for it when you can name the job: remove rumble, tame a boxy resonance, make room for another part or tilt a sound brighter.
Use the moving spectrum to find a problem you already suspect, not to decide that one exists. Keep monitoring quiet while you sweep, bring the gain back to neutral, then make a small change and compare at equal loudness. Linear-phase mode adds latency and isn’t automatically the better setting. The Parametric EQ 2 controls guide explains bands, solo and LIN mode.
6. Fruity Limiter: four processors behind two tabs
Fruity Limiter combines a compressor with sidechain input, a limiter, saturation and a noise gate, and it’s included in all editions. Learn the COMP tab on one vocal or bass before you use the LIMIT tab on the master. Threshold and ratio decide how much happens; attack and release decide which part of the performance survives.
The COMP and LIMIT tabs reveal controls; selecting COMP does not bypass the limiter. To focus on compression, the manual recommends raising LIMIT CEIL to its maximum and setting LIMIT ATT to zero. LIMIT attack adds look-ahead latency, unlike compressor attack; FL’s plugin delay compensation normally handles reported latency. Use the kick-to-bass sidechain guide for the actual routing.
7. Fruity Balance: the two-knob plugin that fixes chain placement
Fruity Balance provides volume and panning controls and is included in every edition. Image-Line describes its panning as mixing the left and right signals, rather than keeping those channels independent. It is not a stereo-width control. Its volume knob is useful before a compressor, between effects, or after a reverb when an automated fade should include the tail.
Placement is the reason to use it. The Mixer fader controls level after the insert’s effects, while Fruity Balance can change gain earlier in that chain. The automation guide covers creating and editing that movement.
8. Fruity WaveShaper: draw the transfer curve, then match level
Fruity WaveShaper maps input amplitude to output amplitude with an editable spline. It is the stock saturation answer when you want to control exactly how hard peaks bend instead of selecting a vague “warm” mode.
Start from the straight line. Add one point, create a gentle bend near the top, lower post gain and compare at the same loudness. A more dramatic curve can be excellent on a drum bus or bass; it is not automatically more analog, more professional or safer on a master.
Space and multiband movement
9. Fruity Delay 3: an echo that can stay in time while tempo moves
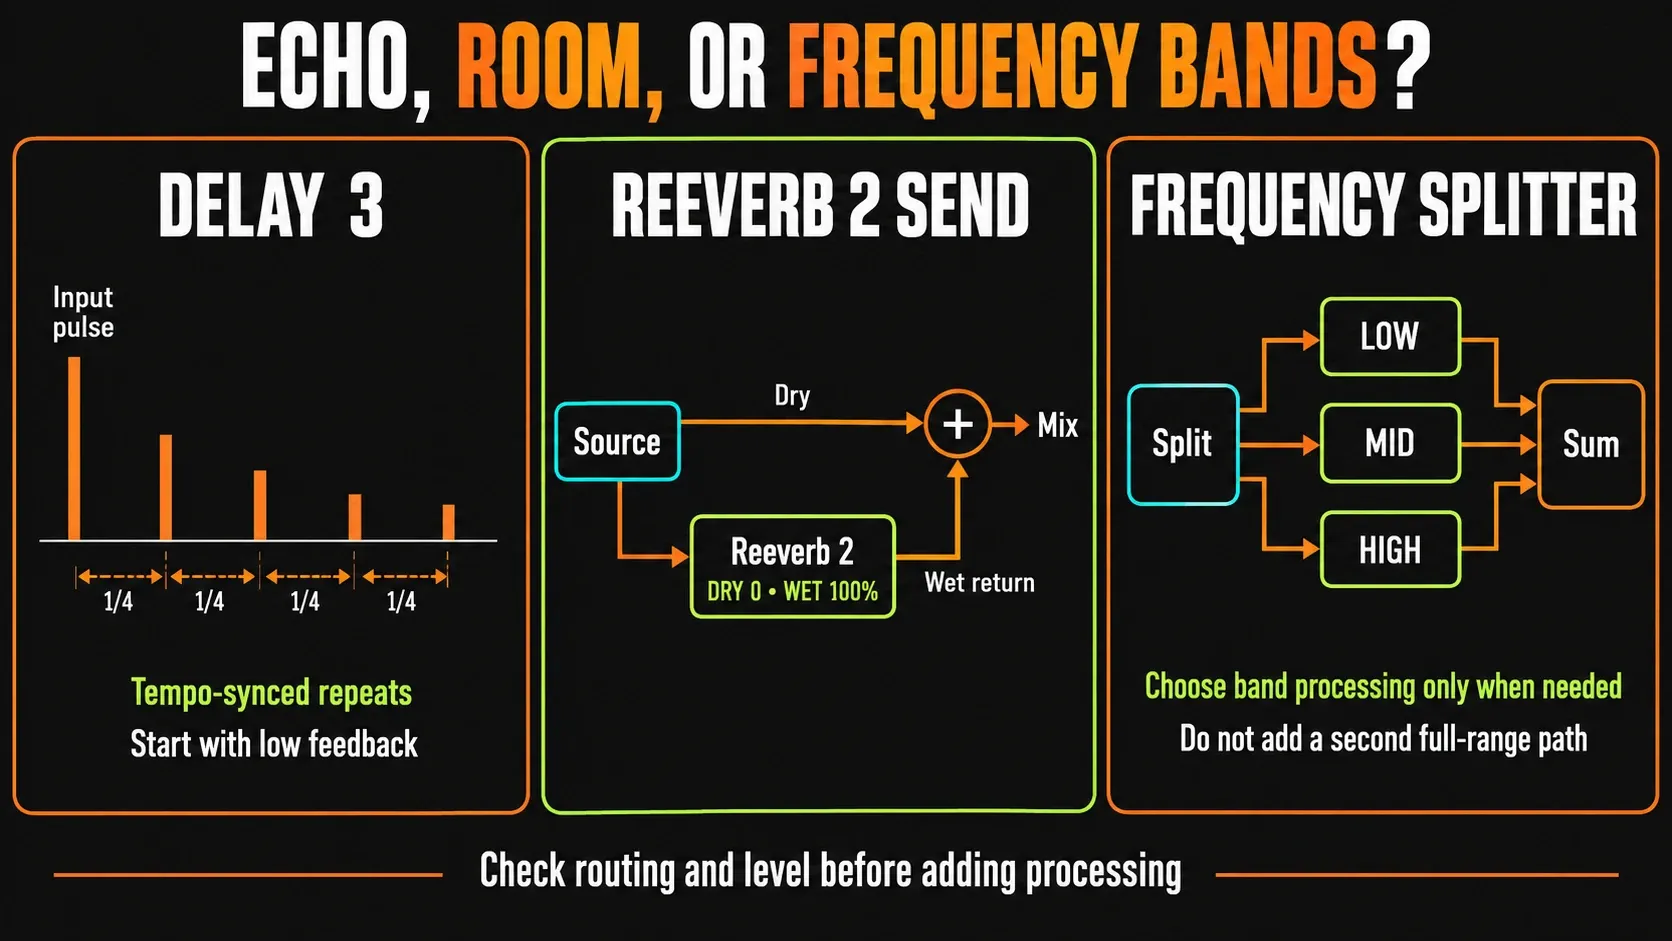
Fruity Delay 3 is an analog-style delay with tempo synchronization, filtering, distortion, diffusion and self-oscillating feedback. It is included in all editions. Put it on a send for a shared echo or automate its input for a single delay throw at the end of a phrase.
Start quietly with feedback at zero, then raise it gradually. Filter the repeats to leave room for the source. Delay 3 can self-oscillate; filter resonance can make feedback grow even below a 100% feedback setting. On a send, set Output DRY to zero and blend the wet return. Its Input WET control feeds the delay line for throws; it is not the same as Output WET. The reverb and delay send setup covers the shared routing.
10. Fruity Reeverb 2: build one room before adding three tails
Fruity Reeverb 2 simulates acoustic spaces and can create tails up to twenty seconds. It is included in all editions. On a send, set dry to zero and wet to full, then control the amount from each source. That creates one shared acoustic decision instead of a different room on every insert.
Decay is only one control. Damping decides how quickly the high end disappears; the bass multiplier and crossover decide whether the tail crowds the low mids. If bypassing the reverb makes the mix clearer but smaller, shorten or filter it before adding another plugin.
11. Frequency Splitter: multiband routing without pretending it is simple EQ
Frequency Splitter divides a signal into two or three bands with minimum-phase or linear-phase filters and can route bands to independent outputs. It is included in all editions. Use it when different ranges need different processing: distort only the mids, keep the sub mono or send high-frequency texture into a long effect.
First check the routes at a safe monitoring level. Main and send paths can carry duplicate audio, making the result louder without improving it. Confirm each band’s destination and recombination before processing; linear-phase filtering also adds latency. Use the Patcher routing examples to build a reusable map rather than guessing at parallel connections.
Routing and sample editors
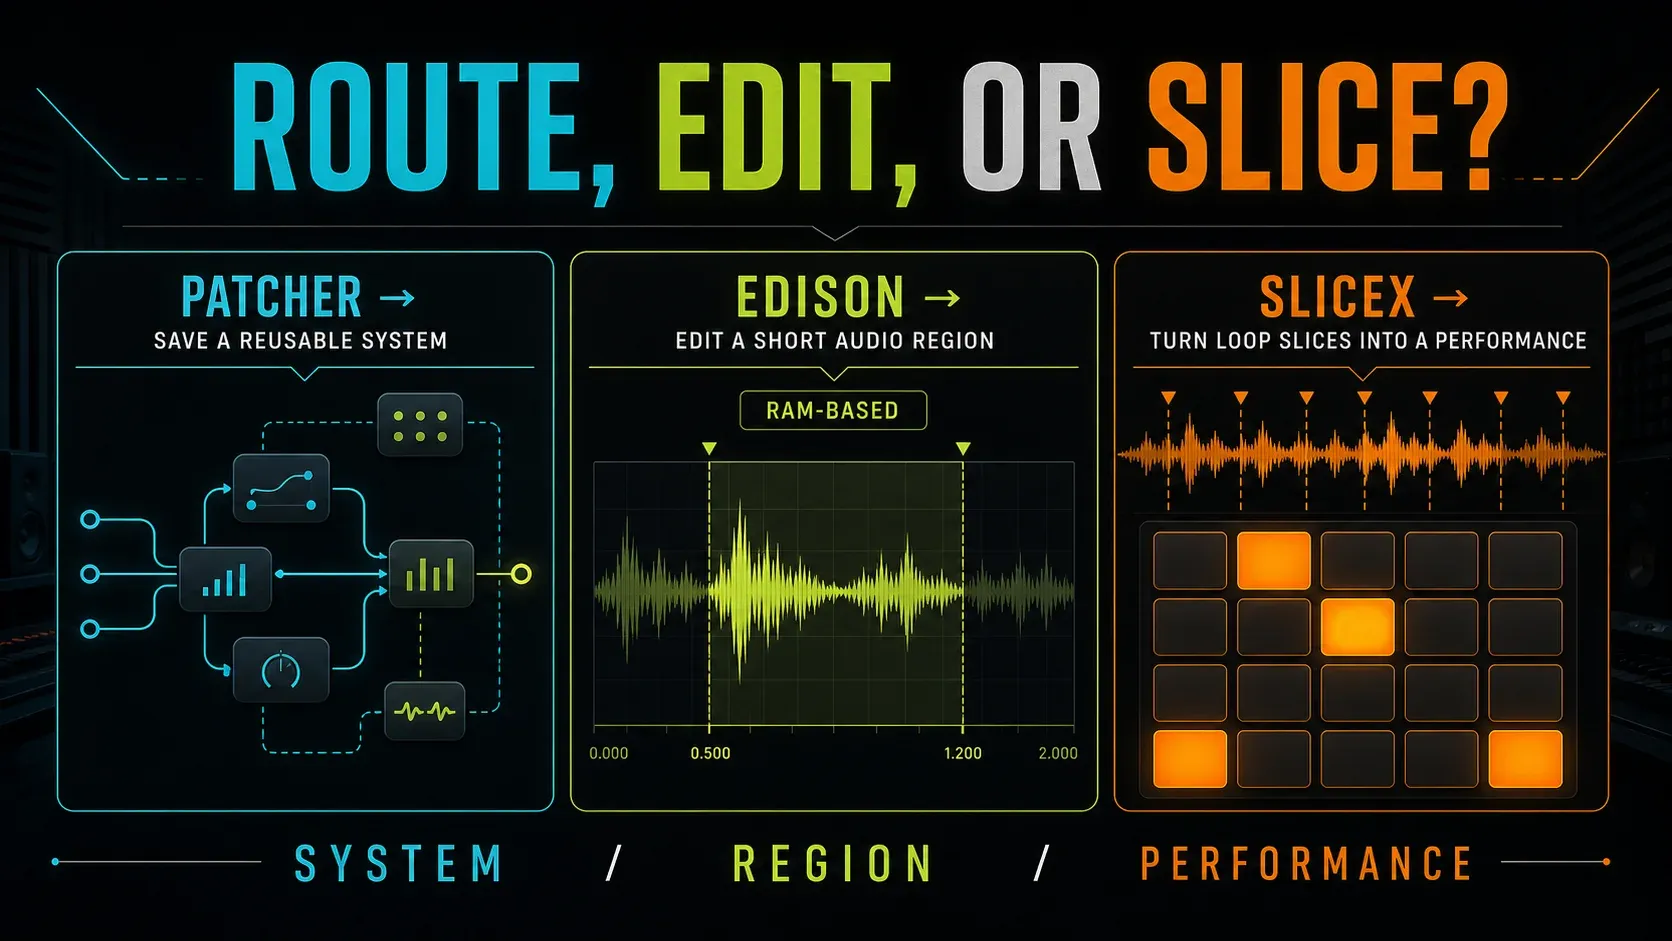
12. Patcher: save the complete system as a preset
Patcher loads as an instrument or effect, chains instruments and effects, routes audio/events/parameters and exposes custom controls through Control Surface. It is included in all editions. Its real value is recall: one tested vocal chain, parallel distortion rack or layered instrument can become a named unit you understand.
Patcher does not license the plugins it hosts. A preset containing a trial-only effect still depends on that effect’s license, and external samples still need preserving. Rename modules, expose only controls you will adjust and test each bypass. Two unintended parallel paths remain a gain error even inside a tidy map.
13. Edison: repair the sample you actually need
Edison is an integrated audio editor included from Producer Edition upward. It records and edits audio from a Mixer effect slot, trims selections, removes noise, creates regions and sends the result back to the Playlist or a sampler.
Edison works in RAM, and Image-Line doesn’t pitch it for hours-long recording. Use it for a vocal phrase, a drum hit or a resampled sound. Keep the source, edit a copy, audition the boundary and save the result under a distinct name. The Edison recording and editing guide covers the controls and export path.
14. Slicex: turn a loop into playable decisions
Slicex is included from Producer Edition upward. It detects beats or reads existing regions, maps slices for Piano roll/controller playback and supports rearrangement and time stretching.
Let the detector make a first pass, then adjust any markers that cut through a transient or sustain. Preserve the source audio before destructive sample edits. The Slicex slicing guide explains markers, triggers and click-free boundaries without turning every small waveform wiggle into a new slice.
Higher-edition plugins that add a distinct workflow
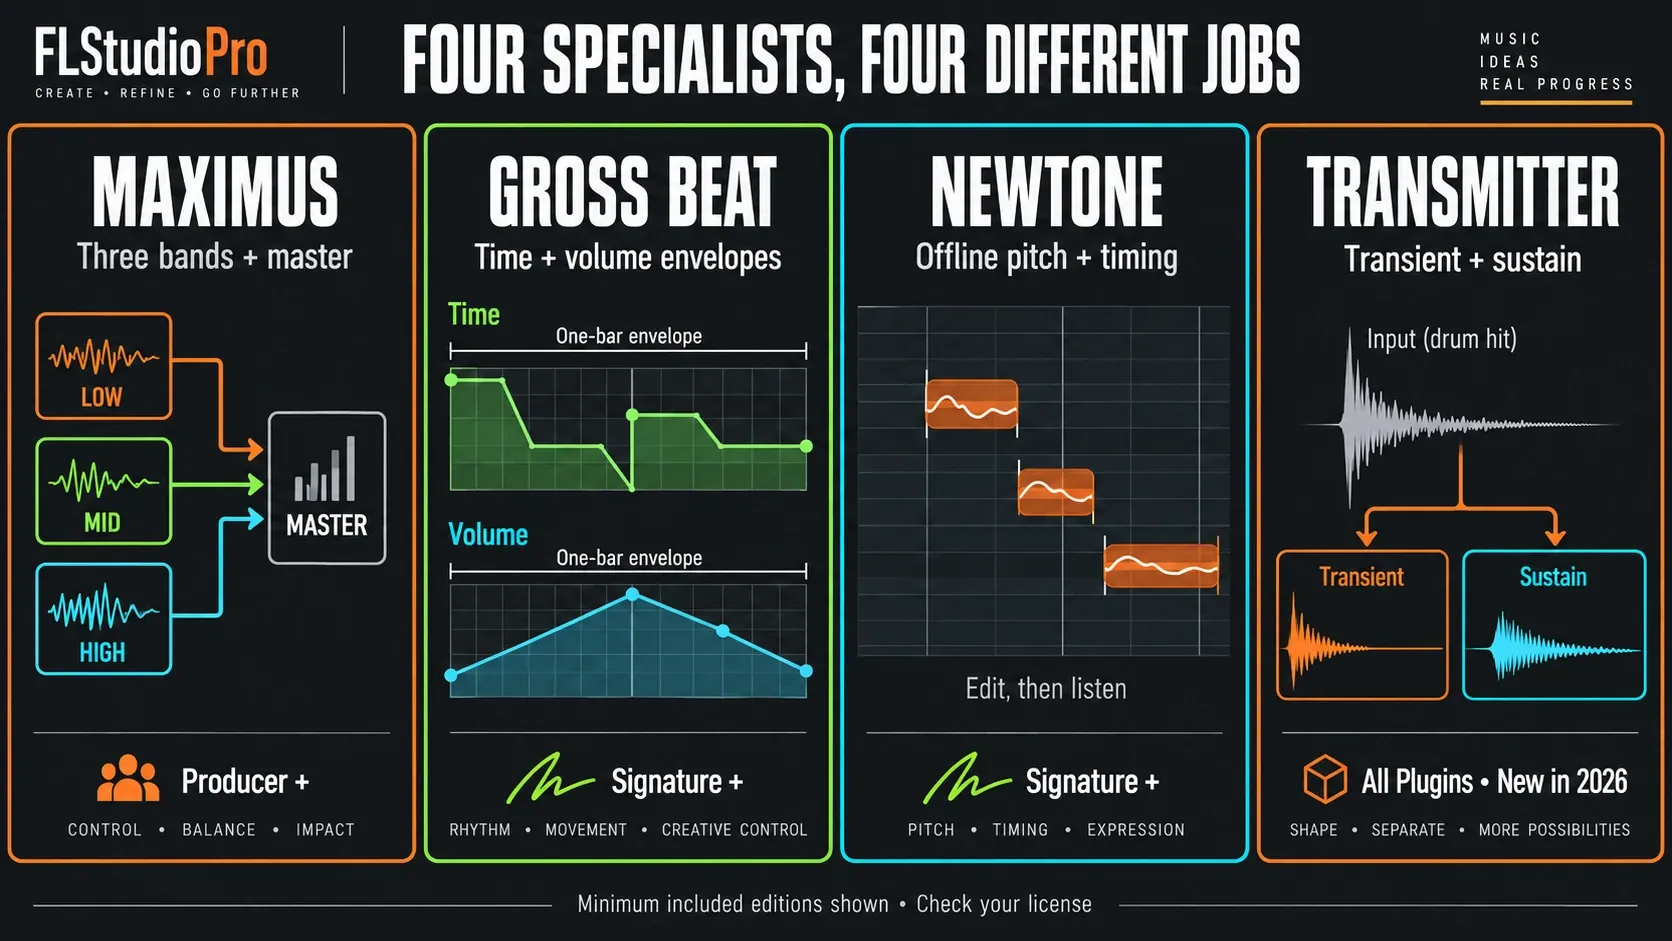
15. Maximus: multiband control after single-band dynamics make sense
Maximus comes with Producer Edition and higher. It combines three independently configurable frequency bands with a master dynamics stage and can compress, limit, gate, expand, duck and de-ess. That makes four dynamics stages in total, not just three bands.
Open it when one frequency range moves differently from the rest. If the whole signal simply needs fewer peaks, Fruity Limiter is easier to diagnose. The stock-plugin mastering workflow keeps Maximus inside a real listening sequence instead of treating a preset as a finished master.
16. Gross Beat: perform time and volume, not a permanent “better” switch
Gross Beat uses a two-bar rolling buffer with time and volume envelopes for synced stutter, repeat, scratching and gating. It’s included from Signature Bundle up. In lower editions it may show up as a trial, so confirm you own it before saving a project that depends on it.
Automate the mix or slot changes around one specific moment. A dramatic time preset left running across the whole arrangement gets predictable fast, while one bar of it before a drop can hold the structure together.
17. Newtone: edit the note, not the singer’s identity
Newtone is an offline pitch-correction and time editor included from Signature Bundle up. It shows detected notes, pitch movement and volume, then lets you correct center, variation and transitions or edit individual notes.
Correct the notes that distract, not every line into the same shape. Listen to consonants and transitions after each move. Newtone can send detected notes out as a score, but detection still needs a human ear. For the full chain around the edit, use the FL Studio vocal mixing guide.
18. Transmitter: the 2026 transient/sustain specialist
Transmitter arrived with FL Studio 2026 and is included in All Plugins Edition. It separates transient and sustain into complementary paths for independent shaping or routing. With look-ahead disabled it can operate at zero latency; enabling look-ahead adds five milliseconds. Do not confuse the edition that includes it with a promise that every lower-edition account already owns it.
Use it when “more attack” and “less room” are two separate requests on the same drum, pluck or guitar. Start by soloing transient and sustain. If the split doesn’t match what your ear calls attack and body, adjust detection before you add effects. A new plugin is fun; a correctly detected boundary is what actually helps.
Build a stock-plugin starter rack in six moves
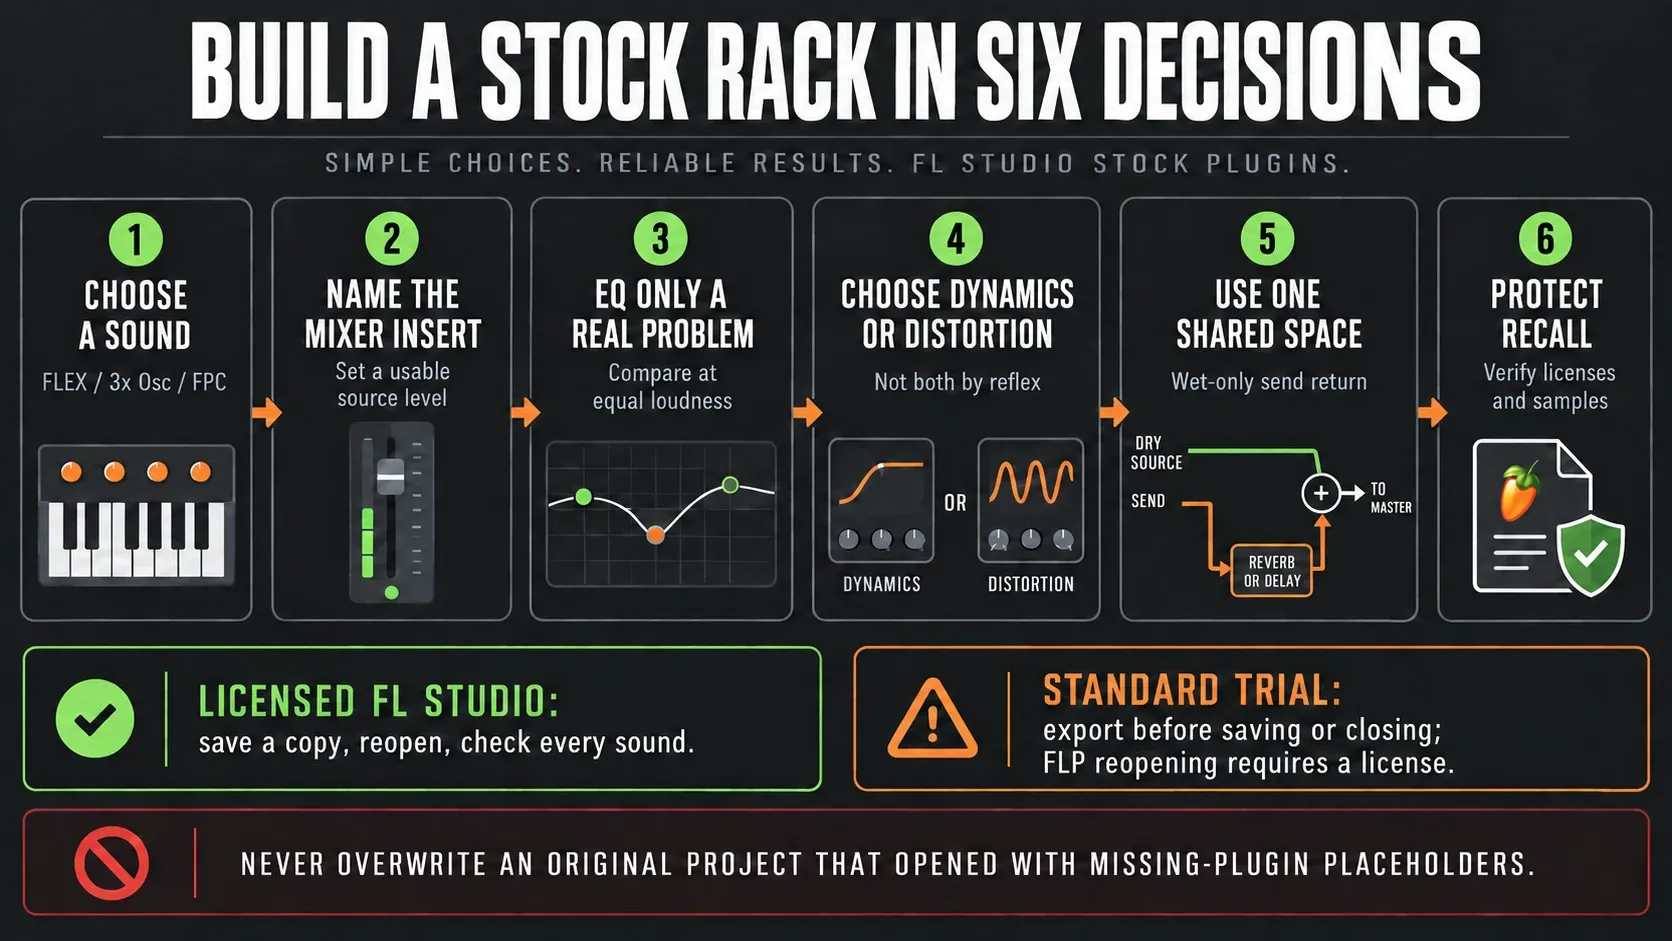
- Choose one instrument job. Use FLEX for a ready sound, 3x Osc for synthesis practice or FPC for a drum kit.
- Route it to a named Mixer insert. Set a sensible source level before effects; the Mixer routing guide explains the connections.
- Add Parametric EQ 2 only for a named frequency problem. Make one move, return to equal loudness and keep it only if the arrangement improves.
- Add one dynamics or distortion decision. Limiter controls movement; WaveShaper changes harmonic shape. Do not reach for both by reflex.
- Create one shared space. Put Delay 3 or Reeverb 2 on a send with its dry output at zero, then blend the wet return with the source.
- Protect the useful system. Save a Mixer or Patcher preset and preserve any external samples. Reopen a small test project only with an FL license and plugins that permit recall. In the standard trial, export audio before saving or closing; do not overwrite an original that opens with unlicensed-plugin placeholders.
The rack is finished when every plugin has a sentence: “This is here because…” If the only sentence you’ve got is “people say it’s good,” bypass it for one session.
Are FL Studio stock plugins good enough?
Yes, stock tools can handle a complete production. FL supplies instruments, drums, EQ, dynamics, distortion, space, editing, routing and automation. That range is a good reason to learn the included rack, but it doesn’t mean every native plugin has the best interface for everyone, or that a preset guarantees professional results.
Before you replace a stock tool, check the source sound, the arrangement, the gain match and the exact problem you want to solve. If a processor already does that job clearly, another download may add nothing. If it keeps slowing you down or lacks a feature you need, an alternative can make sense.
When a third-party plugin is actually justified
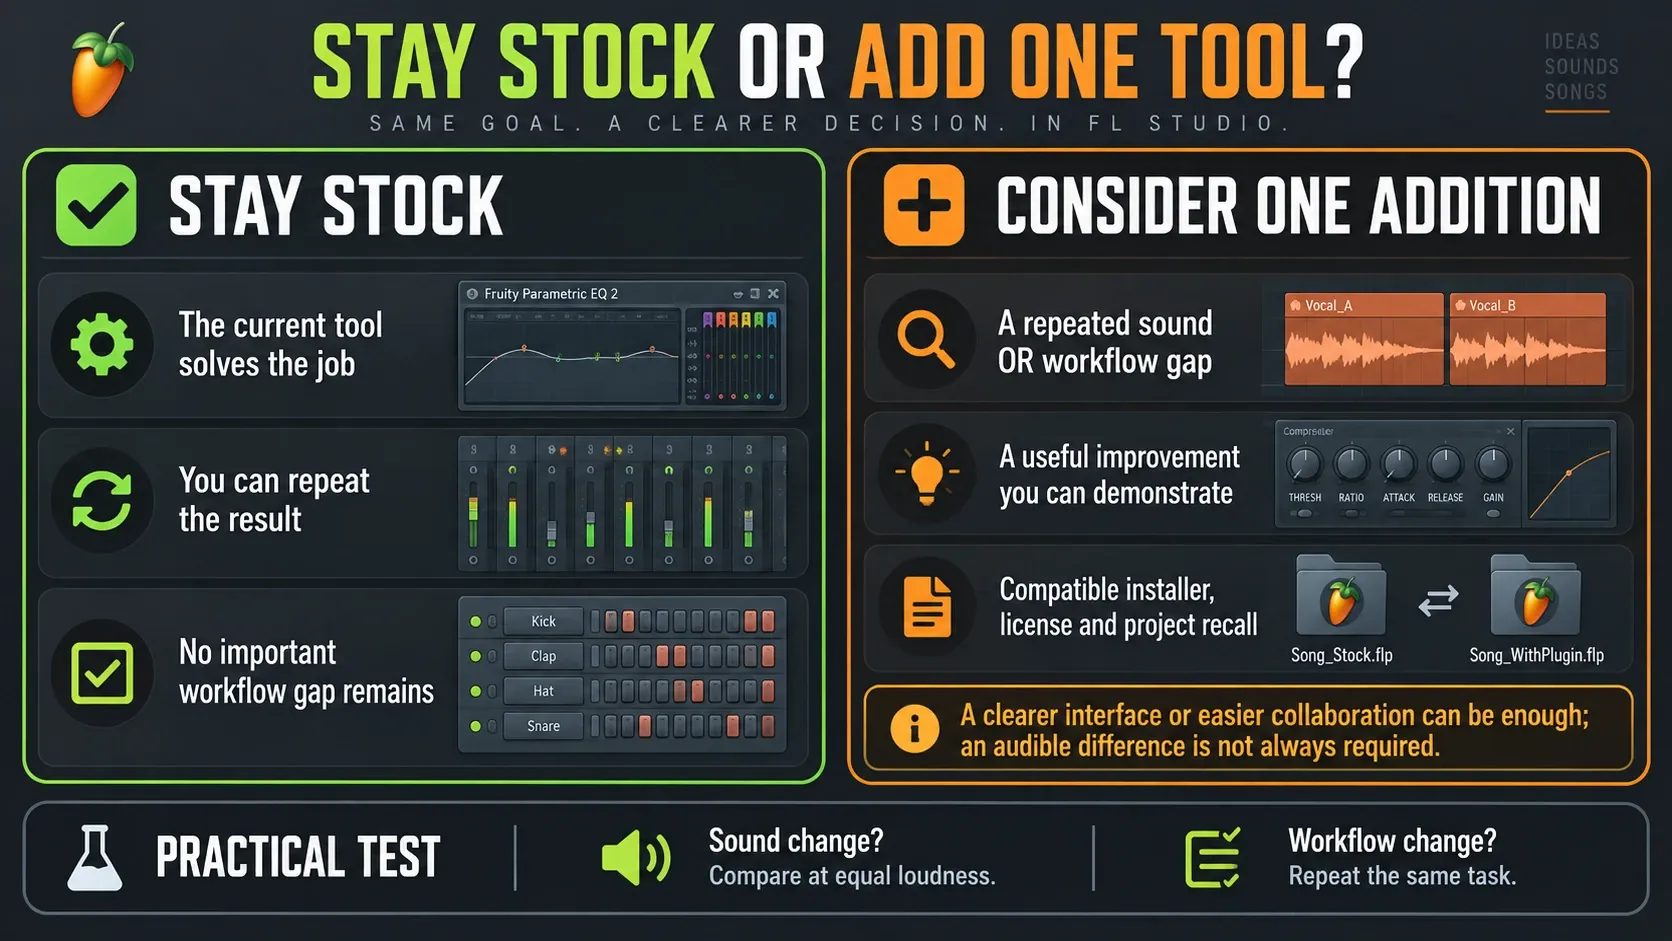
Add an external plugin when it closes one repeatable gap: a sound library you can’t reproduce efficiently, a dynamic process the native tool makes hard to see, a workflow that saves real editing time, or a collaboration format your partners already use. “Different interface” can be a valid reason; “free today” isn’t automatically one.
| Question | Stay stock when… | Add third-party when… |
|---|---|---|
| Does the native tool do the job? | You can state the settings and repeat the result | The same limitation stops several projects |
| Will the project reopen? | Your FL license and the specific plugin license permit recall, with source samples preserved | You verified a compatible installer, license and saved-project recall |
| Does it improve sound or workflow? | The sound and working method already meet the task | Level-matched sound improves, or a clearer interface or compatible format solves the repeated problem |
| Does it reduce friction? | The native workflow is already fast and clear | The alternative removes repeated routing or editing work |
When a gap passes that test, the site’s current free-plugin shortlist gives official download links and limitations, and it doesn’t pretend you need thirteen more tools at once.
Frequently asked questions
What are the best FL Studio stock plugins for beginners?
Start with FLEX, 3x Osc, FPC, Fruity Parametric EQ 2, Fruity Limiter, Fruity Balance, Fruity WaveShaper, Fruity Delay 3, Fruity Reeverb 2 and Patcher. They cover the core instrument, drum, mixing, automation, space and routing jobs in every current edition.
Are FL Studio stock plugins good enough for professional music?
Yes. The native instruments and effects can carry a complete production. Professional results still depend on source choice, arrangement, monitoring, gain decisions and knowing the processor’s limits; buying a different interface does not replace those skills.
Are all stock plugins included in every FL Studio edition?
No. Some plugins are included in all editions, while others begin with Producer Edition, Signature Bundle or All Plugins Edition. Plugins outside your license may still appear as trials, so check the wrapper title and Image-Line’s current comparison before a project depends on one.
Which stock FL Studio plugin is best for vocals?
There is no single vocal plugin. Parametric EQ 2 shapes frequency, Fruity Limiter controls dynamics, and Reeverb 2 or Delay 3 adds space. Newtone edits pitch and timing offline but requires Signature Bundle or higher, or a separate license. Choose the processor for the stage that needs work.
Which FL Studio stock plugin is best for saturation?
Fruity WaveShaper is the clearest starting point because its curve shows how input becomes output. Use a gentle bend, lower post gain and compare at equal loudness. Soft Clipper and Distructor are useful alternatives when their simpler or multi-effect workflow fits better.
Is Maximus included with FL Studio Producer Edition?
Yes. Image-Line’s current edition table and Maximus manual place it in Producer Edition and higher. It offers low, mid and high bands plus a separate master dynamics stage.
Why does a stock plugin say Trial in FL Studio?
A plugin can be installed without being licensed to your account. Buy an available separate license or an edition that includes it before relying on recall. Export trial audio before saving or closing, and never overwrite an original project that opens with unlicensed-plugin placeholders.
Should I learn stock plugins before downloading VSTs?
Learn enough stock tools to spot the missing job first. Then a VST choice gets specific: a sound library, an interface, a collaboration format or a processor the native rack can’t provide efficiently. That keeps you from collecting overlapping plugins that don’t improve the song.
The useful finish line
Finish a short track using a few tools from the core ten. Note the task that slowed you down, then learn one specialist that deals with it. Keep the project’s samples and audio exports along with its FLP. The Plugins learning route connects this stock toolkit to free alternatives, installation and library organization.