FL Studio
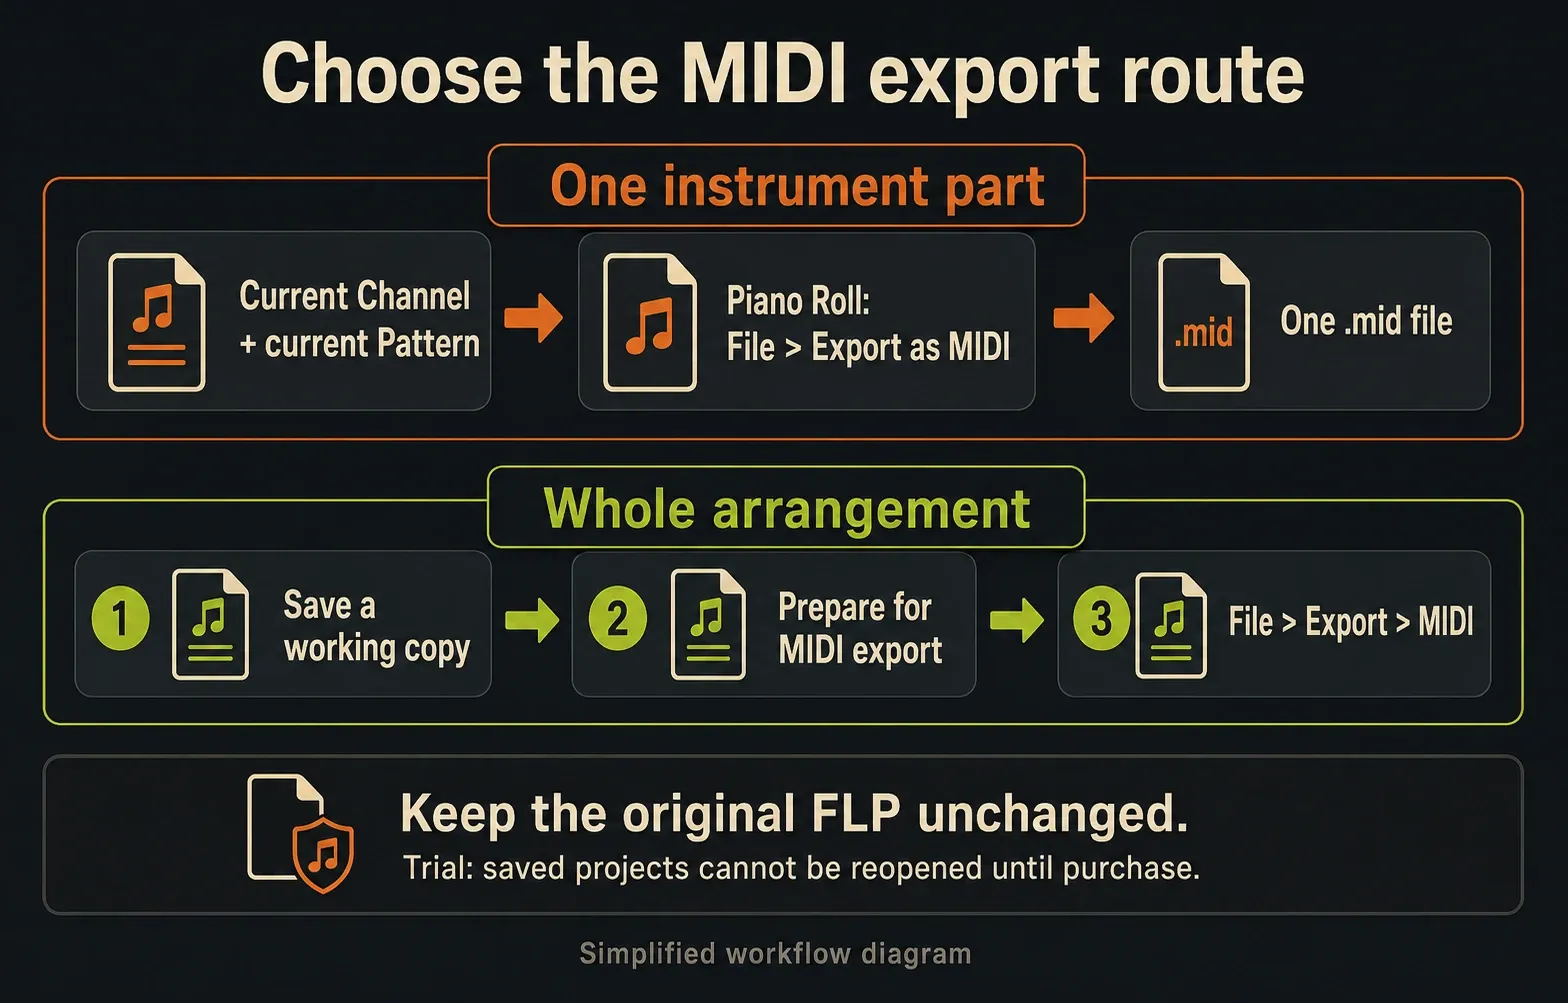
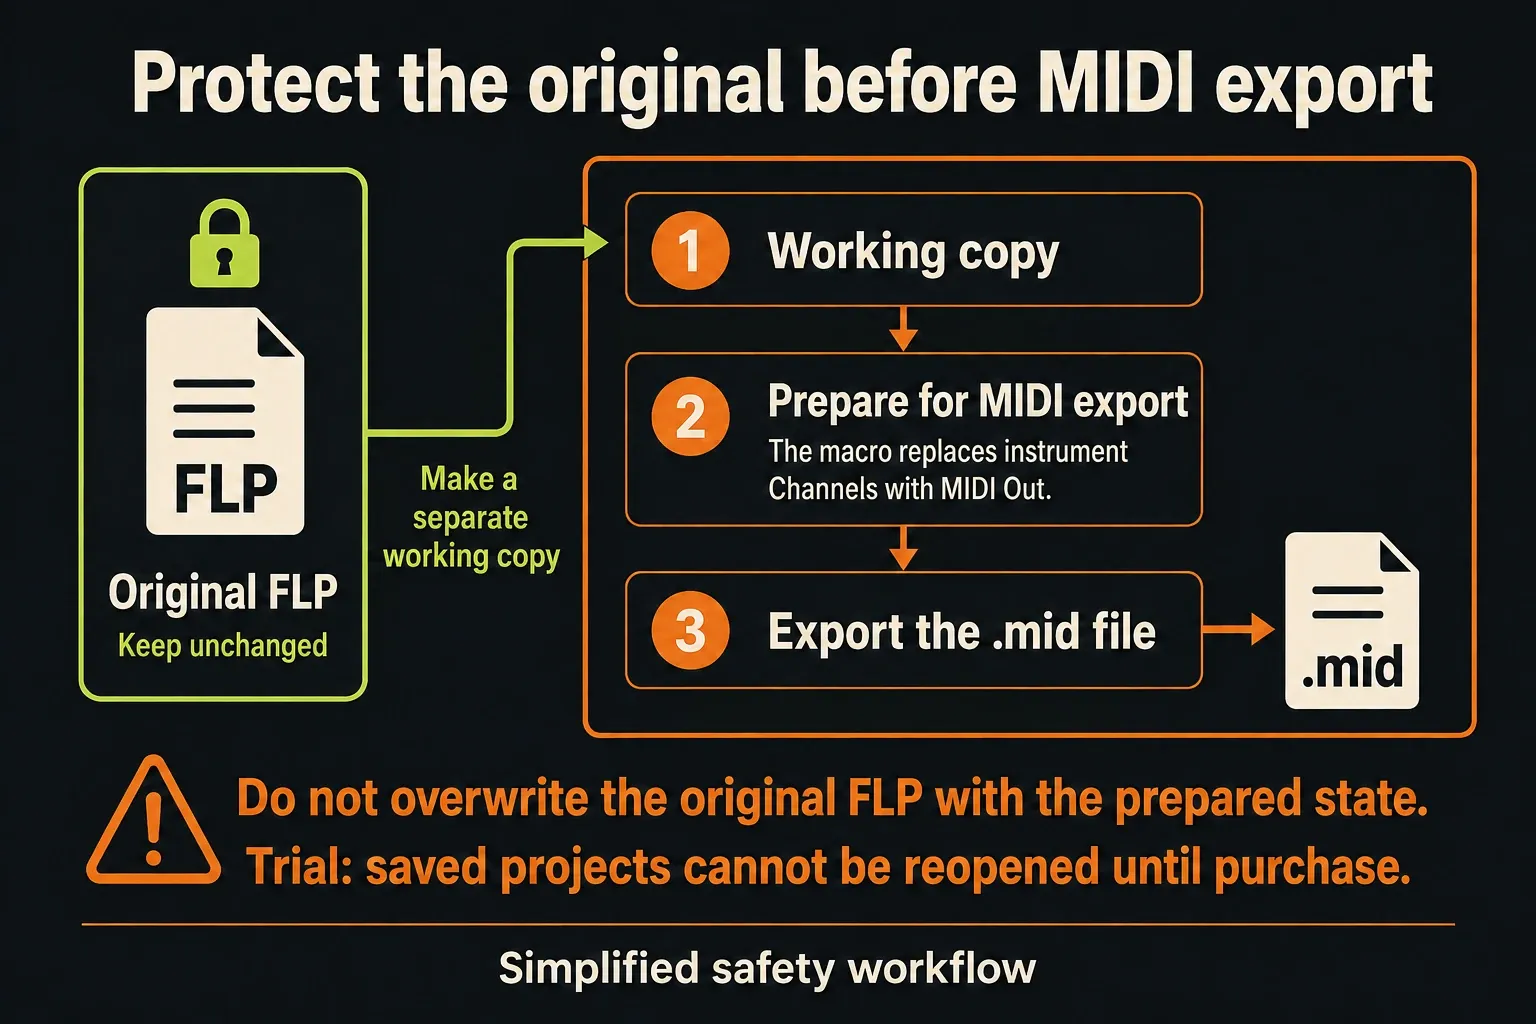
To export MIDI from FL Studio, first choose the scope. For one Channel in the current Pattern, open its Piano Roll and choose File → Export as MIDI file. For several Channels across a song, save the original FLP, make a separate working copy, run Tools → Macros → Prepare for MIDI export, then use File → Export → MIDI file. The macro replaces instrument Channels with MIDI Out Channels: never save that prepared state over the original.
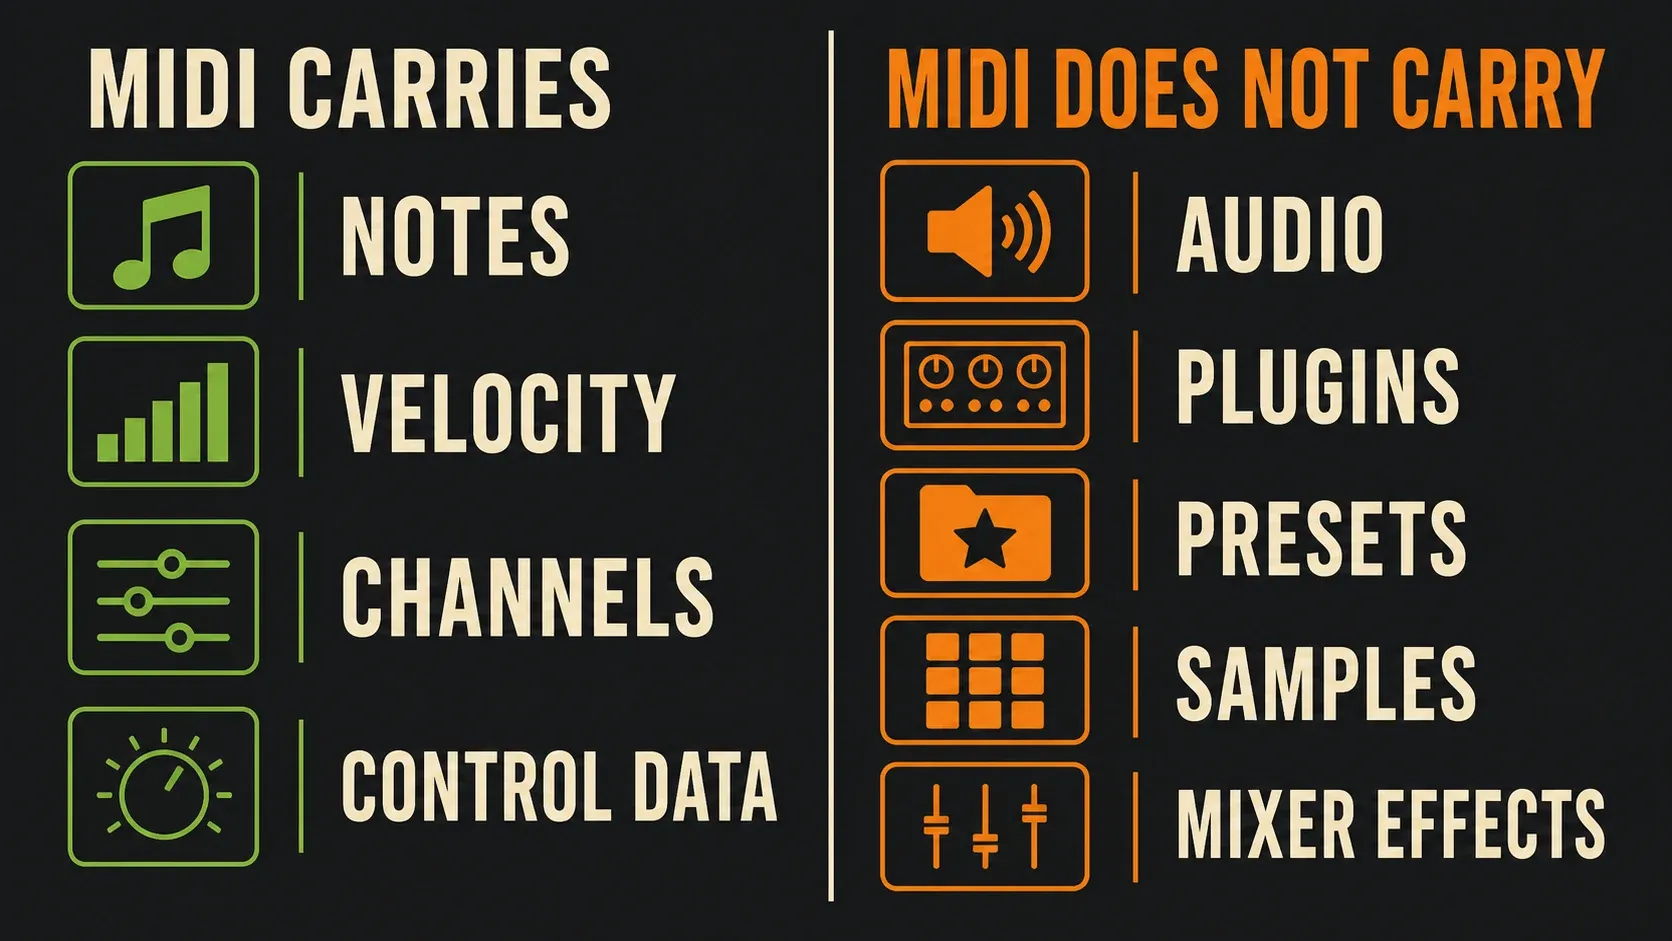
A .mid file carries performance instructions, not your finished sound. Notes, velocity and compatible MIDI messages can move between programs; synth presets, samples and Mixer effects stay behind. Send an audio bounce too when the recipient needs to hear the original arrangement.
Using the Trial? Stop before the preparation macro. Image-Line allows MIDI export, but the Trial cannot reopen projects it saves until purchase. Saving an FLP is not an immediately usable recovery point in that situation. Export individual Piano Roll parts and any reference audio while the original session is still open; postpone the destructive whole-project preparation if you need to keep editing the original instruments.
Export MIDI safely: choose one part or a whole song
- Save the original FLP. Before whole-project preparation, make a separately named working copy and confirm you can reopen the original; the standard Trial cannot reopen its saved projects.
- Choose one Channel in the current Pattern or the complete multichannel arrangement.
- Finish the note timing, velocity and lengths, and render a reference audio bounce before replacing instruments.
- For one part, use Piano Roll → File → Export as MIDI file; skip the preparation macro.
- For the whole arrangement, run Tools → Macros → Prepare for MIDI export on the working copy, then File → Export → MIDI file. Check Song mode and the intended export range before Start.
- Do not overwrite the original FLP with the prepared state. Reopen the saved original only when your license and plugins allow it.
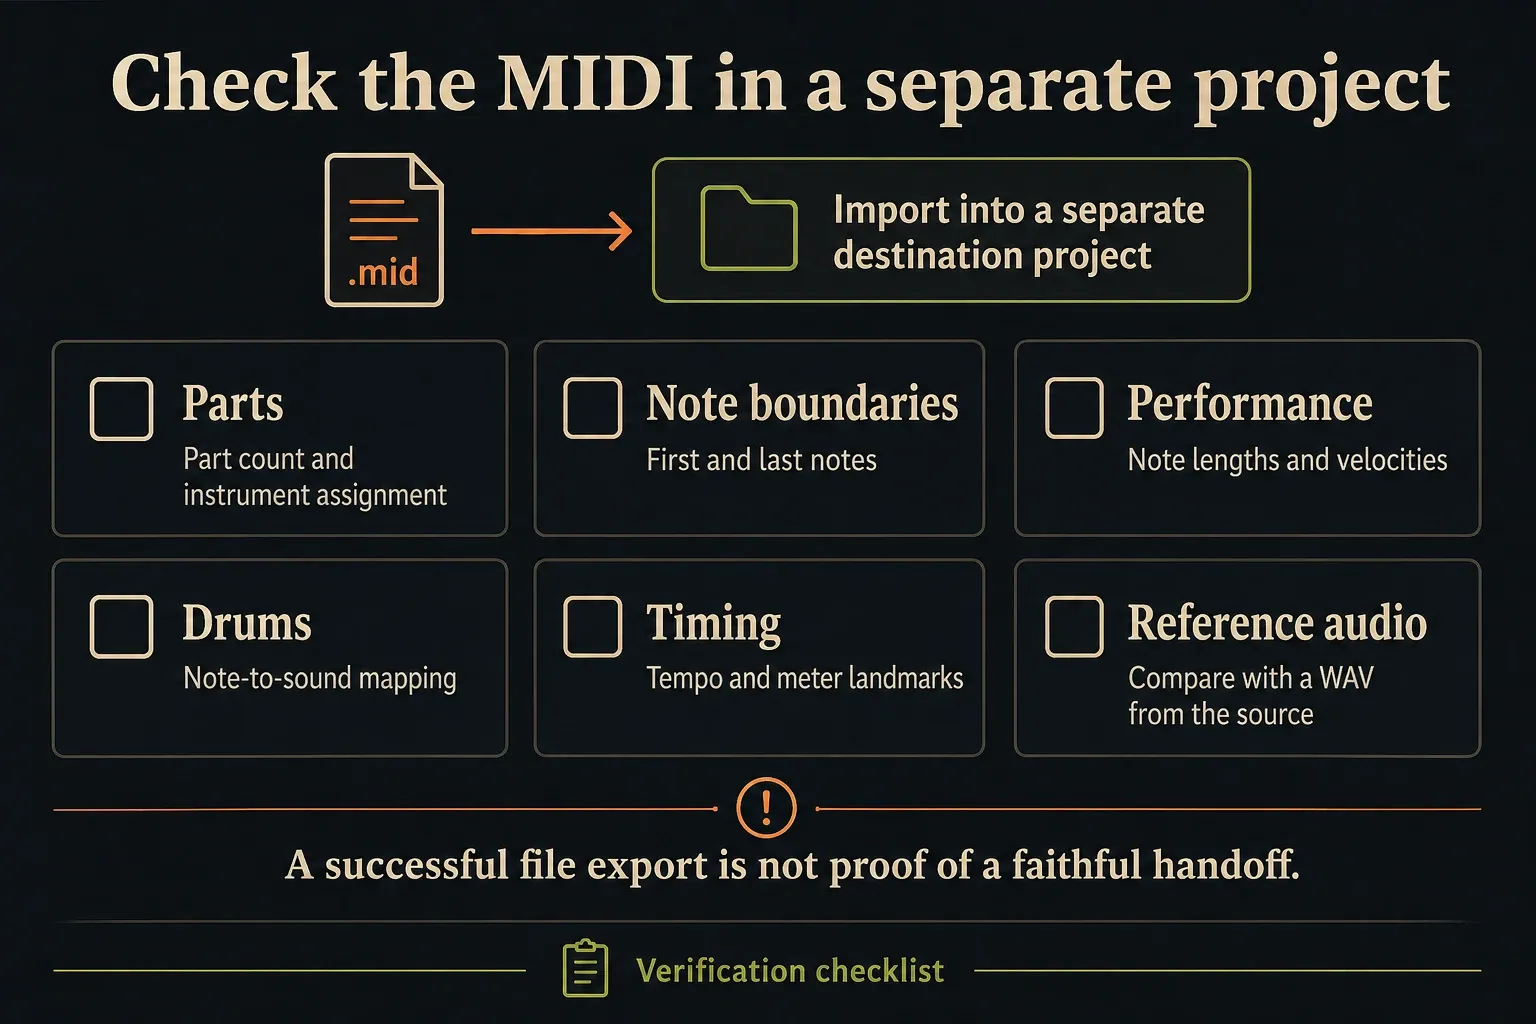
- Import the exported .mid into a separate destination project and compare notes, part count, timing and controller data with the source and reference audio.
If the notes still need work, finish it in the FL Studio Piano Roll before you export. A clean handoff starts with notes you meant to write, not with hoping the recipient will make sense of unfinished timing.
Choose the export scope before opening a menu
A Piano Roll export saves the data for the open Channel in the current Pattern. That's fine for a bassline, a chord progression or a drum part. It does not gather every Channel in that Pattern, or every appearance of the part in the Playlist. Check both the Pattern selector and the Channel before you export.
For a song with several instrument parts, take the project route. The preparation macro converts Channels for a multichannel handoff. If a collaborator wants individual .mid files instead of one combined file, export the relevant Piano Rolls one by one and name each part. Don't mix this up with Split Mixer Tracks, which is an audio-export option and has nothing to do with MIDI per instrument.
Export one Piano Roll part
Select the Pattern and Channel that own the notes, then open the Piano Roll. Choose Piano Roll menu → File → Export as MIDI file and save a .mid. The Piano Roll menu reference lists Shift+Ctrl+M. The main File menu also uses that shortcut for project MIDI export, so use the named menu route when there is any doubt about window focus.
Double-check the Channel before exporting. The command follows whichever Piano Roll is open, regardless of the musical role you meant to send. A helpful filename carries context (song-bass-120bpm-v2.mid is easier to place than score.mid), but a BPM in the filename doesn't prove a tempo map is embedded.
Play the first and last bars once before saving. Listen and look for muted notes, stray note-color groups, hanging notes and material past the phrase boundary. If the part should keep a loose feel, preserve it on purpose with the MIDI humanization workflow. If it should sit tight on the grid, use the FL Studio quantize controls before delivery, not as an automatic cleanup after export.
Export the whole FL Studio project as MIDI
Save the original project, then use File → Save as for a working copy such as song-midi-working-copy.flp. Keep the original name and location separate. The File menu documentation distinguishes Save, which overwrites the last saved file, from Save as and Save new version. Check any trial-plugin warnings before relying on a saved project to restore all sounds.
Choose Tools → Macros → Prepare for MIDI export on the copy only once you have a recoverable original. In the standard Trial, stick with the one-part approach described above if you plan to keep working in the same session.
Choose File → Export → MIDI file, name the output and select MIDI in the Export Project Dialog. For the full arrangement, check Song rather than Pattern mode, clear an unintended timeline selection and check the reported length before Start. The Export Project documentation explains both the MIDI preparation and the scope controls; a selection can shorten what you send.
After export, leave the original FLP alone. If you can reopen it, go back to that saved original instead of saving the prepared state into it. Don't assume every plugin will reload: projects using unowned trial plugins can reopen with those plugins still unavailable. Keep the pre-export file intact and sort out licensing before re-saving a restored project that's missing sounds.
What Prepare for MIDI export actually changes
The macro isn't a cosmetic export preset. The current Image-Line Tools menu says it replaces all Channels with auto-configured MIDI Out Channels. Those Channels give you the numbered MIDI destinations a project-wide file needs, but they don't keep the original synth or sampler that made the sound.
MIDI Out makes no sound of its own; it sends messages to another instrument. So silence after preparation doesn't prove notes disappeared. Don't start rebuilding the original synths in that state. Check the exported data, then go back to the protected FLP when you can reopen it. The point is to keep the original arrangement recoverable, not to make the temporary export copy sound finished.
Use General MIDI patches only when the recipient needs them
A standard MIDI file can include program choices, but the receiving device decides what those programs sound like. If your collaborator will assign new instruments in Ableton Live, Logic Pro, Pro Tools or another DAW, clear Channel names and a reference bounce usually help more than forcing General MIDI patches.
For General MIDI playback, choose suitable programs using each prepared MIDI Out Channel's Patch control. Image-Line's optional Fruity LSD workflow uses matching MIDI Out/LSD ports and is Windows-only. The MIDI Out manual warns that this older technology may not work on every system; on macOS, use suitable instruments for the imported scores. None of this embeds the original preset in the MIDI file.
Know what the MIDI file carries—and what it cannot
The MIDI message reference separates notes, Control Change, Program Change and Pitch Bend. Those don't map one-to-one onto every FL Studio plugin parameter. Check note pitch, start, duration and velocity first, then check any controller messages the performance relies on. A valid file doesn't prove every Automation Clip turned into a matching lane in the destination.
Sustain and bends need their own check. With Foot pedal controls note off enabled during recording, FL Studio extends note lengths and intercepts CC64 instead of passing it to the plugin. Longer notes are not the same thing as a separate pedal lane. Listen for pedal releases, and check both the presence of pitch-bend data and the receiving instrument's bend range.
Native slide notes are not a portability guarantee. The Piano Roll documentation limits its slide/portamento flags to native FL Studio instruments, not VST instruments. Re-create the intended articulation in the destination if necessary, and include an audio reference rather than promising the same glide from the MIDI file alone.
The file doesn't contain recorded vocals, Audio Clips, plugin binaries, presets, sample files, Mixer routing, EQ, compression, reverb or mastering. It also can't make another DAW own the same third-party plugins. When the sound itself has to survive, send audio. If you're pulling material out of an existing mix, the stem separation guide covers that separate job.
Check tempo changes, time signatures and markers
Standard MIDI Files support tempo and time-signature information. That does not establish which FL Studio events a particular export/import combination preserves. In FL Studio, Save tempo information is documented for WAV metadata, and Save playlist markers also refers to WAV. Neither checkbox proves that a MIDI tempo map or Playlist markers were exported.
Test the real destination workflow. Compare the starting tempo, every tempo or meter change, the first bar and a note after each change. If something's missing, send a written tempo map and marker list with the MIDI. For precise alignment, use a WAV reference from a stated start point; an MP3 is fine for listening, but it isn't the best timing reference.
Fix an empty, single-part or wrong-sounding export
The whole-project file is empty or missing Channels
Check the source before you export again: are there real notes in the relevant Channels, or only Audio Clips in the Playlist? Exporting a WAV recording as MIDI won't transcribe it. For a multichannel project, confirm the preparation step, Song/Pattern mode, timeline selection and export length. In Trial, don't close your only editable original session just to restart this check.
Every part arrived as the wrong instrument
That's a sound-assignment problem, and the notes may well have exported fine. Give the recipient a reference bounce and a short instrument list. Use General MIDI patches only when the target explicitly expects them; otherwise let the destination instruments replace the originals.
The file opens as one part
First confirm which route created it. Piano Roll export is deliberately limited to the open Channel and current Pattern. For a complete arrangement, prepare and export the project. On import, check the destination's track/channel separation options, because one visible instrument track doesn't prove the file holds only one MIDI channel.
The notes are early, late or cut off
Compare first-note positions, note lengths and bar boundaries. Check the intended lead-in, muted notes, the export range and tempo handling. In FL Studio, Realign events removes leading space during import: leave it off when that space matters. The Playlist workflow covers arrangement placement; export is not the time to silently move the opening notes.
Re-import the file before sending it
Use a separate destination project, not an import into your only unsaved source. In FL Studio, the main File → Import → MIDI file route offers multichannel import. The FL Studio MIDI import guide explains the scope choices and how to load CC automation separately. For a notes-plus-CC check, use matching import options with Realign events off for both, as the MIDI import manual instructs.
Count the parts. Check the first and last note in each one, velocity on a quiet note and a loud one, note lengths across bar lines, drum mapping, channel names or numbers, the first downbeat and every tempo or meter landmark. Then compare everything against a reference audio bounce. This acceptance test catches a file that's technically valid but musically wrong.
Package a collaborator-ready MIDI handoff
Send the .mid, a reference WAV, tempo and meter notes, and a short instrument list. Say whether it's one part or multichannel, where the first downbeat belongs and whether the file includes intentional leading silence. Add a listening MP3 if it helps. A name like bass-v2.mid tells the recipient far more than a folder full of files called score.mid.
Exporting isn't live capture. Use the MIDI recording guide to capture a performance and the controller mapping guide to assign knobs, pads and faders. You don't need a hardware controller or a new recording to save notes that are already in the project.
Frequently asked questions
How do I export one Pattern as MIDI in FL Studio?
For one Channel in that Pattern, use Piano Roll → File → Export as MIDI file. This does not collect the other Channels. For all parts together, prepare a protected project copy and use project MIDI export with Pattern mode; check the resulting parts and length after import.
How do I export the entire FL Studio project as MIDI?
Protect the original FLP and confirm you can reopen it before preparing a separate working copy. Run Tools → Macros → Prepare for MIDI export, then File → Export → MIDI file. Choose Song mode and check the range. Never overwrite the original with the prepared state; Trial users should not rely on reopening their saved project.
Why did Prepare for MIDI export remove my instruments?
The macro replaces Channels with auto-configured MIDI Out Channels for multichannel export. Do not overwrite the original FLP. Return to the saved pre-macro project when your license and plugins allow reopening; saving in the standard Trial does not give you an immediately reopenable project.
Does an exported MIDI file include my FL Studio sounds and effects?
No. MIDI carries performance instructions, not audio, plugin presets, samples or Mixer effects. Send a reference bounce or audio stems when the exact sound matters.
Does FL Studio export tempo changes in MIDI?
Do not assume every tempo change will transfer correctly. Import the file through the recipient's real MIDI workflow and compare every tempo and meter landmark; provide a written map or reference bounce when anything differs.
For your next note-editing or transfer task, head to the Piano Roll & MIDI hub. When the notes are ready to grow into a finished arrangement, continue through the Workflow hub.