FL Studio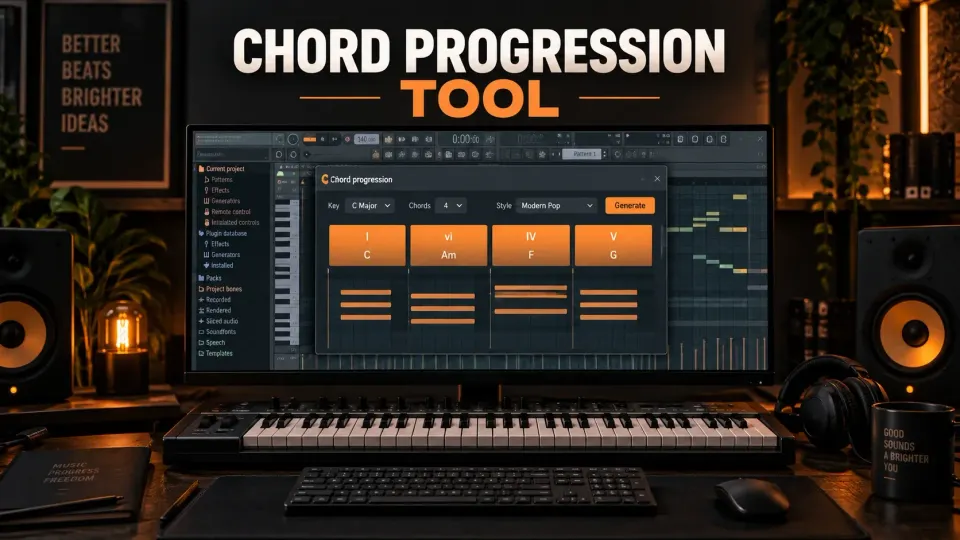
The FL Studio Chord Progression Tool is most useful when you treat it as an editor, not a one-click song button. Open the correct instrument’s Piano Roll in Pattern mode, set the musical boundaries, then generate or analyze a progression. Keep the chords that work, replace only the weak ones, fix the voicing and bass movement, and press Accept only when the harmony supports the part you already have.
The short workflow is: choose the right Pattern and Channel → set Scale, Root, Count and Length → Generate or Analyze → Lock good chords → refine individual chords → decide what happens to existing notes → add performance → Accept. That order prevents the two common failures: losing a good idea during regeneration and polishing rhythm before the harmony is settled.
Open the tool on the correct Pattern and instrument
The Chord Progression Tool works in Pattern mode. Select the Pattern that should receive the chords, then open the Piano Roll for the instrument that will play them. If you are unsure which Channel is active, stop and verify the instrument name in the Piano Roll title. Our FL Studio Piano Roll guide explains the Pattern/Channel relationship in detail.
Open the tool from the Piano Roll tools menu; the official Chord Progression Tool manual documents the current controls and modes. FL Studio switches to Pattern mode when needed because the tool depends on a selected Pattern. This is more than a transport detail: Accept writes the finished notes into that Pattern. Starting from the wrong Channel can leave a perfectly usable progression on the wrong sound.
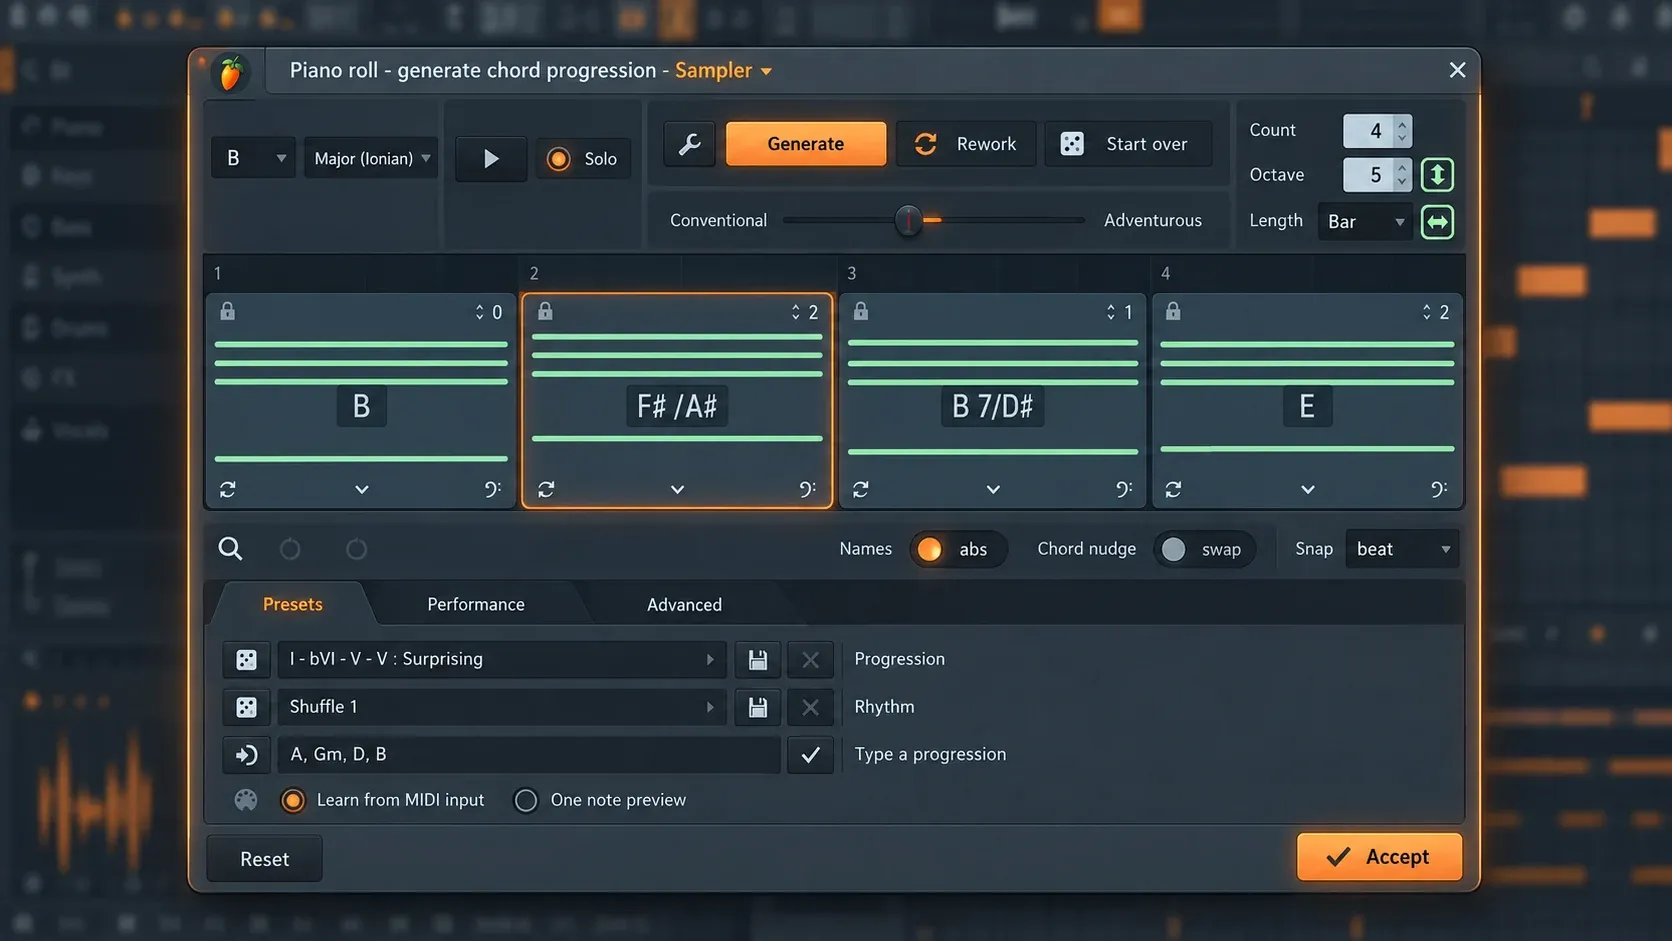
When the tool opens, it begins with four chords. Treat them as a proposal. Before chasing alternatives, set the broad musical shape: Scale, Root, chord Count, octave and Length. The tool also updates the Piano Roll’s Scale and Root context. If Snap to scale is active, notes you add later follow that setting; the scale highlighting guide separates visual highlighting from pitch constraint.
Make the first progression easy to judge
Start with four chords of equal length. It is easier to hear whether the harmony moves somewhere when the rhythm is predictable. Choose a scale you can recognize, use a simple instrument with a clear attack, and preview the loop without adding Arp, Chop or Humanize yet.
Chord names can appear as standard letter names or scale-relative Roman numerals. Letter names answer “what notes are here?” Roman numerals answer “what job does this chord perform in the key?” Toggle between them when a progression sounds useful but you want to understand or reuse its harmonic shape.
Do not judge only the individual chords. Listen to the transition from chord two to three, the bass movement across the loop, and whether the final chord makes the first chord feel intentional when playback repeats. A progression can contain four acceptable chords and still have a clumsy loop.
Know when to use Generate, Rework and Start over
Generate creates another progression from the current settings. It respects locked chords and considers chord-to-chord movement, metric position, extensions and bass choices. Use it when the current direction is close but one or more unlocked positions need new ideas.
Rework stays closer to the existing context. It considers previous chord suggestions, notes that were already in the Piano Roll when the tool opened, and the key signature. Use it when the progression has an identity worth preserving but needs a more coherent pass.
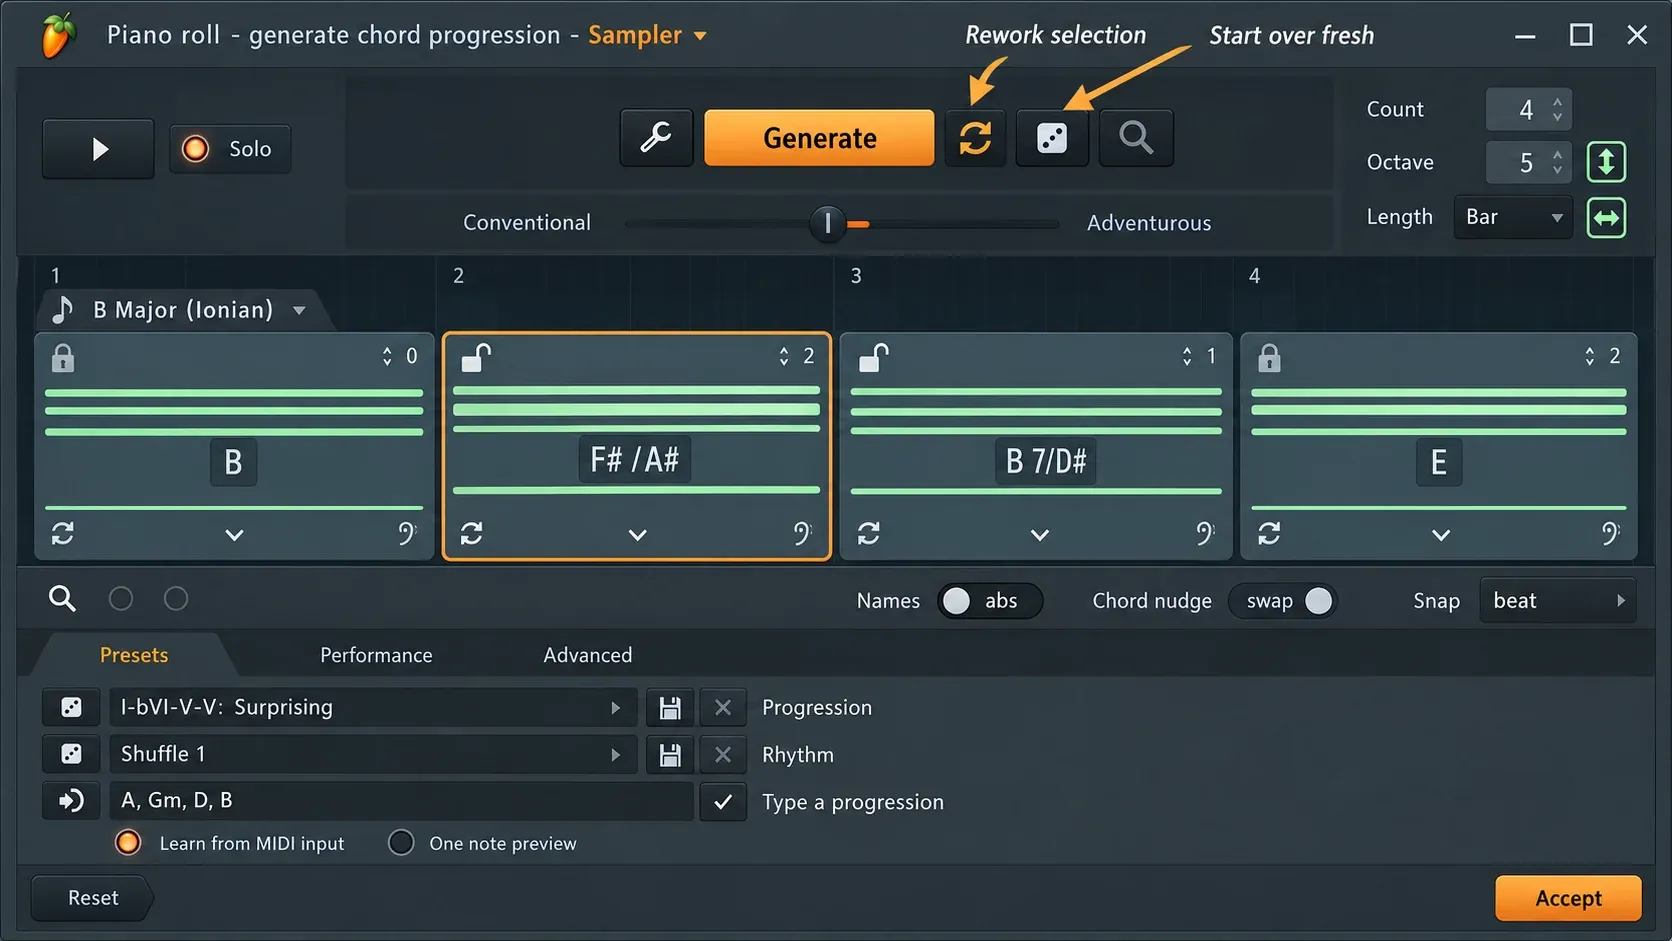
Start over, shown by the dice control, breaks away from the current chord direction. It keeps global settings such as chord Count, octave, Length and generation parameters, but creates a fresh progression and can change the scale between generations. Use it when repeated Generate passes feel like variations of the same bad answer.
Lock the musical decisions you want to keep
A useful chord should survive the next experiment. Click its padlock before Generate or Analyze. Unlocked chords remain available to the model; locked chords stay in place.
Lock by function, not by fear. Keep the opening chord when it establishes the right key center. Keep a strong final chord when it turns back into the loop cleanly. Leave a weak middle transition unlocked. This narrows the problem from “find four new chords” to “find one chord that connects these two decisions.”
If you lock every chord, generation has nothing meaningful to change. If you lock none, a good cadence can vanish while you fix an unrelated position. Two anchors and two open positions are often easier to judge than another completely new four-chord set.
Replace one weak chord without rebuilding the loop
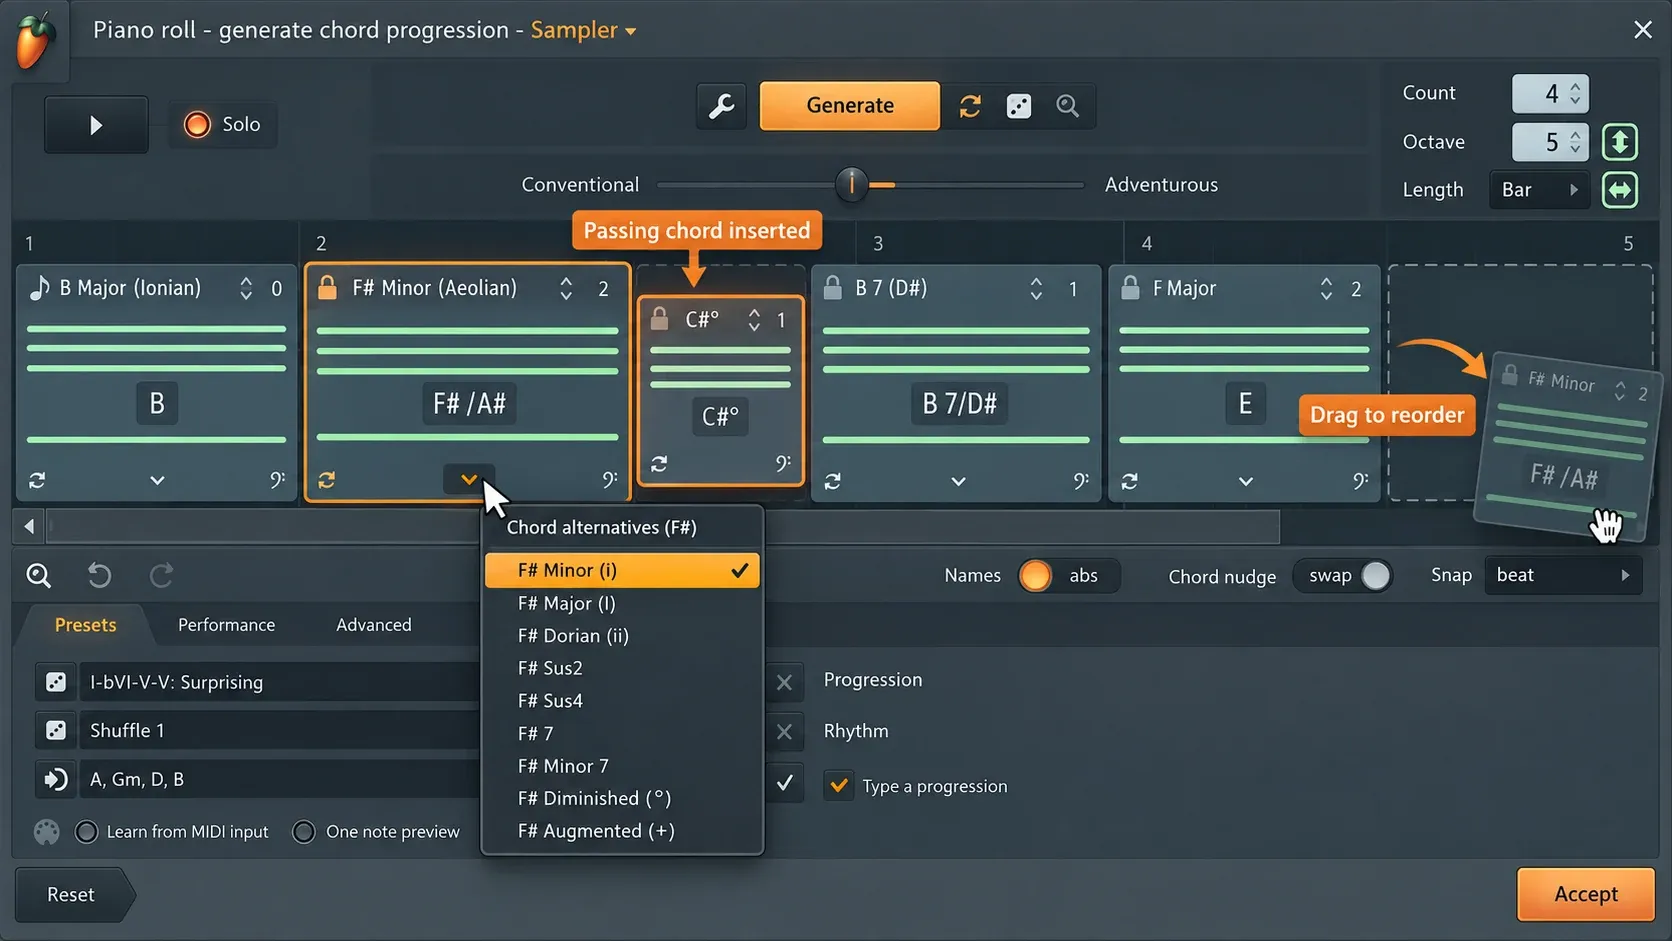
Open an individual chord’s options when one position is the problem. Show alternatives presents choices intended to fit the surrounding progression. Preview them before committing. Regenerate asks for another answer at that position while considering neighboring chords. Select chord lets you choose manually or type a chord name.
A passing chord splits a chord region and creates a shorter lead-in toward the following harmony. Use it when the jump between two chords feels empty or abrupt. It is less useful when the original progression already changes quickly; another harmonic event can make the loop feel crowded.
Chord nudge controls how blocks behave when reordered. Swap exchanges positions. Slide moves a chord along the timeline and pushes the surrounding sequence. Choose deliberately so a timing edit does not silently change the order.
Fix inversion, voicing and bass before replacing the harmony
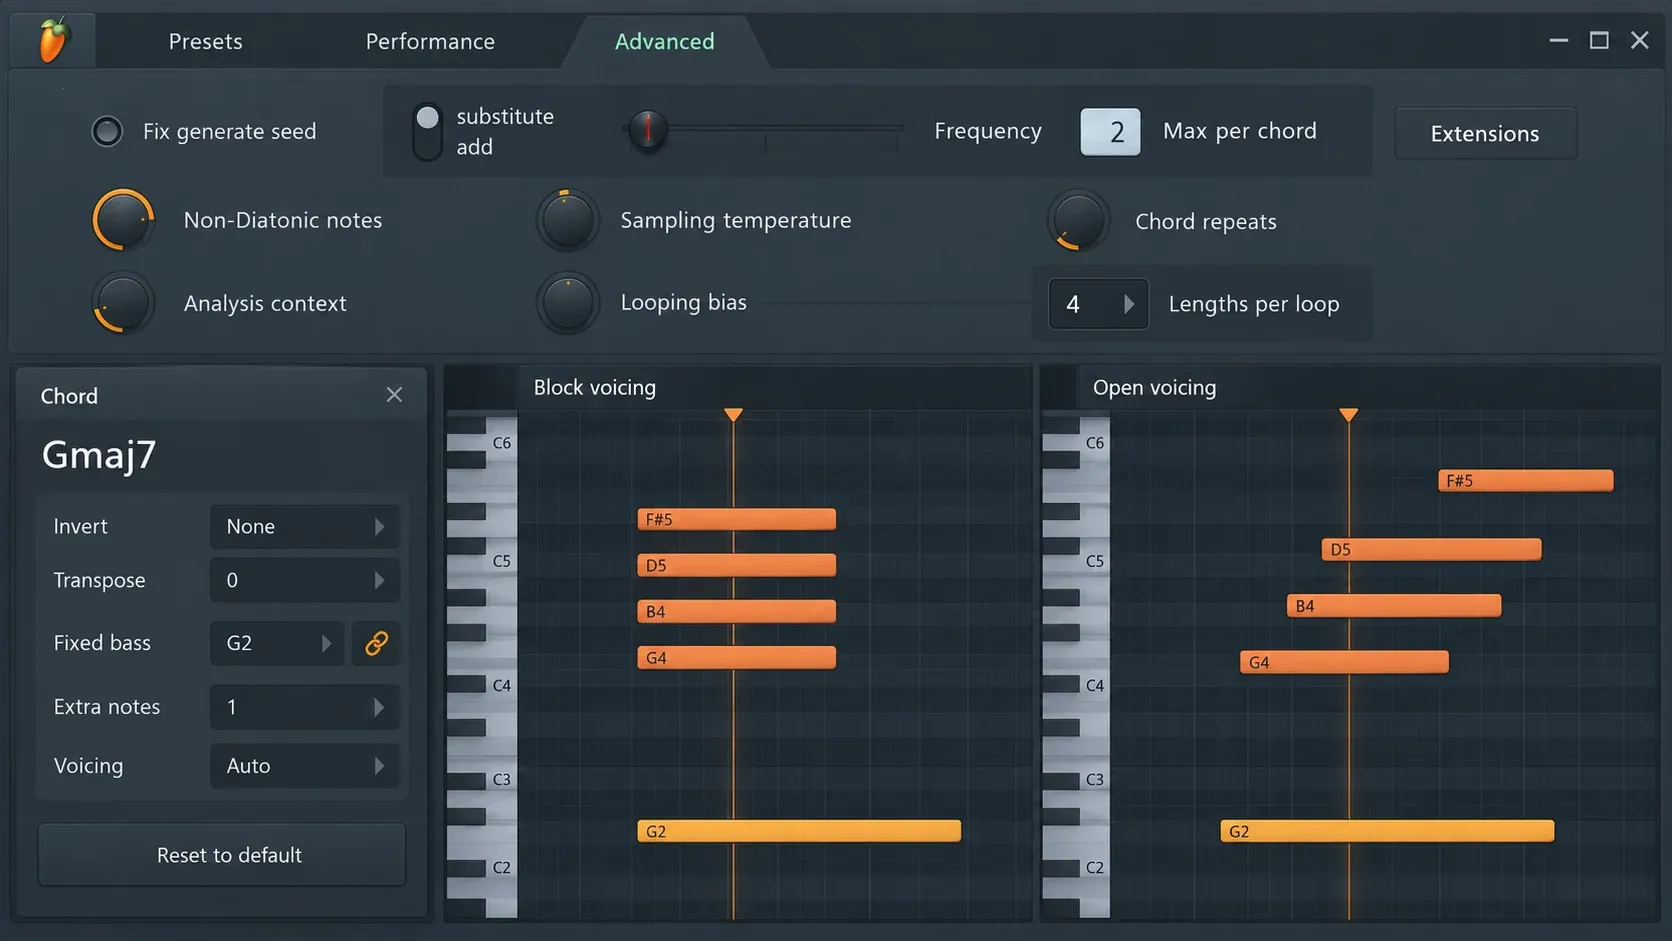
Sometimes the chord choice is fine and the register is the problem. An inversion moves chord tones between octaves, changing which note sits at the bottom and how far each voice travels from the previous chord. Try inversion before rejecting a chord that sounds too heavy, too high or awkward after its neighbor.
The voicing modes change how notes are distributed:
- Block keeps the notes compact.
- Open spreads notes so neighboring tones are farther apart.
- Octave repeats the lowest chord note one octave higher.
- Stacked builds a wider stacked arrangement of chord tones.
Fixed bass holds a chosen bass note when that chord is regenerated. Use it when the low movement is the reason the progression works. Extra notes and extensions add color, but they also increase the chance of crowding a melody. Add them after the basic triads and bass line are clear.
Use Analyze when the melody already exists
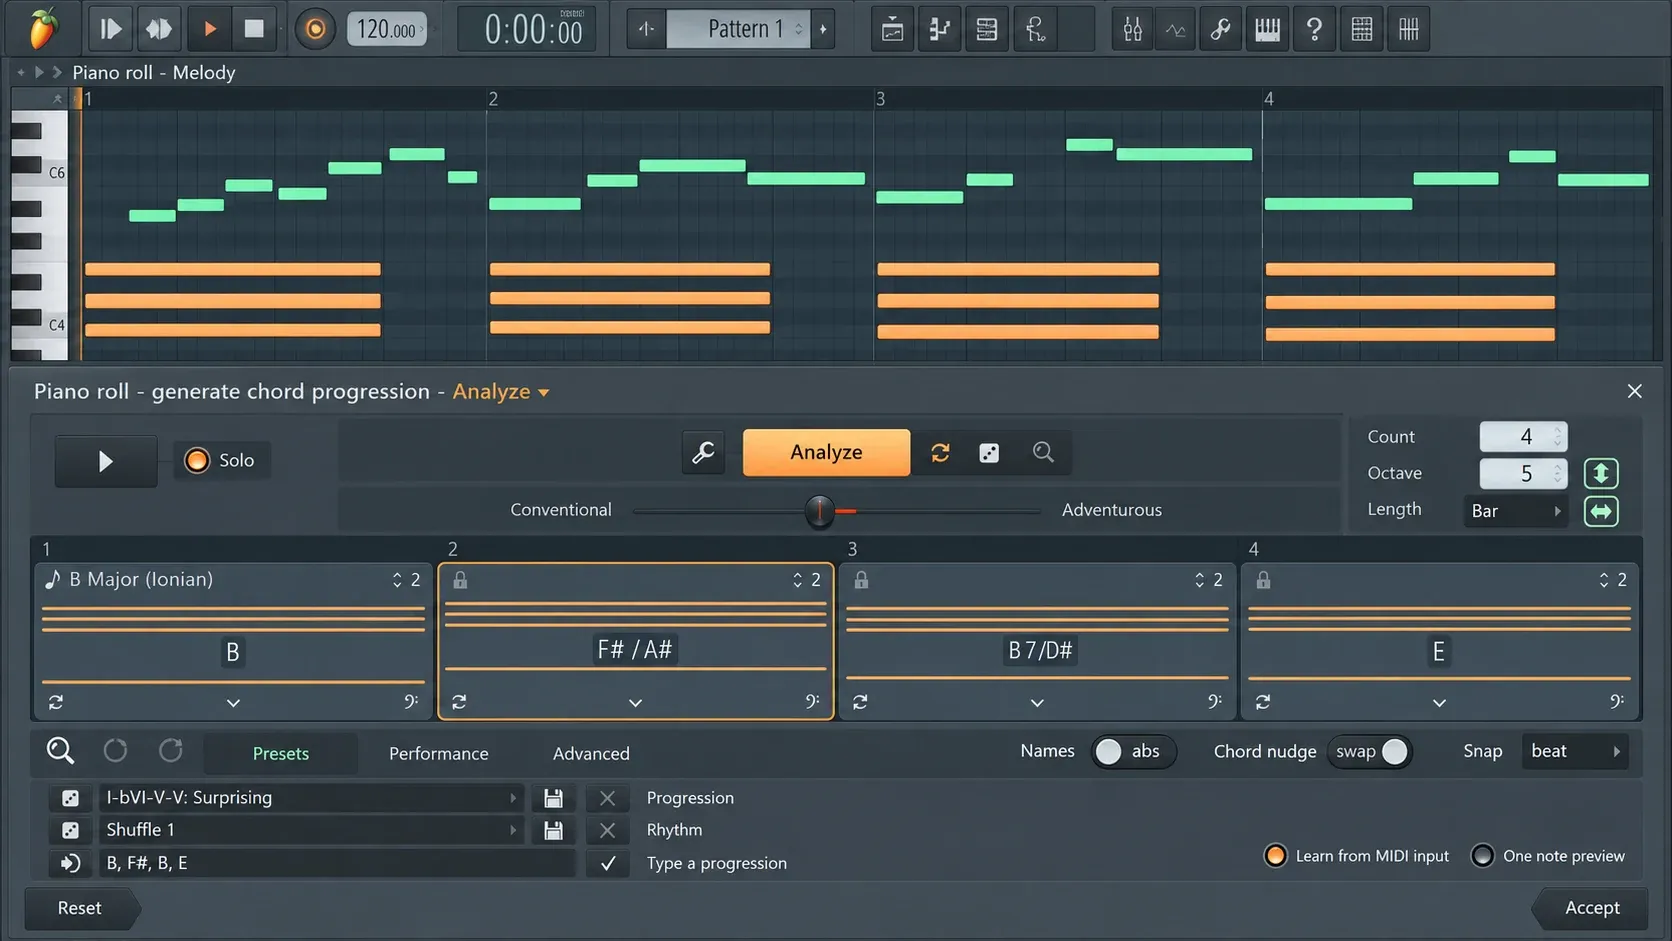
Analyze is available when notes were already present in the Piano Roll before the tool opened. It looks for a chord sequence that fits those notes and can return variations because the process is not deterministic.
This is the right mode when the melody is the fixed idea. Choose a believable Scale and Root, then Analyze while keeping the melody visible. The resulting chords should support the important notes on strong beats. A passing melody note does not need to appear in every chord, but a sustained note that clashes through the whole bar deserves attention.
Use Ghost Notes when the melody or bass lives on another Channel. They help you check surrounding material, but Analyze uses the notes that were already in the active Piano Roll when the tool opened. Put the actual analysis source in the intended Channel and Pattern rather than assuming grey references become input.
Choose what happens to existing Piano Roll notes
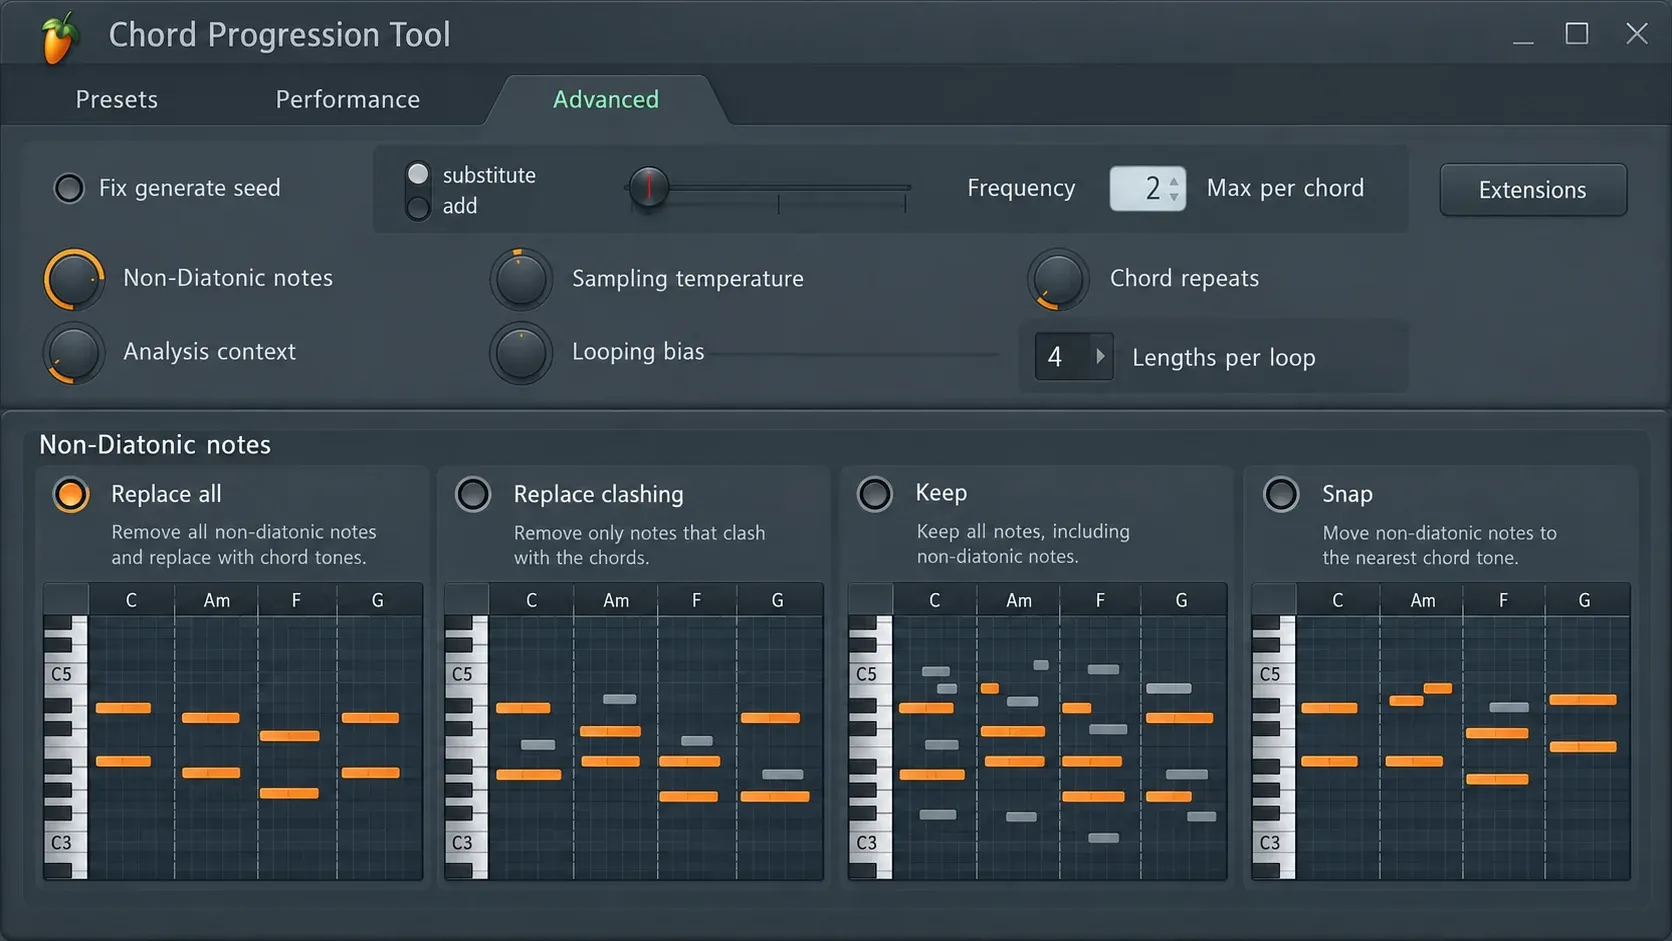
The Non chord notes setting decides how the tool handles notes that existed before it opened. This is the point where a creative experiment can become destructive if the option is chosen casually.
- Replace all: removes the pre-existing notes, although Analyze can still use them as input before replacement.
- Replace clashing: removes notes inside the regions used by generated Main or Bass notes.
- Keep: preserves the notes and asks for chords that accompany them.
- Snap: preserves the notes but moves out-of-chord pitches to the nearest chord tone.
For a melody you intend to preserve, start with Keep. Use Snap as a deliberate transformation, especially on a static arpeggio or repeated melodic figure that should follow changing chords. Replace all belongs to a rebuild. Replace clashing is useful when the generated chord or bass part should own a defined register, but review every removed note before Accept.
Add rhythm with Performance after the harmony works
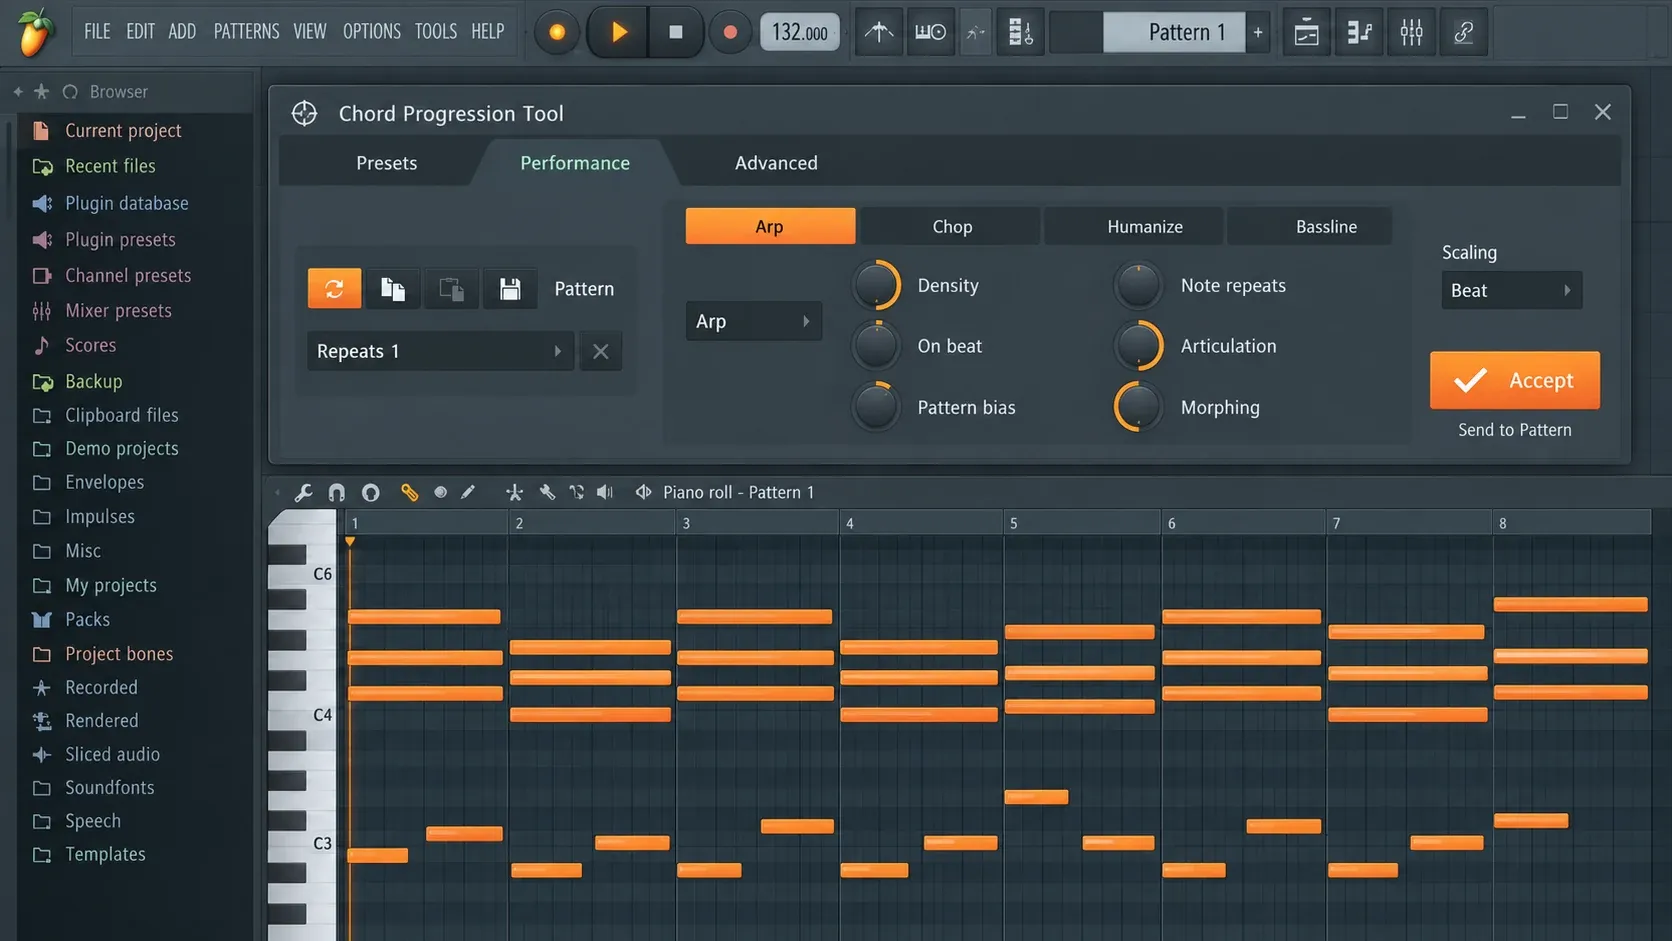
The Performance panel can turn chord blocks into a playable phrase. Arp creates ordered note movement, Chop divides the chord into a rhythmic pattern, Humanize varies timing and dynamics, and Bassline develops the low part.
Humanize includes Timing depth, Dynamics depth, Strum time and Strum curve. Increase one dimension at a time. Timing changes when notes begin; dynamics changes their emphasis; strum controls the spread and shape of chord attacks. If all four move aggressively, it becomes difficult to identify which change improved the part.
Performance patterns can be regenerated, copied, pasted and saved as user patterns. They are strongest when the chord progression already survives as plain blocks. If the harmony only sounds interesting after a busy arp hides it, go back to chord choice and voice leading.
After Accept, the resulting chord notes can be processed further. The dedicated Arpeggiate guide is useful when you want to build the rhythmic pattern in the Piano Roll instead of committing it inside this tool.
Use Advanced controls to limit variation
Advanced settings are useful once you can name the problem. Fix generate seed keeps results consistent while you change parameters. Extensions controls decide whether added tones substitute for basic notes or sit beside them, how often they appear and how many one chord may receive. Non-diatonic notes encourages pitches outside the selected scale.
Sampling temperature moves from common chord transitions toward less common and more dissonant choices. Chord repeats controls how often the same chord returns. Analysis context changes how much surrounding harmonic sequence matters compared with notes in the current chord interval. Looping bias encourages related or different chord choices across repeated generation loops. Lengths per loop gives generation and Humanize a metric phrase structure.
Change one of these controls, listen, then decide. A high temperature, more non-diatonic notes and frequent extensions all at once may create novelty, but it does not reveal which setting produced the useful tension.
Accept the progression into the Pattern
Press Accept when the key, chord order, bass movement, voicing and treatment of existing notes are all intentional. The notes are written into the selected Pattern. The tool also establishes the Scale and Root context used by the Piano Roll.
Generated chord notes are grouped by default. Grouping makes each chord easy to move as a unit. When you need to edit individual tones, select the chord notes and use Alt/Option+G to ungroup them. Rename the Pattern immediately so the result does not become another anonymous block in the project.
Fix the decision that caused the bad result
The chords appeared on the wrong instrument
Undo, select the intended Pattern and Channel, and reopen the correct Piano Roll. The tool writes into the selected Pattern; it does not infer which instrument you meant.
A useful chord disappears every time you generate
Lock that chord before the next pass. Leave only the unresolved positions open. If every new answer still resembles the same direction, use Start over instead of repeating Generate.
The progression sounds jumpy even though the chord names look right
Adjust inversions and voicing, then review the fixed bass. Large register changes can make a sound harmonic choice feel disconnected.
The existing melody changed or vanished
Check Non chord notes. Use Keep when the melody must survive, Snap only when pitch adaptation is intentional, and the Replace modes only when generated notes should take over those regions.
The result is busy and hard to edit
Turn off Performance, reduce extensions and listen to block chords. Solve harmony first. Then add one rhythmic treatment and ungroup only the notes that need individual work.
Use this repeatable workflow
- Select the destination Pattern and instrument, then open its Piano Roll in Pattern mode.
- Set Scale, Root, Count, octave and Length.
- Preview the simple four-chord result before adding performance.
- Use Generate for new unlocked positions, Rework for a related pass, or Start over for a new direction.
- Lock the chords that define the progression.
- Use alternatives, passing chords and reorder controls on specific weak transitions.
- Improve voice leading with inversion, voicing and fixed bass before replacing good harmony.
- Use Analyze when notes already in the active Piano Roll should lead the harmony.
- Choose Replace all, Replace clashing, Keep or Snap before rendering.
- Add Arp, Chop, Humanize or Bassline only after the plain progression works.
- Press Accept into the intended Pattern, name it, and ungroup with Alt/Option+G only when note-level editing is needed.
The best result is rarely the first generated loop. It is the loop you can explain: which chords establish the key, which transition creates tension, why the bass moves the way it does, and which notes were kept from the original idea. The tool can propose harmony quickly; your job is to turn that proposal into a Pattern that belongs in the track.