FL Studio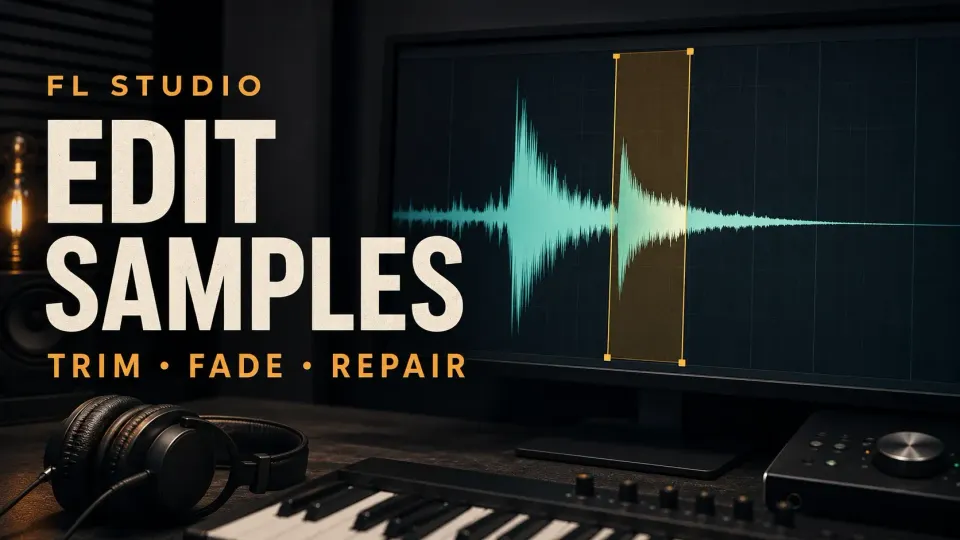
A sample can lose its punch while you are trying to remove one tiny click. Before adding more processing, check what changed: the selected range, an automatic edge fade, the file itself, or just the way an Audio Clip plays it.
To trim a sample in Edison, protect the original file, select the audio you want to keep, then choose Edit > Trim (Ctrl+Del). Listen to the new start and end. Repair only the defect you can identify, and save the edited version under a different filename before using it in the song.
Edison is included in Producer Edition and higher editions. In the standard time-unlimited Trial you can export audio and save projects, but saved projects cannot reopen until purchase and unlock. Export any sample you need before closing the session; an FLP save alone is not a way to resume Trial work.
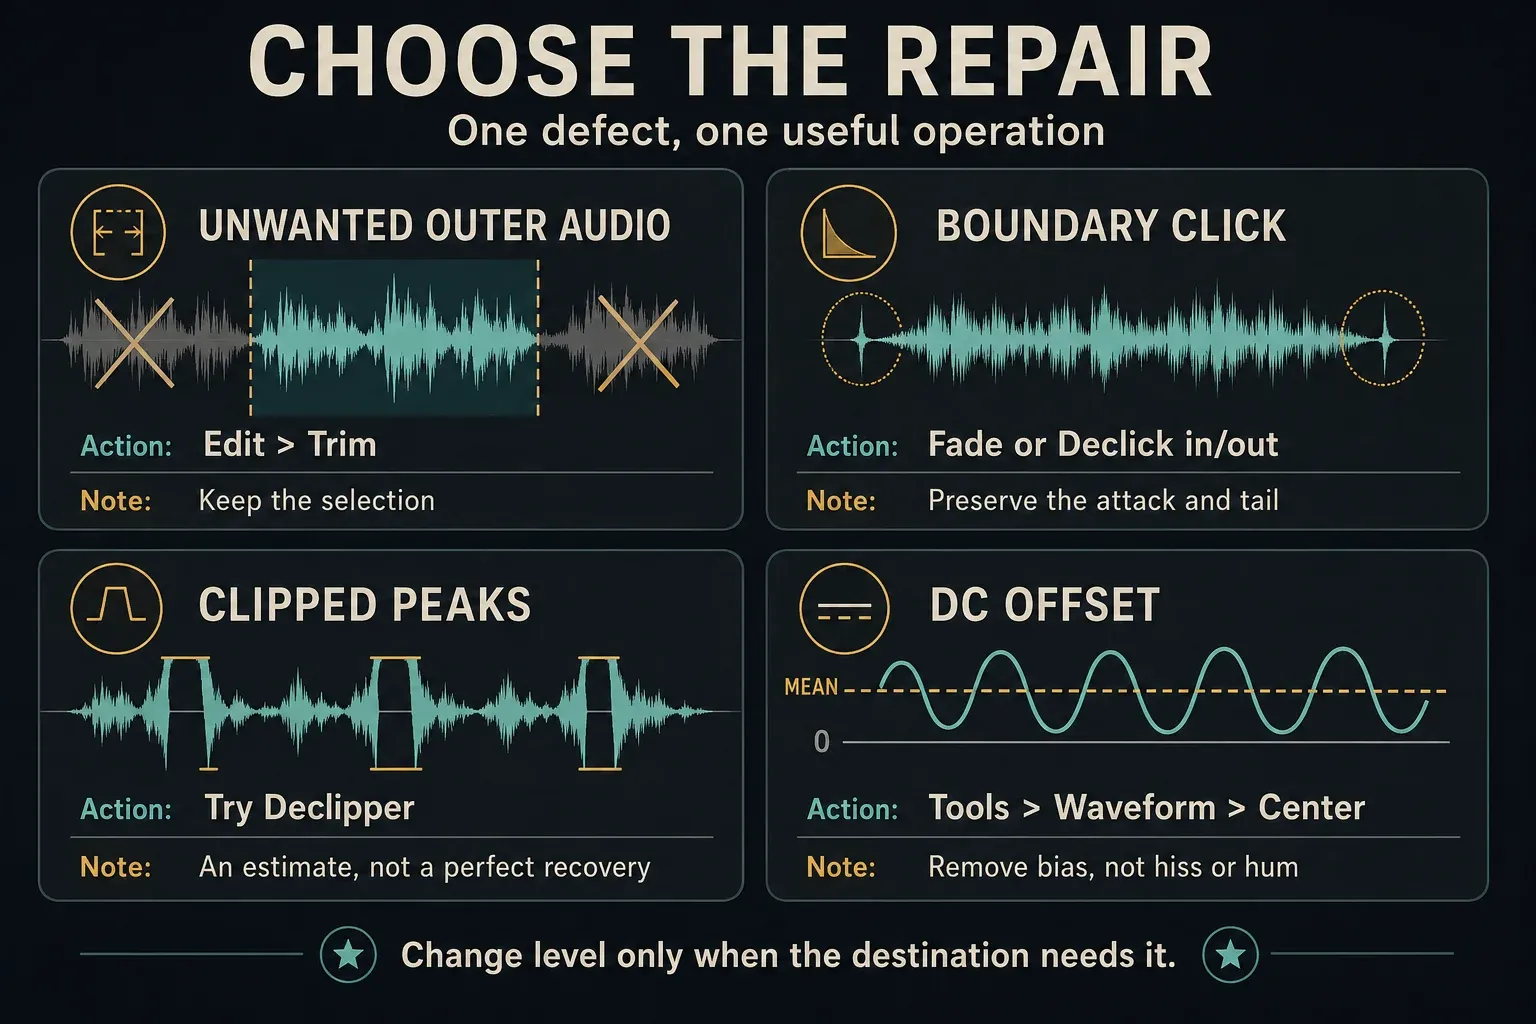
Choose the problem before the tool
Play the raw sample first. Is the unwanted sound already in the file, or does it appear only after you cut, loop or arrange it? That answer is more useful than the size of the waveform.
| What you hear or see | What to try | What to protect |
|---|---|---|
| Unwanted material before or after the keeper | A deliberate selection, then Edit > Trim | The first transient and useful decay |
| A click at a new start or end | A better boundary, short fade or Declick in/out | The timing and attack of the sound |
| A short click embedded within the recording | Inspect the exact event; consider the Windows Declicker | Nearby musical transients |
| Flattened peaks and audible clipping | Try Declipper on a copy, or re-record | The raw recording and consistent level |
| A genuine average offset from the zero line | Center | Do not confuse waveform asymmetry with DC bias |
| A quiet but otherwise usable sample | Gain adjustment or peak normalization, if needed | The intended balance in the track |
Steady hiss or hum needs a different decision: use the background-noise removal guide for the noise-profile workflow. Clicks that vary with project load may instead need playback crackling troubleshooting; do not destructively process every sample to chase an intermittent playback fault.
Protect the source file before editing
Make unique is not the same as Make unique as sample. For an Audio Clip, ordinary Make unique creates another Audio Clip Channel while reusing the original audio file. Make unique as sample also creates a separate sample file on disk. Image-Line documents this distinction in the Audio Clip editing controls.
If you are isolating one Playlist occurrence for file-level edits, choose Make unique as sample from that clip's menu and give the copy a recognizable name. Preserve the full raw recording before cropping if you might need material outside that clip later. If you are starting from a file in Edison, use File > Save sample as to create a separate working file before editing. Keep the raw file at its original path; never confirm an overwrite of it merely to get past a save dialog.
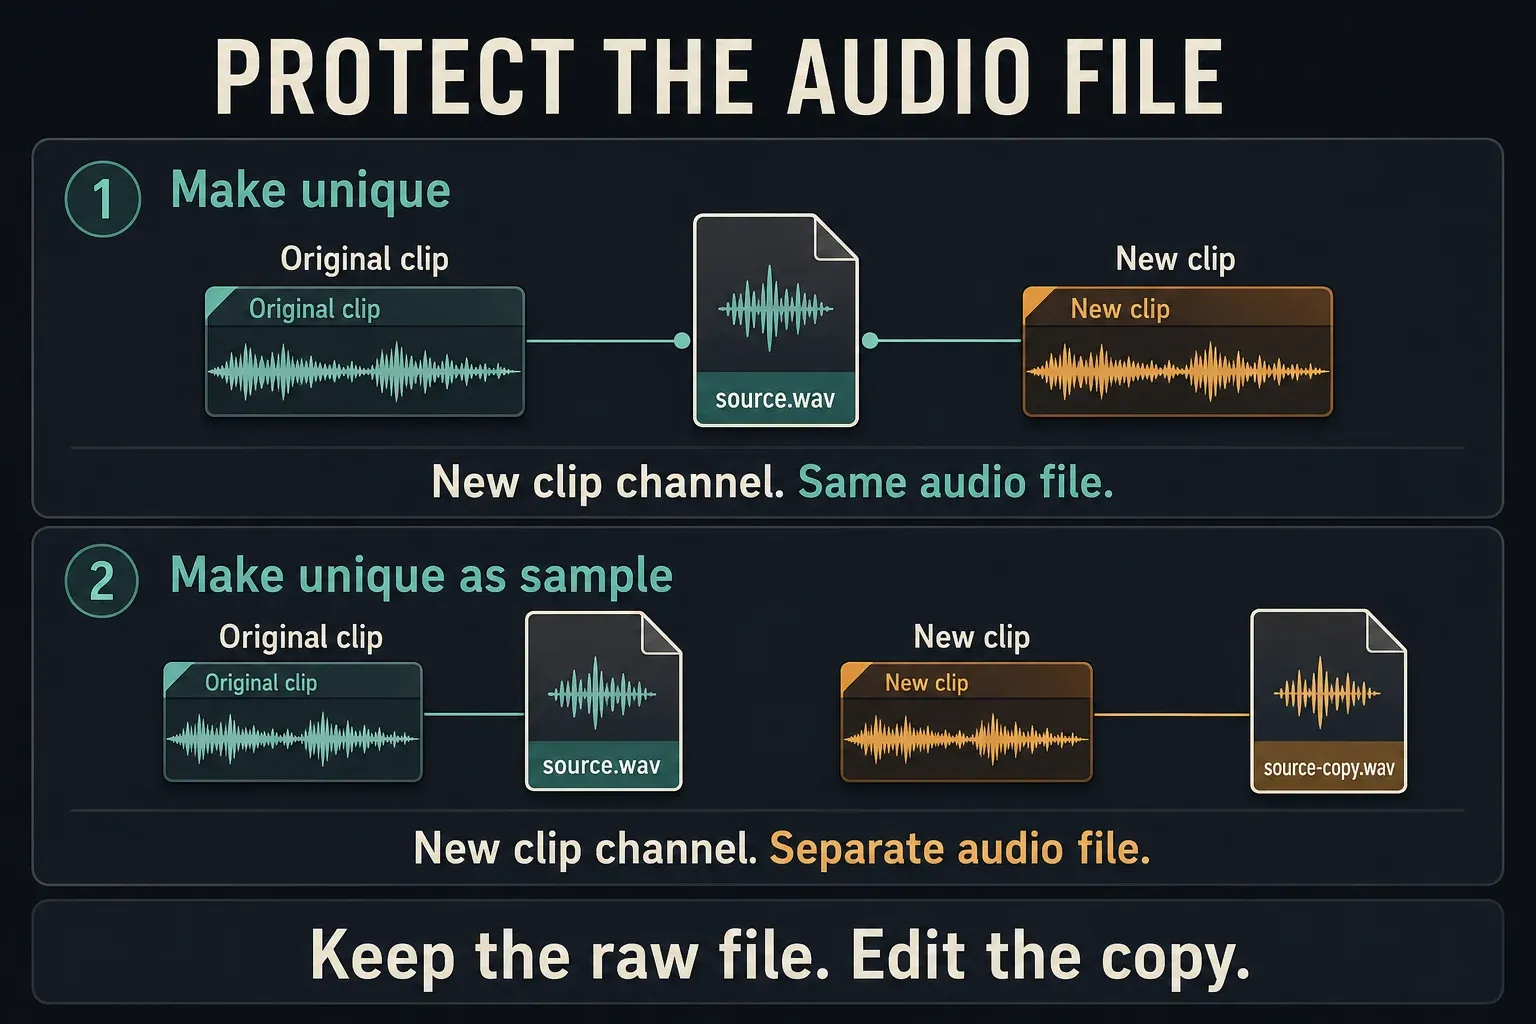
Changing the waveform in Edison and delivering that result back to the project are separate actions. A renamed Playlist label is not a backup, and saving a new WAV does not automatically replace the intended clip. The final handoff below makes that choice explicit.
Load the working audio with File > Load sample. If you need help opening the plugin or understanding its recording controls, start with the complete Edison guide. Here, keep the task smaller: preserve the useful sound and remove the specific defect.
Clean a sample in eight steps
- Protect the raw file. Make an independent working sample, not just another Channel using the same file. In standard Trial, plan to export before closing.
- Identify one defect. Listen to the unedited sound and decide whether you need trimming, boundary repair, embedded-click repair, declipping, DC correction or level adjustment.
- Select the keeper. In waveform editing mode, drag across the wanted audio. Include the attack and the full decay you need.
- Trim outside the selection. Audition both ends, then choose
Edit > Trim. This removes the outside data; it does not pad that space with silence. - Check the new boundaries. Use a suitable zero crossing, short selected fade or Declick in/out only where needed. Compare the attack before accepting smoothing.
- Apply only relevant repair. Preview Declipper or the Windows Declicker on the working copy. Keep unrelated Clean up modules off and
Output noise onlyoff when accepting the processed audio. Use Center only for actual DC offset. - Set level deliberately. Use ordinary Normalize only if peak scaling is useful; it does not restore clipped detail or set perceived loudness.
- Compare, save and place. Compare raw and edited versions at similar listening levels, save a distinctly named lossless WAV, then send the intended selection or whole sample to the Playlist. Check it in context.
Trim the selection, not the transient
Make sure Edison is in waveform editing mode. Left-click and drag horizontally to select the keeper, then zoom into each boundary. The sample-edit window documentation explains selection and zoom controls. A visible gap before a kick can be unwanted lead-in; a quiet breath, pick sound or reverb tail can be part of the performance.
Edit > Trim removes audio outside the selection. Edit > Delete removes the selection itself and shortens the file. Edit > Clear silences the selection without shortening the sample. These are different operations, not interchangeable ways to tidy the screen.
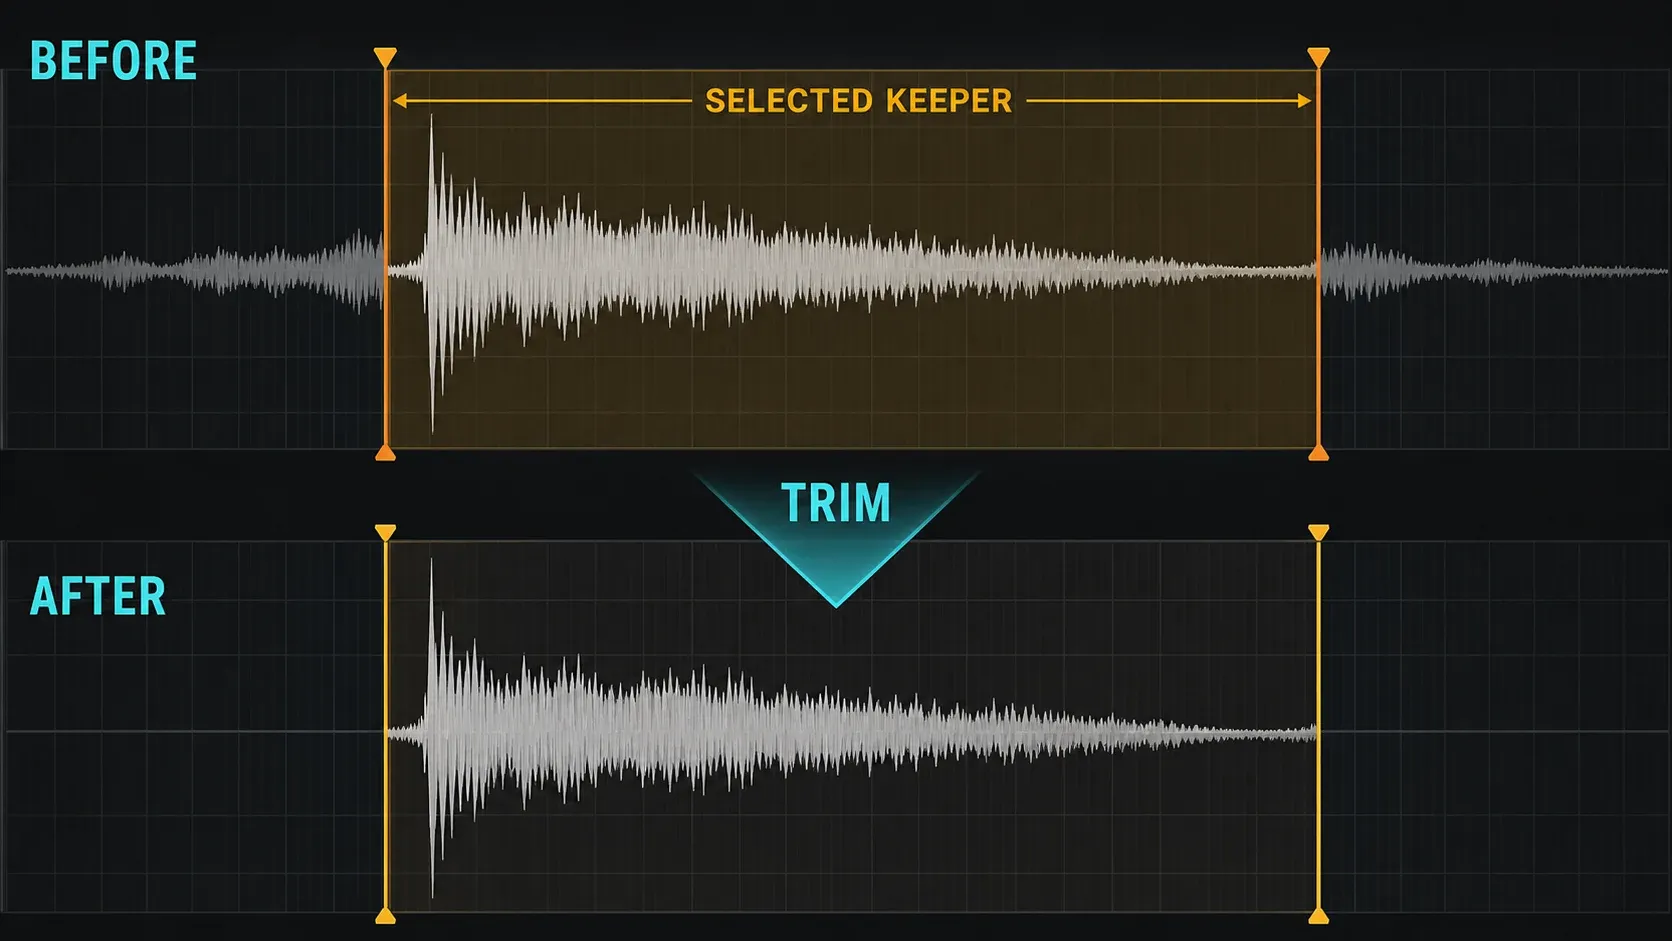
The toolbar's Trim side noise is another tool: it uses a noise threshold. It is not the exact-selection command above. If you want control over where a cymbal decay or vocal ending stops, audition that boundary yourself instead of letting a threshold decide it.
Why trimming can soften the attack
Check Edit > Click-free (smooth) editing if a transient changes even though your selection did not cut into it. This option applies short fades or crossfades around edit points. It can reduce clicks, but the edge is no longer untouched.
Compare a trim with and without that option on the working copy. Keep the version that preserves the attack without an objectionable click. Image-Line's feature-switch reference confirms the automatic smoothing; the visible older support discussion about softened transients illustrates why this setting can surprise users. That discussion is not a test of the current build.
Remove clicks at the start or end
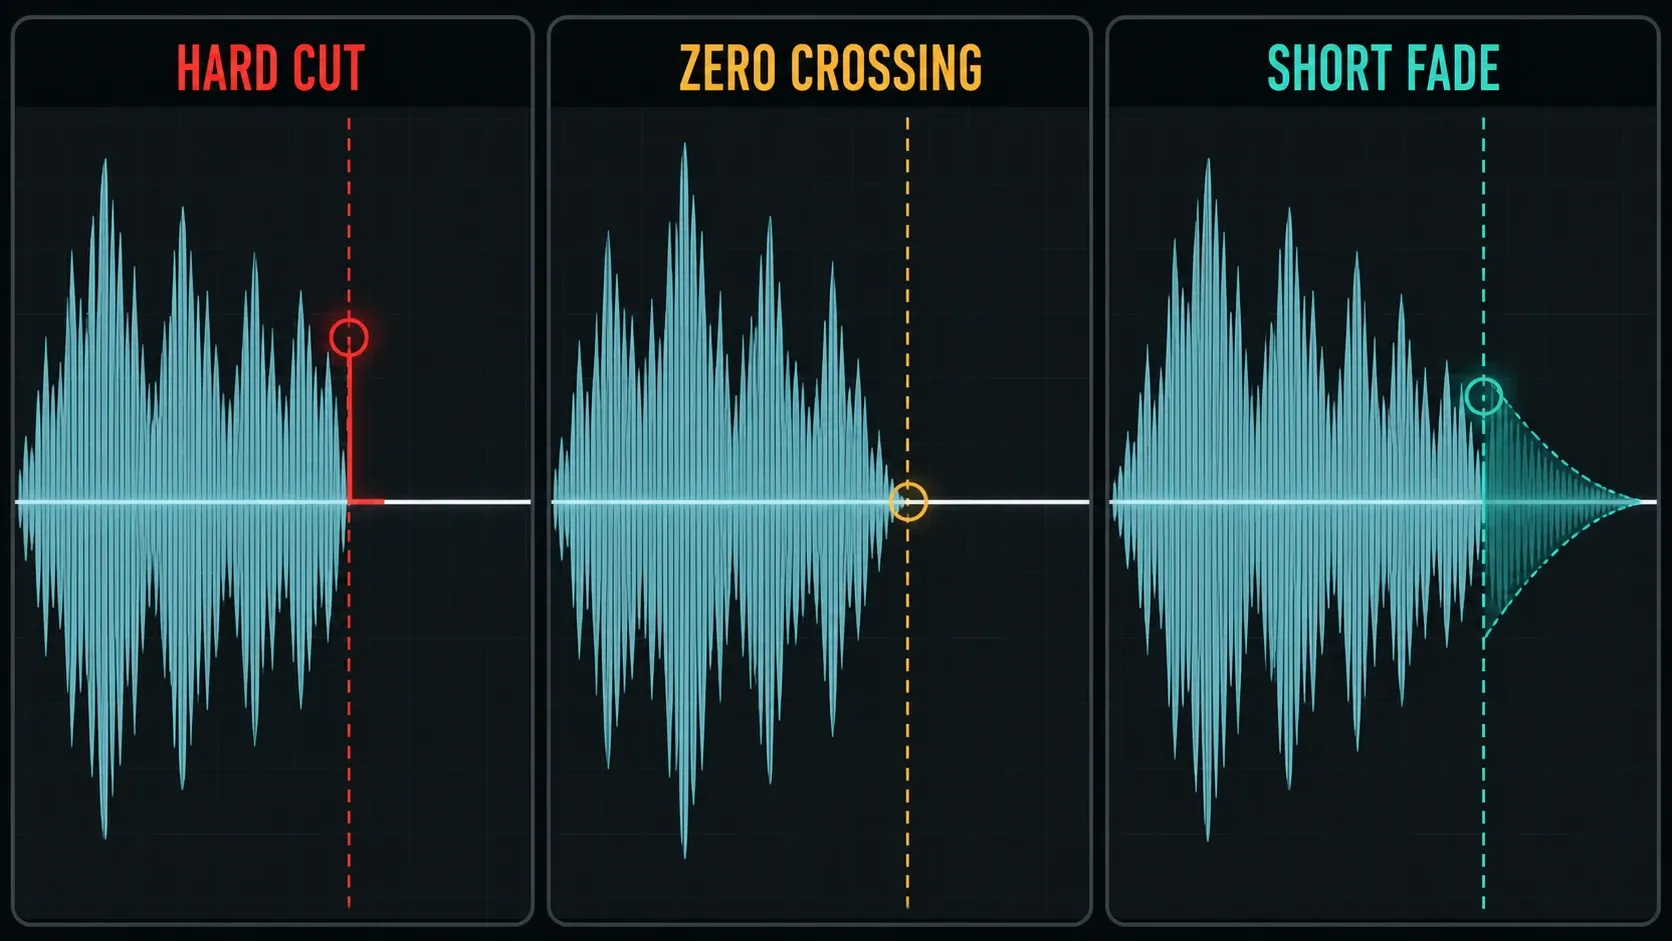
A hard cut away from zero amplitude can create an abrupt jump between the waveform and silence. The Sampler documentation explains this discontinuity. Zooming in makes the boundary easier to inspect, but the listening check still decides whether the edit works.
Edison's Snap > Snap to zero-crossing helps place selections where the waveform crosses the zero-amplitude line. This is not 0 dBFS: zero amplitude means the center line, not the loudest available digital level. Do not move an important attack noticeably late just to find a convenient crossing. A short fade can be the better compromise.
Fade only the range you mean to fade
Select a short region at the start, then use Tools > Amp > Fade in. At the end, select the intended tail and use Tools > Amp > Fade out. Start with the smallest useful region and lengthen it only if the edge still needs smoothing. There is no single fade duration that protects every kick, bass note and vocal consonant.
Fade in rises from silence to full level; Fade out falls from full level to silence. Both use a logarithmic curve. Crucially, with no region selected, the fade applies across the whole sample. Check the selection before clicking, especially if a previous fade made the sound lose its attack.
Fade, Declick and Declicker are different
The Edison edit buttons have separate mouse actions: left-click the fade controls for Fade in/out; right-click them for Declick in/out. The latter smooths the corresponding edge of the selection. It is not the analysis-based Declicker inside Clean up.
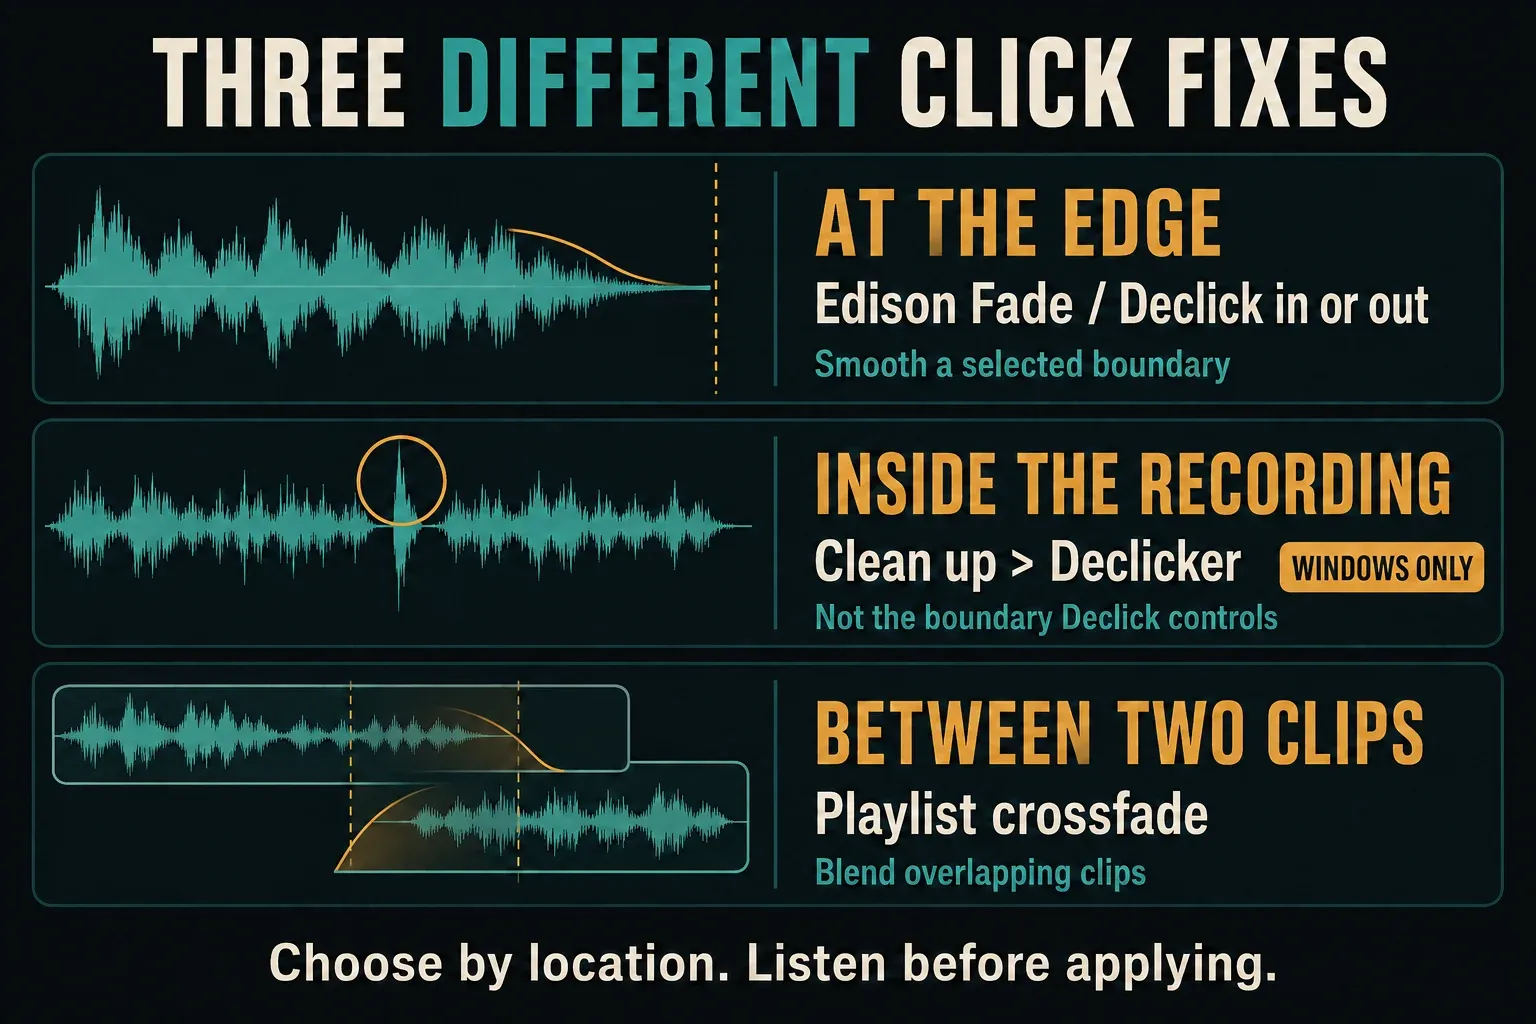
If the join belongs to an arrangement you are still changing, consider a Playlist clip fade or crossfade instead of baking it into the sample. Current Audio Clips have per-instance fade controls. For an overlapping pair, a crossfade can shape the transition while the source audio remains available. Automatic crossfades depend on their setting and can be overridden by manual fades.
Repair an embedded click without erasing the hit
A pop in the middle of a sustained sound is not a new clip boundary. Mark the exact location and compare it with the raw file. If the click is present in the recording, test a suitable repair on a copy; cutting or fading a large area can damage more music than the original click did.
On Windows, open Tools > Spectral > Clean up (denoise) and enable the Declicker section. Image-Line says it works best on click transients of 10 ms or less. Its Sensitivity control trades missed clicks against mistaken detection of useful transients: raising it can distort drums and other attacks.
Leave the Denoiser and Declipper disabled unless you intend to use them, and check that the EQ envelope is neutral. Keep Output noise only off for the final processed result. Preview before Accept; Accept replaces the selected audio in Edison, not a separately saved safety copy. On macOS this particular Declicker is unavailable, but the ordinary edge Fade and Declick controls are separate functions. The current Clean up manual documents these scopes.
If the click changes position between playbacks, disappears in an exported check or affects unrelated tracks when the project is busy, investigate audio settings and underruns as well. Those observations are clues, not proof that the file is undamaged.
Use Declipper for clipping, not ordinary volume
Turning a clipped file down makes it quieter; it does not restore flattened peaks. Edison's AI Declipper estimates missing peak information and can improve a recording you cannot repeat. It cannot promise the original detail. If the performance is repeatable, a clean replacement recording is often the more dependable choice.
In Clean up, enable only the repair modules you mean to apply. Declipper may prompt for a model download on first use. Choose Vocal for voice alone or General for music, including voice mixed with music. For percussion, compare both models rather than assuming one will always win.
Set the Declipper threshold just below the actual clipping level, using the flattened waveform as your reference. Do not borrow a fixed threshold from an unrelated file. Preview the result with Output noise only off, then compare tone and attack before accepting it.
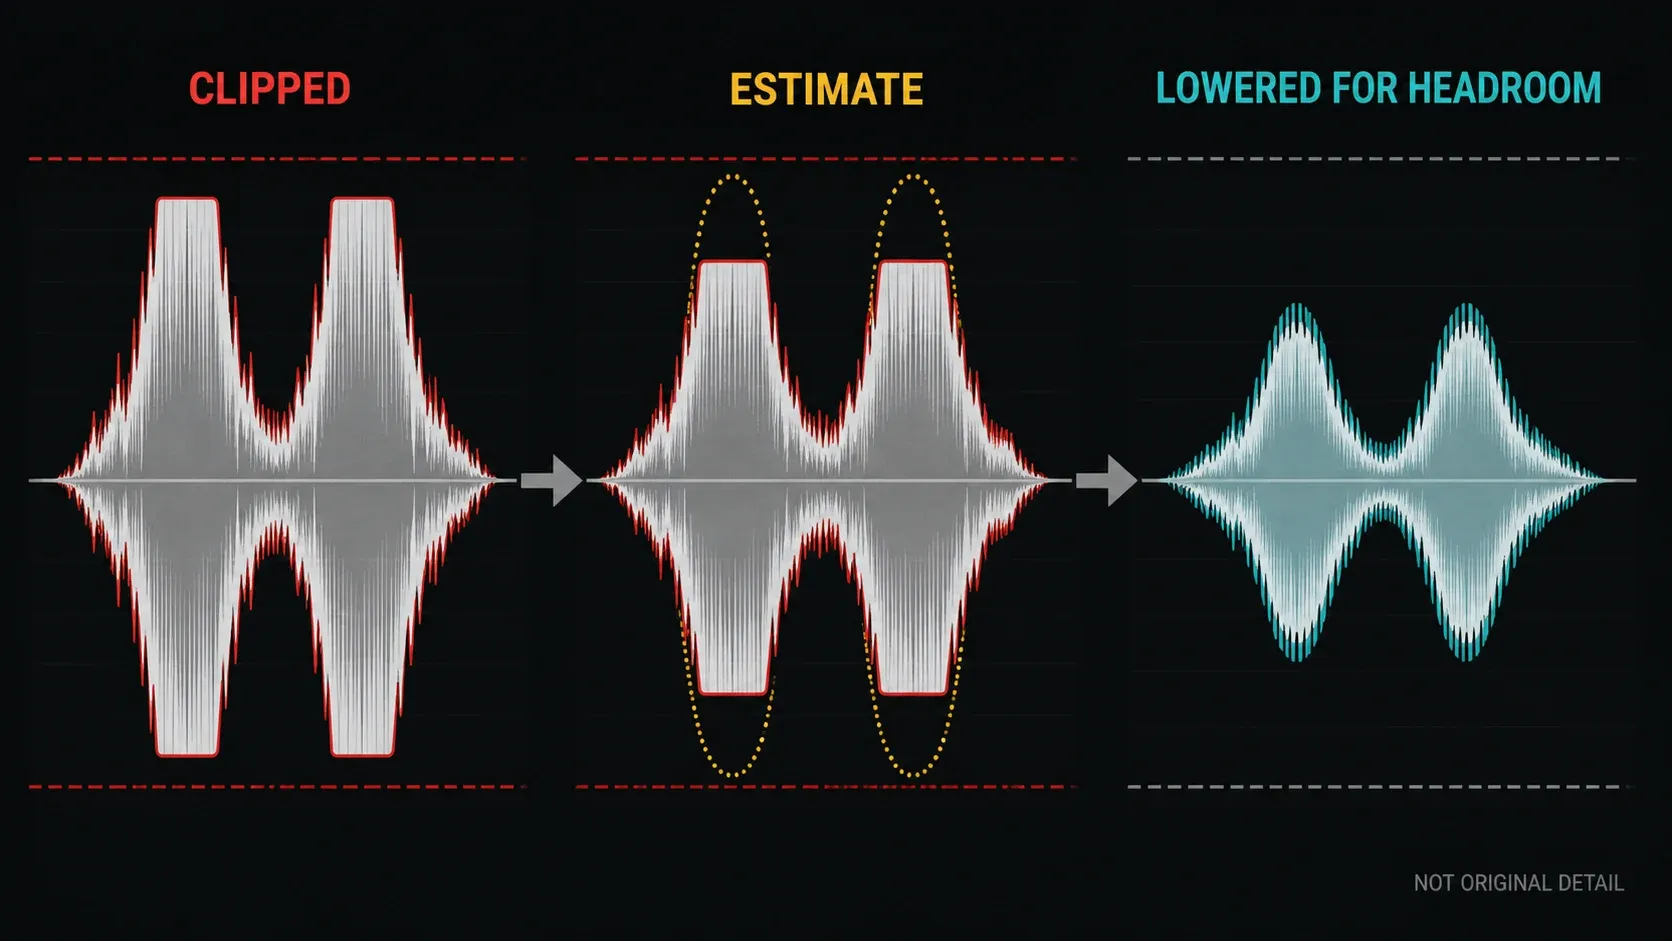
The lower level after processing is expected: the new peaks need headroom. Image-Line therefore recommends processing the entire recording in the usual case, rather than creating a sudden level drop in one small processed section. Preserve the raw version and compare at similar listening levels so a louder file does not win by default.
Center DC offset and normalize only with a reason
Tools > Waveform > Center removes DC offset by shifting the waveform's average amplitude to zero. DC offset is a bias above or below the center line; it is not simply a waveform whose positive and negative peaks have different shapes. Center is not a hum remover or a general noise-cleaning step.
Tools > Amp > Normalize applies peak scaling: the loudest sample value reaches the available maximum and the other values are scaled by the same factor. That does not repair clipping, rebalance loud and quiet phrases or set a loudness target. A sample that already sits correctly in the track may need no normalization at all.
Two similarly named options behave differently. Normalize all regions equalizes selected regions to the loudest region; it does not by itself make every region peak at the maximum available level. Lossy normalize also manipulates waveform phase. For simple cleanup, use the ordinary operation when you actually want gain-only peak scaling. These distinctions are documented in Edison's menu reference.
Once the file is usable, set its musical balance in the Mixer. Do not turn a sample-editing pass into a contest for the largest waveform.
Save the edited sample and check the handoff
Compare the raw and edited versions one at a time, at similar perceived listening levels. Listen for the original attack, a natural ending and any new roughness around a repair. Then hear the edited sample against the surrounding instruments. Keep it if the specific problem improved without a worse trade-off.
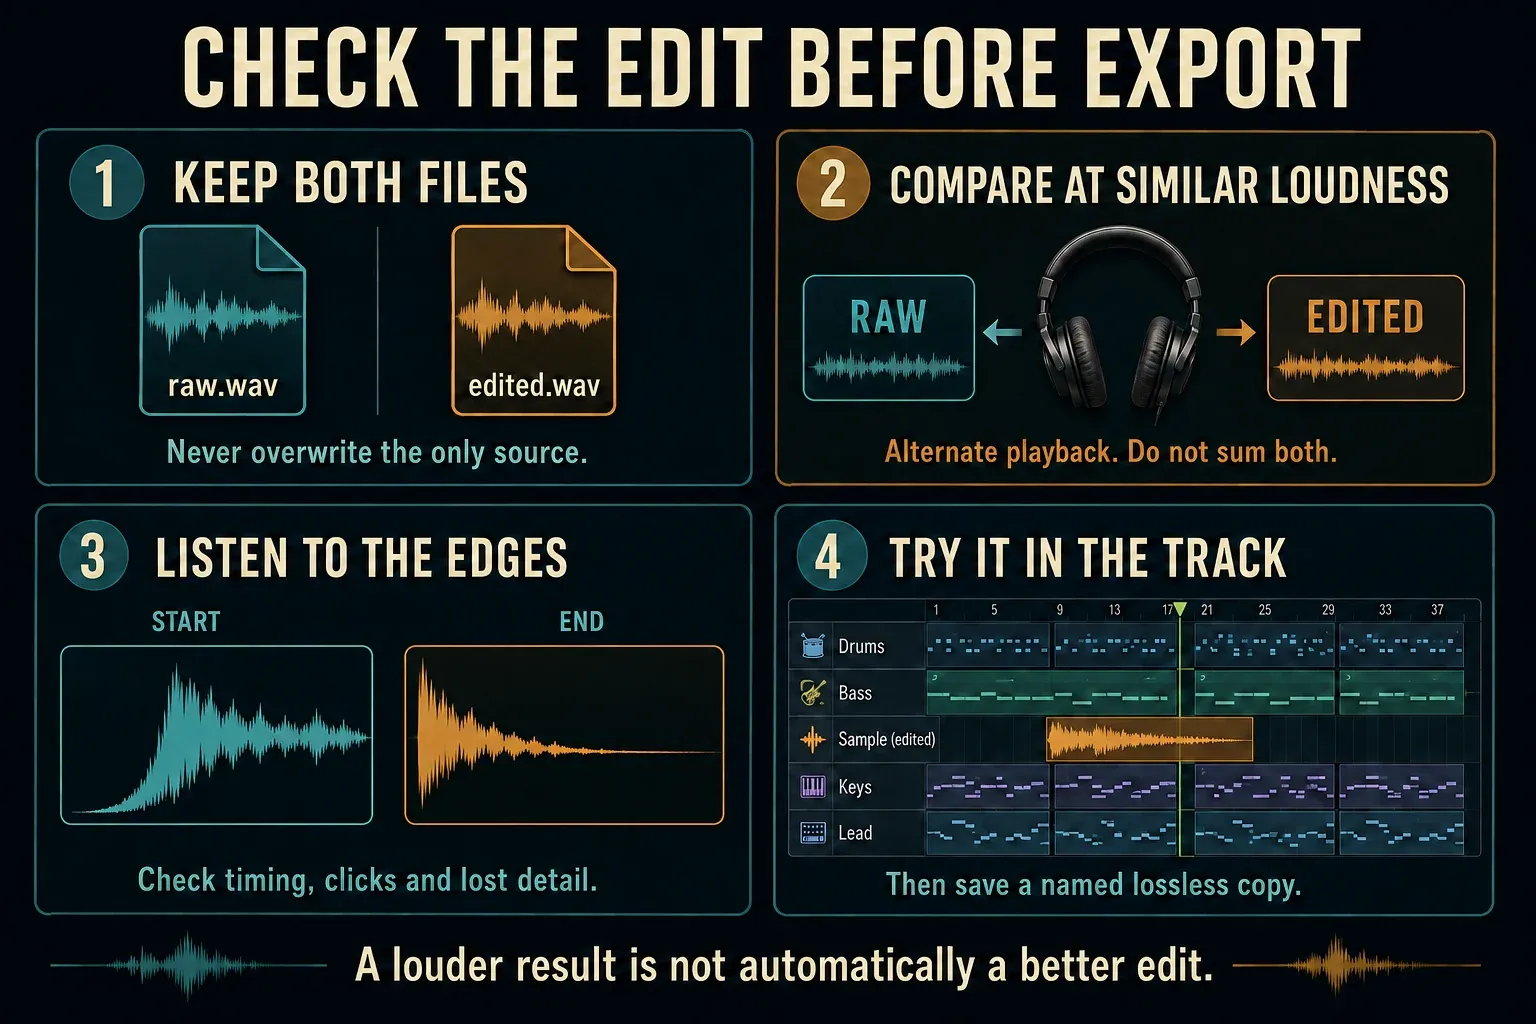
Use File > Save sample as for a clearly named working result, such as snare-clean-v01.wav. Choose the standard lossless Microsoft wave file type, not compressed WAV or MP3, for an editing master. Check the sample properties for the intended rate and bit depth; a .wav extension alone does not prove an uncompressed file.
To place a new clip, left-click Send sample to Playlist, or drag the Drag / copy sample / move selection control to the intended destination. These actions use the selection, or the whole sample when there is no selection. Clear an accidental small selection with Select > Deselect before sending a whole file.
Right-clicking Send sample to Playlist is different: it replaces the currently selected Audio Clip or Sampler Channel with Edison's sample or selection. Use that only when you have identified the intended destination and protected other uses. Saving a new WAV and inserting a new clip is the clearer route when you want to keep the original beside it for comparison.
Check that the correct version plays in the project and that trimming has not moved the audible attack out of time. If you are preparing playable chops, continue with Slicex sample slicing. If you still need to extract a vocal or instrument from a mix, do that with stem separation first; extraction and sample cleanup solve different problems. More editing routes are grouped in Samples & Audio Editing.
Frequently asked questions
How do I trim a sample in Edison?
Select the audio you want to keep, audition both ends, then choose Edit > Trim or Ctrl+Del with Edison focused. Trim deletes material outside the selection. Delete removes the selection itself; Clear silences it without shortening the file.
Why does a sample click or lose its attack after trimming?
A new boundary can jump abruptly from a non-zero waveform value. Try a suitable zero crossing or a short selected fade. If the attack softened instead, compare the edit with Click-free (smooth) editing on and off; automatic smoothing can change the edge.
What is the difference between Fade, Declick and Declicker?
Left-clicking an Edison fade control applies a regular fade to the selected range; right-clicking applies Declick at that edge. With no selection, a regular fade affects the whole sample. The separate Declicker inside Clean up detects short clicks within recordings and is Windows-only.
Does Make unique protect the original sample file?
Not by itself. Ordinary Make unique creates another Audio Clip Channel using the same audio file. Make unique as sample creates a separate disk file as well. Keep the raw file and save edits under a distinct filename.
Can Edison repair clipped audio?
Its AI Declipper can estimate missing peaks, but cannot guarantee the original detail. It lowers overall level to make headroom, so processing only a short section can introduce a level change. Compare a working copy with the raw recording, or re-record when possible.
Does Normalize fix a quiet or distorted sample?
Ordinary Normalize scales peak level by a common factor. It can raise a quiet sample, but it does not repair clipping, balance phrases or match perceived loudness. Use it only when peak scaling helps the intended result.