 FL Studio
To import an MP3, WAV or other supported audio file into FL Studio, drag it from Explorer, Finder or the FL Studio Browser into empty space in the Playlist. FL Studio creates an Audio Clip that you can move, trim, slice and arrange on the timeline. If you drop the same file into the Channel Rack instead, FL Studio creates a Sampler Channel. That route is better when you want to trigger a one-shot from the Step Sequencer or Piano Roll.
The file is not copied into the project merely because it appears in the Playlist. Keep the source in a stable local folder, save the FLP, and use File → Export → Zipped loop package or another deliberate collection method before moving the project to a different computer. A successful drop and a portable project are two separate jobs.
Import audio in five steps
- Download or extract the file so it exists as a normal local file, not only in a cloud placeholder or ZIP archive.
- Open the Playlist with F5.
- Drag the MP3 or WAV from Explorer, Finder or the FL Studio Browser into an empty Playlist lane.
- Place the first clear downbeat on the correct grid line and confirm the clip ends where expected.
- Save the project, then keep the source file in the same stable folder.
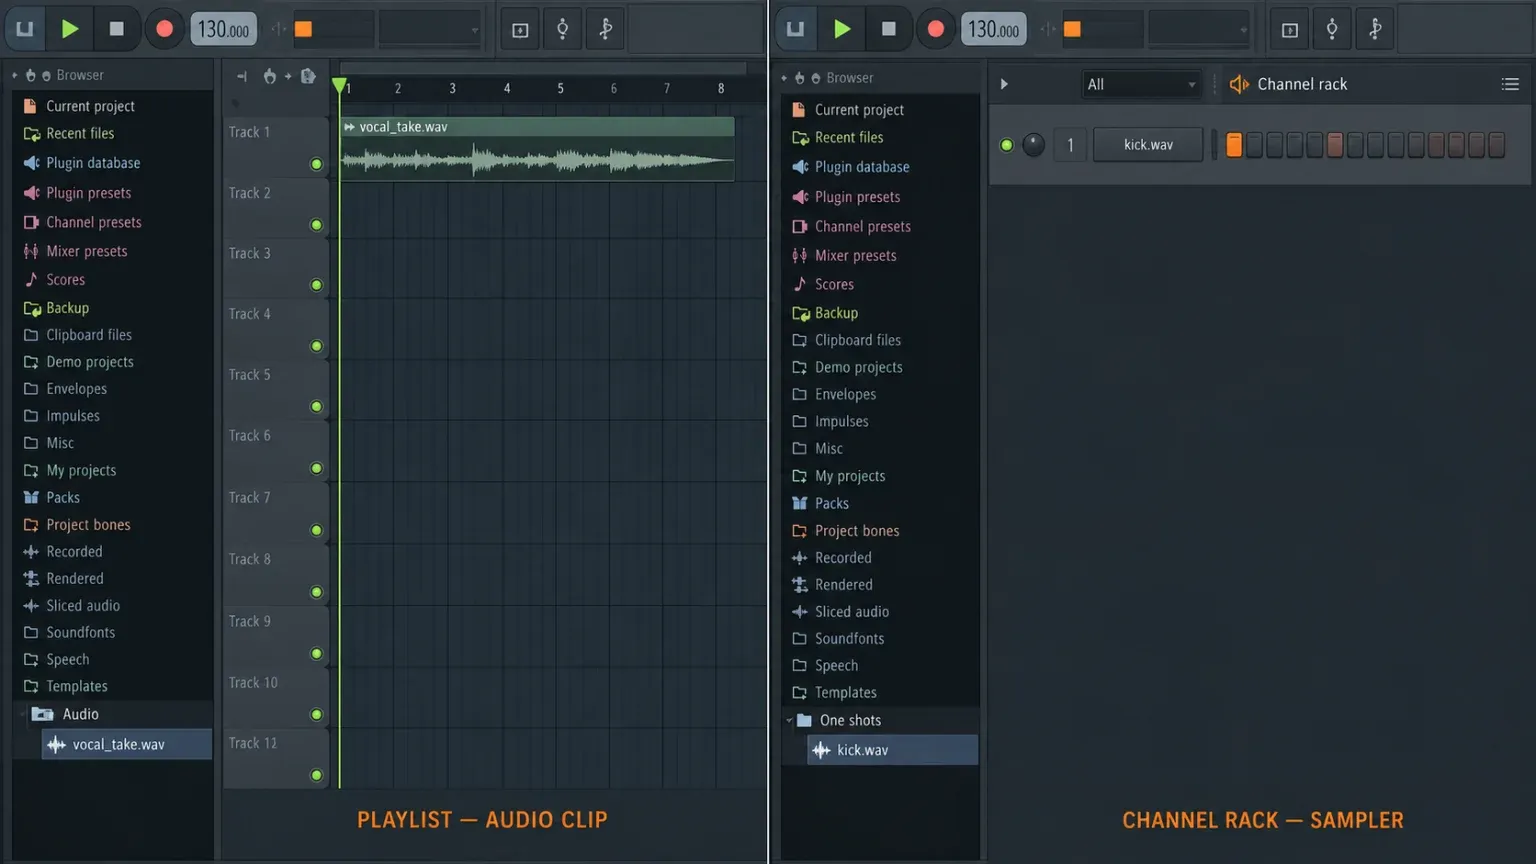
Image-Line’s current Audio Clip documentation describes the Playlist route, while the Sampler documentation covers the Channel Rack result. The file can be identical; the destination decides the working object FL Studio creates.
Choose the Playlist for songs, stems and long recordings
Use the Playlist when the audio already has a position in time: a full song, vocal take, guitar recording, ambience bed, reference track, drum loop or exported stem. An Audio Clip exposes its waveform on the timeline, so its start, end, fades and relationship to the grid remain visible.
The Playlist is also the clearer destination when you need several files to begin together. Drag each stem into its own lane, align every file to the same starting bar and keep the original leading silence. Trimming every stem to its first audible sound destroys the common reference point and makes the package harder to reconstruct.
A Playlist lane does not automatically equal a Mixer insert. Route the Audio Clip or use an Audio Track when the file needs a predictable Mixer path. Our FL Studio Playlist guide explains free lanes, Track Mode and clip organization after the source is imported.
Choose the Channel Rack for one-shots and playable samples
Drop the file into the Channel Rack when you want a Sampler Channel. This is the natural home for a kick, snare, hi-hat, short vocal chop or any sound you intend to trigger as notes. You can program steps, open the Piano Roll, change pitch by note and shape the sample with the Sampler envelope and time controls.
A full song can load into a Sampler Channel, but that does not make it convenient. Long files become harder to position against the arrangement because the Channel stores the source while a Pattern triggers playback. If your goal is “start this recording at bar 17,” use an Audio Clip. If your goal is “play this sound at several pitches,” use a Sampler Channel.
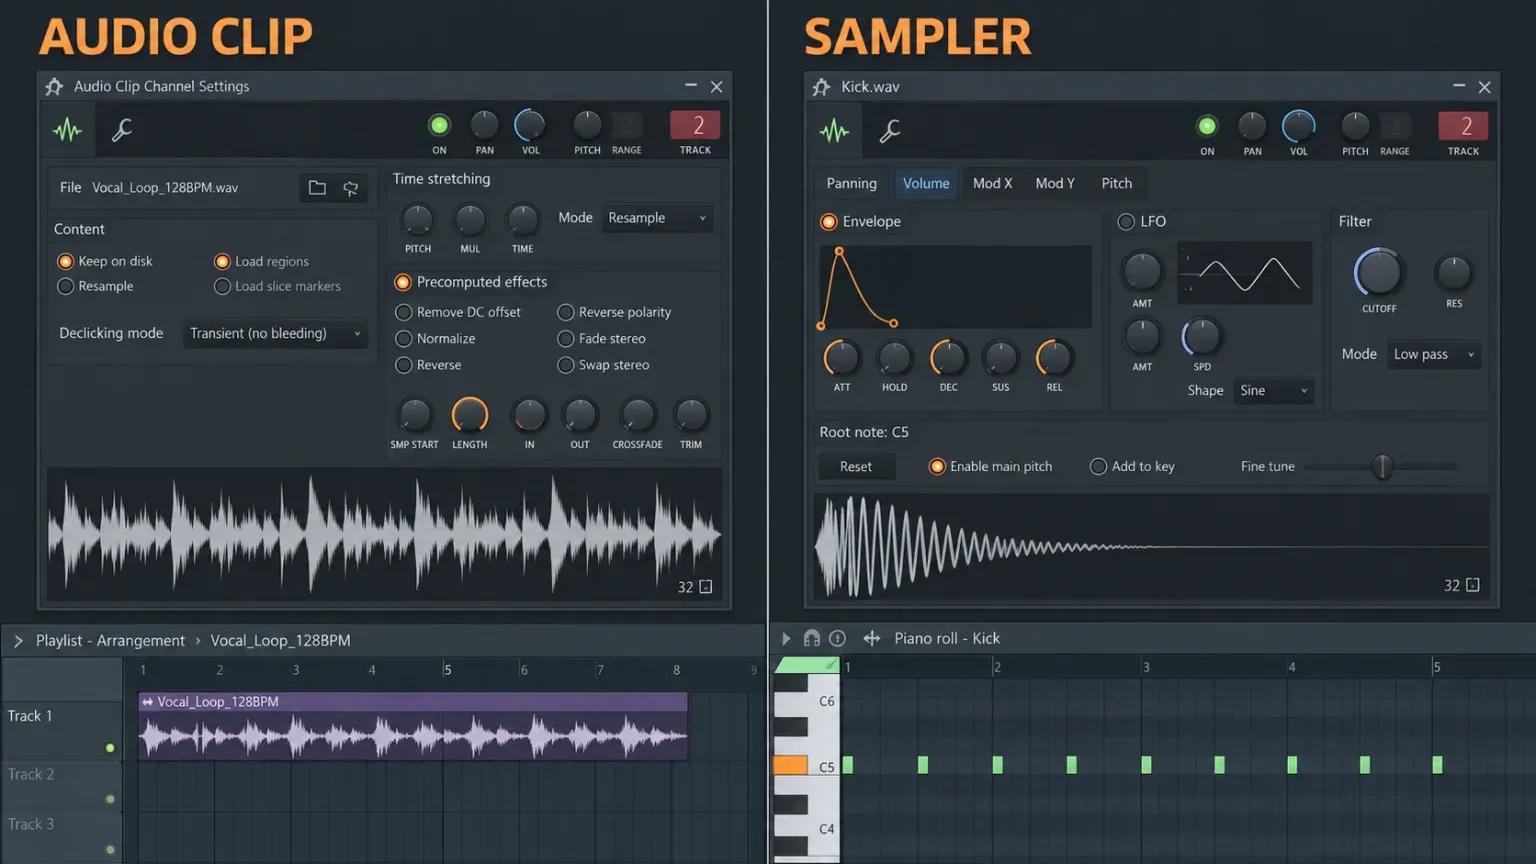
The deeper creative choices belong in the FL Studio sampling guide. For detailed destructive edits, cleanup or region work, move on to the Edison sample-editing guide.
Add a permanent audio folder to the FL Studio Browser
Repeatedly opening Finder or Explorer is fine for one file. For a working library, add one stable parent folder to the FL Studio Browser:
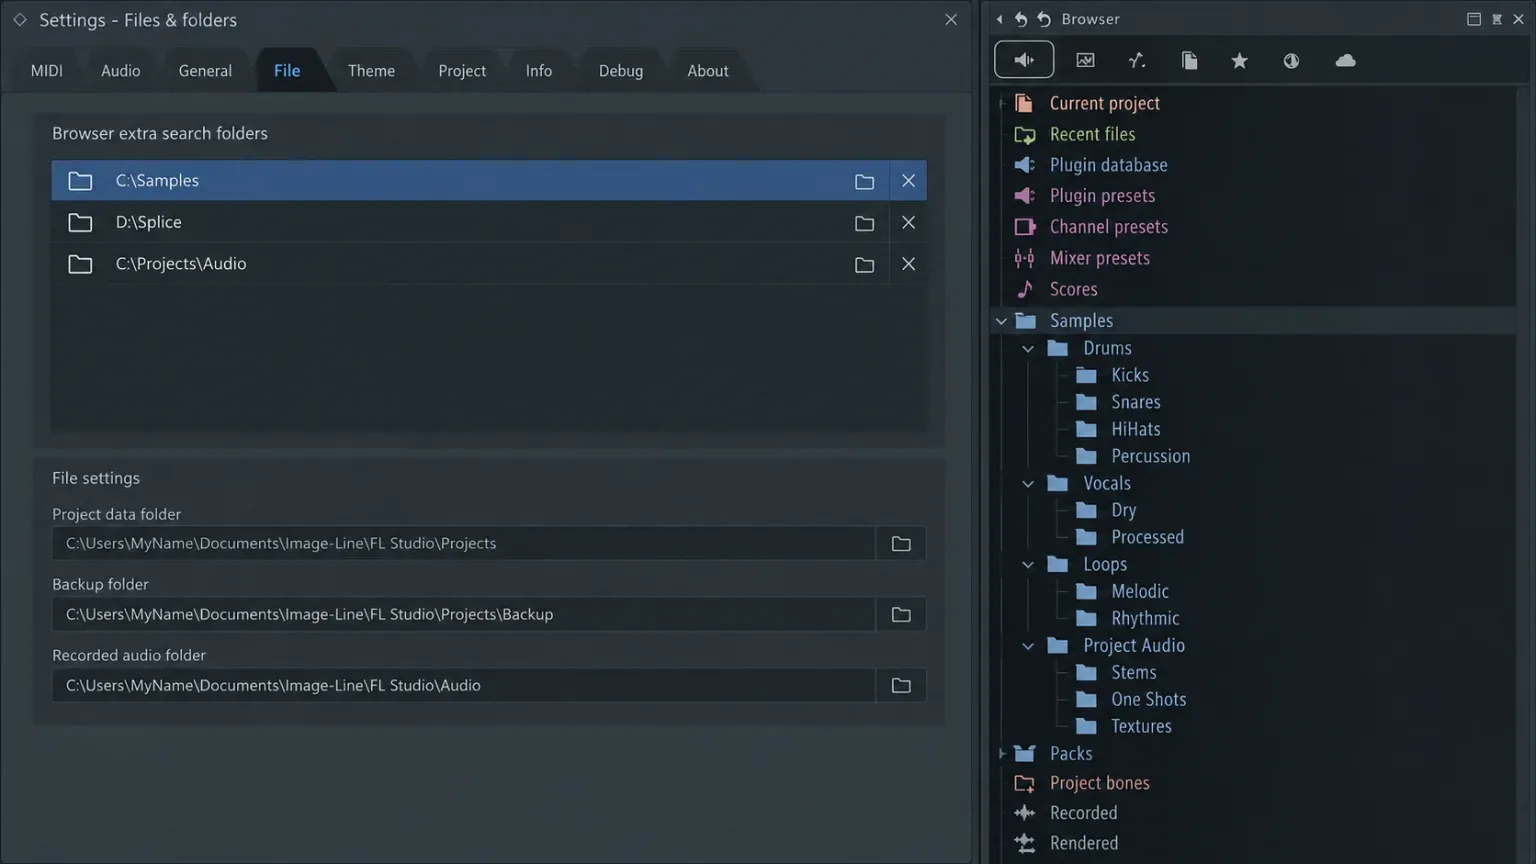
- Create or choose a local parent folder such as Samples, with clear subfolders for drums, vocals, loops and project audio.
- Drag that folder from Explorer or Finder onto the FL Studio Browser, or open Options → File settings.
- Under Browser extra search folders, choose an empty row and select the folder.
- Return to the Browser and confirm that the folder and its subfolders appear.
- Preview a file, then drag it to the Playlist or Channel Rack according to the job.
The current FL Studio Browser manual documents the drag-in route. The File Settings reference documents up to 30 Browser extra search folders. One well-organized parent is usually better than using all 30 slots for individual packs.
Do not add an entire system drive as a permanent search folder. It broadens searches and missing-file scans far beyond the library you actually use. The complete Browser guide covers search scope, preview settings and indexing; the sample-pack guide covers extraction and long-term library organization.
Audio Clip or Sampler: use this decision table
| Task | Destination | Why |
|---|---|---|
| Import a full song or reference mix | Playlist | The complete waveform stays visible against the timeline. |
| Arrange a vocal, guitar take or stem | Playlist | Start, end, fades and edits are placed directly in song time. |
| Use a drum one-shot | Channel Rack | The Sampler can be triggered by steps or notes. |
| Pitch a sound across the keyboard | Channel Rack | Piano Roll notes control the Sampler pitch. |
| Slice or clean a recording in detail | Playlist, then Edison if needed | Keep the arrangement position visible before deeper editing. |
| Reuse the same long file in several sections | Audio Clip source in the Playlist | Clip instances can share the source while occupying different positions. |
Why drag-and-drop does not work
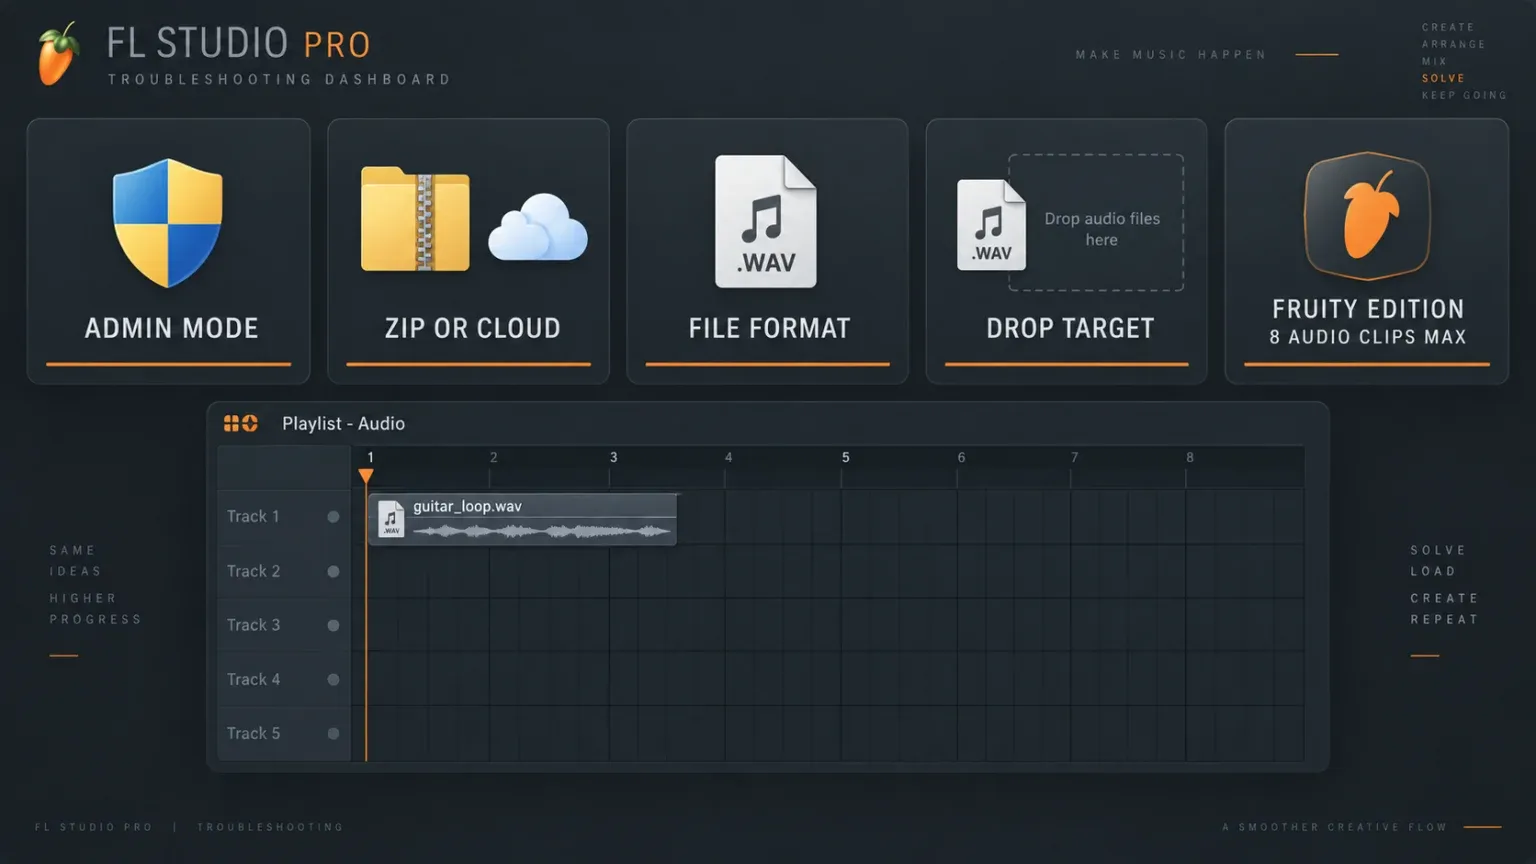
FL Studio is running as administrator on Windows
Windows can block a normal Explorer window from dropping files into an elevated application. Image-Line’s drag-and-drop support note tells users not to run FL Studio as administrator. Close FL Studio, remove the administrator setting from its shortcut or executable, reopen it normally and try again.
The file is still in a ZIP or only in the cloud
Extract archive contents before importing them. For OneDrive, iCloud Drive, Dropbox or another synced folder, make sure the file has downloaded locally. A filename visible in a folder does not prove that the audio bytes are present on disk.
The file is damaged or uses an unusual encoding
FL Studio supports common audio formats including MP3 and WAV, as listed in Image-Line’s supported file formats. A supported extension can still hide damaged data or a codec variation the decoder cannot read. Confirm that the file plays in a normal media player. If it does, convert a copy to a standard PCM WAV with a trusted audio editor, then import that copy.
You dropped the file on the wrong target
If the file seems to vanish into the Channel Rack, look for a new Sampler Channel. If you need a visible timeline clip, drag it into empty Playlist space instead. Avoid dropping it directly on a plugin or control whose purpose is unrelated to audio files.
Fruity Edition reached its Audio Clip limit
Old tutorials often say Fruity Edition cannot use Audio Clips. That became stale with FL Studio 21.2. Image-Line announced support for up to eight Audio Clips in Fruity Edition, and its current edition comparison keeps the edition limits visible. If a Fruity project already uses eight Audio Clips, adding another requires freeing a slot or moving to an edition with unrestricted Audio Clips.
MP3 or WAV: which should you import?
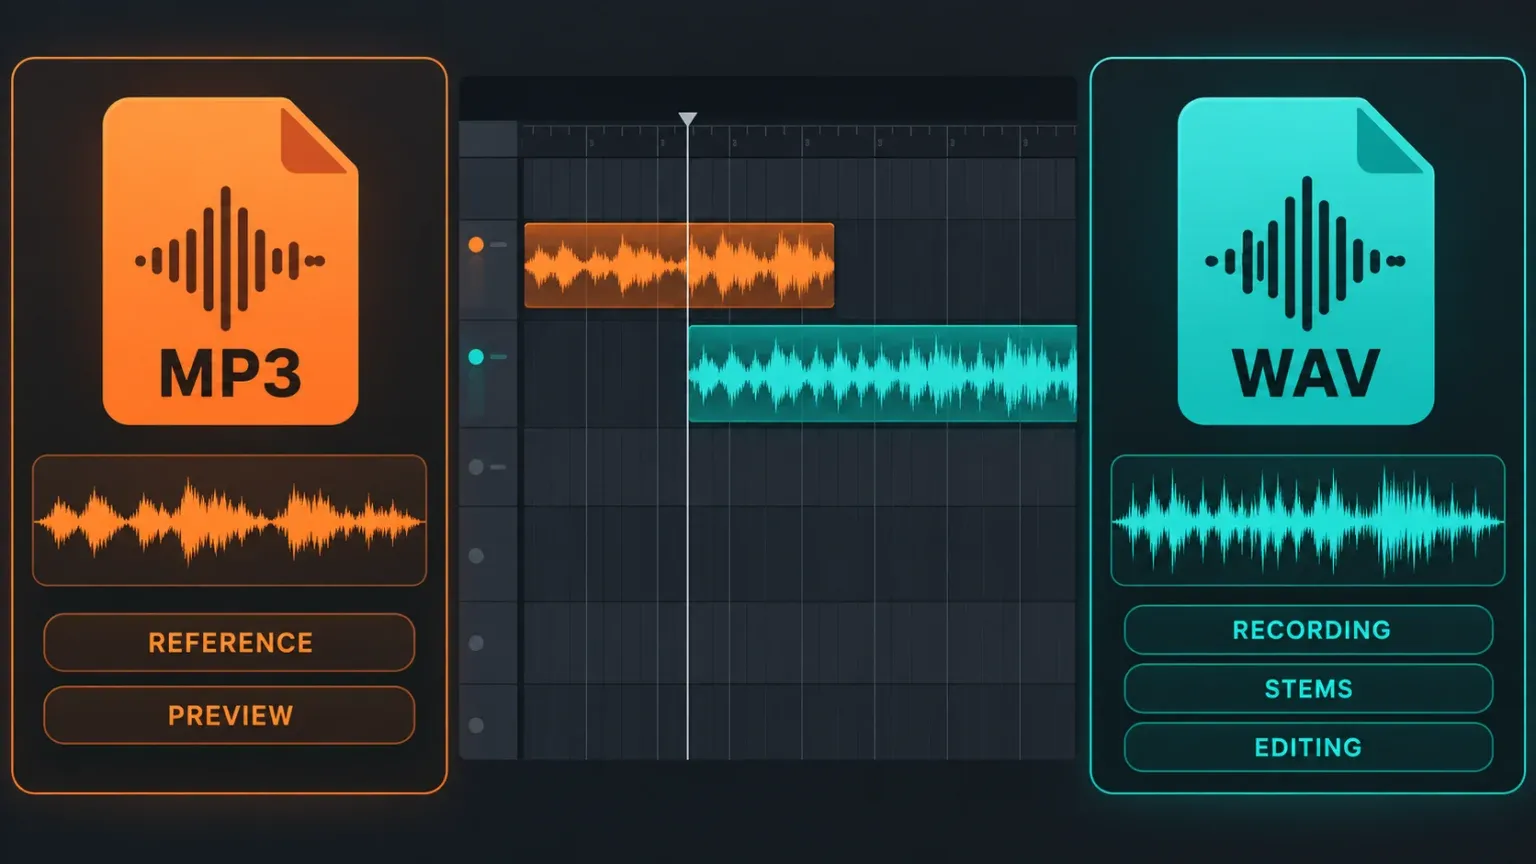
MP3 is convenient for a reference track, a preview or a source that exists only as MP3. It is a lossy format: some audio information was discarded during encoding. Repeatedly converting, processing and re-encoding the file does not restore that information.
Use WAV when you control the export and expect further editing, mixing, stretching or delivery. PCM WAV stores uncompressed audio and avoids another lossy generation between production stages. For a beat reference that will never enter the final mix, MP3 is usually adequate. For stems, vocals and material another engineer will process, request WAV at the project’s intended sample rate and bit depth.
| Source | Practical choice |
|---|---|
| Commercial reference song | Use the legitimate file you have; MP3 is fine for comparison. |
| Vocal, guitar or live recording | Prefer WAV for editing and mixing. |
| One-shot from a licensed sample pack | Use the supplied original; do not convert merely to change the extension. |
| Stem transfer between DAWs | Use WAV with one common start point. |
| File that fails to decode | Convert a copy to standard PCM WAV after confirming the source is legitimate and playable. |
Check tempo and stretching immediately after import
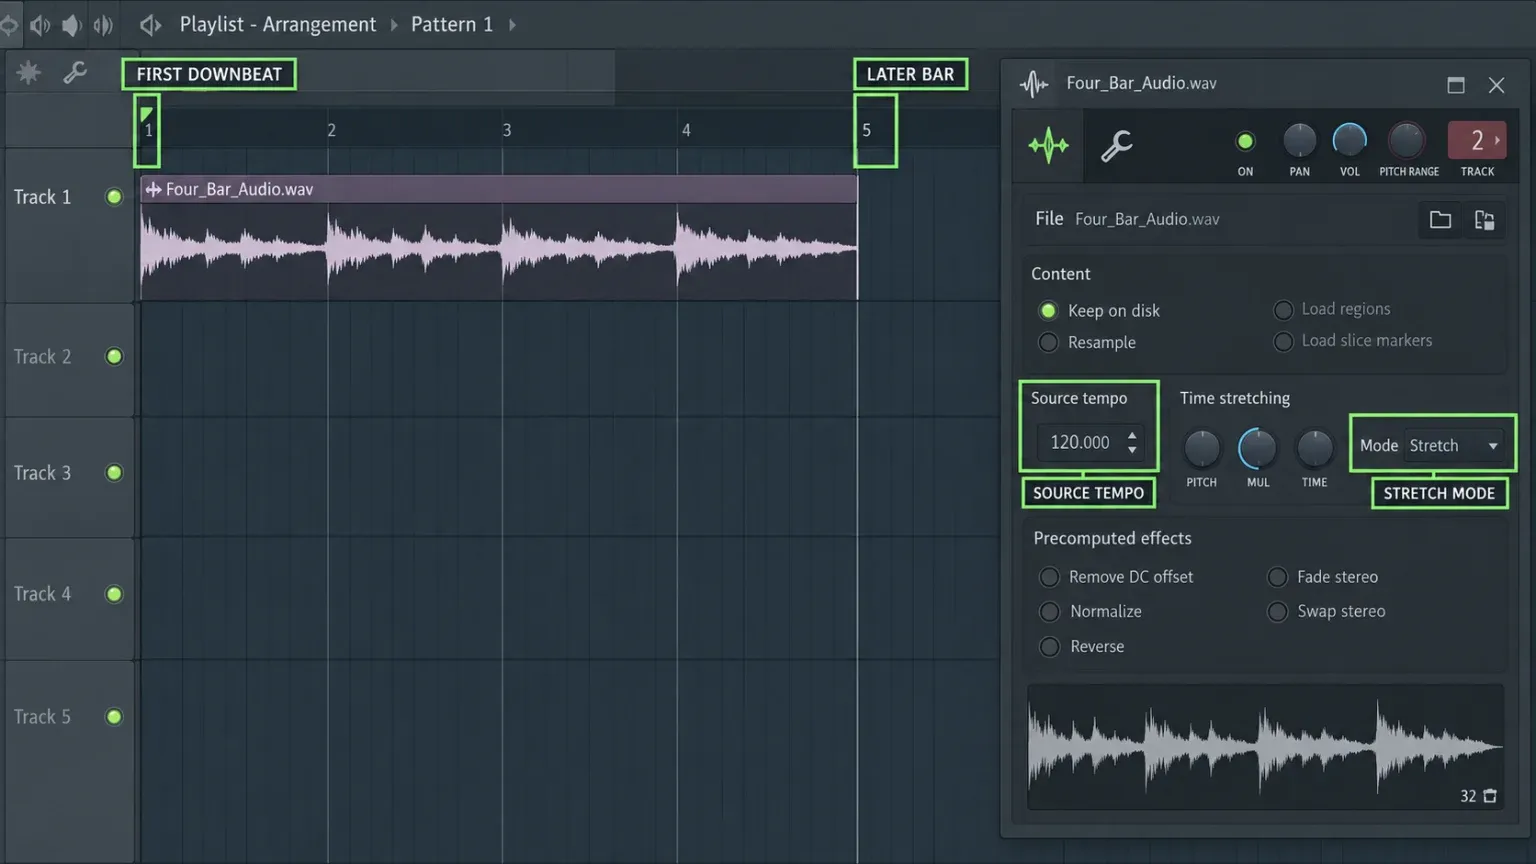
A loop can import successfully and still play at the wrong duration. Some WAV files contain tempo or beat metadata, and FL Studio can interpret that information when creating the clip. If the waveform suddenly snaps to a different length, do not assume the source was altered. Open the clip settings and inspect the detected tempo and time-stretch mode.
Place the first true downbeat on the grid, then inspect a later downbeat several bars away. If the beginning aligns but the end drifts, the source tempo or musical length is wrong. If duration changes and pitch moves with it, the clip is using Resample behavior. The FL Studio time-stretch guide explains source BPM, Fit to tempo, Resample and pitch-preserving modes without mixing them into the import step.
Keep imported files from going missing
FL Studio usually references the source file by its path. Renaming the folder, moving the audio to another drive or opening the FLP on a new computer can break that reference. Store project-specific recordings and stems in a project folder, and keep shared sample libraries at stable locations.
Before archiving or transferring a project, collect what it depends on. A Zipped loop package can gather the FLP and used samples into one archive, but verify the package before deleting or moving originals. If the project already opens with missing media, use the missing-samples recovery guide instead of importing random replacements with similar names.
FL Studio Mobile uses a different route
FL Studio Mobile is a separate product with its own file locations and import controls. Do not follow a desktop tutorial that tells you to drop a file from Windows Explorer or macOS Finder into the desktop Playlist. On mobile, place or share the audio into a location FL Studio Mobile can access, then load it through the mobile app’s file or track workflow. The exact share-sheet and storage steps depend on Android, iOS, ChromeOS or Windows.
If Google brought you here for Mobile, confirm the product name at the top of the app before changing folders. The desktop Browser, Channel Rack and Playlist instructions above are for FL Studio on Windows and macOS.
The import is finished when the project can reopen safely
A file appearing in the Playlist is only the first checkpoint. Confirm the destination is correct, align the audio, route it if necessary, save the FLP, close and reopen the project, and verify that the source still loads from the expected folder. That short reopen check catches unstable cloud paths, temporary download folders and renamed files before the arrangement depends on them.
For most desktop jobs, the decision remains simple: Playlist for audio placed in song time; Channel Rack for audio played as an instrument. Make that choice first, and the rest of the FL Studio workflow becomes much easier to read.
