FL Studio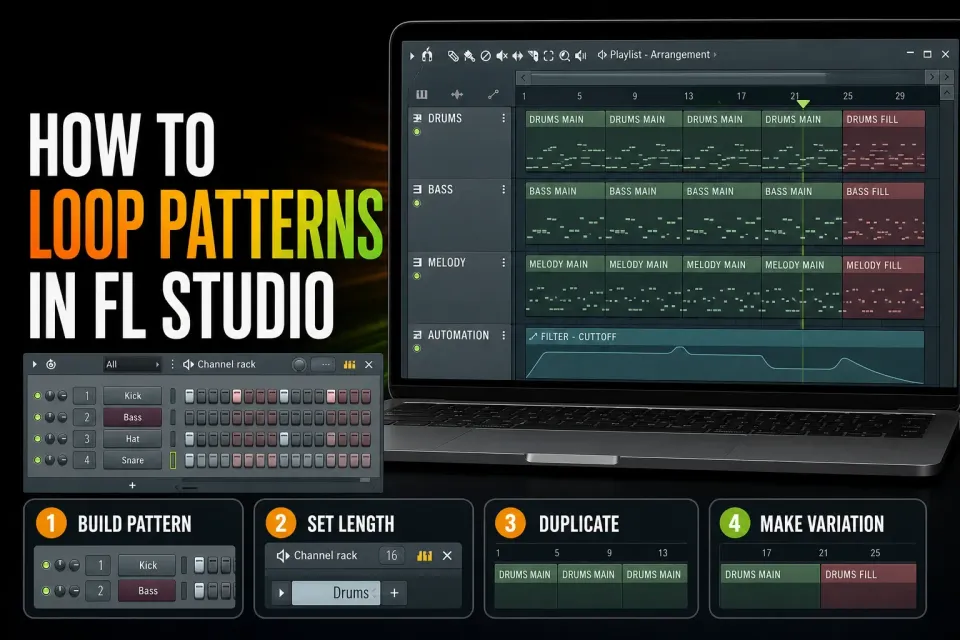
To loop patterns in FL Studio, put the Pattern in the Playlist as a Pattern Clip, then either drag with the Paint tool to place repeats or select the clip and press Ctrl+B on Windows or Command+B on macOS. Use Pattern mode only when you want to hear the current Pattern repeat while editing it. Use Song mode when you want to hear the Playlist arrangement.
Before you copy anything, check both the Pattern’s length and the visible Clip boundary. An accidental empty bar can leave silence between copies, and a shortened Playlist Clip can hide part of a longer phrase. More repeats won’t fix either one.
Decide what “loop” means in this project
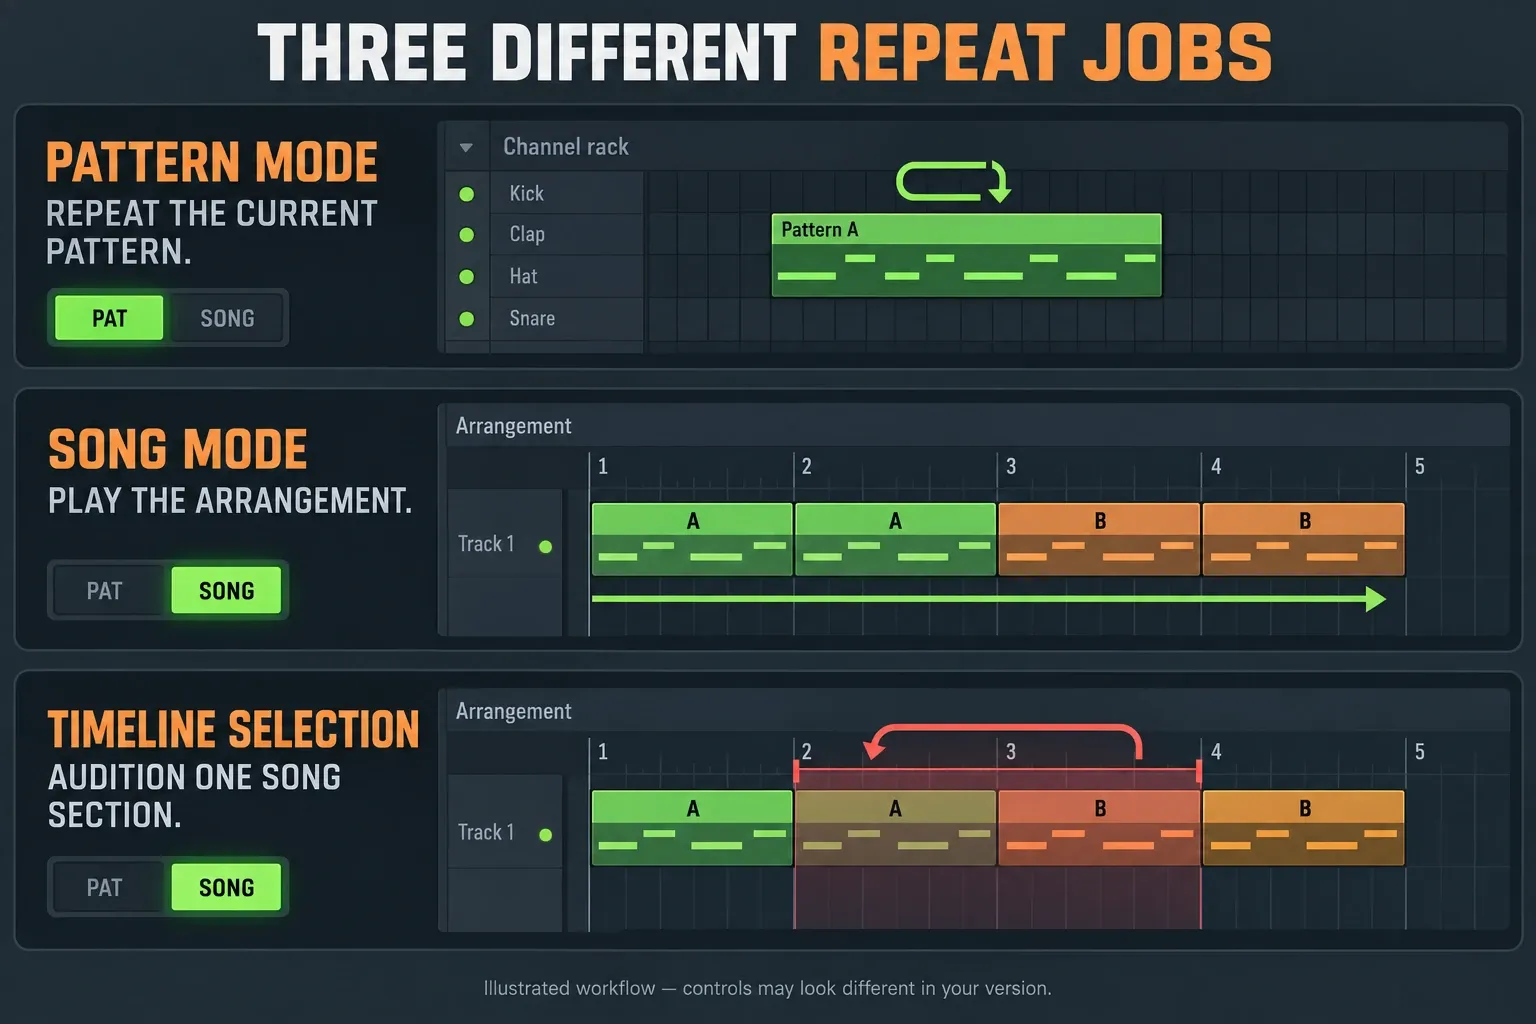
FL Studio uses the word loop for several different jobs, and mixing them up causes most of the frustration:
| Goal | Use | What repeats |
|---|---|---|
| Keep hearing one Pattern while editing | Pattern mode | The current Pattern |
| Repeat drums or melody through the arrangement | Pattern Clips in Playlist | Placed or duplicated clips |
| Audition one section of the song | Playlist timeline selection | The selected time range |
| Repeat a shorter channel sequence inside a longer Pattern | Channel Rack loop controls | That Channel’s steps or notes, depending on loop mode |
This guide covers those Pattern jobs. Sample loop points, Audio Clip stretching and loop recording each have their own workflows.
Build one Pattern that loops cleanly on its own
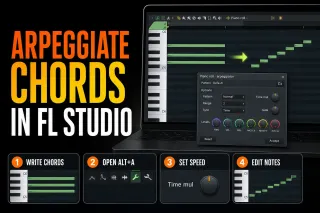
Open the Channel Rack and create the drum, bass or melody idea. For step-based drums, the Step Sequencer makes the cycle visible. For longer notes, chords or detailed timing, use the Piano roll. When the idea is a repeating broken chord, build its note order with the FL Studio arpeggiation workflow before duplicating it. Name the Pattern by musical role, such as Drums Main, Bass Verse or Chords A, before the Playlist fills with anonymous Pattern numbers.
Switch to Pattern mode and let it cycle a few times. Listen across the boundary as closely as you listen to the middle. A note that runs past the loop point, a reverb tail that vanishes or a pickup that belongs before beat one only shows up when the Pattern restarts.
Set the Pattern length before you duplicate it
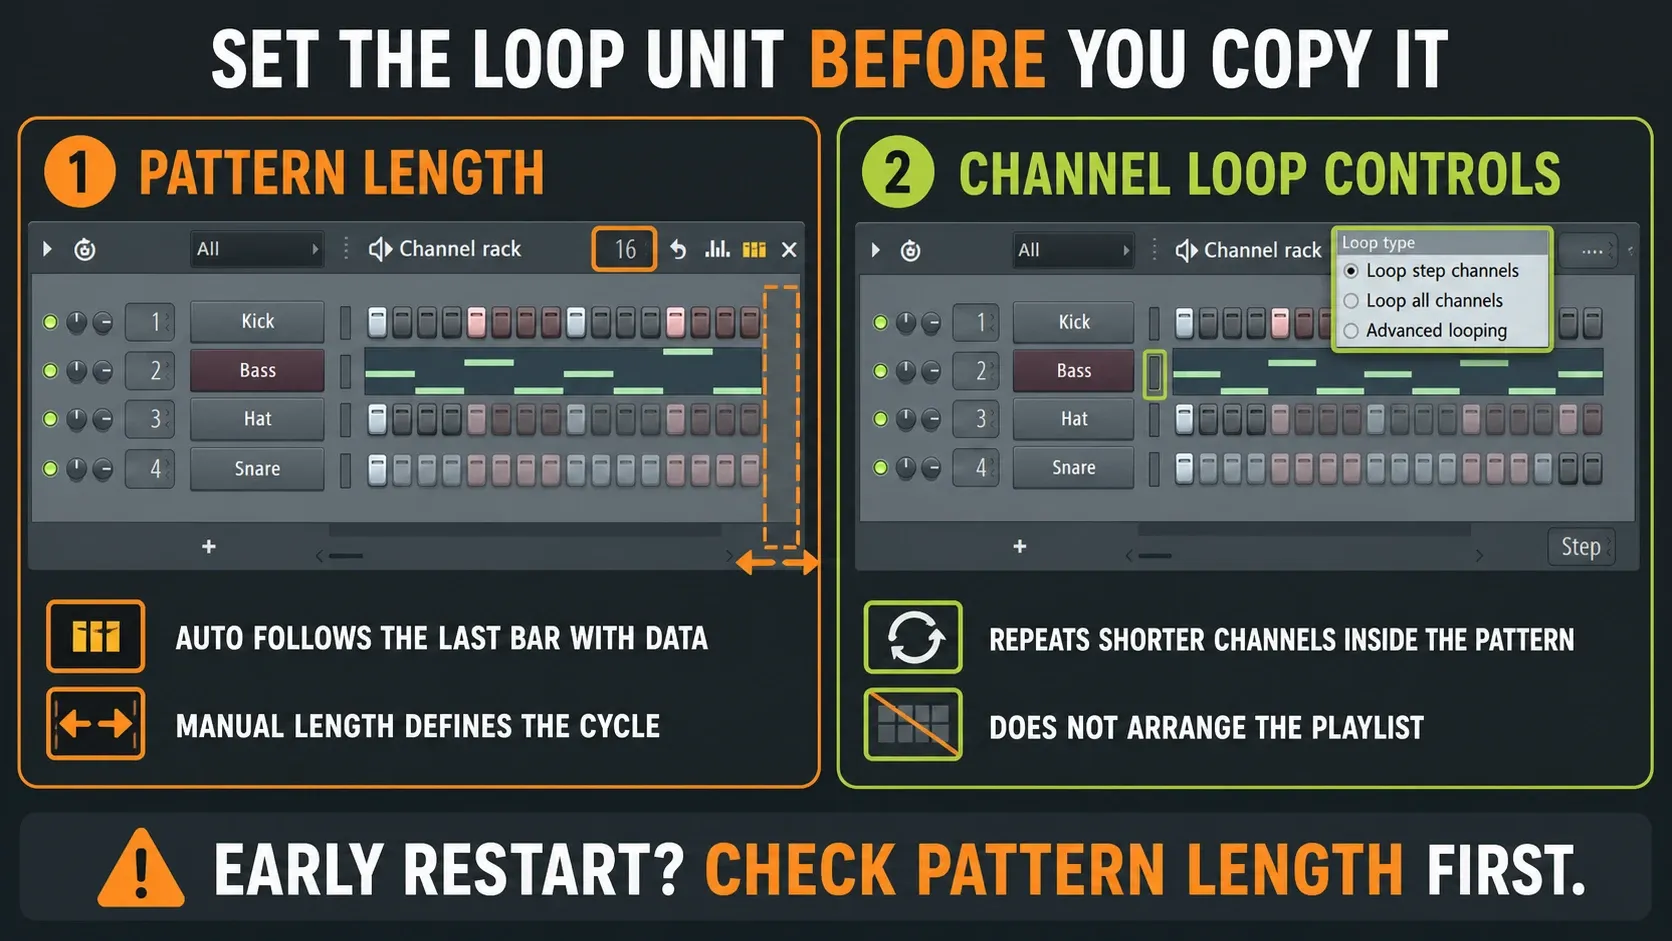
The Channel Rack manual separates automatic and manual Pattern length. In Auto, the last bar that contains data sets the length. Right-click the Pattern Length control to choose a length in bars. Widening the Channel Rack shows more steps, but that’s not the same as writing more notes.
Let the musical phrase choose the length. A kick-and-snare loop might need one bar, a bass answer two, and a chord turnaround four or eight. Check every Channel, including ones hidden by a display filter, for stray late notes or events. If the phrase uses an odd or changing meter, set the correct project or Pattern time signature before you judge its bar length.
The Step Sequencer supports up to 512 steps, and the manual recommends the Piano roll when the sequence needs to run longer. It’s an edge case, but it matters when a long performance is being squeezed into a grid built for compact loops.
Place the first Pattern Clip in the Playlist
Open the Playlist, pick the Pattern from the Clip source or Picker Panel, and place one Pattern Clip on a named lane. Switch to Song mode and play through the clip once. Playlist tracks aren’t locked to one Pattern, but keeping a consistent lane makes the arrangement much easier to read.
If the Channel Rack, Playlist and transport still feel disconnected, the beginner project workflow explains how Patterns turn into a song. Here, you start with one working Pattern Clip already visible in the Playlist.
Paint repeated Pattern Clips with the mouse
Select the Paint tool, choose the Pattern and drag across empty Playlist space to lay down repeated instances. Start with a short section so you can check the boundaries before you fill a whole verse. The selected Clip source decides what you paint, and selecting an instrument Channel won’t stand in for choosing the Pattern.
Keep an eye on the Snap setting. If clips land a hair early or late, fix the placement before you build variations. Painting with Snap off can create tiny overlaps or gaps that are hard to spot at normal zoom. If you only need a few copies, click them in one by one instead of dragging past the section and deleting the extras.
Duplicate a selected Pattern with Ctrl+B or Command+B
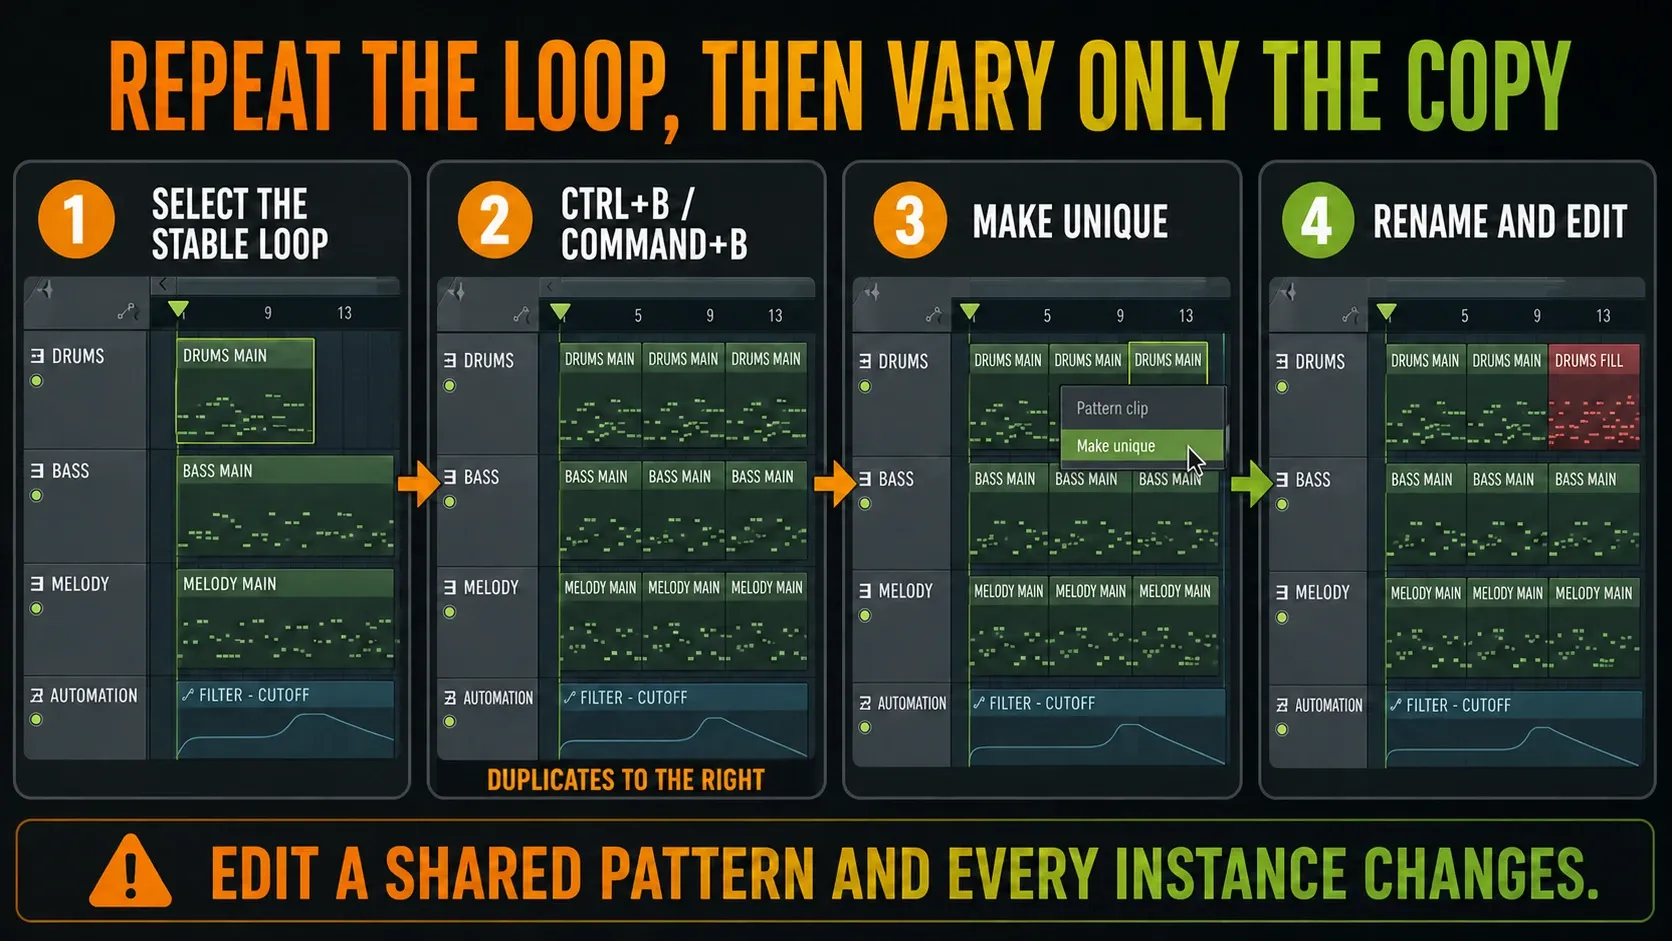
Focus the Playlist, select the intended Pattern Clips, then press Ctrl+B on Windows or Command+B on macOS. The Playlist manual describes duplication to the right. With no Clip selection, the command can duplicate all Clips. Use the Select tool to draw around the required material and inspect the selection before repeating the shortcut.
Duplicating a selected group keeps coordinated lanes together, relative offsets included. Check for selected automation, pickups and grouped Clips before you commit the copy. If the shortcut changes notes or a recording option instead, the wrong window has focus, because FL Studio shortcuts are context-dependent. Click back into the Playlist or use its Edit > Duplicate command.
Use a timeline selection to control the duplicate interval
Clip selection chooses what gets copied; a timeline selection chooses how far it moves. Hold Ctrl on Windows or Command on macOS and drag across the Playlist bar ruler to define the repeat interval. A range from bar 1 to bar 5 spans four bars. Select the intended Clips as well: Clips outside the time range can still be copied when they belong to the Clip selection.
That split explains the “why did my copy jump so far?” problem. Double-click an empty part of the time ruler to clear the timeline selection when you want copies right next to each other. Keep a deliberate range when the silence between notes or Clips is part of the phrase, and don’t stretch a musical note just to force a four-bar duplicate.
To audition a section instead of copying it, switch to Song mode and make the timeline selection. Playback loops that range, but rendering won’t create endless repeats. Arrange the repetitions you need as Clips before using the song export workflow.
Make the variation unique before editing notes
Repeated Pattern Clips normally point to the same Pattern data, so changing the snare in one shared Pattern updates every instance. That’s great right up until the last bar needs a fill.
- Duplicate the stable Pattern Clip into the transition bar.
- Open its clip menu and choose Make unique.
- Rename the new Pattern immediately, such as Drums Fill 1.
- Edit only the new notes.
Make unique separates the Pattern’s note and event data, but it doesn’t create a new synth or Mixer chain. Patterns still use the same instrument Channels, so changing a shared synth preset, Channel volume or Mixer effect can change the sound of other Patterns too. Use a separate instrument Channel when the variation needs its own sound, then check its routing.
Keep ordinary repeats shared so a note fix reaches all of them. Make a new Pattern for a different fill, pickup or chord phrase. For a silent bar, muting or removing that Playlist occurrence may be all you need; there’s no reason to create another Pattern just to leave a gap.
Use Channel Rack loop controls for unequal channel lengths
For a short channel sequence inside a longer Pattern, right-click the Channel Rack’s Loop icon. Loop step channels repeats Step Sequencer channels at the next step; Loop all channels includes Piano roll channels and uses the next beat. Choose Advanced looping for per-channel controls.
In Advanced looping, set a Channel to Step, Beat or Bar based on the boundary after its last used data. Use Don’t loop for a Channel that should play only once. For example, a one-beat hat sequence can repeat under a longer bass phrase. Count the hat cycle against the bass instead of assuming every enabled loop ends on a bar.
Ghost steps indicate repeated material; they are not separately written notes yet. Burn to pattern converts a Channel’s ghost repeats into real steps. Burn selected channels or Burn all looping channels commits the corresponding channels to match the longest Channel. Save a separate project version before committing, and compare the result with the original. The Step Sequencer guide covers note-entry and velocity details.
These controls handle repetition inside the Pattern, and the song’s verse and chorus structure is a separate decision. For predictable arrangement editing, place the Pattern Clips you need explicitly. Dragging a Clip edge, stretching audio and writing new note data are three different actions.
Stop long samples and notes from stacking
A Pattern can restart right on time while the sound from the previous pass is still ringing. Long one-shots, open hats, pads and instruments with long release tails may overlap the next trigger. The result gets louder or blurrier with every loop, even though the Pattern Clips sit perfectly.
For Step Sequencer notes, the Cut itself documentation explains self-cutting through matching Cut/Cut by groups. It doesn’t self-cut Piano roll notes. Cut sends a note-off/release to the instrument and doesn’t hard-mute the audio, so a long release can still be heard.
For Piano roll overlaps, edit the note lengths and the instrument’s envelope or voice settings. Max polyphony set to 1 can stop older voices on supported Channels, but it also removes chords; Mono mode can retain release overlap and is not the same operation. A separate Channel can use Cut/Cut by to trigger a cut in another Channel. Choose the behavior the instrument actually supports and listen to the result.
Don’t strip out a deliberate ambience tail. If the level still builds up unexpectedly, look for overlapping Playlist instances and follow the Mixer routing and gain stages before you reach for a limiter. A note-off can’t remove reverb already ringing in a Mixer effect.
Turn a repeated loop into an arrangement
Eight identical bars prove the loop works, but they don’t prove the song moves. After duplicating the core section, do a mute pass before you add more notes:
- Remove the kick for the first half-bar of a new section.
- Drop the bass under a vocal or lead pickup.
- Use one unique drum fill before the transition.
- Change chord inversion or top note without replacing the whole progression.
- Leave an intentional gap where the listener expects another repeat.
For movement in a parameter instead of new notes, use the automation guide. Filter sweeps and sends don’t need dozens of Pattern copies. Once the loop has some useful contrast, build out sections with the Playlist arrangement guide; for counted drum variations, use the drum-pattern examples.
Fix the common loop failures
| Problem | Likely cause | Check |
|---|---|---|
| Pattern restarts too early | Pattern/Channel loop point or resized Clip boundary is shorter than the phrase | Pattern length, per-channel loops and Playlist Clip boundary |
| Silence appears before every repeat | Pattern length extends beyond the data | Auto length or manual bar count |
| Ctrl+B copy jumps too far | Old timeline selection defines the interval | Clear or resize the selection |
| Editing notes in one repeat changes all copies | Clips share the same Pattern | Make the note variation unique; instrument settings remain shared |
| Loop becomes louder each pass | Overlapping voices, Clips or effect tails | Note/envelope behavior, Clip overlap and Mixer route |
| Playlist does not play | Transport is still in Pattern mode | Switch to Song mode |
Keep a version you can return to
Save a separate project version before you merge or burn repetitions into editable data. In standard FL Studio Trial, saving an FLP doesn’t mean you can reopen it before purchase, so export any audio you need while the session is open. In a licensed host, unowned trial plugins can reopen as empty slots; unlock them before reopening, and don’t overwrite the original once their states have gone missing.
Check the loop before moving to the next section
- The Pattern boundary matches the musical phrase.
- The transport is deliberately set to Pattern mode for editing or Song mode for arrangement.
- Painted or duplicated clips land exactly on the grid.
- Any timeline selection is intentional.
- Only true variations use Make unique.
- Long notes and samples do not stack by accident.
- Any planned contrast in density, register, rhythm or silence is audible; deliberate repetition remains a valid choice.
- The Playlist remains readable after duplication.
Continue through the Workflow hub once the repetition is stable. Your next useful step is usually arrangement editing, not yet another copy of the same bar.
Frequently asked questions
How do I repeat a Pattern in the FL Studio Playlist?
Place it as a Pattern Clip, select it and press Ctrl+B on Windows or Command+B on macOS. You can also select the Paint tool and drag across empty Playlist space to place consecutive copies.
Why does FL Studio keep playing only one Pattern?
The transport is probably in Pattern mode. Switch to Song mode to play the Pattern Clips and other material arranged in the Playlist.
Why does my Pattern loop before the notes finish?
Check Pattern length, the Channel’s loop point and the visible Playlist Clip boundary. A resized Clip may expose only part of a longer Pattern. Also inspect late notes or events that unexpectedly extend Auto length.
How do I change one repeated Pattern without changing all copies?
Duplicate the Clip, choose Make unique, rename it and edit the new Pattern’s notes. This separates Pattern data, not the instrument: a shared synth preset or Mixer change can still affect other Patterns.
Why do sounds stack and get louder every loop?
Check overlapping Clips, note lengths, instrument release and Mixer effect tails. Cut itself applies to Step Sequencer notes and doesn’t self-cut Piano roll notes. It sends a release rather than hard-muting audio. Use appropriate envelope or voice settings for the instrument.