FL Studio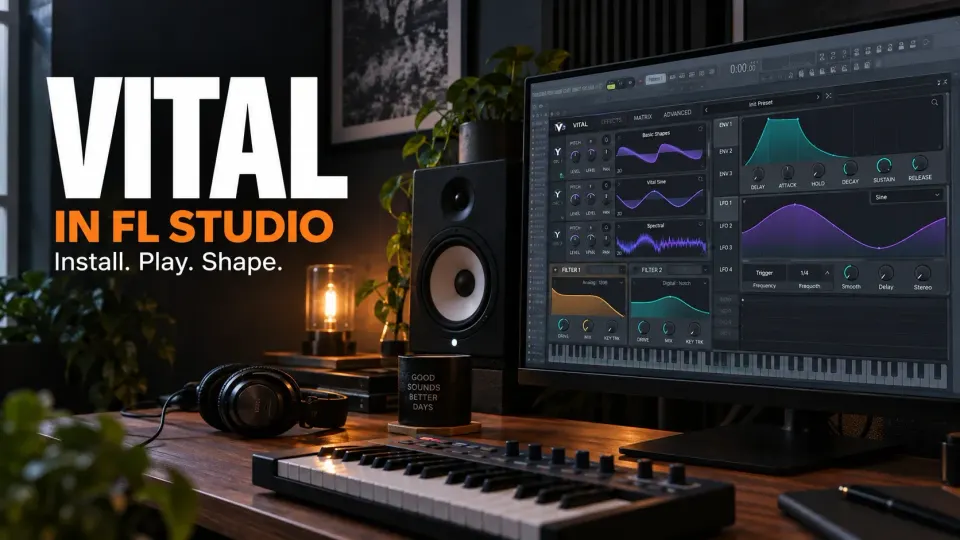
Vital opens on your desktop, but it is nowhere in the Channel Rack. Check the plugin component first: opening the standalone app does not load an instrument into FL Studio.
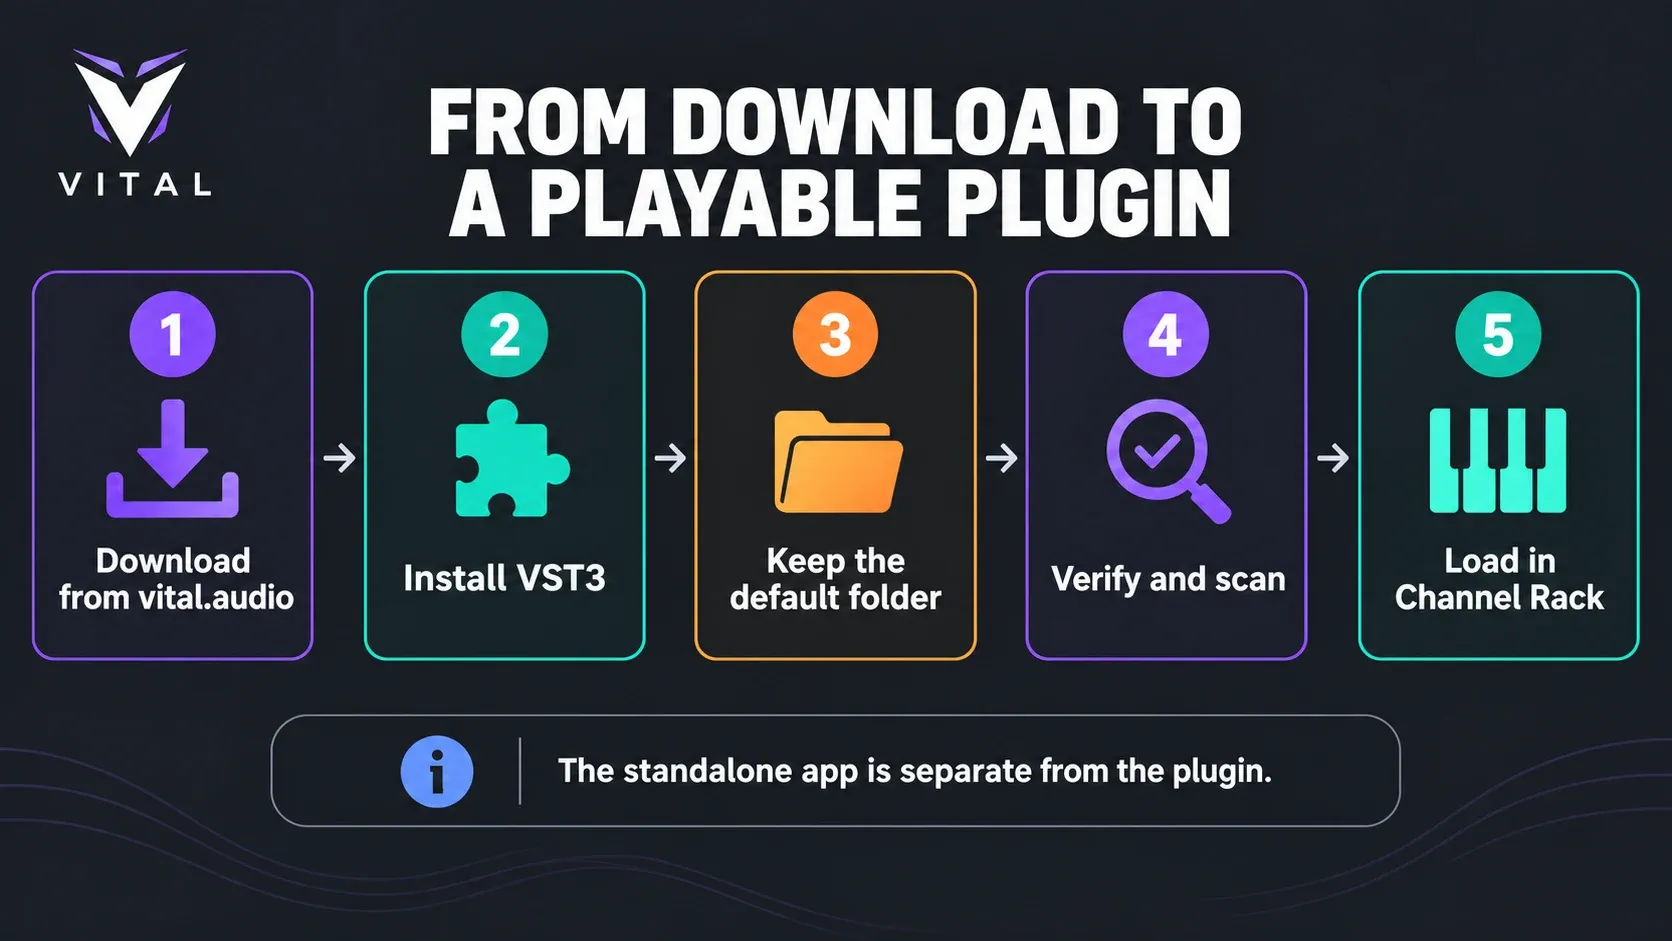
To use Vital in FL Studio, install its VST3 component with the official installer, keep the default location, then run Find installed plugins with Verify plugins enabled. Once it loads as a generator, build one sound with OSC 1, ENV 1 and Filter 1 before adding more modulation.
Is Vital free, and what do you need?
Vital Basic includes the full synthesizer, with 75 presets and 25 wavetables currently listed. It is not a time-limited synth demo. Paid options add content and account benefits; for example, text-to-wavetable is a web service normally limited to five requests per day, with unlimited requests listed for Pro and subscribers. None of that is required for the patch below.
Vital lists Windows 10 or later, macOS 10.15 or later on Intel or Apple Silicon, 64-bit operation and OpenGL 3 or later. It also offers Linux support, but this FL Studio walkthrough is for Windows and macOS. Check the requirements of both the plugin and your installed FL Studio version; one application's minimum OS does not establish compatibility for the other.
The FL Studio trial has a separate restriction: you can save projects, but cannot reopen them until the host is unlocked. Image-Line's trial explanation is the rule to follow. Export your audio before closing a trial session, even though Vital itself is free.
How to install Vital in FL Studio
Get the installer through your account at vital.audio. Choose the download for your operating system, close FL Studio and run the installer. Select VST3 and accept the default plugin location. You can also install the standalone application, but its executable is not the instrument file that FL Studio hosts.
Do not put third-party plugins inside the FL Studio program folder. Image-Line's installation instructions recommend the vendor's installer and default locations; extra search paths are mainly a concern for legacy VST2 installations. The full plugin installation guide explains the directories if you need to check an existing setup.
For an update, first copy your user presets and preserve the working project. Note its Vital version and plugin format. Changing a binary while FL Studio has it open, or moving files manually afterward, adds avoidable uncertainty about which installation the host is using.
Should you choose VST3 or AU?
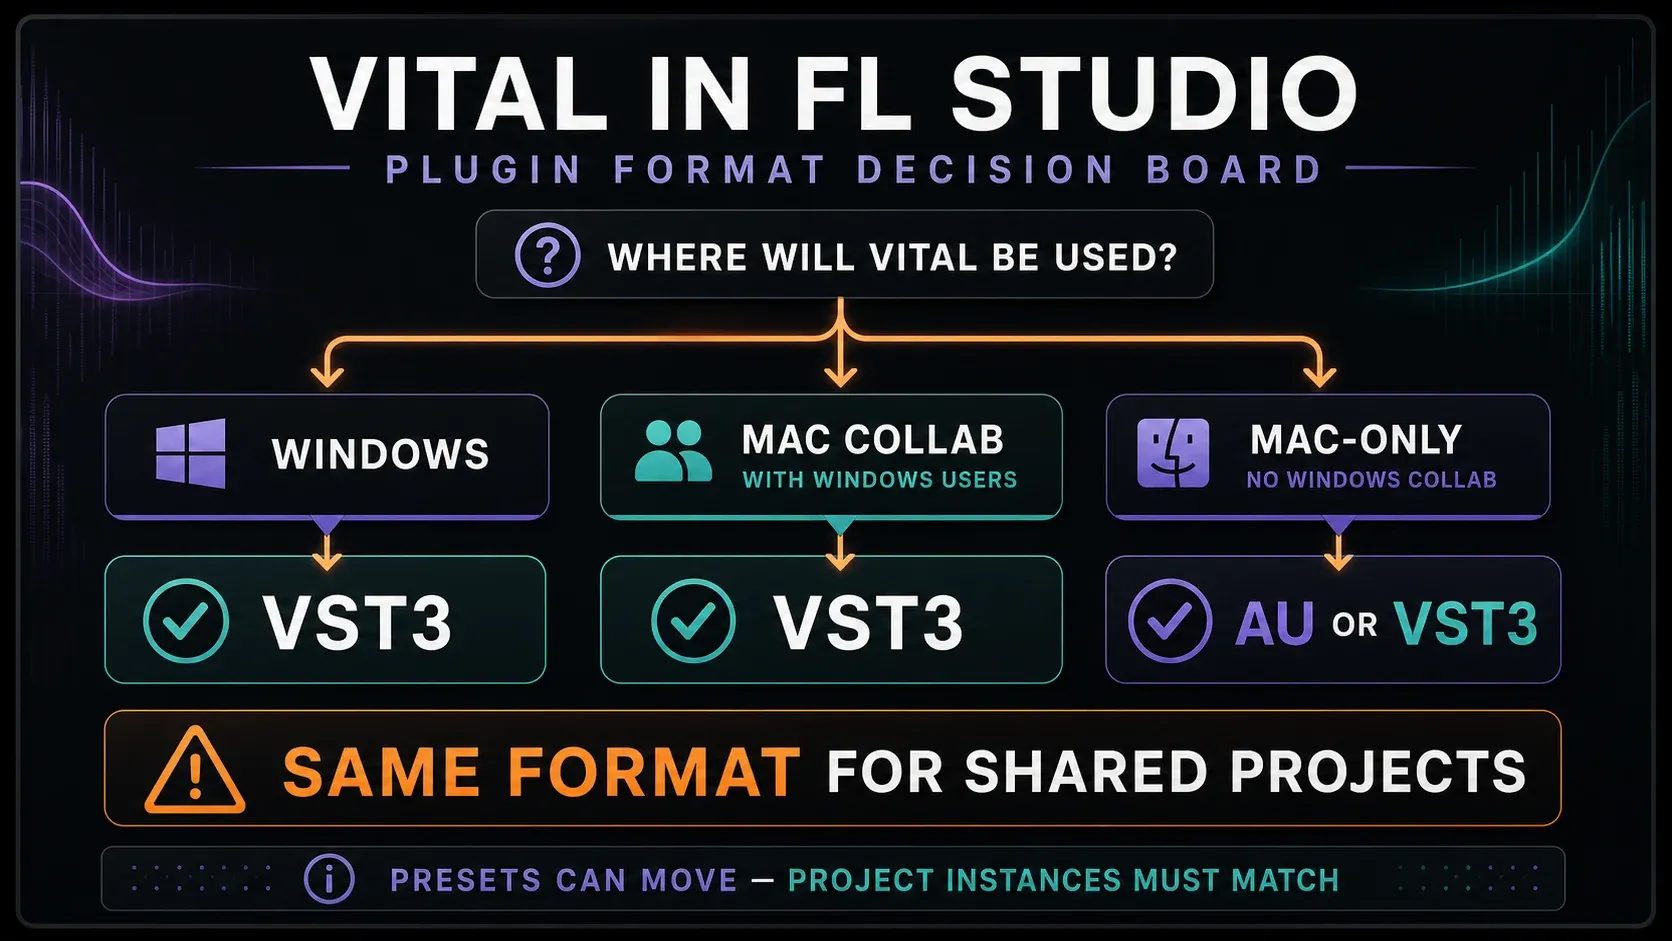
Choose VST3 for a new Windows project, or a Mac project that may be shared with Windows. Each computer still needs its own OS-specific installer. A Mac VST3 file is not a Windows plugin binary.
AU is a macOS-only choice. Image-Line says an AU instance will not be matched to its VST equivalent when opening a cross-platform project. Likewise, do not assume an old VST2 instance can simply be replaced by VST3 with its settings intact. Keep the original format available while testing a copy, and align Vital versions between collaborators.
If you are changing FL Studio between native Apple Silicon and Rosetta operation, follow the Apple Silicon plugin checks. Runtime mode, plugin format and the CPU architecture of an installed build are separate decisions.
How do you make FL Studio find Vital?
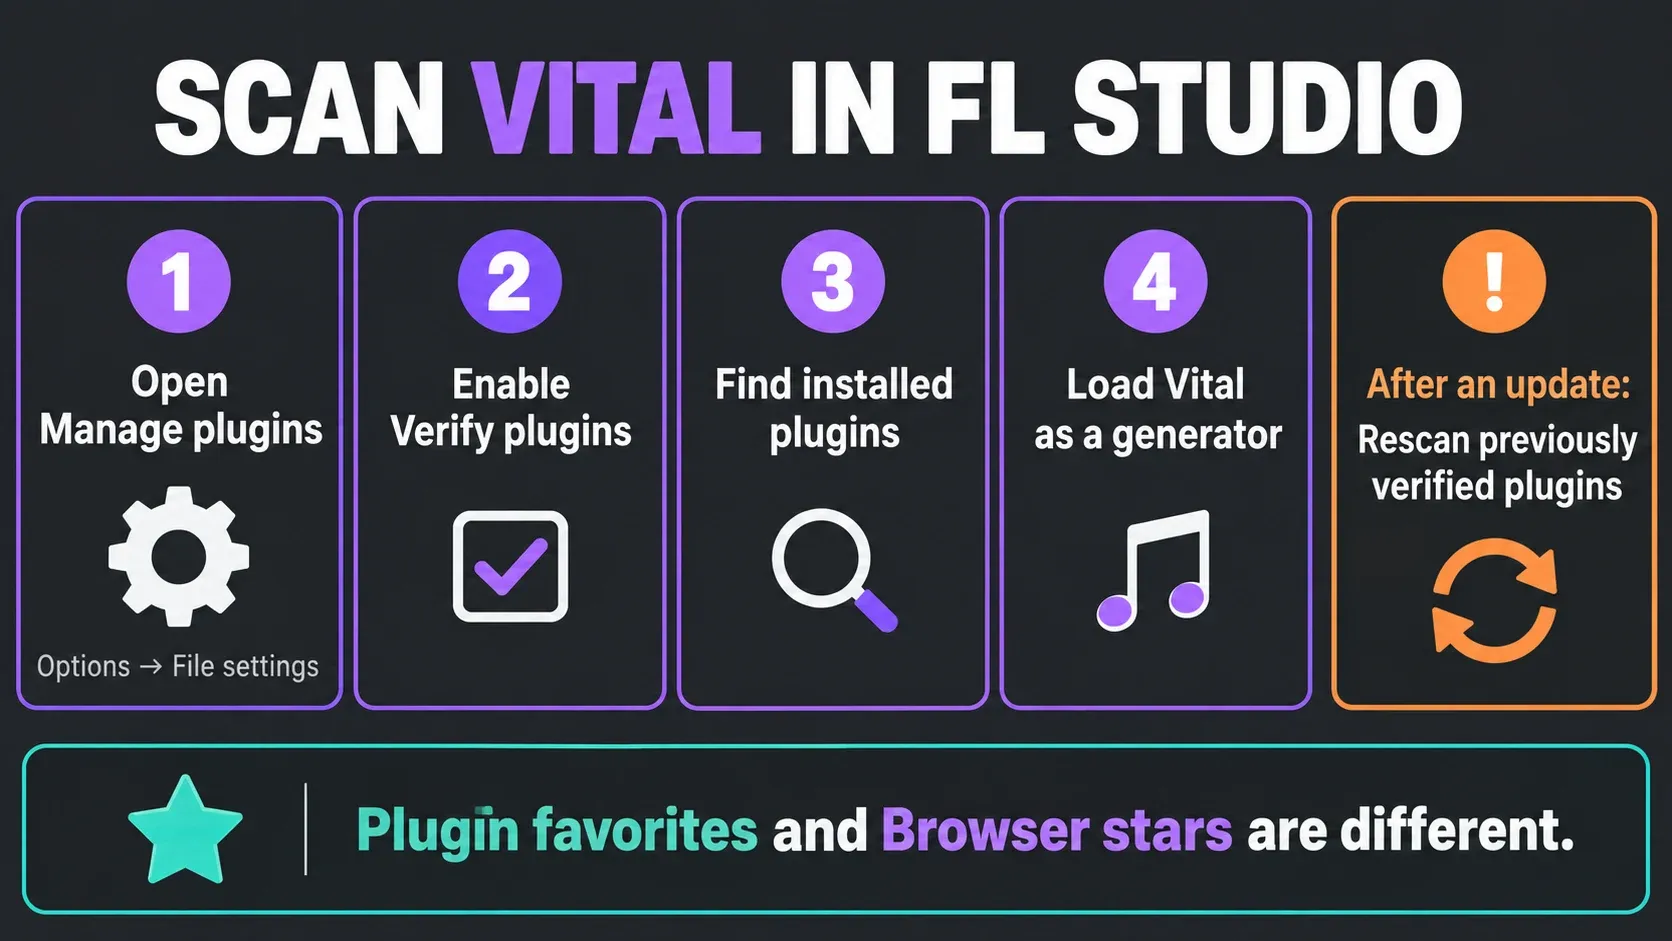
Open Options → File settings → Manage plugins. Enable Verify plugins and run Find installed plugins. Verification identifies the plugin and classifies it as a generator or effect; a quick file-name scan is not equivalent.
For a new installation, start with that verified scan. After an update, enable Rescan previously verified plugins too. If a previous scan returned an error, Rescan plugins with errors is the relevant additional check. Image-Line documents these distinct options in File Settings; rescanning every existing plugin is not a mandatory first step each time you add a new one.
Look under Browser → Plugin database → Installed → Generators → New, and in the corresponding VST3 subfolder. If Vital is still absent, confirm that you installed the plugin component before adding search paths. Use the missing-plugin diagnostic for a persistent failed scan.
Load Vital into the Channel Rack
Add the verified generator through the Channel Rack's + menu, using More plugins if needed. Vital is the sound source here, so do not start by placing it in a Mixer effect slot. Write a short phrase in the Piano Roll and route the Channel to a named Mixer insert.
Make a plugin favorite only after it opens correctly. FL Studio's Plugin Database can remember a prepared starting state and offer a convenient entry. That entry does not install Vital's sound library, and a Browser star is a different favorite mechanism.
Understand OSC 1, ENV 1 and Filter 1
A wavetable contains a sequence of waveform frames. Its position control selects a point in that sequence; moving the position changes the source sound. Begin with OSC 1 alone so you can hear what that change does. Leave OSC 2, OSC 3 and the sample source off for this exercise.
ENV 1 shapes the voice's amplitude. Its Delay, Attack, Hold, Decay, Sustain and Release controls determine the note's level over time. If a short note seems late, inspect Delay and Attack before blaming the audio buffer. If notes pile up, shorten Release and listen again. These are patch decisions, not fixed settings for every bass or lead.
Filter 1 changes the spectrum of sources routed into it. Enable the filter and confirm OSC 1 feeds it; then try a low-pass response and move cutoff while the phrase plays. A moving cutoff display will not change an oscillator that bypasses that filter.
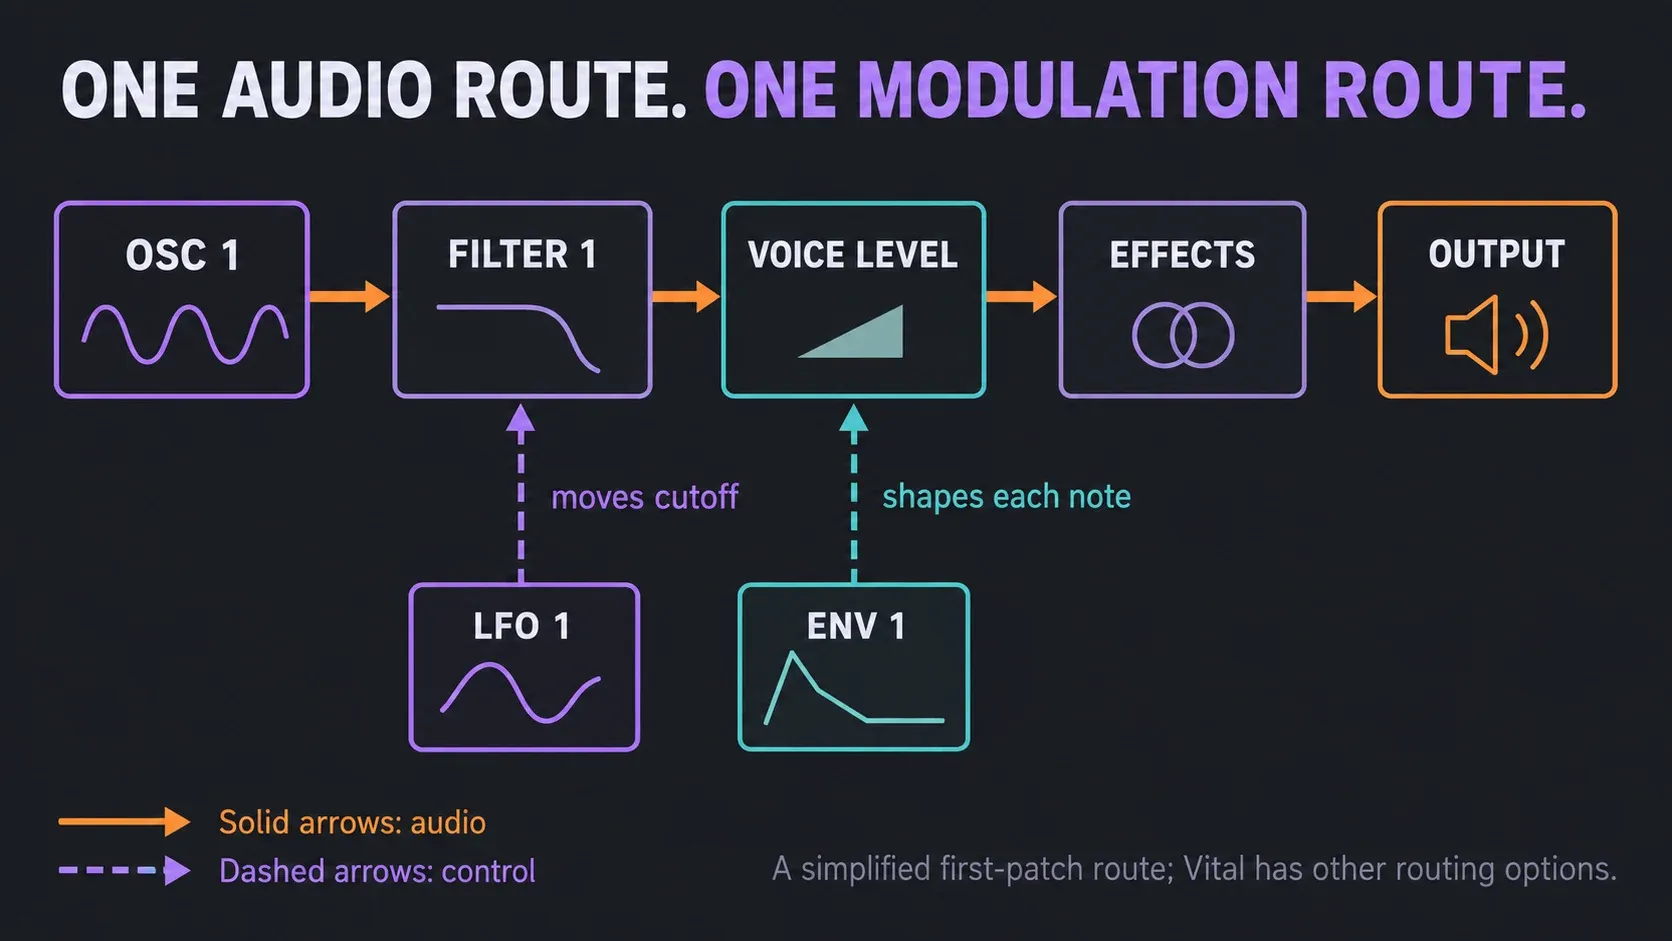
The diagram below isolates one possible route. Vital has additional source and filter-routing options; it does not force every oscillator through both filters. ENV 1 and LFO 1 are control sources, while the Matrix describes modulation connections—not an extra audio processor after the filters.
Build your first Vital patch in eight steps
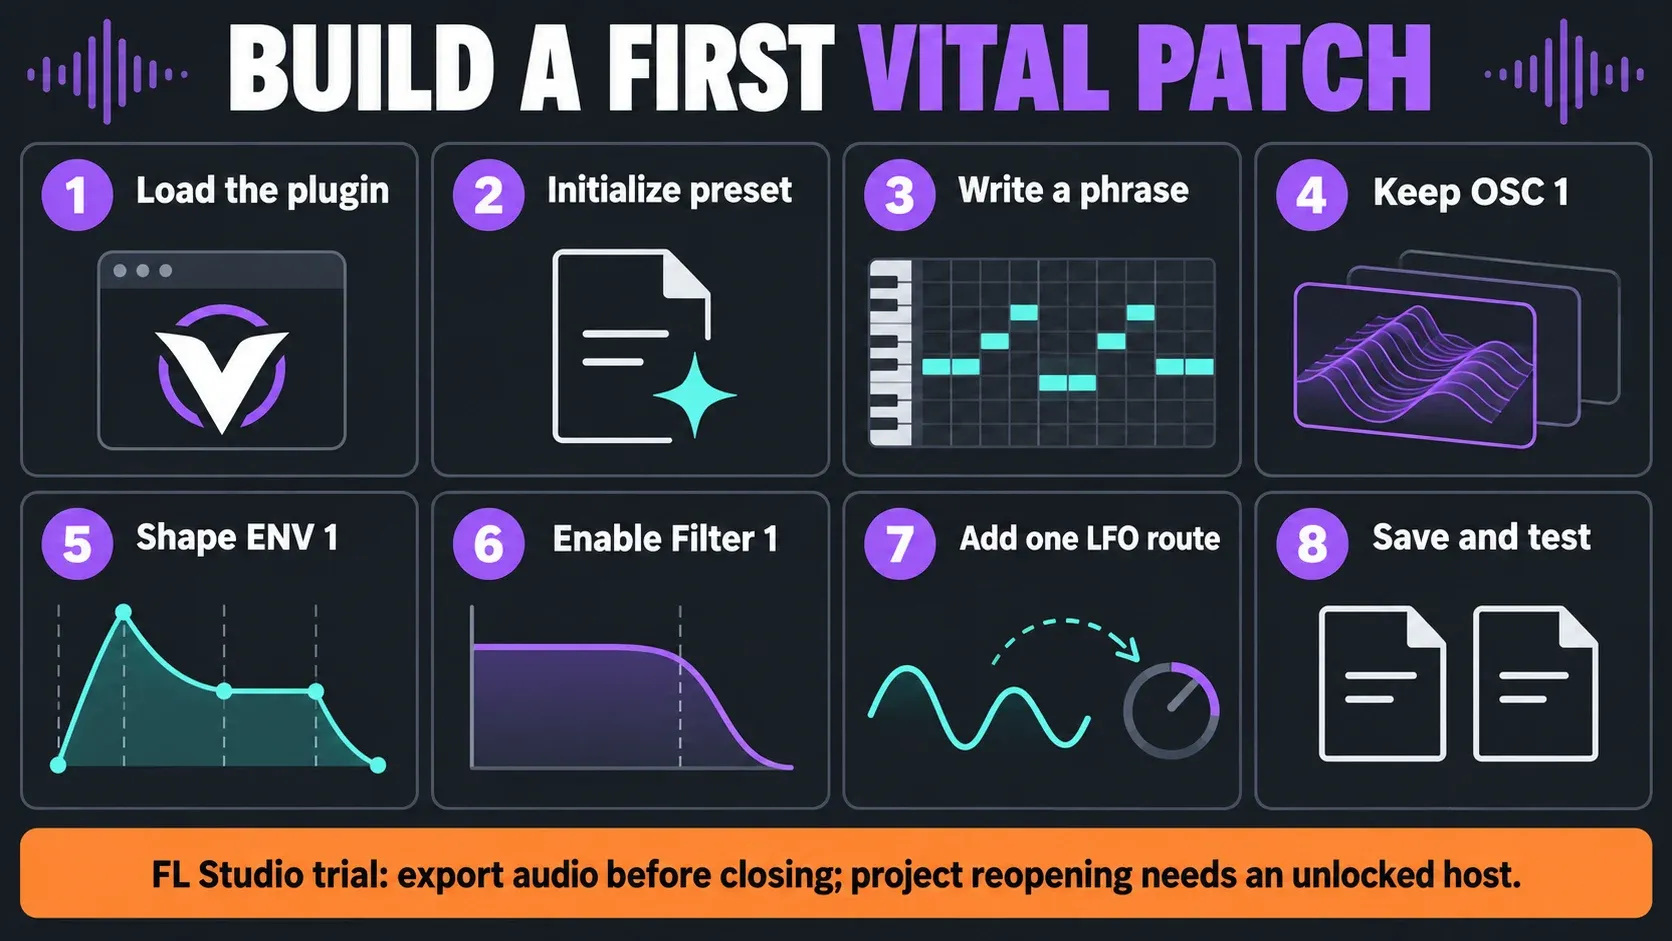
- Load the plugin. Add verified Vital to the Channel Rack, lower monitoring to a comfortable level and route it to a named Mixer insert.
- Initialize the preset. Save any sound you want to keep, then choose
Initialize Presetin Vital's preset menu. Do not assume a favorite entry opens an untouched starting state. - Write a test phrase. Include a short note, a held note and the pitch range you intend to use. Add a chord only if the part needs chords.
- Keep OSC 1. Choose one wavetable and a starting position. Leave the other oscillators and sample source off; keep unison modest while learning.
- Shape ENV 1. Start with no intentional Delay or Hold, then adjust Attack, Decay, Sustain and Release by listening to the phrase. Check that short notes speak and released notes stop when you want.
- Enable Filter 1. Route OSC 1 into it, select a low-pass response and lower cutoff enough to hear a change. Avoid a large resonance boost while setting the starting tone.
- Add one LFO route. Drag LFO 1 to Filter 1 cutoff, set a small audible modulation amount and confirm that exact connection in Matrix.
- Save and test. Save the sound in Vital and save a separately named FL Studio project. In licensed FL Studio, reopen the copy and compare the sound and modulation. In the trial, export audio before closing and defer project reopening until unlocked.
Keep Vital's effects and unnecessary Mixer processing bypassed while building the patch. Once the dry phrase works, add one effect and compare at similar loudness. A longer reverb tail should not hide a release that already overlaps the next note.
How to assign LFO 1 to filter cutoff
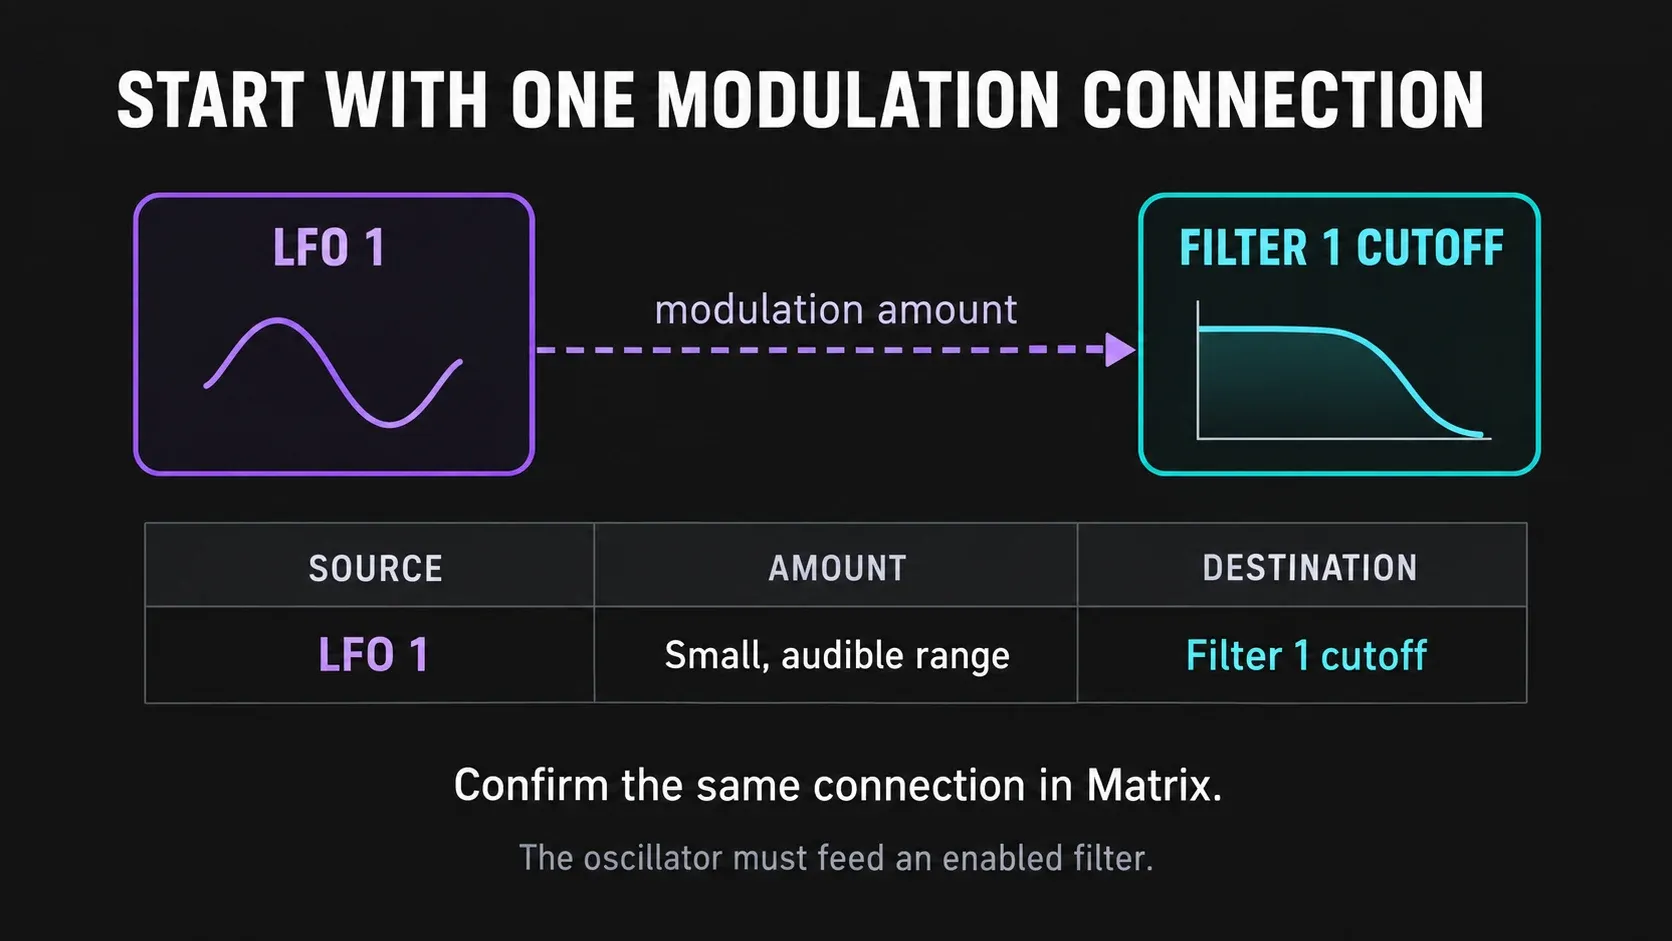
Drag LFO 1's modulation source onto Filter 1's cutoff control. Adjust the modulation amount so the filter moves through a useful range rather than closing the sound completely. The base cutoff and the modulation amount do different jobs: one sets the starting tone, the other determines the movement around it.
Open Matrix and confirm LFO 1 is connected to Filter 1 cutoff. Check the source, destination and amount before adding another connection. If you hear no change, first confirm the filter is enabled and OSC 1 is routed into it; increasing the amount cannot repair a bypassed audio route.
Choose the LFO's timing and trigger behavior for the part, then compare repeated notes with a held note. For a change tied to the arrangement, such as opening a filter during a transition, use an FL Studio Automation Clip. Avoid driving the same parameter with several systems until you can explain which one is responsible for the movement.
Save Vital presets without confusing them with favorites
Use Save Preset inside Vital to name the sound. Its preset menu also offers Export Preset and Open External Preset for a separate .vital file. Import Bank is a different operation for a compatible bank package. An FL Studio .fst favorite is host state, not the same file format as a Vital preset.
If the factory browser is empty, check Vital's account and installed content. Rebuilding the FL Studio thumbnail cannot download missing presets. Keep original imported samples and wavetables with your backups as a precaution, and test the exported preset on the receiving installation. Do not assume copying a preset also supplies the recipient with compatible plugin software.
Vital's license permits music creation, including commercial music. That is not blanket permission to redistribute its supplied presets, samples or wavetables unchanged as your own content pack. Check the terms of any third-party bank you use too.
What if a project opens with Init Preset?
Preserve the project before saving over it. Compare the actual sound and parameters, not just the displayed preset name. Then check whether FL Studio loaded the same Vital version and format as the working session.
In a 2022 developer response about preset recall, Matt Tytel explained that an older Vital build could not load a preset saved by a newer one. That is a useful compatibility check, not proof that every current reset has the same cause. Avoid blindly downgrading or deleting all Vital files.
Before an update, save a new project version, back up presets and render a reference. After installing and rescanning, compare a project copy with that reference in licensed FL Studio. For collaboration, send the preset, version/format notes and an audio export of the part. Audio preserves the result, but not editable synth controls.
Troubleshoot missing plugins, blank windows and high CPU
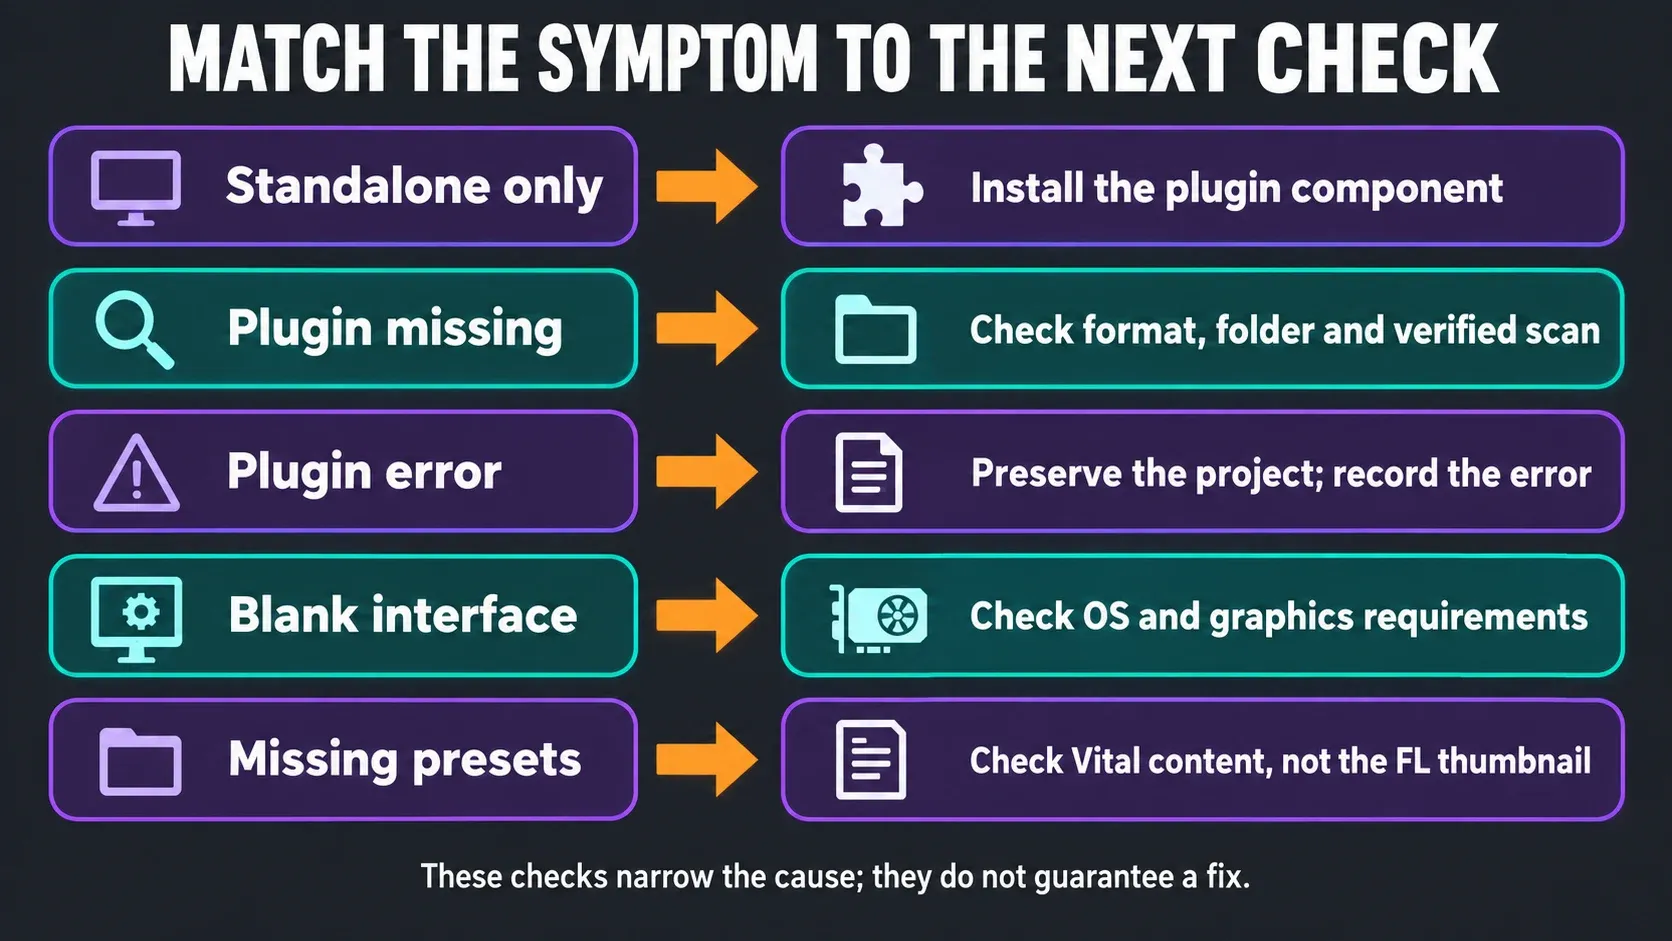
If only the standalone app works, revisit the plugin component in the installer. If the plugin is present but fails verification, record the error and format before changing anything. Test repairs in a copy; changing to AU or VST3 does not automatically restore an existing instance's state.
For a blank interface, compare your OS and graphics support with Vital's 64-bit and OpenGL 3 requirements. Use supported updates from the hardware or OS vendor. For missing sounds inside an otherwise working plugin, inspect Vital content rather than the FL Studio Plugin Database.
If playback breaks up, simplify one patch variable at a time: active oscillators, unison, overlapping release tails or effects. These checks trade sound complexity for processing load; they do not promise a particular CPU saving. Image-Line's performance guidance distinguishes CPU overload from system problems that interrupt real-time audio. Follow the high-CPU checklist if simplifying Vital does not resolve it.
What should you learn after your first patch?
Save a dry version before building a more elaborate sound. If the envelope/filter relationship is still unclear, the 3xOSC lesson provides a smaller native-instrument exercise. If you mainly want to adapt existing sounds, the FLEX guide focuses on presets and macros.
Use the Sound Design learning routes to choose your next instrument lesson; the Plugins library handles installation and plugin management. You do not need a second synth just to practice a clearer envelope or a more deliberate cutoff movement.
Vital in FL Studio FAQ
Where do I download Vital for FL Studio?
Get the OS-specific installer through vital.audio. Install its plugin component, such as VST3, then verify-scan it in FL Studio. Opening the standalone application alone does not add it to the Channel Rack.
Is Vital free or a trial?
Vital Basic is free and includes the full synth, with 75 presets and 25 wavetables currently listed. Paid options add content and account benefits. FL Studio's own trial restrictions remain separate.
Can I reopen a Vital project in the FL Studio trial?
The FL Studio trial can save projects but cannot reopen them until the host is unlocked. Save the Vital preset and export audio before closing the trial session; free Vital does not unlock FL Studio.
Should I install VST3 or AU?
Choose VST3 for Windows or a project shared between Windows and Mac. AU is Mac-only and will not be matched to a VST instance across platforms. Use the correct installer on each OS and align plugin versions.
Why does Vital standalone open but not appear in FL Studio?
The standalone app and plugin are separate components. Check that VST3 was installed in its default location, then run Find installed plugins with Verify plugins enabled in FL Studio's Plugin Manager.
Where is Vital after a verified scan?
Look under Browser → Plugin database → Installed → Generators → New and in its format subfolder. Add it as a generator to the Channel Rack, then create a favorite if you want quicker access.
What does ENV 1 control?
ENV 1 shapes voice amplitude. Check Delay and Attack for a late onset, and Release for overlapping note tails. To move filter cutoff in this exercise, make a separate LFO 1 connection.
How do I modulate filter cutoff in Vital?
Enable Filter 1, route OSC 1 into it, then drag LFO 1 to its cutoff control. Set a small audible modulation amount and confirm the source, destination and amount in Matrix.
Why are my Vital presets missing?
Check Vital's own browser, account and installed content. An FL Studio Plugin Database favorite is a host entry; rebuilding its thumbnail does not install Vital's preset library.
How do I save a Vital sound for another project?
Use Save Preset inside Vital, or Export Preset for a separate .vital file. Keep backups and test recall with a compatible Vital version and format. Also save the FL Studio project and an audio reference.
Keep the first sound simple enough that you can explain every movement. Once its preset and project recall correctly, build on that same phrase with arrangement-level automation.